Python实现剪映自动关键帧
Python实现剪映自动关键帧
说到做小说推文,咱们最痛苦的就是遇到上百张图片,每个都得挨着打关键帧,鄙人也做了几天小说推文,遇到这样头痛的事情,才萌生出自己写一个打关键帧的软件,但是发现市面上都是写好了的gui程序,我会点pyqt但不多,也不会美化,花时间学习,又会提高成本,关键是不想学习,所以最后决定用已有的知识,Django+vue结合写出来了。重要的不是界面,是如何操作的关键帧。这里和大家分享一下如何操作,让剪映自动关键帧。
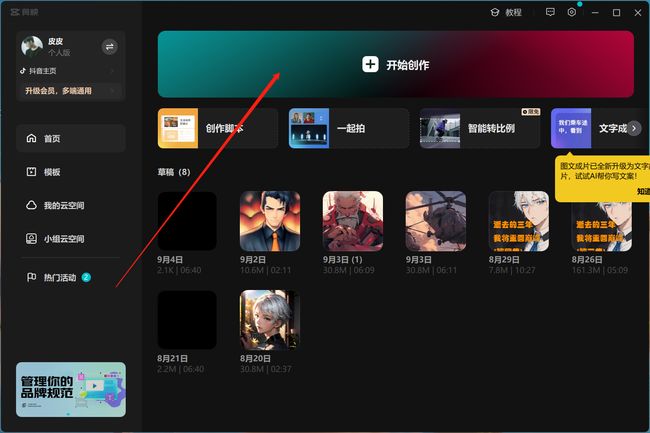
1 首先我们要创建一个草稿,让剪映生成对应的文件
2 随便丢几张图片或者视频进去,然后就可以关闭了
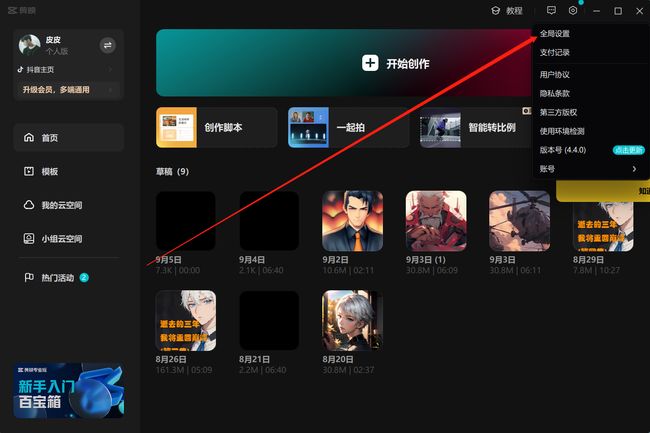
3 找到剪映草稿位置
该文件就是存放剪映草稿的关键文件,咱们打开它
这个就是关键的json了,咱们只需要操作json就能实现关键帧了,现在这个json都是一些初始的东西
咱们再次进入剪映,打上关键帧,再观察新的json有哪些改变
4 分析Json
我在最开始的位置和图片结束的位置打了一个关键帧,结束的位置是放大到百分之120.
操作完成后关闭这个界面,此时json文件已经发生了改变,咱们把那个json文件复制到vscode里进行对比,看看哪里发生了改变
会发现这个节点增加的代码比较多,再segments里,就是关键帧存放的位置。咱们刚才在第一个图片添加了两个关键帧,一个初始帧和一个结束帧。
从这里能分析出来,每一张图片都有一个common_keyframes,打上关键帧之后就在common_keyframes里,咱们把第一张图片的关键帧拿出来分析就行了。
{
"cartoon": false,
"clip": {
"alpha": 1.0,
"flip": {
"horizontal": false,
"vertical": false
},
"rotation": 0.0,
        "scale": {

          "x": 1.2,    # 缩放倍数

          "y": 1.2		# 缩放倍数

        },
"transform": { # 动画时间
"x": 0.0,
"y": 0.0
}
},
"common_keyframes": [
{
"id": "4B48849D-2828-4ab7-978D-41A624C7B5E9",
"keyframe_list": [
{
"curveType": "Line",
"graphID": "",
"id": "1C3C22E0-1586-4b73-B4FE-16397DA1EE45",
"left_control": {
"x": 0.0,
"y": 0.0
},
"right_control": {
"x": 0.0,
"y": 0.0
},
"time_offset": 0,
"values": [
1.0
]
},
{
"curveType": "Line",
"graphID": "",
"id": "97305231-1B66-4ebb-AE96-4987D02C1061",
"left_control": {
"x": 0.0,
"y": 0.0
},
"right_control": {
"x": 0.0,
"y": 0.0
},
"time_offset": 5000000, # 关键帧结束时间
"values": [
1.2 # 缩放倍数
]
}
],
"material_id": "",
"property_type": "KFTypeScaleX"
}
],
"enable_adjust": true,
"enable_color_curves": true,
"enable_color_wheels": true,
"enable_lut": true,
"enable_smart_color_adjust": false,
"extra_material_refs": [
"27FB9436-AADC-47d0-9EDA-B19444B347CC",
"9CACE842-4FAF-4330-89D3-17AA4C5DFFA9",
"0CE6F32F-9D57-455f-9B6A-C3BD8B12B592"
],
"group_id": "",
"hdr_settings": {
"intensity": 1.0,
"mode": 1,
"nits": 1000
},
"id": "F771B787-587A-48ac-A550-1E440341E8AD",
"intensifies_audio": false,
"is_placeholder": false,
"is_tone_modify": false,
"keyframe_refs": [],
"last_nonzero_volume": 1.0,
"material_id": "6C5ECA8D-A028-4c72-884D-B34D5600CDFE",
"render_index": 0,
"reverse": false,
"source_timerange": {
"duration": 5000000,
"start": 0
},
"speed": 1.0,
"target_timerange": {
"duration": 5000000,
"start": 0
},
"template_id": "",
"template_scene": "default",
"track_attribute": 0,
"track_render_index": 0,
"uniform_scale": {
"on": true,
"value": 1.0
},
"visible": true,
"volume": 1.0
}
重点关注:
"scale": {
"x": 1.2, # 缩放倍数
"y": 1.2 # 缩放倍数
},
从这里我们可以看出,有两个values,第一个就是咱们打的第一个关键帧,第二个就是第二个关键帧了。倍数也对得上,从100%到120%,至于time_offset就是这个图片的时间轴了。
咱们从这里获取duration就可以丢到time_offset。
咱们可以代码实操一下。
5 Python代码实现
""""
关键帧,缩放
"""

import os
import json
import uuid


def Amplfy(folder_path, num_value):   # 路劲,放大倍数
    try:
        # 遍历文件夹中的文件
        for filename in os.listdir(folder_path):
            file_path = os.path.join(folder_path, filename)

            # 检查文件是否是名为"draft_content.json"的JSON文件
            if os.path.isfile(file_path) and filename == "draft_content.json":
                try:
                    # 以字节方式打开文件,并指定正确的编码格式
                    with open(file_path, "rb") as file:
                        content = file.read().decode("utf-8")  # 编码
                        json_content = json.loads(content)  # 加载JSON
                        for i in json_content['tracks'][0]['segments']:
                            start_position = i['target_timerange']['start']  # 起始时间
                            duration = i['target_timerange']['duration']  # 动画时间
                            end_position = start_position + i['target_timerange'][
                                'duration']  # 结束时间
                            # 缩放倍数
                            n = int(num_value)
                            n = int(num_value) * 0.01
                            # 复位
                            scale = {
                                "alpha": 1.0,
                                "flip": {
                                    "horizontal": False,
                                    "vertical": False
                                },
                                "rotation": 0.0,
                                "scale": {
                                    "x": 1.0,
                                    "y": 1.0
                                },
                                "transform": {
                                    "x": 0.0,
                                    "y": 0.0
                                }
                            }
                            data_json = {
                                'id': str(uuid.uuid4()).upper(),
                                'keyframe_list': [
                                    {
                                        'curveType': 'Line', 'graphID': '',
                                        'id': str(uuid.uuid4()).upper(),
                                        'left_control': {'x': 0.0, 'y': 0.0},
                                        'right_control': {'x': 0.0, 'y': 0.0},
                                        'time_offset': 0, 'values': [1.0]
                                    },
                                    {
                                        'curveType': 'Line', 'graphID': '',
                                        'id': str(uuid.uuid4()).upper(),
                                        'left_control': {'x': 0.0, 'y': 0.0}, 'right_control': {'x': 0.0, 'y': 0.0},
                                        'time_offset': duration, 'values': [n]
                                    }
                                ],
                                'material_id': '',
                                'property_type': 'KFTypeScaleX'
                            }
                            data2 = []
                            data2.append(data_json)
                            # 只操作没有关键帧的,不影响其他已有的关键帧
                            if len(i['common_keyframes']) < 1:
                                i['common_keyframes'] = data2
                                i['clip'] = scale

                        # 将修改后的数据保存回原始文件
                        with open(file_path, "w", encoding="utf-8") as file:
                            file.write(json.dumps(json_content, indent=4, ensure_ascii=False))
                            return {'code': 200, 'msg': '处理完成'}
                except FileNotFoundError:
                    return {'code': -1, 'msg': '系统找不到指定的路径'}
                except json.JSONDecodeError:
                    return {'code': -1, 'msg': '无法解析JSON文件'}
    except FileNotFoundError:
        return {'code': -1, 'msg': '系统找不到指定的路径'}
这里就结束了,咱这个只是放大,至于其他的功能,都放在网盘里了,上下自动,左右自动,上下左右自动,实现的方法我和这个差不多,分析json就完事儿了,咱gui不好,只能用Django+vue 写点界面了。文件我会放在网盘里。需要学习和自用的自行下载。再来个完整界面图
!(https://gitee.com/mrliu-pc/mrliuimags/raw/master/mrliuimags/image-20230905153356258.png)
这里就结束了,咱这个只是放大,至于其他的功能,都放在网盘里了,上下自动,左右自动,上下左右自动,实现的方法我和这个差不多,分析json就完事儿了,咱gui不好,只能用Django+vue 写点界面了。文件我会放在网盘里。需要学习和自用的自行下载。再来个完整界面图
源码在这个文件里。
下载地址以及小说推文需要用到的工具教程我都丢在这个网盘了。
下载地址:http://43.139.191.66:82


