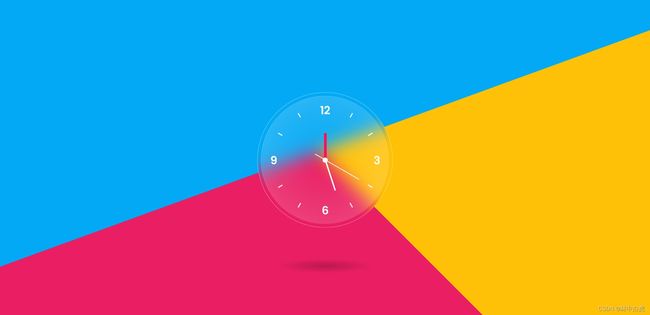
毛玻璃时钟特效
效果展示
页面结构组成
从上述的效果展示可以看到,我们的背景图片是有三个色块组成,为了能够掌握linear-gradient属性,所以我们背景的三个色块可以采用此属性来实现。
而时钟的数字我们采用背景图片实现,而三个指针我们是用元素来实现,而时钟的阴影是通过阴影属性来实现。
CSS3 知识点
- linear-gradient 属性运用
- animation 属性运用
- radial-gradient 属性运用
页面结构实现
通过上述的页面结构说明,我们可以这样来定义页面结构。
<div class="container">
  <div class="box">

    <div class="clock">
      <div class="hour">
        <div class="hr" id="hr">div>
      div>
      <div class="min">
        <div class="mn" id="mn">div>
      div>
      <div class="sec">
        <div class="sc" id="sc">div>
      div>
    div>
  div>
div>
页面背景实现
实现页面背景的时候,我们可以使用background中的linear-gradient属性来设置,并且采用伪元素来展示不同的色块。
body::before {
  content: "";
  display: block;
  position: absolute;
  top: 0;
  left: 0;
  width: 100%;
  height: 100%;
  background: linear-gradient(
    45deg,
    #e91e63,
    #e91e63 50%,
    #ffc107 50%,
    #ffc107
  );
}

body::after {
  content: "";
  display: block;
  position: absolute;
  top: -20px;
  left: 0;
  width: 100%;
  height: 100%;
  background: linear-gradient(
    160deg,
    #03a9f4,
    #03a9f4 50%,
    transparent 50%,
    transparent
  );
  animation: animate 5s ease-in-out infinite;
}
时钟外框实现
时钟的外框其实就是一个带有边框并且带有毛玻璃属性的元素。
.box {
  position: relative;
  z-index: 1;
  width: 400px;
  height: 400px;
  backdrop-filter: blur(25px);
  border-radius: 50%;
  border: 1px solid rgba(255, 255, 255, 0.5);
  animation: animate 5s ease-in-out infinite;
  animation-delay: -2.5s;
}
时钟仪表盘实现
时钟的仪表盘我们采用图片进行展示,因为仪表盘的图片是透明背景,而要实现时钟仪表盘呈现毛玻璃的效果,我们需要借助radial-gradient属性来帮我们实现功能。
.clock {
  position: absolute;
  top: 10px;
  left: 10px;
  right: 10px;
  bottom: 10px;
  display: flex;
  justify-content: center;
  align-items: center;
  background: radial-gradient(transparent, rgba(255, 255, 255, 0.2)),
    url(clock.png);
  background-size: cover;
  border-radius: 50%;
  backdrop-filter: blur(25px);
  border: 1px solid rgba(255, 255, 255, 0.2);
  border-bottom: none;
  border-right: none;
  box-shadow: -10px -10px 20px rgba(255, 255, 255, 0.1), 10px 10px 20px rgba(
        0,
        0,
        0,
        0.1
      ) 0 40px 50px rgba(0, 0, 0, 0.2);
}

// 仪表盘中心的实心圆
.clock::before {
  content: "";
  display: block;
  position: absolute;
  width: 15px;
  height: 15px;
  background: #fff;
  border-radius: 50%;
  z-index: 10000;
}
实现三个指针部分
三个指标比较简单,采用绝对定位就可以。
.hour,
.hr {
  width: 160px;
  height: 160px;
}

.min,
.mn {
  width: 190px;
  height: 190px;
}

.sec,
.sc {
  width: 230px;
  height: 230px;
}

.hr,
.mn,
.sc {
  display: flex;
  justify-content: center;
  position: absolute;
  border-radius: 50%;
}

.hr::before {
  content: "";
  position: absolute;
  width: 8px;
  height: 80px;
  background: #ff105e;
  z-index: 11;
  border-radius: 6px;
}

.mn::before {
  content: "";
  position: absolute;
  width: 4px;
  height: 90px;
  background: #fff;
  z-index: 11;
  border-radius: 6px;
}

.sc::before {
  content: "";
  position: absolute;
  width: 2px;
  height: 150px;
  background: #fff;
  z-index: 11;
  border-radius: 6px;
}
编写动画
因为页面在展示的时候,背景和时钟都是会进行上下移动的,所以这里编写一下动画函数。
@keyframes animate {
  0%,
  100% {
    transform: translateY(10px);
  }
  50% {
    transform: translateY(-10px);
  }
}
完整代码下载
完整代码下载
