linux 搭建elasticsearch 集群环境(包含x-pack)
注意事项:linux中配置文件修改,如果想要下载编辑后再上传回去的话,需要注意windows和linux中\n\r 和 \r 的问题
环境:vmware16 、centOS7 、 elasticsearch7.16.2
1、vmware16 安装centos7
2、采用NAT桥接方式,配置linux静态地址
vi /etc/sysconfig/network-scripts/ifcfg-ens33
TYPE=Ethernet
BOOTPROTO=static //修改为static
DEFROUTE=yes
IPV4_FAILURE_FATAL=no
IPV6INIT=yes
IPV6_AUTOCONF=yes
IPV6_DEFROUTE=yes
IPV6_FAILURE_FATAL=no
IPV6_ADDR_GEN_MODE=stable-privacy
NAME=ens33
UUID=6696db8e-f0b9-4b5a-a3ef-15fc4163daa7
DEVICE=ens33
ONBOOT=yes //修改为yes
PREFIX=24
IPADDR=192.168.27.220 //地址
GATEWAY=192.168.27.254 //网关
NETMASK=255.255.255.0 //掩码
IPV6_PEERDNS=yes
IPV6_PEERROUTES=yes
IPV6_PRIVACY=no
3、elasticsearch 默认不允许root用户启动,所以需要创建es用户
# 新增es操作用户
useradd esOperator
# 创建密码
passwd operatorPass
# 如果密码忘了,可以删除再加
userdel -r es
# 文件夹所有者
chown -R esOperater:esOperater /opt/elasticsearch-cluster
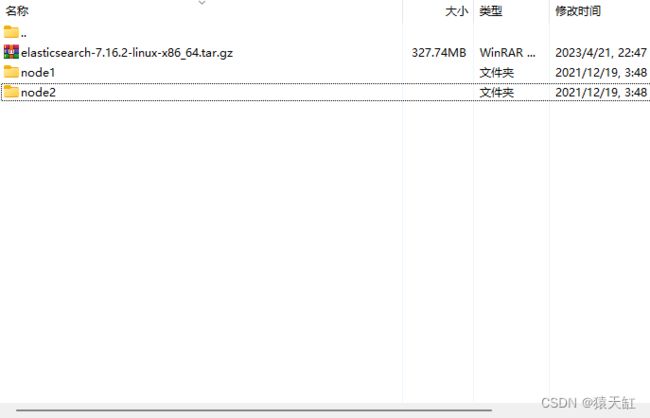
4、切换es用户,将安装包拷入文件夹并解压(一定要用es用户解压,不然的话,需要再次切换文件夹所有者。这是个坑)
tar -xvf elasticsearch.tar.gz
解压后:
5、调整elasticsearch.yml 配置文件
node1/config/elasticsearch.yml
cluster.name: my-cluster
node.name: node-1
node.master: true
node.data: truebootstrap.memory_lock: false
# 是否锁住内存
bootstrap.system_call_filter: false
network.host: 0.0.0.0
http.port: 9200
transport.tcp.port: 9300
discovery.seed_hosts: ["127.0.0.1:9301"]
cluster.initial_master_nodes: ["node-1" ,"node-2"]
node2/config/elasticsearch.yml
cluster.name: my-cluster
node.name: node-2
node.master: true
node.data: truebootstrap.memory_lock: false
# 是否锁住内存
bootstrap.system_call_filter: false
network.host: 0.0.0.0
http.port: 9201
transport.tcp.port: 9301
discovery.seed_hosts: ["127.0.0.1:9300"]
cluster.initial_master_nodes: ["node-1" ,"node-2"]
6、启动两个 es节点

编辑 /etc/security/limits.conf,
sudo vi /etc/security/limits.conf
追加以下内容;
* soft nofile 65536
* hard nofile 65536
修改后用户需要重新登陆,可以通过下面命令进行检查
ulimit -Hu
ulimit -Su如果修改失败了,我又加了两行就可以了

运行elasticsearch需要vm.max_map_count至少需要262144内存
切换到root用户修改配置sysctl.conf
vi /etc/sysctl.conf
在尾行添加以下内容
vm.max_map_count=655360
执行命令sysctl -p 可以验证是否修改成功
/opt/elasticsearch-cluster/node1/bin/elasticsearch
/opt/elasticsearch-cluster/node2/bin/elasticsearch
![]()
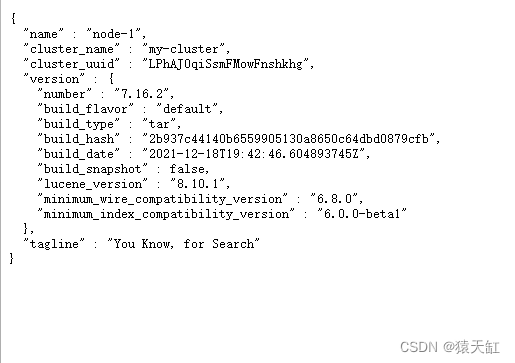
成功一小步,没密码,没证书的集群启动成功!!!
7、开启x-pack 安全认证(在es用户创建ca证书)
1)、先破解xpack,85服务器执行(es7.7以上版本可忽略该步骤)
curl -H "Content-Type:application/json" -XPOST http:// 127.0.0.1:9200/_xpack/license/start_trial?acknowledge=true
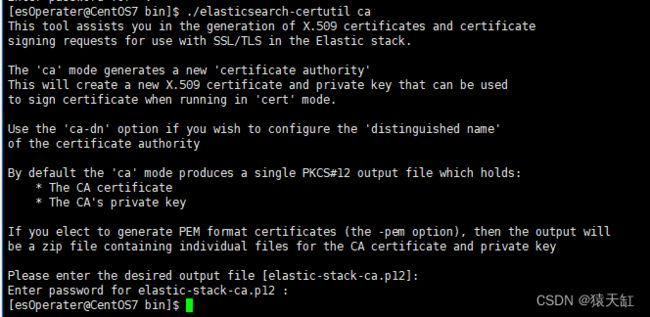
2)、生成CA文件
cd 到任一节点下的/bin目录下执行
./elasticsearch-certutil ca
命令执行后,需要先后设置输出的文件名(建议不输入,会自动默认),ca的密码(千万别忘了,后面有用)
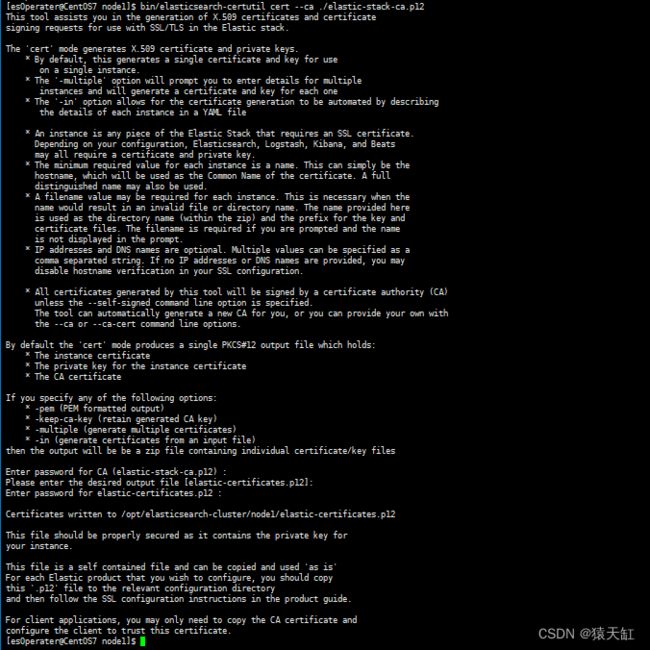
3)、为节点颁发证书
bin/elasticsearch-certutil cert --ca ./elastic-stack-ca.p12
输入ca的密码
输入cert 的文件输出名(默认不输入,采用默认文件名)
输入cert的密码
4)、配置节点之间通信的密码
./elasticsearch-keystore add xpack.security.transport.ssl.keystore.secure_password
./elasticsearch-keystore add xpack.security.transport.ssl.truststore.secure_password
这有两个坑,
1、这两个密码不能随便写,需要设置为颁发证书时的密码。2、我是两个节点的集群,在node1/bin配置了密码,在node2中不会带过去,我又手动在node2上配了一次。node2不配会不会出错,由于时间问题我没有尝试。
5)此时的es配置文件
cluster.name: my-cluster
node.name: node-1
node.master: true
node.data: truebootstrap.memory_lock: false
# 是否锁住内存
bootstrap.system_call_filter: false
network.host: 0.0.0.0
http.port: 9200
transport.tcp.port: 9300
discovery.seed_hosts: ["127.0.0.1:9301"]
cluster.initial_master_nodes: ["node-1" ,"node-2"]xpack.security.enabled: true
xpack.security.transport.ssl.enabled: true
xpack.security.transport.ssl.verification_mode: certificate
xpack.security.transport.ssl.keystore.path: #存放elastic-certificates.p12文件路径-本节点下
xpack.security.transport.ssl.truststore.path: #存放elastic-certificates.p12文件路径-本节点下
xpack.security.transport.ssl.keystore.password: ****** #自己设置的颁发证书密码
xpack.security.transport.ssl.truststore.password: ****** #自己设置的颁发证书密码
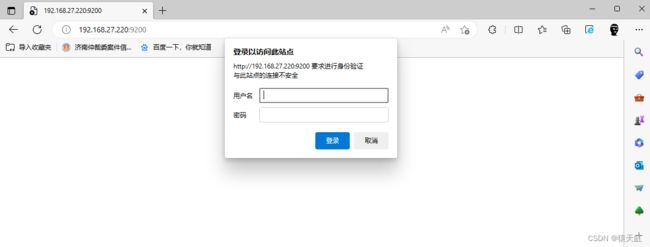
8、开启密码
./elasticsearch-setup-passwords interactive

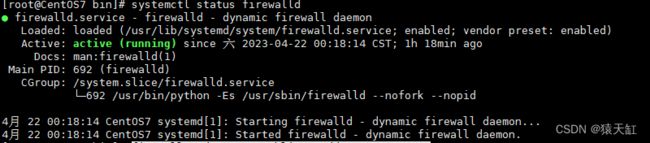
9、开启防火墙端口
查询防火墙状态
systemctl status firewalld
开放端口firewall-cmd --zone=public --add-port=9200/tcp
firewall-cmd --zone=public --add-port=9201/tcp
10、打完收工
(注:如果你要实现只能通过https进行访问的话,需要额外配两个节点密码
./elasticsearch-keystore add xpack.security.http.ssl.keystore.secure_password
./elasticsearch-keystore add xpack.security.http.ssl.truststore.secure_password
配置文件中也要多配一点
xpack.security.http.ssl.enabled: true
xpack.security.http.ssl.keystore.path: #存放elastic-certificates.p12文件路径
xpack.security.http.ssl.truststore.path: #存放elastic-certificates.p12文件路径
xpack.security.http.ssl.keystore.password: ****** #自己设置的颁发证书密码
xpack.security.http.ssl.truststore.password: ****** #自己设置的颁发证书密码)

祝愿此贴,是你关于es集群搭建看的最后一个帖子!!!
祝君成功!!!