anaconda环境下安装torch+torch_geometric
一、安装anaconda
官网下载anaconda
检验Anaconda环境变量是否配置成功:
(1)打开cmd。
(2)输入“conda --version”
(3)输入“conda info”
(4)输入“activate”,回车,之后再输入“python”。
anaconda配置国内镜像,在Anaconda Prompt里复制以下命令行即可
清华源:
conda config --add channels https://mirrors.tuna.tsinghua.edu.cn/anaconda/pkgs/free/
conda config --add channels https://mirrors.tuna.tsinghua.edu.cn/anaconda/cloud/conda-forge
conda config --add channels https://mirrors.tuna.tsinghua.edu.cn/anaconda/cloud/msys2/
conda config --set show_channel_urls true
中科大源:
conda config --add channels https://mirrors.ustc.edu.cn/anaconda/pkgs/main/
conda config --add channels https://mirrors.ustc.edu.cn/anaconda/pkgs/free/
conda config --add channels https://mirrors.ustc.edu.cn/anaconda/cloud/conda-forge/
conda config --add channels https://mirrors.ustc.edu.cn/anaconda/cloud/msys2/
conda config --add channels https://mirrors.ustc.edu.cn/anaconda/cloud/bioconda/
conda config --add channels https://mirrors.ustc.edu.cn/anaconda/cloud/menpo/
conda config --set show_channel_urls yes
可使用以下指令,查看镜像源是否配置成功
conda config --get
PS: 若要删除镜像加速通道,则把”add channels”改为“remove channels"
conda config --remove channels 【通道地址】
anaconda建立一个新的虚拟环境
1.查看当前存在哪些虚拟环境
conda env list #查看当前存在哪些虚拟环境 或 conda info --envs
 2.创建虚拟环境
step1. 打开Anaconda的命令行界面控制端Anaconda Promp,输入以下指令,建立新环境
conda create -n 【name_of_new_environment】python=【python_version】
step2. 输入”y“,在新环境中下载以上建议的new packages
其他指令:
(1)进入新环境
conda activate 【虚拟环境名】
(2) 查看该环境下装的包
conda list
(3) 删除创建的虚拟环境
conda remove -n 【虚拟环境名字】 --all
二、安装gpu版本的pytorch(不需要做)
(1)首先查看自己电脑GPU版本
方法一:
方法二:
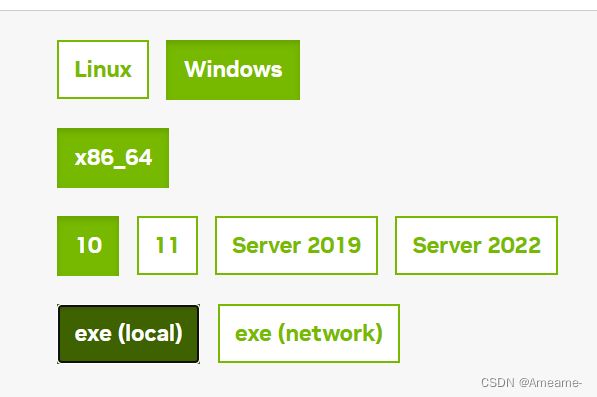
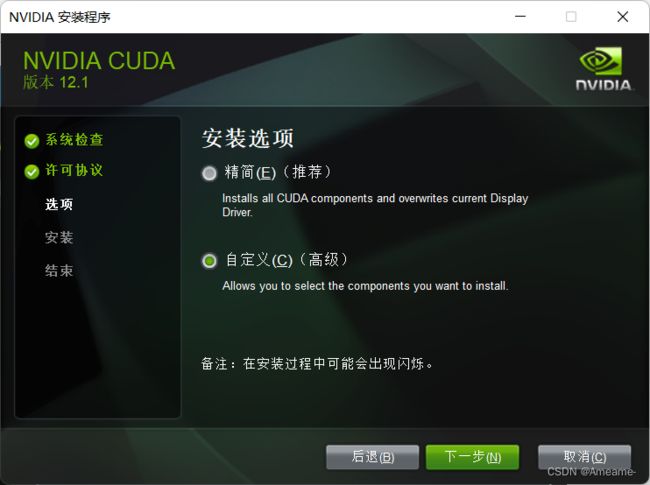
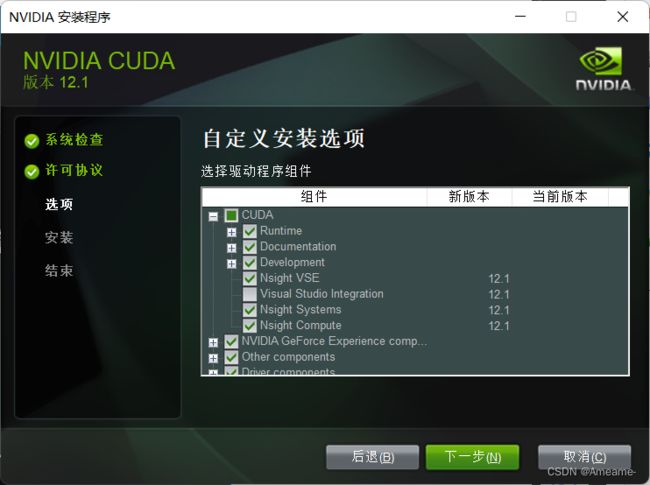
(2)下载cuda
cuda官网
查看环境变量,只有这俩
验证是否安装成功:
运行cmd,输入nvcc --version 即可查看版本号;
set cuda,可以查看 CUDA 设置的环境变量。
cuDNN配置(目前没安装,没出现问题)
# 安装cudnn,如果不指定版本,在安装CUDA之后,会自动匹配对应版本的cudnn安装 conda install cudnn
三、安装pytorch(gpu)
方法一:在线安装
step1. 进入新建的pytorch虚拟环境
配置清华源(若有问题)
conda config --add channels https://mirrors.tuna.tsinghua.edu.cn/anaconda/pkgs/free/
conda config --add channels https://mirrors.tuna.tsinghua.edu.cn/anaconda/pkgs/main/
conda config --add channels https://mirrors.tuna.tsinghua.edu.cn/anaconda/cloud/pytorch/
conda config --set show_channel_urls yes#下载时显示文件来源
切换默认镜像
conda config --remove-key channels
step2. 直接复制官网的pip指令至命令行窗口下载
最好安装老版本torch
conda install pytorch==1.12.1 torchvision==0.13.1 torchaudio==0.12.1 cudatoolkit=11.3 -c pytorch验证pytorch是否安装成功
step1. 在我们新建的pytorch虚拟环境下,输入以下命令,查看有没有对应package
conda list
step2. 输入python,进入python解释器
print(torch.__version__)
print(torch.cuda.is_available())
四、torch_geometric安装 (gpu)
环境:
方法一:
安装4个辅助包,安装的顺序是scatter-sparse-cluster-spline_conv
pip install torch_scatter-2.1.0+pt112cu113-cp39-cp39-win_amd64.whl
pip install torch_sparse-0.6.16+pt112cu113-cp39-cp39-win_amd64.whl
pip install torch_cluster-1.6.0+pt112cu113-cp39-cp39-win_amd64.whl
pip install torch_spline_conv-1.2.1+pt112cu113-cp39-cp39-win_amd64.whl
pip install torch-geometric
卸载错误版本
pip uninstall torch-scatter torch-sparse torch-cluster torch-geometric
方法二:(推荐一)
在线安装
pip install torch_scatter torch_sparse torch_cluster torch_spline_conv -f https://data.pyg.org/whl/torch-2.0.0+cu118.html
pip install torch_geometric
安装完成
检查是否安装成功
import torch_geometric
五、安装pytorch(cpu)
也是选择老版本,
环境
安装成功
import torch
print(torch.__version__)
import torchvision
x=torch.rand(2,3)
print(x)

#输出
tensor([[0.4188, 0.9226, 0.4112],
        [0.7577, 0.6346, 0.2201]])
#则pytorch安装成功
安装辅助包
pip install torch-geometric
六、安装老版的torch
conda install cudatoolkit=11.1 -c pytorch -c conda-forge
pip install torch==1.8.1+cu111 torchvision==0.9.1+cu111 torchaudio==0.8.1 -f https://download.pytorch.org/whl/torch_stable.html4个辅助包
pip install torch_scatter-2.0.8-cp39-cp39-win_amd64.whl
pip install torch_sparse-0.6.12-cp39-cp39-win_amd64.whl
pip install torch_cluster-1.5.9-cp39-cp39-win_amd64.whl
pip install torch_spline_conv-1.2.1-cp39-cp39-win_amd64.whl
pip install torch_geometric


