Ai项目十四:基于 LeNet5 的手写数字识别及训练
若该文为原创文章,转载请注明原文出处。
一、介绍
pytorch复现lenet5模型,并检测自己手写的数字图片。
利用torch框架搭建模型相对比较简单,但是也会遇到很多问题,网上资料很多,搭建模型的方法大同小异,在我尝试了自己搭建搭建出来模型,无论是训练还是检测都会遇到很多的问题,像这种自己遇到的问题,请教别人也没有用。原本使用的是github上的一份代码来复现,环境搭建完成后,才发现要有GPU,而我搭建是使用CPU,失败告终,为了复现,租用了AutoDL平台,在次搭建,这里记录GPU下的操作,CPU版本需要修改源码,自行修改,我的目的是在要训练自己的模型并在RK3568上部署,所以先训练并测试好。为后续部署作基础。
二、环境

三、搭建
1、创建虚拟环境
conda create -n LeNet5_env python==3.82、安装pytorch
Previous PyTorch Versions | PyTorch
根据官方PyTorch,安装pytorch,使用的是CPU版本,其他版本自行安装,安装命令:
pip install torch==1.7.1+cu110 torchvision==0.8.2+cu110 torchaudio==0.7.2 -f https://download.pytorch.org/whl/torch_stable.html
-i https://pypi.tuna.tsinghua.edu.cn/simple
还需要安装一些其他的库
pip install matplotlib -i https://pypi.tuna.tsinghua.edu.cn/simple
pip install opencv-python -i https://pypi.tuna.tsinghua.edu.cn/simple
3、数据集下载
http://yann.lecun.com/exdb/mnist/train-images-idx3-ubyte.gz
http://yann.lecun.com/exdb/mnist/train-labels-idx1-ubyte.gz
http://yann.lecun.com/exdb/mnist/t10k-images-idx3-ubyte.gz
http://yann.lecun.com/exdb/mnist/t10k-labels-idx1-ubyte.gz
直接把上面地址复制到网页上,就只可以下载
下载后保存到data/MNIST/raw目录下

四、训练代码
训练模型有四个文件分别为:LeNet5.py;myDatast.py;readMnist.py;train.py
文件LeNet5.py是网络层模型
train.py
import torch
from torch.autograd import Variable
import torch.nn as nn
from torch.utils.data import DataLoader
from readMnist import *
from myDatast import Mnist
from LeNet5 import LeNet5

train_images = load_train_images()
train_labels = load_train_labels()

trainData = Mnist(train_images, train_labels)
train_data = DataLoader(dataset=trainData, batch_size=1, shuffle=True)

lenet5 = LeNet5()
lenet5.cuda()

lossFun = nn.CrossEntropyLoss()

optimizer = torch.optim.Adam(params=lenet5.parameters(), lr=1e-4)

Epochs = 100
L = len(train_data)

for epoch in range(Epochs):
    for i, (img, id) in enumerate(train_data):

        img = img.float()
        id = id.float()

        img = img.cuda()
        id = id.cuda()

        img = Variable(img, requires_grad=True)
        id = Variable(id, requires_grad=True)

        Output = lenet5.forward(img)
        loss = lossFun(Output, id.long())

        optimizer.zero_grad()
        loss.backward()
        optimizer.step()

        iter = epoch * L + i + 1
        if iter % 100 == 0:
            print('epoch:{},iter:{},loss:{:.6f}'.format(epoch + 1, iter, loss))

    torch.save(lenet5.state_dict(), 'lenet5.pth')
LeNet5.py
import torch.nn as nn


class LeNet5(nn.Module):
    def __init__(self):
        super(LeNet5, self).__init__()

        self.conv1 = nn.Sequential(
            nn.Conv2d(in_channels=1, out_channels=6, kernel_size=5),
            nn.Sigmoid(),
            nn.MaxPool2d(kernel_size=2, stride=2)
        )

        self.conv2 = nn.Sequential(
            nn.Conv2d(in_channels=6, out_channels=16, kernel_size=5),
            nn.Sigmoid(),
            nn.MaxPool2d(kernel_size=2, stride=2)
        )

        self.fc1 = nn.Sequential(
            nn.Linear(in_features=16 * 4 * 4, out_features=120),
            nn.Sigmoid()
        )

        self.fc2 = nn.Sequential(
            nn.Linear(in_features=120, out_features=84),
            nn.Sigmoid()
        )

        self.fc3 = nn.Linear(in_features=84, out_features=10)

    def forward(self, img):
        img = self.conv1.forward(img)
        img = self.conv2.forward(img)

        img = img.view(img.size()[0], -1)

        img = self.fc1.forward(img)
        img = self.fc2.forward(img)
        img = self.fc3.forward(img)

        return img
readMnist.py
from torch.utils.data import Dataset
from torchvision import transforms
import numpy as np


class Mnist(Dataset):
    def __init__(self, dataset, label):
        self.dataset = dataset
        self.label = label
        self.len = len(self.label)
        self.transforms = transforms.Compose([transforms.ToTensor() , transforms.Normalize(mean=[0.5], std=[0.5])])

    def __len__(self):
        return self.len

    def __getitem__(self, item):
        img = self.dataset[item]
        img_id = self.label[item]

        img = np.transpose(img,(1,2,0))
        img = self.transforms(img)

        return img, img_id
readMnist.py
import numpy as np
import struct
import matplotlib.pyplot as plt
import cv2
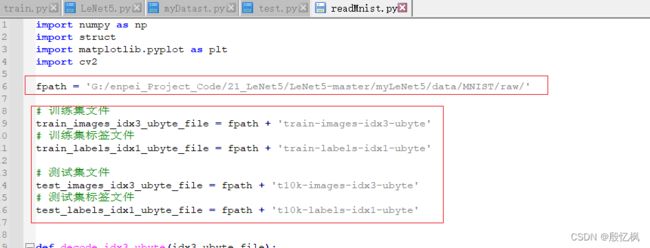
fpath = 'G:/enpei_Project_Code/21_LeNet5/LeNet5-master/myLeNet5/data/MNIST/raw/'
# 训练集文件
train_images_idx3_ubyte_file = fpath + 'train-images-idx3-ubyte'
# 训练集标签文件
train_labels_idx1_ubyte_file = fpath + 'train-labels-idx1-ubyte'
# 测试集文件
test_images_idx3_ubyte_file = fpath + 't10k-images-idx3-ubyte'
# 测试集标签文件
test_labels_idx1_ubyte_file = fpath + 't10k-labels-idx1-ubyte'
def decode_idx3_ubyte(idx3_ubyte_file):
"""
解析idx3文件的通用函数
:param idx3_ubyte_file: idx3文件路径
:return: 数据集
"""
# 读取二进制数据
bin_data = open(idx3_ubyte_file, 'rb').read()
# 解析文件头信息,依次为魔数、图片数量、每张图片高、每张图片宽
offset = 0
fmt_header = '>iiii' # 因为数据结构中前4行的数据类型都是32位整型,所以采用i格式,但我们需要读取前4行数据,所以需要4个i。我们后面会看到标签集中,只使用2个ii。
magic_number, num_images, num_rows, num_cols = struct.unpack_from(fmt_header, bin_data, offset)
print('魔数:%d, 图片数量: %d张, 图片大小: %d*%d' % (magic_number, num_images, num_rows, num_cols))
# 解析数据集
image_size = num_rows * num_cols
offset += struct.calcsize(fmt_header) # 获得数据在缓存中的指针位置,从前面介绍的数据结构可以看出,读取了前4行之后,指针位置(即偏移位置offset)指向0016。
print(offset)
fmt_image = '>' + str(
image_size) + 'B' # 图像数据像素值的类型为unsigned char型,对应的format格式为B。这里还有加上图像大小784,是为了读取784个B格式数据,如果没有则只会读取一个值(即一副图像中的一个像素值)
print(fmt_image, offset, struct.calcsize(fmt_image))
images = np.empty((num_images, 1, num_rows, num_cols))
# plt.figure()
for i in range(num_images):
if (i + 1) % 10000 == 0:
print('已解析 %d' % (i + 1) + '张')
print(offset)
images[i] = np.array(struct.unpack_from(fmt_image, bin_data, offset)).reshape((1, num_rows, num_cols))
# print(images[i])
offset += struct.calcsize(fmt_image)
# plt.imshow(images[i],'gray')
# plt.pause(0.00001)
# plt.show()
# plt.show()
return images
def decode_idx1_ubyte(idx1_ubyte_file):
"""
解析idx1文件的通用函数
:param idx1_ubyte_file: idx1文件路径
:return: 数据集
"""
# 读取二进制数据
bin_data = open(idx1_ubyte_file, 'rb').read()
# 解析文件头信息,依次为魔数和标签数
offset = 0
fmt_header = '>ii'
magic_number, num_images = struct.unpack_from(fmt_header, bin_data, offset)
print('魔数:%d, 图片数量: %d张' % (magic_number, num_images))
# 解析数据集
offset += struct.calcsize(fmt_header)
fmt_image = '>B'
labels = np.empty(num_images)
for i in range(num_images):
if (i + 1) % 10000 == 0:
print('已解析 %d' % (i + 1) + '张')
labels[i] = struct.unpack_from(fmt_image, bin_data, offset)[0]
offset += struct.calcsize(fmt_image)
return labels
def load_train_images(idx_ubyte_file=train_images_idx3_ubyte_file):
"""
TRAINING SET IMAGE FILE (train-images-idx3-ubyte):
[offset] [type] [value] [description]
0000 32 bit integer 0x00000803(2051) magic number
0004 32 bit integer 60000 number of images
0008 32 bit integer 28 number of rows
0012 32 bit integer 28 number of columns
0016 unsigned byte ?? pixel
0017 unsigned byte ?? pixel
........
xxxx unsigned byte ?? pixel
Pixels are organized row-wise. Pixel values are 0 to 255. 0 means background (white), 255 means foreground (black).
:param idx_ubyte_file: idx文件路径
:return: n*row*col维np.array对象,n为图片数量
"""
return decode_idx3_ubyte(idx_ubyte_file)
def load_train_labels(idx_ubyte_file=train_labels_idx1_ubyte_file):
"""
TRAINING SET LABEL FILE (train-labels-idx1-ubyte):
[offset] [type] [value] [description]
0000 32 bit integer 0x00000801(2049) magic number (MSB first)
0004 32 bit integer 60000 number of items
0008 unsigned byte ?? label
0009 unsigned byte ?? label
........
xxxx unsigned byte ?? label
The labels values are 0 to 9.
:param idx_ubyte_file: idx文件路径
:return: n*1维np.array对象,n为图片数量
"""
return decode_idx1_ubyte(idx_ubyte_file)
def load_test_images(idx_ubyte_file=test_images_idx3_ubyte_file):
"""
TEST SET IMAGE FILE (t10k-images-idx3-ubyte):
[offset] [type] [value] [description]
0000 32 bit integer 0x00000803(2051) magic number
0004 32 bit integer 10000 number of images
0008 32 bit integer 28 number of rows
0012 32 bit integer 28 number of columns
0016 unsigned byte ?? pixel
0017 unsigned byte ?? pixel
........
xxxx unsigned byte ?? pixel
Pixels are organized row-wise. Pixel values are 0 to 255. 0 means background (white), 255 means foreground (black).
:param idx_ubyte_file: idx文件路径
:return: n*row*col维np.array对象,n为图片数量
"""
return decode_idx3_ubyte(idx_ubyte_file)
def load_test_labels(idx_ubyte_file=test_labels_idx1_ubyte_file):
"""
TEST SET LABEL FILE (t10k-labels-idx1-ubyte):
[offset] [type] [value] [description]
0000 32 bit integer 0x00000801(2049) magic number (MSB first)
0004 32 bit integer 10000 number of items
0008 unsigned byte ?? label
0009 unsigned byte ?? label
........
xxxx unsigned byte ?? label
The labels values are 0 to 9.
:param idx_ubyte_file: idx文件路径
:return: n*1维np.array对象,n为图片数量
"""
return decode_idx1_ubyte(idx_ubyte_file)
if __name__ == '__main__':
train_images = load_train_images()
train_labels = load_train_labels()
test_images = load_test_images()
test_labels = load_test_labels()
pass
# 查看前十个数据及其标签以读取是否正确
for i in range(10):
print(train_labels[i])
img = train_images[i]
img = np.transpose(img, (1, 2, 0))
cv2.namedWindow('img')
cv2.imshow('img', img)
cv2.waitKey(100)
print('done')
上面代码需要注意的是数据集的路径,需要修改成对应的路径。
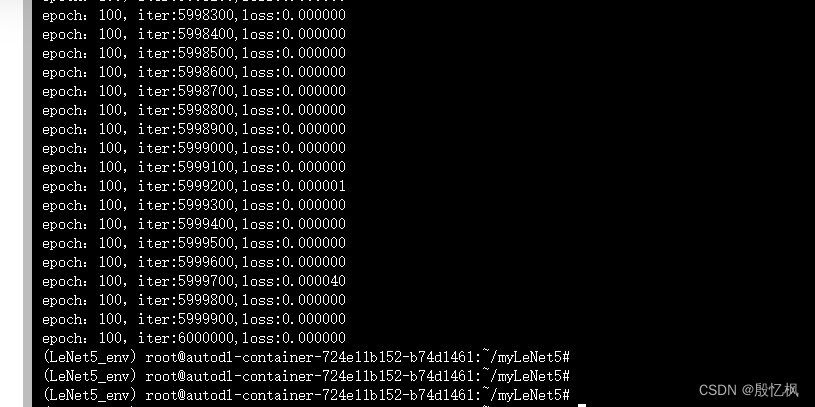
运行python train.py

训练大概5小时
五、测试
from LeNet5 import LeNet5
import torch
from readMnist import *
from myDatast import Mnist
from torch.utils.data import DataLoader
import numpy as np
import cv2

test_images = load_test_images()
test_labels = load_test_labels()

testData = Mnist(test_images, test_labels)
test_data = DataLoader(dataset=testData, batch_size=1, shuffle=True)

lenet5 = LeNet5()
lenet5.load_state_dict(torch.load('lenet5.pth'))
lenet5.eval()

showimg = True
js = 0
for i, (img, id) in enumerate(test_data):

    img = img.float()
    outid = lenet5(img)

    oid = torch.argmax(outid)
    if oid == id:
        js = js + 1

    if showimg == True:
        img = img.numpy()
        img = np.squeeze(img)

        id = id.numpy()
        id = np.squeeze(id)
        id = np.int32(id)

        oid = oid.numpy()
        oid = np.squeeze(oid)

        maxv = np.max(img)
        minv = np.min(img)

        img = (img - minv) / (maxv - minv)

        cv2.namedWindow("img", 0)
        cv2.imshow("img", img)

        title = "img, predicted value:{},truth value:{}".format(oid, id)
        cv2.setWindowTitle("img",title)

        cv2.waitKey(1)

print('准确率:{:.6f}'.format(js / (i + 1)))
测试结果准确率达到0.986基本达到要求

如有侵权,或需要完整代码,请及时联系博主。