第一篇:编译Opencv并用于人脸检测
步骤
- step 1:下载Visual Studio
- step 2:下载cmake
- step 3:下载opencv source code
- step 4:进行编译
- step 5:进行接口测试
step 1:下载Visual Studio
个人电脑安装的Visual Studio 2019 community版本,下面以VS2019为例说明
VS官方下载地址
下载完visual studio installer后进行安装就行,详细网上一大堆教程
step 2:下载cmake
由于选用的VS2019,需要版本较高的cmake,我选用的是cmake3.15.0
cmake下载地址
由于个人电脑是64位的,选用x64版本
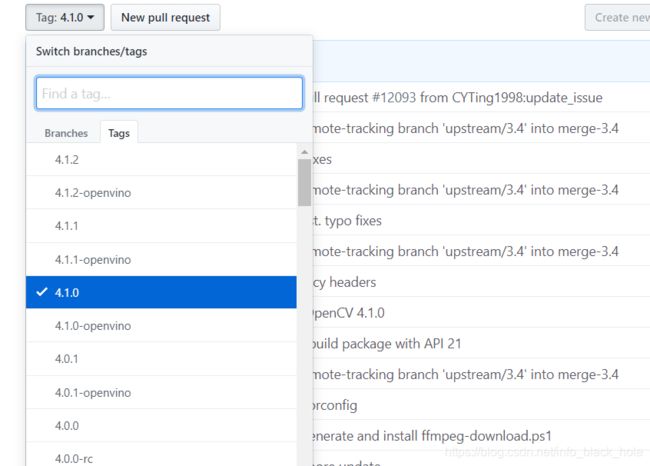
step 3:下载opencv source code
opencv github地址:https://github.com/opencv/opencv
注意这里选择branch里面的4.1.0分支,然后点击download下载
若是需要opencv的一些扩展功能,需要下载opencv_contrib源码
下载地址为:https://github.com/opencv/opencv_contrib
下载完毕两个压缩包后解压
step 4:进行编译
打开cmake的gui,分别设置cmakelists路径和build路径

点击configure,cmake会探测出当前用的VS版本为2019,其余默认(x64平台)
然后进行第一次Configure。
其中在第一次configure中会从网上下载:ippicv_2019_lnx_intel64_general_20180723.tgz
此包下载速度过慢,不想等的可以离线下载到本地,然后修改cmake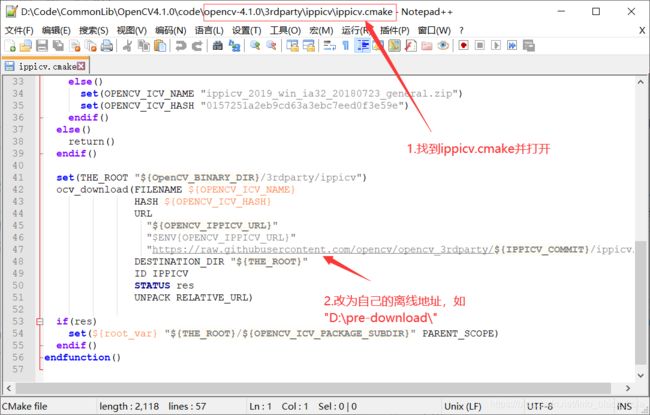
第一次configure完后有很多标红的地方,进行第二次configure,一般需要补充三个地方:(需要配置GPU加上的需要设置cuda相关)
(1)
(2)

(3)
![]()
再次点击Configure进行编译,这次红色消失,配置成功

然后按generate就会生成opencv的VS2019工程


利用VS2019打开Opencv解决方案

然后直接批量进行编译,点击生成
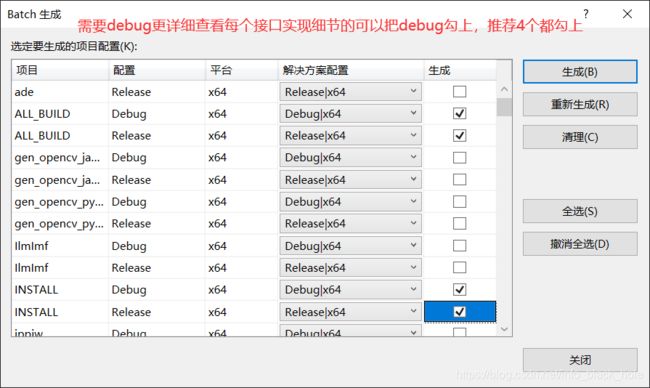
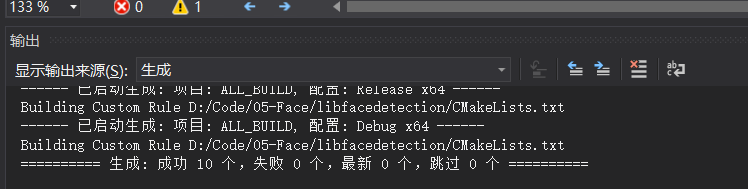
大约等待20分钟编译完成
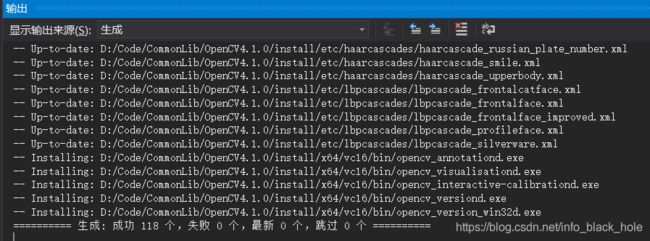
对编译好的lib库和dll进行查看
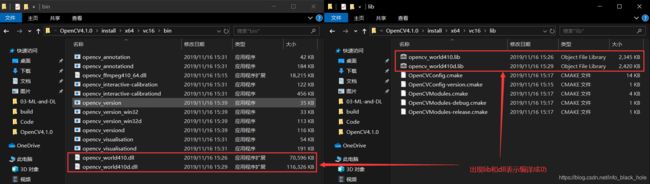
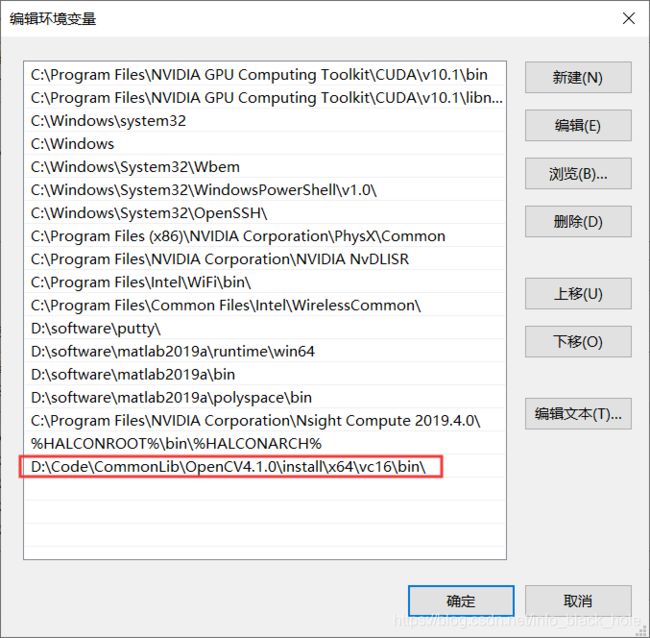
在测试前需要将编译好的dll添加到系统环境变量,然后需要重启动VS2019才能使得设置生效
step 5:进行接口测试
我这里直接选取稍微复杂一点的人脸检测任务进行测试
libfacedetection的github地址为:
https://github.com/ShiqiYu/libfacedetection
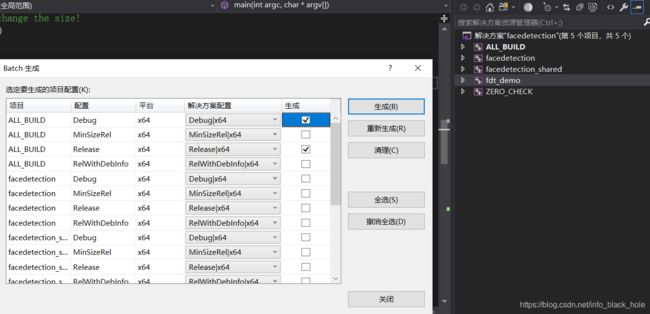
下载下来后同样通过cmake进行solution的生成

打开生成的sln,并同样选择批生成
接下来查看demo的源代码
#include
#include
#include "facedetectcnn.h"

//define the buffer size. Do not change the size!
#define DETECT_BUFFER_SIZE 0x20000
using namespace cv;

int main(int argc, char* argv[])
{
    if(argc != 2)
    {
        printf("Usage: %s \n", argv[0]);
        return -1;
    }

	//load an image and convert it to gray (single-channel)
	Mat image = imread(argv[1]);
	if(image.empty())
	{
		fprintf(stderr, "Can not load the image file %s.\n", argv[1]);
		return -1;
	}

	int * pResults = NULL;
    //pBuffer is used in the detection functions.
    //If you call functions in multiple threads, please create one buffer for each thread!
    unsigned char * pBuffer = (unsigned char *)malloc(DETECT_BUFFER_SIZE);
    if(!pBuffer)
    {
        fprintf(stderr, "Can not alloc buffer.\n");
        return -1;
    }


	///
	// CNN face detection
	// Best detection rate
	//
	//!!! The input image must be a BGR one (three-channel) instead of RGB
	//!!! DO NOT RELEASE pResults !!!
	pResults = facedetect_cnn(pBuffer, (unsigned char*)(image.ptr(0)), image.cols, image.rows, (int)image.step);

    printf("%d faces detected.\n", (pResults ? *pResults : 0));
	Mat result_cnn = image.clone();
	//print the detection results
	for(int i = 0; i < (pResults ? *pResults : 0); i++)
	{
        short * p = ((short*)(pResults+1))+142*i;
		int x = p[0];
		int y = p[1];
		int w = p[2];
		int h = p[3];
		int confidence = p[4];
		int angle = p[5];

		printf("face_rect=[%d, %d, %d, %d], confidence=%d, angle=%d\n", x,y,w,h,confidence, angle);
		rectangle(result_cnn, Rect(x, y, w, h), Scalar(0, 255, 0), 2);
	}
	imshow("result_cnn", result_cnn);

	waitKey();

    //release the buffer
    free(pBuffer);

	return 0;
}
此代码的含义是利用opencv库读入一幅图像,并且利用cnn来进行人脸检测
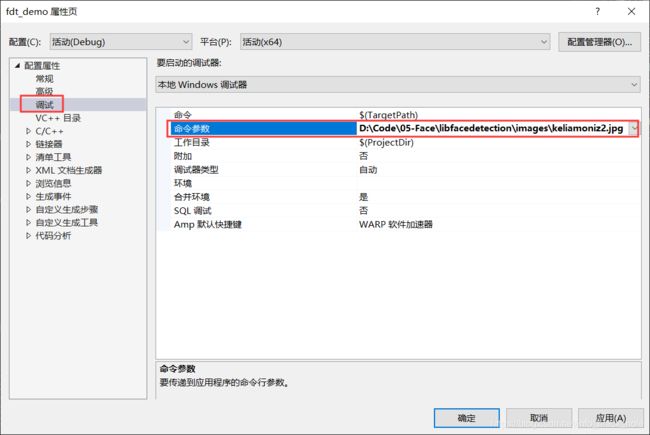
将ftd_demo设为启动项,然后输入需要测试的图片路径
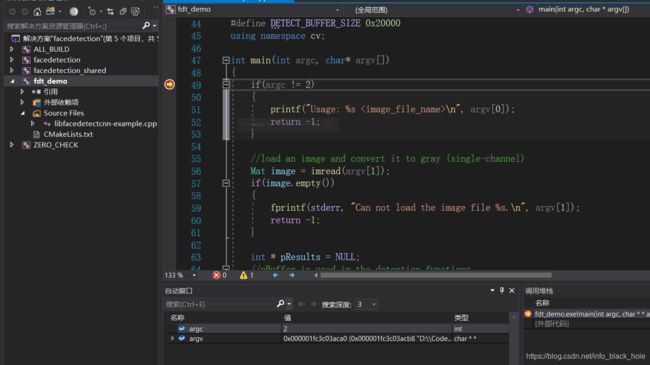
打个断点然后按F5进入调试
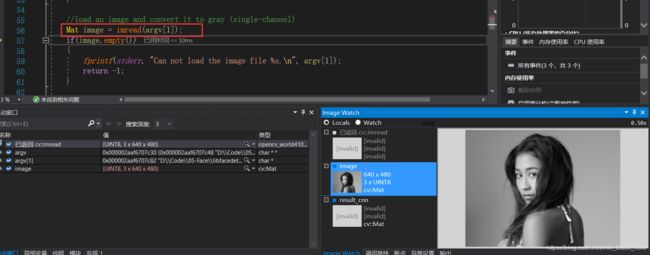
这里推荐用Image watch来对图片进行观察:
Image watch可以在扩展中直接下载

然后一步一步调试,由于是debug模式,而且opencv是源码编译,可以直接跳入opencv的所有接口查看所有实现细节

最终结果图
检测到人脸
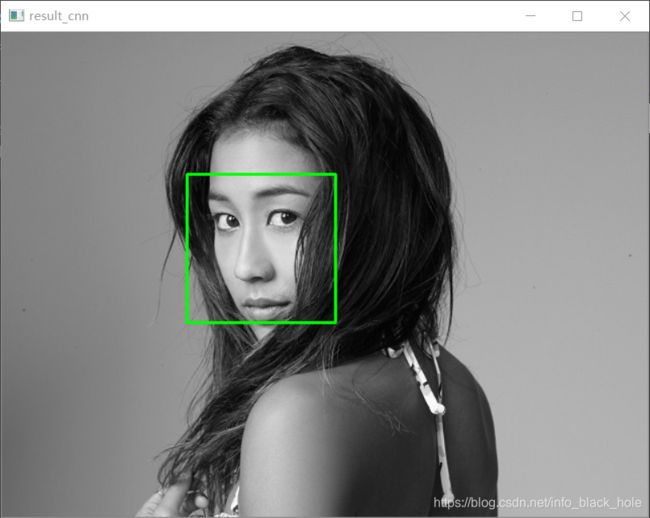
至此opencv源码编译、image watch调试、利用量化后的cnn模型进行人脸检测全部实现完毕,并且可以随时跳入opencv接口进行细节的查看