puppeteer入门_Puppeteer入门
puppeteer入门
Browser developer tools provide an amazing array of options for delving under the hood of websites and web apps. These capabilities can be further enhanced and automated by third-party tools. In this article, we’ll look at Puppeteer, a Node-based library for use with Chrome/Chromium.
浏览器开发人员工具为网站和Web应用程序的底层提供了许多惊人的选择。 这些功能可以通过第三方工具进一步增强和自动化。 在本文中,我们将研究Puppeteer ,这是一个用于Chrome / Chromium的基于节点的库。
The puppeteer website describes Puppeteer as
人偶网站将人偶描述为
a Node library which provides a high-level API to control Chrome or Chromium over the DevTools Protocol. Puppeteer runs headless by default, but can be configured to run full (non-headless) Chrome or Chromium.
一个Node库,它提供了高级API来通过DevTools协议控制Chrome或Chromium。 Puppeteer默认情况下无头运行,但可以配置为运行完整(无头)的Chrome或Chromium。
Puppeteer is made by the team behind Google Chrome, so you can be pretty sure it will be well maintained. It lets us perform common actions on the Chromium browser, programmatically through JavaScript, via a simple and easy-to-use API.
Puppeteer由Google Chrome背后的团队开发,因此您可以肯定它将得到很好的维护。 它使我们能够通过一个简单易用的API,通过JavaScript以编程方式在Chromium浏览器上执行常见操作。
With Puppeteer, you can:
使用Puppeteer,您可以:
- scrape websites 抓取网站
- generate screenshots of websites including SVG and Canvas 生成包括SVG和Canvas的网站的屏幕截图
- create PDFs of websites 创建网站PDF
- crawl an SPA (single-page application) 搜寻SPA(单页应用程序)
- access web pages and extract information using the standard DOM API 使用标准DOM API访问网页并提取信息
- generate pre-rendered content — that is, server-side rendering 生成预渲染的内容-即服务器端渲染
- automate form submission 自动提交表单
- automate performance analysis 自动化性能分析
automate UI testing like Cypress
像Cypress一样自动化UI测试
- test chrome extensions 测试chrome扩展
Puppeteer does nothing new that Selenium, PhantomJS (which is now deprecated), and the like do, but it provides a simple and easy-to-use API and provides a great abstraction so we don’t have to worry about the nitty-gritty details when dealing with it.
Puppeteer并没有Selenium , PhantomJS (现已不推荐使用)之类的东西做任何新的事情,但是它提供了一个简单易用的API并提供了很好的抽象性,因此我们不必担心问题的实质。处理它的细节。
It’s also actively maintained so we get all the new features of ECMAScript as Chromium supports it.
它也得到了积极的维护,因此Chromium支持ECMAScript的所有新功能。
先决条件 (Prerequisites)
For this tutorial, you need a basic knowledge of JavaScript, ES6+ and Node.js.
对于本教程,您需要JavaScript,ES6 +和Node.js的基础知识。
You must also have installed the latest version of Node.js.
您还必须安装了最新版本的Node.js。
We’ll be using yarn throughout this tutorial. If you don’t have yarn already installed, install it from here.
在整个教程中,我们将使用yarn 。 如果尚未安装yarn ,请从此处安装。
To make sure we’re on the same page, these are the versions used in this tutorial:
为了确保我们在同一页面上,这些是本教程中使用的版本:
- Node 12.12.0 节点12.12.0
- yarn 1.19.1 纱1.19.1
- puppeteer 2.0.0 up 2.0.0
安装 (Installation)
To use Puppeteer in your project, run the following command in the terminal:
要在项目中使用Puppeteer,请在终端中运行以下命令:
$ yarn add puppeteerNote: when you install Puppeteer, it downloads a recent version of Chromium (~170MB macOS, ~282MB Linux, ~280MB Win) that is guaranteed to work with the API. To skip the download, see Environment variables.
注意:安装Puppeteer时,它会下载保证可以使用该API的Chromium的最新版本(〜170MB macOS,〜282MB Linux,〜280MB Win)。 要跳过下载,请参阅环境变量 。
If you don’t need to download Chromium, then you can install puppeteer-core:
如果您不需要下载Chromium,则可以安装puppeteer-core :
$ yarn add puppeteer-corepuppeteer-core is intended to be a lightweight version of Puppeteer for launching an existing browser installation or for connecting to a remote one. Be sure that the version of puppeteer-core you install is compatible with the browser you intend to connect to.
puppeteer-core旨在作为Puppeteer的轻量级版本,用于启动现有的浏览器安装或用于连接到远程浏览器。 确保您安装的puppeteer-core版本与您打算连接的浏览器兼容。
Note: puppeteer-core is only published from version 1.7.0.
注意: puppeteer-core仅从1.7.0版发布。
用法 (Usage)
Puppeteer requires at least Node v6.4.0, but we’re going to use async/await, which is only supported in Node v7.6.0 or greater, so make sure to update your Node.js to the latest version to get all the goodies.
Puppeteer至少需要Node v6.4.0,但是我们将使用async / await,只有Node v7.6.0或更高版本才支持,因此请确保将Node.js更新到最新版本以获取所有好处。 。
Let’s dive into some practical examples using Puppeteer. In this tutorial, we’ll be:
让我们深入研究使用Puppeteer的一些实际示例。 在本教程中,我们将是:
- generating a screenshot of Unsplash using Puppeteer 使用Puppeteer生成Unsplash的屏幕截图
- creating a PDF of Hacker News using Puppeteer 使用Puppeteer创建黑客新闻PDF
- signing in to Facebook using Puppeteer 使用Puppeteer登录Facebook
1.使用Puppeteer生成Unsplash的屏幕截图 (1. Generate a Screenshot of Unsplash using Puppeteer)
It’s really easy to do this with Puppeteer. Go ahead and create a screenshot.js file in the root of your project. Then paste in the following code:
使用Puppeteer做到这一点真的很容易。 继续,在项目的根目录中创建一个screenshot.js文件。 然后粘贴以下代码:
const puppeteer = require('puppeteer')

const main = async () => {
  const browser = await puppeteer.launch()
  const page = await browser.newPage()
  await page.goto('https://unsplash.com')
  await page.screenshot({ path: 'unsplash.png' })

  await browser.close()
}

main()
Firstly, we require the puppeteer package. Then we call the launch method on it that initializes the instance. This method is asynchronous as it returns a Promise. So we await for it to get the browser instance.
首先,我们需要puppeteer程序包。 然后,我们在其上调用launch方法以初始化实例。 此方法是异步的,因为它返回Promise 。 因此,我们await它获取browser实例。
Then we call newPage on it and go to Unsplash and take a screenshot of it and save the screenshot as unsplash.png.
然后我们在其上调用newPage并转到Unsplash并对其进行截图,并将其保存为unsplash.png 。
Now go ahead and run the above code in the terminal by typing:
现在继续输入以下内容在终端中运行以上代码:
$ node screenshot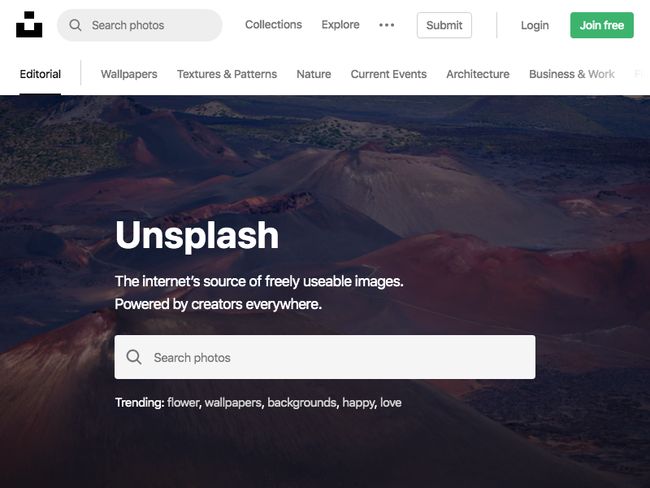
Now after 5–10 seconds you’ll see an unsplash.png file in your project that contains the screenshot of Unsplash. Notice that the viewport is set to 800px x 600px as Puppeteer sets this as the initial page size, which defines the screenshot size. The page size can be customized with Page.setViewport().
现在,5-10秒后,你会看到一个unsplash.png在项目中包含Unsplash截图文件。 请注意,视口设置为800px x 600px,因为Puppeteer将此视口设置为初始页面尺寸,该尺寸定义了屏幕截图尺寸。 可以使用Page.setViewport()自定义页面大小。
Let’s change the viewport to be 1920px x 1080px. Insert the following code before the goto method:
让我们将视口更改为1920px x 1080px。 在goto方法之前插入以下代码:
await page.setViewport({
  width: 1920,
  height: 1080,
  deviceScaleFactor: 1,
})
Now go ahead and also change the filename from unsplash.png to unsplash2.png in the screenshot method like so:
现在,继续在screenshot方法中将文件名从unsplash.png更改为unsplash2.png ,如下所示:
await page.screenshot({ path: 'unsplash2.png' })The whole screenshot.js file should now look like this:
现在,整个screenshot.js文件应如下所示:
const puppeteer = require('puppeteer')

const main = async () => {
  const browser = await puppeteer.launch()
  const page = await browser.newPage()
  await page.setViewport({
    width: 1920,
    height: 1080,
    deviceScaleFactor: 1,
  })
  await page.goto('https://unsplash.com')
  await page.screenshot({ path: 'unsplash2.png' })

  await browser.close()
}

main()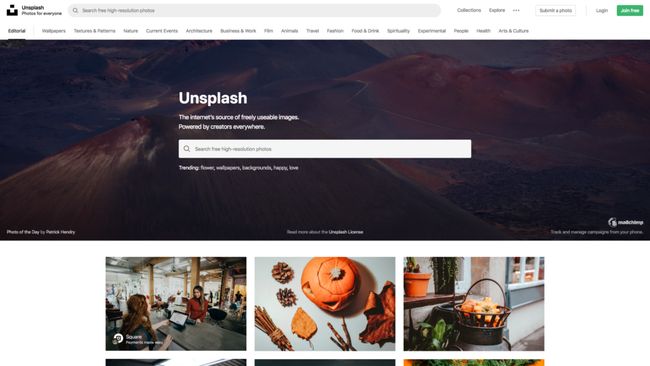
2.使用Puppeteer创建Hacker News的PDF (2. Create PDF of Hacker News using Puppeteer)
Now create a file named pdf.js and paste the following code into it:
现在创建一个名为pdf.js的文件,并将以下代码粘贴到其中:
const puppeteer = require('puppeteer')

const main = async () => {
  const browser = await puppeteer.launch()
  const page = await browser.newPage()
  await page.goto('https://news.ycombinator.com', { waitUntil: 'networkidle2' })
  await page.pdf({ path: 'hn.pdf', format: 'A4' })

  await browser.close()
}

main()
We’ve only changed two lines from the screenshot code.
我们仅从screenshot代码中更改了两行。
Firstly, we’ve replaced the URL with Hacker News and then added networkidle2:
首先,我们用Hacker News替换了URL,然后添加了networkidle2 :
await page.goto('https://news.ycombinator.com', { waitUntil: 'networkidle2' })networkidle2 comes in handy for pages that do long polling or any other side activity and considers navigation to be finished when there are no more than two network connections for at least 500ms.
对于进行长时间轮询或任何其他附带活动的页面, networkidle2非常有用,并且当至少两个网络连接持续至少500毫秒时,认为导航已完成。
Then we called the pdf method to create a PDf and called it hn.pdf and we formatted it to be A4 size:
然后,我们调用pdf方法来创建PDf,并将其命名为hn.pdf并将其格式化为A4大小:
await page.pdf({ path: 'hn.pdf', format: 'A4' })That’s it. We can now run the file to generate a PDF of Hacker News. Let’s go ahead and run the following command in the terminal:
而已。 现在,我们可以运行该文件来生成Hacker News的PDF。 让我们继续在终端中运行以下命令:
$ node pdfThis will generate a PDF file called hn.pdf in the root directory of the project in A4 size.
这将在项目的根目录中以A4大小生成一个名为hn.pdf的PDF文件。
3.使用Puppeteer登录到Facebook (3. Sign In to Facebook Using Puppeteer)
Create a new file called signin.js with the following code:
使用以下代码创建一个名为signin.js的新文件:
const puppeteer = require('puppeteer')

const SECRET_EMAIL = '[email protected]'
const SECRET_PASSWORD = 'secretpass123'

const main = async () => {
  const browser = await puppeteer.launch({
    headless: false,
  })
  const page = await browser.newPage()
  await page.goto('https://facebook.com', { waitUntil: 'networkidle2' })
  await page.waitForSelector('#login_form')
  await page.type('input#email', SECRET_EMAIL)
  await page.type('input#pass', SECRET_PASSWORD)
  await page.click('#loginbutton')
  // await browser.close()
}

main()
We’ve created two variables, SECRET_EMAIL and SECRET_PASSWORD, which should be replaced by your email and password of Facebook.
我们创建了两个变量SECRET_EMAIL和SECRET_PASSWORD ,应将其替换为您的Facebook电子邮件和密码。
We then launch the browser and set headless mode to false to launch a full version of Chromium browser.
然后,我们launch浏览器并将headless模式设置为false以启动完整版的Chromium浏览器。
Then we go to Facebook and wait until everything is loaded.
然后,我们转到Facebook ,等待所有内容加载完毕。
On Facebook, there’s a #login_form selector that can be accessed via DevTools. This selector contains the login form, so we wait for it using waitForSelector method.
在Facebook上,有一个#login_form选择器,可以通过DevTools进行访问。 该选择器包含登录表单,因此我们使用waitForSelector方法等待它。
Then we have to type our email and password, so we grab the selectors input#email and input#pass from DevTools and pass in our SECRET_EMAIL and SECRET_PASSWORD.
然后,我们必须输入我们的email和password ,以便从DevTools获取选择器input#email和input#pass ,并传入SECRET_EMAIL和SECRET_PASSWORD 。
After that, we click the #loginbutton to log in to Facebook.
之后,我们单击#loginbutton按钮登录Facebook。
The last line is commented out so that we see the whole process of typing email and password and clicking the login button.
最后一行被注释掉,以便我们看到键入email和password并单击登录按钮的整个过程。
Go ahead and run the code by typing the following in the terminal:
在终端中键入以下内容,继续运行代码:
$ node signinThis will launch a whole Chromium browser and then log in to Facebook.
这将启动整个Chromium浏览器,然后登录Facebook。
结论 (Conclusion)
In this tutorial, we made a project that creates a screenshot of any given page within a specified viewport. We also built a project where we can create a PDF of any website. We then programmatically managed to sign in to Facebook.
在本教程中,我们创建了一个项目,该项目创建指定视口内任何给定页面的屏幕截图。 我们还建立了一个项目,可以在其中创建任何网站的PDF。 然后,我们以编程方式设法登录了Facebook。
Puppeteer recently released version 2, and it’s a nice piece of software to automate trivial tasks with a simple and easy-to-use API.
Puppeteer最近发布了版本2,它是一个很好的软件,可以通过简单易用的API自动执行琐碎的任务。
You can learn more about Puppeteer on its official website. The docs are very good, with tons of examples, and everything is well documented.
您可以在其官方网站上了解有关Puppeteer的更多信息。 这些文档非常好,有大量示例,并且所有文档都记录在案。
Now go ahead and automate boring tasks in your day-to-day life with Puppeteer.
现在,使用Puppeteer在您的日常生活中自动执行无聊的任务。
翻译自: https://www.sitepoint.com/getting-started-with-puppeteer/
puppeteer入门