sentinel 入门详解
Sentinel 的使用可以分为两个部分:
核心库(Java 客户端):不依赖任何框架/库,能够运行于 Java 8 及以上的版本的运行时环境,同时对 Dubbo / Spring Cloud 等框架也有较好的支持(见 主流框架适配)。
控制台(Dashboard):控制台主要负责管理推送规则、监控、集群限流分配管理、机器发现等。
我们将会提供 本地运行 demo 和 阿里云公网 demo 来帮助新手快速入门。这两种方式都只需要您执行2到5个步骤。其中阿里云 AHAS demo 支持全自动托管的集群流控能力
客户端就是使用端,一般用来定义资源,控制台用来展示修改配置数据。
1. 引入 Sentinel 依赖
如果您的应用使用了 Maven,则在 pom.xml 文件中加入以下代码即可:
  <dependency>
            <groupId>com.alibaba.cspgroupId>
            <artifactId>sentinel-coreartifactId>
        dependency>

        <dependency>
            <groupId>com.alibaba.cspgroupId>
            <artifactId>sentinel-transport-spring-mvcartifactId>
        dependency>
        <dependency>
            <groupId>org.springframework.bootgroupId>
            <artifactId>spring-boot-starter-webartifactId>
            <version>${spring.boot.version}version>
        dependency>
    dependencies>
2. 定义资源
资源 是 Sentinel 中的核心概念之一。最常用的资源是我们代码中的 Java 方法。 Sentinel API SphU.entry(“demo-hello-api”) 和 entry.exit() 这个”demo-hello-api”就对应控制面板的簇点,entry这个方法是一个流量控制方法,用这个方法将逻辑包括起来,来实现对逻辑的控制,也可以使用注解来实现。在下面的例子中,我们将 System.out.println(“hello world”); 作为资源(被保护的逻辑),用 API 包装起来。参考代码如下:
 @GetMapping("/hello")
    @ResponseBody
    public String hello() {
        Entry entry = null;
        try {
            entry = SphU.entry("demo-hello-api");
            Thread.sleep(1000);
            return "ok: " + LocalDateTime.now();
        } catch (BlockException e1) {
            return "helloBlockHandler: " + LocalDateTime.now();
        }
        catch (Exception ex)
        {
            return "helloBlockHandler: " + LocalDateTime.now();
        }
        finally {
            if (entry != null) {
                entry.exit();
            }
        }
    }
通过注解的代码:
@SentinelResource("HelloWorld")
public void helloWorld() {
    // 资源中的逻辑
    System.out.println("hello world");
}
3. 定义规则
接下来,通过流控规则来指定允许该资源通过的请求次数,例如下面的代码定义了资源 HelloWorld 每秒最多只能通过 20 个请求。
    public static void initFlowRules() {
        List<FlowRule> rules = new ArrayList<>();
        FlowRule rule = new FlowRule();
        rule.setResource("demo-hello-api");
        rule.setGrade(RuleConstant.FLOW_GRADE_QPS);
        rule.setCount(20);
        rules.add(rule);
        FlowRuleManager.loadRules(rules);
    }
完成上面 3 步,Sentinel 就能够正常工作了。但是没有把数据同步到控制台。
启动 Sentinel 控制台
Sentinel 开源控制台支持实时监控和规则管理。启动控制台:
下载jar包

进入到jar所在的路径下,启动cmd
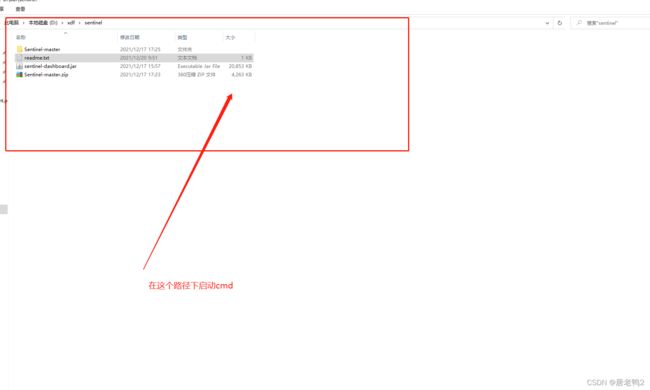
java -Dserver.port=8080 -Dcsp.sentinel.dashboard.server=localhost:8080 -Dproject.name=sentinel-dashboard -jar sentinel-dashboard.jar
注意-Dproject.name=sentinel-dashboard 这个name要和真是jar包一致。可以修改jar文件名为sentinel-dashboard。
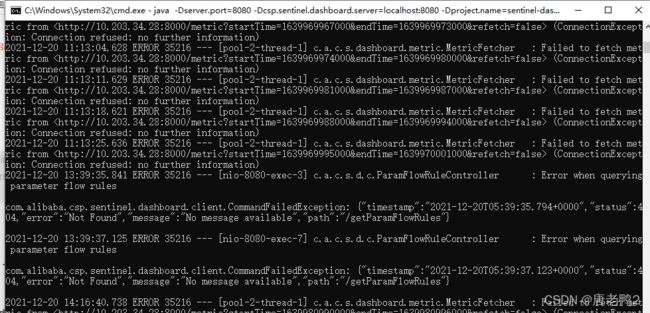
上面的pom文件已经把控制台依赖加进来了。但是缺少配置控制台的地址和端口。
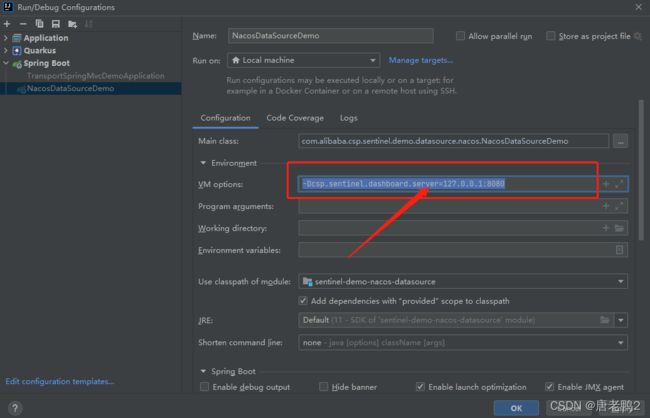
点击idea 的Run选择Edit Configurations
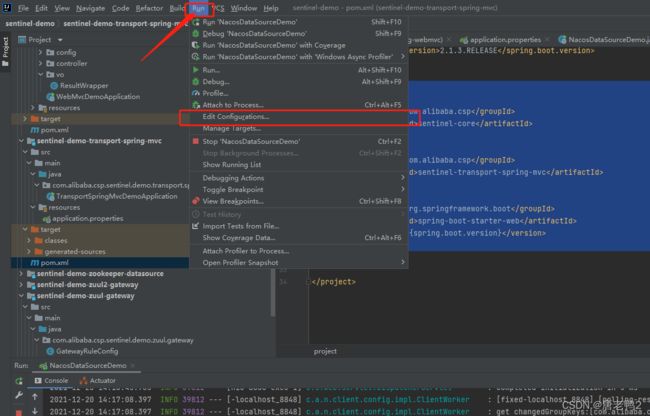
在VM options里加入-Dcsp.sentinel.dashboard.server=127.0.0.1:8080 这个是我们启动的控制台的ip和端口
5. 监控
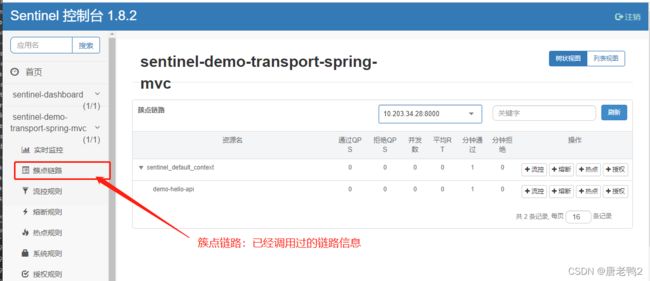
5.1 "簇点链路"中显示刚刚调用的资源(单机实时)
簇点链路(单机调用链路)页面实时的去拉取指定客户端资源的运行情况。它一共提供两种展示模式:一种用树状结构展示资源的调用链路,另外一种则不区分调用链路展示资源的实时情况。
注意: 簇点链路监控是内存态的信息,它仅展示启动后调用过的资源。
5.2 "实时监控"汇总资源信息(集群聚合)
同时,同一个服务下的所有机器的簇点信息会被汇总,并且秒级地展示在"实时监控"下。
注意: 实时监控仅存储 5 分钟以内的数据,如果需要持久化,需要通过调用实时监控接口来定制
注意:请确保 Sentinel 控制台所在的机器时间与自己应用的机器时间保持一致,否则会导致拉不到实时的监控数据。

6. 规则管理及推送
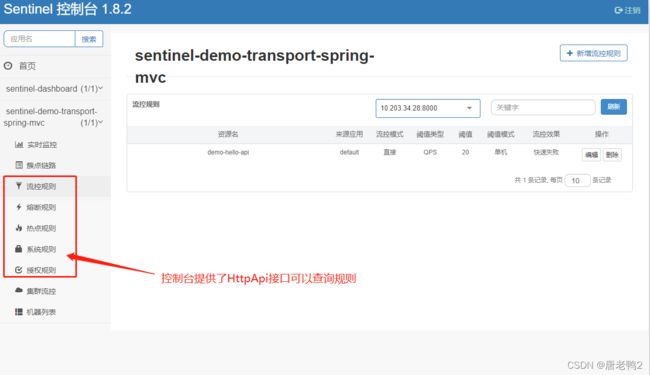
可以在控制台通过接入端暴露的 HTTP API 来查询规则。
规则的种类
Sentinel 的所有规则都可以在内存态中动态地查询及修改,修改之后立即生效。同时 Sentinel 也提供相关 API,供您来定制自己的规则策略。
Sentinel 支持以下几种规则:流量控制规则、熔断降级规则、系统保护规则、来源访问控制规则 和 热点参数规则。
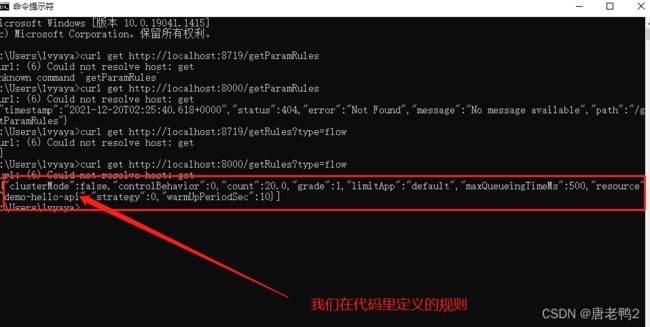
http://localhost:8719/getRules?type=
其中,type=flow 以 JSON 格式返回现有的限流规则,degrade 返回现有生效的降级规则列表,system 则返回系统保护规则。
代码加入流量控制规则:
    public static void initFlowRules() {
        List<FlowRule> rules = new ArrayList<>();
        FlowRule rule = new FlowRule();
        rule.setResource("demo-hello-api");
        rule.setGrade(RuleConstant.FLOW_GRADE_QPS);
        rule.setCount(20);
        rules.add(rule);
        FlowRuleManager.loadRules(rules);
    }
定制自己的持久化规则
通过上面的代码我们知道开发者可以再代码中定义规则。然后通过控制台修改规则。那为什么还要持久化呐?当服务重启之后规则就会失效。显然这是不合理的,费劲吧咧配置完成之后服务一重启一切归零,尤其是在大型项目中。那么持久化就尤为重要了。所以Sentinel 的理念是开发者只需要关注资源的定义,当资源定义成功后可以动态增加各种流控降级规则。这句话是官网的原话,要牢记。Sentinel 提供两种方式修改规则:
- 通过 API 直接修改 (loadRules)
- 通过 DataSource 适配不同数据源修改
手动通过 API 修改比较直观,可以通过以下几个 API 修改不同的规则:
FlowRuleManager.loadRules(List<FlowRule> rules); // 修改流控规则
DegradeRuleManager.loadRules(List<DegradeRule> rules); // 修改降级规则
手动修改规则(硬编码方式)一般仅用于测试和演示,生产上一般通过动态规则源的方式来动态管理规则。****(不推荐)
DataSource 扩展
上述 loadRules() 方法只接受内存态的规则对象,但更多时候规则存储在文件、数据库或者配置中心当中。DataSource 接口给我们提供了对接任意配置源的能力。相比直接通过 API 修改规则,实现 DataSource 接口是更加可靠的做法。
我们推荐通过控制台设置规则后将规则推送到统一的规则中心,客户端实现 ReadableDataSource 接口端监听规则中心实时获取变更,流程如下:
DataSource 扩展常见的实现方式有:
- 拉模式:客户端主动向某个规则管理中心定期轮询拉取规则,这个规则中心可以是 RDBMS、文件,甚至是 VCS 等。这样做的方式是简单,缺点是无法及时获取变更;
- 推模式:规则中心统一推送,客户端通过注册监听器的方式时刻监听变化,比如使用 Nacos、Zookeeper 等配置中心。这种方式有更好的实时性和一致性保证。
Sentinel 目前支持以下数据源扩展: - Pull-based: 动态文件数据源、Consul, Eureka
- Push-based: ZooKeeper, Redis, Nacos, Apollo, etcd
推模式:使用 Nacos 配置规则
拉取模式就不说了。大家可以去官网看看,都很简单。
Nacos 是阿里中间件团队开源的服务发现和动态配置中心。Sentinel 针对 Nacos 作了适配,底层可以采用 Nacos 作为规则配置数据源。使用时只需添加以下依赖:
    <dependency>
            <groupId>com.alibaba.cspgroupId>
            <artifactId>sentinel-coreartifactId>
        dependency>
        <dependency>
            <groupId>com.alibaba.cspgroupId>
            <artifactId>sentinel-datasource-extensionartifactId>
        dependency>

        <dependency>
            <groupId>com.alibaba.cspgroupId>
            <artifactId>sentinel-datasource-nacosartifactId>
        dependency>

        <dependency>
            <groupId>com.alibabagroupId>
            <artifactId>fastjsonartifactId>
        dependency>

        <dependency>
            <groupId>com.alibaba.cspgroupId>
            <artifactId>sentinel-transport-spring-mvcartifactId>
        dependency>

        <dependency>
            <groupId>org.springframework.bootgroupId>
            <artifactId>spring-boot-starter-webartifactId>
            <version>2.1.3.RELEASEversion>
        dependency>

        <dependency>
            <groupId>ch.qos.logbackgroupId>
            <artifactId>logback-classicartifactId>
            <version>1.2.3version>
        dependency>
然后创建 NacosDataSource 并将其注册至对应的 RuleManager 上即可。比如:
 private static void loadRules() {
        ReadableDataSource<String, List<FlowRule>> flowRuleDataSource = new NacosDataSource<>(remoteAddress, groupId, dataId,
                source -> JSON.parseObject(source, new TypeReference<List<FlowRule>>() {
                }));
        FlowRuleManager.register2Property(flowRuleDataSource.getProperty());
    }
例子具体例子可以参考:
Nacos数据源demo
调用publishConfig将配置发布到nacos
 */
public class NacosConfigSender {

    public static void main(String[] args) throws Exception {
        final String remoteAddress = "localhost:8848";
        final String groupId = "Sentinel_Demo";
        final String dataId = "com.alibaba.csp.sentinel.demo.flow.rule";
        final String rule = "[\n"
            + "  {\n"
            + "    \"resource\": \"TestResource\",\n"
            + "    \"controlBehavior\": 0,\n"
            + "    \"count\": 5.0,\n"
            + "    \"grade\": 1,\n"
            + "    \"limitApp\": \"default\",\n"
            + "    \"strategy\": 0\n"
            + "  }\n"
            + "]";
        ConfigService configService = NacosFactory.createConfigService(remoteAddress);
        System.out.println(configService.publishConfig(dataId, groupId, rule));
    }
}
