前端三大框架 :
Vue:开源项目,适合中小型项目
React:Facebook公司 ,适合中小型项目+RN手机端开发
Angular:Google公司,适合大型项目;简称NG,和Vue年相似
初识Angular______________________________
脚本方式: 适合最基本的入门, 实际开发没用.
脚手架方式: 属于工程化的开发方式, 利用脚手架生成完善的项目包.
安装脚手架: npm i -g @angular/cli --force 安装过程中, 有可能弹出选项, 询问是否要分享使用体验(y/N): 直接回车即可
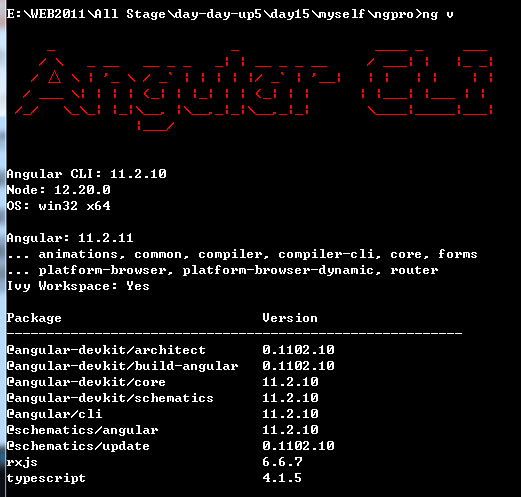
安装成功之后 可以通过ng v 查看Angular版本
生成项目包, 关注 cmd 开启的位置, 在哪开 在哪生成
生成过程会有很多项目的询问, 都直接 回车 采用默认值即可; 不然容易会出现各种bug.
ng new 包名
例如: ng new ngpro
生成结果中, 只要有 这个 successfully 字样即可, 此行不是最后一行
启动项目: 在项目目录下 , 即 ngpro 目录下执行
ng serve --open
项目端口号: 4200

项目的启动_______________________________________
当访问: localhost:4200 之后, 发生了什么?
访问当前计算机上, 端口号是4200的程序.
4200的程序, 就是 Angular 项目的自带服务器的端口号.
服务器的默认设定: index.html ; 来访用户如果不指定文件名, 则默认提供 index.html
根组件:
angular采用 TypeScript 语言进行逻辑层编写
main.ts : 此文件是 webpack 打包工具, 在项目运行时会自动打包引入到 index.html 中
app/app.module.ts 此文件是项目的 根配置文件
app.component.ts 文件, 此文件就是项目的根组件, 类似于 React的 App.js 和 Vue的 App.vue
组件:
组件的制作__________________________
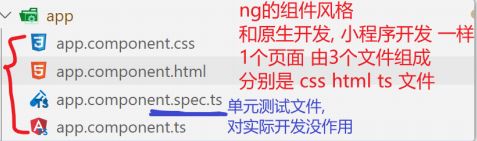
Angular的组件 类似于 微信小程序 和 原生开发, 把一个页面拆分成3个文件: html , css , ts
angular的文件命名规范:
名字.作用.代码类型
例如: myc01.component.ts 名字是myc01, 作用是组件component, 代码类型ts文件
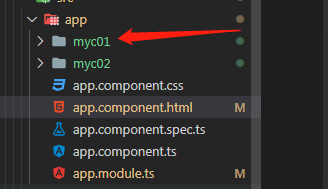
首先是在App文件目录下创建文件夹myc01
然后创建在该文件夹下创建3个文件 分别为app.component.css,app.component.ts ,app.component.html

html文件
Hello, 我的第一个组件
css文件就是相应的一些样式这里就不写出来了
ts文件
// 在之前 安装插件的 前提下:
// ng-component
import { Component, OnInit } from '@angular/core';
/**
* 在原生开发中, html文件是主文件, 运行的是html文件, 在html中引入了 其它的css和js文件
*
* 在NG开发中, ts文件是主文件, 在ts文件中引入html 和 css
*/
@Component({
// 当前组件使用时的 标签名
selector: 'app-myc01', //
最后需要在app.module.ts文件中注册组件
app.module.ts
import { NgModule } from '@angular/core';
import { BrowserModule } from '@angular/platform-browser';

import { AppComponent } from './app.component';
// 引入组件, 然后注册
import { Myc01Component } from './myc01/myc01.component';
import { Myc02Component } from './myc02/myc02.component';


@NgModule({
  // declarations: 用于注册组件
  declarations: [
    AppComponent, Myc01Component, Myc02Component
  ],
  // imports: 引入模块
  imports: [
    BrowserModule
  ],
  providers: [],
  bootstrap: [AppComponent]
})
export class AppModule { }
最后在根组件app.component.html中引用即可
HELlo word
快捷命令________________________
官方为了提高程序员的工作效率, 对很多操作提供了快捷的命令
项目启动命令:
ng serve --open : 启动服务 并 在默认浏览器自动打开
简化: ng s -o
生成组件命令
g generate component 组件名

generate: 生成

component: 组件

简化:
ng g c 组件名
例如: ng g c myc03
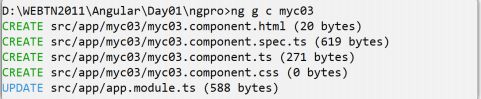
这种快捷方式会给app文件夹生成对应文件 并且会在app.module.ts中自动引入该组件
插值 __________________________________
把 js 代码中的变量, 插入到 html 代码中: {{}}
在组件ts文件中定义一些数据
import { Component, OnInit } from '@angular/core';

@Component({
  selector: 'app-myc03',
  templateUrl: './myc03.component.html',
  styleUrls: ['./myc03.component.css'],
})
export class Myc03Component implements OnInit {
  name = '天天';
  age = 33;
  married = true;

  skills = ['vue', 'dom', 'axios', 'vue3.0'];

  boss = { name: '天霸', age: 39 };

  constructor() {}

  ngOnInit(): void {}
}

// 面向对象
// class Demo {
//   name = '东东';
// }

// 对象
// const obj = {
//   name: '东东',
// };
组件的HTML文件中用插值语法
myc03 works!
- {{ name }}
- {{ age }}
- {{ married }}
- {{ skills }}
- {{ boss }}
- {{ skills[0] }}
- {{ boss.age }}
- {{ age + 4 }}
- {{ age - 4 }}
- {{ age * 4 }}
- {{ age / 4 }}
- {{ age % 4 }}
- {{ age > 5 }}
- {{ age >= 5 }}
- {{ age < 5 }}
- {{ age <= 5 }}
- {{ age == 5 }}
- {{ age != 5 }}
- {{ true && true }}
- {{ true && false }}
- {{ true || false }}
- {{ false || false }}
- {{ !true }}
- {{ !false }}
- {{ age > 18 ? "成年" : "未成年" }}
- {{ married ? "已婚" : "未婚" }}
- {{ skills[0].toUpperCase() }}
属性绑定_________________________
快捷生成组件 ng g c myc04
在组件ts文件中定义一些数据
import { Component, OnInit } from '@angular/core';

@Component({
  selector: 'app-myc04',
  templateUrl: './myc04.component.html',
  styleUrls: ['./myc04.component.css'],
})
export class Myc04Component implements OnInit {
  href1 = 'http://www.baidu.com';
  href2 = 'http://www.bilibili.com';

  constructor() {}

  ngOnInit(): void {}
}
组件的HTML文件中用属性绑定语法
事件_________________________________
快捷生成组件 ng g c myc05
vue中: v-on:事件名="方法名" 或者 @事件名="方法名"
在组件ts文件中定义一些事件函数
import { Component, OnInit } from '@angular/core';

@Component({
  selector: 'app-myc05',
  templateUrl: './myc05.component.html',
  styleUrls: ['./myc05.component.css'],
})
export class Myc05Component implements OnInit {
  num = 1;

  doAdd() {
    this.num++;

    // react,小程序:setState 或 setData  主动触发刷新
    // vue,angular: 自动检测数据变化, 更新DOM
  }

  constructor() {}

  // 这里不是React, 没有this指向问题
  show() {
    alert('啊,疼!');
  }

  ngOnInit(): void {}
}
组件的HTML文件中用利用事件触发事件函数
myc05 works!
双向数据绑定_____________________________
快捷生成组件 ng g c myc06
vue中:
在组件ts文件中定义一些数据
import { Component, OnInit } from '@angular/core';

@Component({
  selector: 'app-myc06',
  templateUrl: './myc06.component.html',
  styleUrls: ['./myc06.component.css'],
})
export class Myc06Component implements OnInit {
//定义个name 举例
  name = 'comeintobud';

  constructor() {}

  ngOnInit(): void {}
}
在使用用双向绑定之前需要在app.module.ts中引入模块
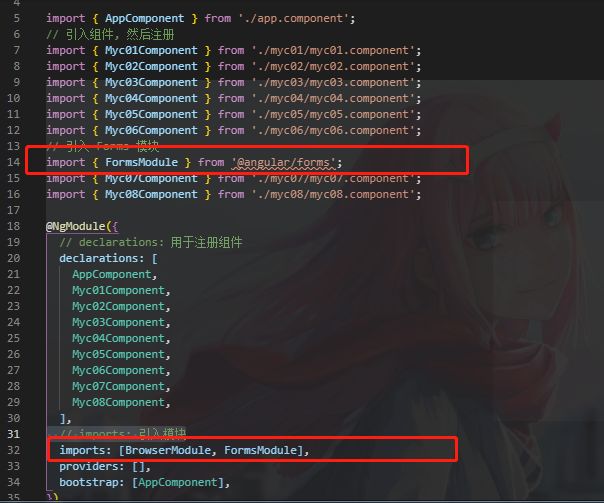
// 引入 Forms 模块
import { FormsModule } from '@angular/forms';
@NgModule({
 // declarations: 用于注册组件
 declarations: [],
 // imports: 引入模块
 imports: [BrowserModule, FormsModule],
 providers: [],
 bootstrap: [AppComponent],
})
export class AppModule {}
组件的HTML文件中使用双向绑定对数据做更改
myc06 works!


{{ name }}
特殊属性_______________________
快捷生成组件 ng g c myc07
网页内容: vue中: v-html
在组件ts文件中定义一些数据
import { Component, OnInit } from '@angular/core';
@Component({
selector: 'app-myc07',
templateUrl: './myc07.component.html',
styleUrls: ['./myc07.component.css'],
})
export class Myc07Component implements OnInit {
//希望将h1编译成浏览器样式
data = 'Hello World!
';
constructor() {}
ngOnInit(): void {}
}
在组件的HTML文件中编译网页内容
myc07 works!


  {{ data }}
动态样式_______________________
vue中:
:style="{样式名: 值}"
:class="{样式类名: true/false}" true生效 false无效
快捷生成组件 ng g c myc08
在组件ts文件中定义一些数据
import { Component, OnInit } from '@angular/core';

@Component({
  selector: 'app-myc08',
  templateUrl: './myc08.component.html',
  styleUrls: ['./myc08.component.css'],
})
export class Myc08Component implements OnInit {
  //动态样式初始值
  size = 17;

  constructor() { }

  ngOnInit(): void { }
}
组件的HTML中写动态样式
myc08 works!
Hello
Hello Class
在css文件中定义样式便于动态绑定类
View Code
条件判断_________________
vue中: v-if v-else :本质上是 切换 DOM 的 添加和移除. 消耗更多的资源, 适合不频繁的切换
对应
v-show: 本质是切换 css 的 display 属性, 利用css实现元素的隐藏; 消耗资源少, 适合频繁切换.
快捷生成组件 ng g c myc09
HTML文件
分数:{{ score }}
很遗憾, 您的成绩不及格!
及格了, 但是仍要继续努力.
优秀 优秀!
很遗憾, 您的成绩不及格!
恭喜, 及格了!
列表渲染______________________
vue中: v-for="(item,index) in arr" :key="index"
快捷生成组件 ng g c myc10
ts文件定义数据和函数
import { Component, OnInit } from '@angular/core';

@Component({
  selector: 'app-myc12',
  templateUrl: './myc12.component.html',
  styleUrls: ['./myc12.component.css']
})
export class Myc12Component implements OnInit {
  data = ['vue', 'angular', 'react', 'ionic', 'jQuery', 'uniapp'];
  teachers = [
    // 数据项必须自带唯一标识id, 才能配合 trackBy 使用
    { id: 0, name: '亮亮' },
    { id: 1, name: '然然' },
    { id: 2, name: '东东' },
    { id: 3, name: '铭铭' },
    { id: 4, name: '小新' },
  ];
  trackFunc = (index, item) => {
    return item.id;
    // return index; 也可以
  };
  // 自定义函数 把数字转数组
  range(num: number) {
    // TypeScript: 静态类型声明
    // num: number 代表 参数num 是数字类型
    const arr = [];
    for (let i = 1; i <= num; i++) {
      arr.push(i);
    }
    return arr;
  }


  constructor() { }

  ngOnInit(): void {
  }

}
HTML文件渲染
- {{ item }}
-
{{ i }}--
{{ item }}
-
{{ item.name }}
综上写个例子
快捷生成组件 ng g c work
ts文件
import { Component, OnInit } from '@angular/core';

@Component({
  selector: 'app-work',
  templateUrl: './work.component.html',
  styleUrls: ['./work.component.css'],
})
export class WorkComponent implements OnInit {
  todo = '';

  todoList = ['吃饭', '睡觉', '打亮亮'];

  doAdd() {
    this.todoList.push(this.todo);

    this.todo = '';
  }

  // TypeScript: 静态类型声明
  doDel(index: number) {
    // splice(a,b,c): 从序号a位置删除b个元素, 把c元素加入到a位置
    this.todoList.splice(index, 1);
  }

  constructor() {}

  ngOnInit(): void {}
}
HTML文件(注意双向绑定需要在app.module.ts中引入FromModule模块)
-
{{ item }}
暂无待办事项
暂无待办事项