VsCode C++环境配置、VsCode + cmake 多目录文件编译、调试
0、准备工作
-
下载 VsCode 链接:https://code.visualstudio.com/
-
下载 g++ 链接:https://pan.baidu.com/s/1b7FPbnDzVLuuKMm1dWVhaA 提取码:p978
-
下载CMake 链接:https://pan.baidu.com/s/1JDTR0GHvBpBJ_AoH0qP-ow 提取码:k4zr
一、C++环境配置
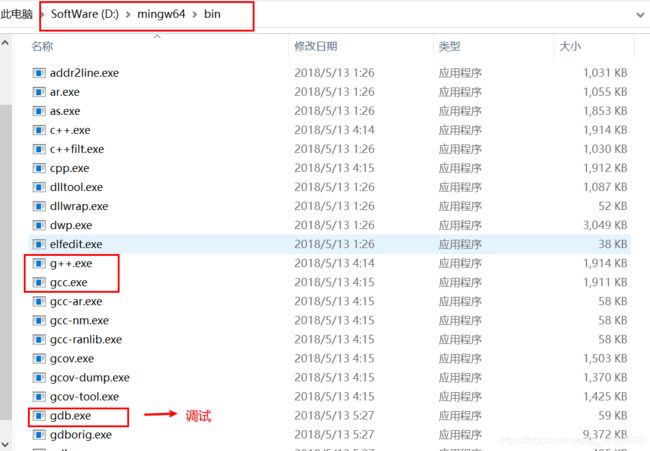
1、配置g++环境
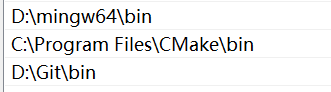
将下载好的 gcc包解压到一个文件夹,然后将其的 bin 目录添加到你电脑的环境变量中,并将bin目录下的mingw32-make.exe 改为make.exe。比如我的
右点击 此电脑 --> 属性 --> 高级系统设置 --> 环境变量 --> 用户变量 --> 选中 Path --> 点击编辑
2、安装CMake ,默认安装就OK
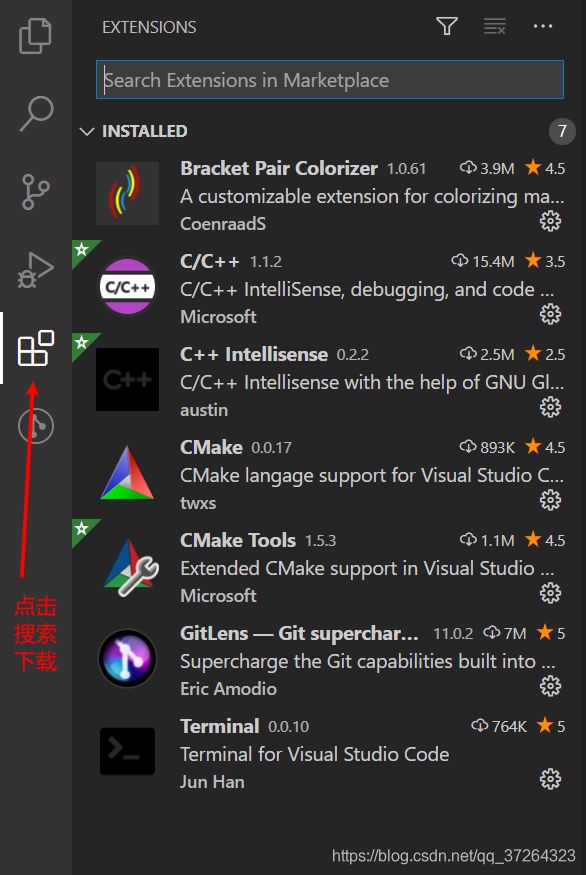
3、安装VsCode,并下载插件,清单如下,搜索下载即可
二、编译、调试环境搭建
一般文件结构
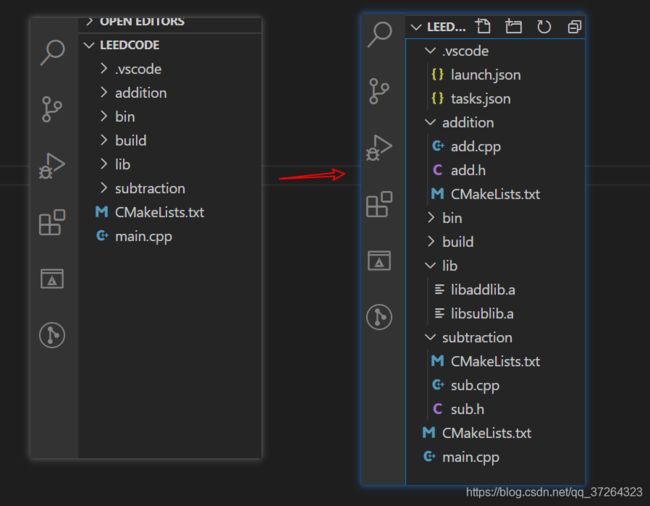
- main.cpp 主程序
- .vscode 下为 调试配置文件
- bin 生成的可执行文件放在这里
- build 存放cmake后的make文件
- lib 代码生成的库放在这里
- addition subtraction 用来测试的两个目录,里面各有一对源文件
1、具体程序代码:
// main.cpp
#include"addition/add.h"
#include"subtraction/sub.h"
#include
using namespace std;

int main(int argc, char* argv)
{
    addFunc(1, 2);
    subFunc(7, 1);

    return 0;
}
// add.h
#ifndef ADD_H_
#define ADD_H_

#include
void addFunc(int x, int y);

#endif  // !ADD_H_
// add.cpp
#include"add.h"
void addFunc(int x, int y)
{
printf("%d + %d = %d \n", x, y, x + y);
}// sub.h
#ifndef SUB_H_
#define SUB_H_
#include
void subFunc(int x, int y);
#endif // !SUB_H_ // sub.cpp
#include"sub.h"
void subFunc(int x, int y)
{
printf("%d + %d = %d \n", x, y, x - y);
}2、具体编译调试配置文件:
launch.json
{
    // Use IntelliSense to learn about possible attributes.
    // Hover to view descriptions of existing attributes.
    // For more information, visit: https://go.microsoft.com/fwlink/?linkid=830387
    "version": "0.2.0",
    "configurations": [
        {
            "name": "(gdb) 启动",
            "type": "cppdbg",
            "request": "launch",
            "program": "${workspaceFolder}/bin/main",
            "args": [],
            "stopAtEntry": false,
            "cwd": "${workspaceFolder}",
            "environment": [],
            "externalConsole": true,
            "MIMode": "gdb",
            // "miDebuggerPath": "/path/to/gdb",
            "setupCommands": [
                {
                    "description": "为 gdb 启用整齐打印",
                    "text": "-enable-pretty-printing",
                    "ignoreFailures": true
                }
            ],
            "preLaunchTask": "make"  // very import, task.json' make
        }
    ]
}
tasks.json
{
    // See https://go.microsoft.com/fwlink/?LinkId=733558
    // for the documentation about the tasks.json format
    "version": "2.0.0",
    "options": {
        "cwd": "${workspaceRoot}/build"
    },    // very import
    "tasks": [
        {
            "label": "build",
            "type": "shell",
            "command": "msbuild",
            "args": [
                // Ask msbuild to generate full paths for file names.
                "/property:GenerateFullPaths=true",
                "/t:build",
                // Do not generate summary otherwise it leads to duplicate errors in Problems panel
                "/consoleloggerparameters:NoSummary"
            ],
            "group": "build",
            "presentation": {
                // Reveal the output only if unrecognized errors occur.
                "reveal": "silent"
            },
            // Use the standard MS compiler pattern to detect errors, warnings and infos
            "problemMatcher": "$msCompile"
        },
        {
            "label": "cmake",
            "type": "shell",
            "command": "cmake",
            "args": [
                "-G",
                "Unix Makefiles",
                "-DCMAKE_BUILD_TYPE=Debug",
                ".."
            ]
        },
        {
            "label": "make",
            "group": {
                "kind": "build",
                "isDefault": true
            },
            "type": "shell",
            "command": "make",
            "args": []
        }
    ]
}
根目录下的 CMakeLists.txt ,看清楚这个文件名
CMAKE_MINIMUM_REQUIRED(VERSION 2.6)

#项目名称
PROJECT(HelloWorld)

set(CMAKE_C_COMPILER "gcc")
set(CMAKE_CXX_COMPILER "g++")
set(CMAKE_CXX_STANDARD 11)

# 根目录/代码路径
aux_source_directory(. DIR_MAIN)

#dubug 模式-----------------------it's very import for Debug
set (CMAKE_CXX_FLAGS  "${CMAKE_CXX_FLAGS} -g")

# 添加子目录
include_directories("${PROJECT_SOURCE_DIR}/addition" "${PROJECT_SOURCE_DIR}/subtraction")   # head file
add_subdirectory(addition)         # source file search the catalog
add_subdirectory(subtraction)

# 编译成可执行文件
set(EXECUTABLE_OUTPUT_PATH ${PROJECT_SOURCE_DIR}/bin)       ###### 输出可执行文件目录
add_executable(main ${DIR_MAIN})

# 链接hellolib库,注意下面子目录src的CMakeLists
link_directories("${PROJECT_SOURCE_DIR}/lib")
target_link_libraries(main addlib sublib)


####################################   Makefile.txt   #######################################
# CPP = g++
# CFLAGS = -Wall -O2 -g -IGeomtry -IInput -IOutput -IPostProcess -ISolver
# TARGET = ./Bin/main.exe
# DIRS = Common Geomtry Parser PostProcess Solver Main .
# FILES = $(foreach dir, $(DIRS), $(wildcard $(dir)/*.cpp))
# OBJS = $(patsubst %.cpp,%.o,$(patsubst %.cpp,%.o,$(FILES)))
# $(TARGET):$(OBJS)
# 	$(CPP) -o $(TARGET) $(OBJS)
# clean:
# 	-$(RM) $(TARGET)
# 	-$(RM) $(OBJS)
addition 目录下的 CMakeLists.txt
CMAKE_MINIMUM_REQUIRED(VERSION 2.6)

# generate lib
SET(LIBRARY_OUTPUT_PATH ${PROJECT_SOURCE_DIR}/lib)  #####

aux_source_directory(. ADD_SRC)
add_library(addlib ${ADD_SRC})


# 用到其他的代码文件时,即头文件引用了其他的头文件
# link_directories("${PROJECT_SOURCE_DIR}/lib")
# target_link_libraries(addlib xxx xxx)
subtraction 目录下的 CMakeLists.txt
CMAKE_MINIMUM_REQUIRED(VERSION 2.6)

# generate lib
SET(LIBRARY_OUTPUT_PATH ${PROJECT_SOURCE_DIR}/lib)  #####

aux_source_directory(. SUB_SRC)
add_library(sublib ${SUB_SRC})


# 用到其他的代码文件时,即头文件引用了其他的头文件
# link_directories("${PROJECT_SOURCE_DIR}/lib")
# target_link_libraries(sublib xxx xxx)
3、编译步骤
- 进入 build 目录,执行 cmake .. (PS: 第一次编译需要执行 cmake -G "Unix Makefiles" .. )
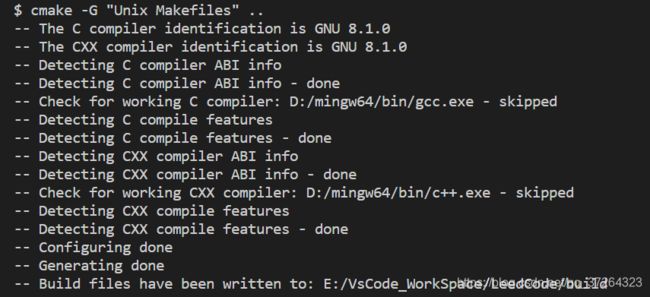
- 继而 执行 make

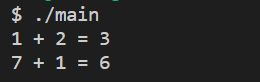
- 进入 bin 目录,你会发现多了一个生产的可执行文件 main. 执行 ./main
4、调试
按 F5 或者 点击图示 绿色三角形
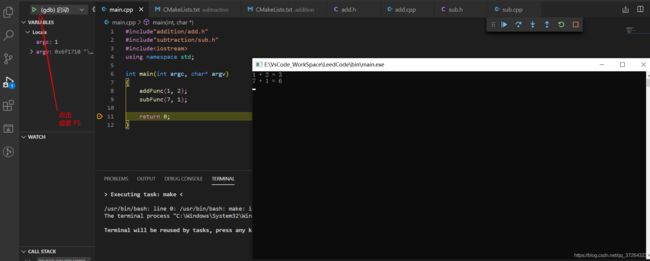
写在最后:每次改动后,都需要在 build 目录 make 一下代码
如 前面 make 成功了,改动代码重新make时失败了,那么删除 以前 cmake 的文件,重新 camke。 即在 build 目录操作如下:
rm -rf *
cmake -G "Unix Makefiles" ..
make