vs2019+openvino部署yolov5目标检测流程+bug解决
背景:
项目需要利用c++部署yolov5的.pt文件 尝试intel厂商的openvino套件
版本:
vs2019
openvino==2022.3(只用部署所以只下载runtime)
opencv==4.5.5 (模型部署的前处理和后处理)
流程:
一、软件下载
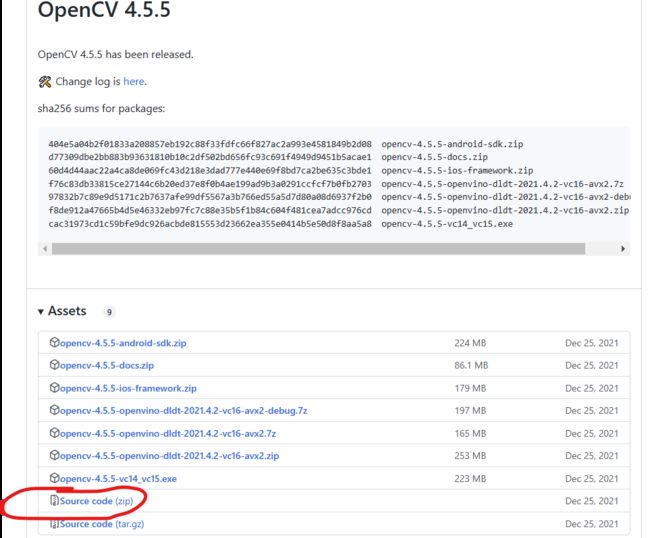
opencv的下载
链接:Releases · opencv/opencv (github.com)
下载后进行解压
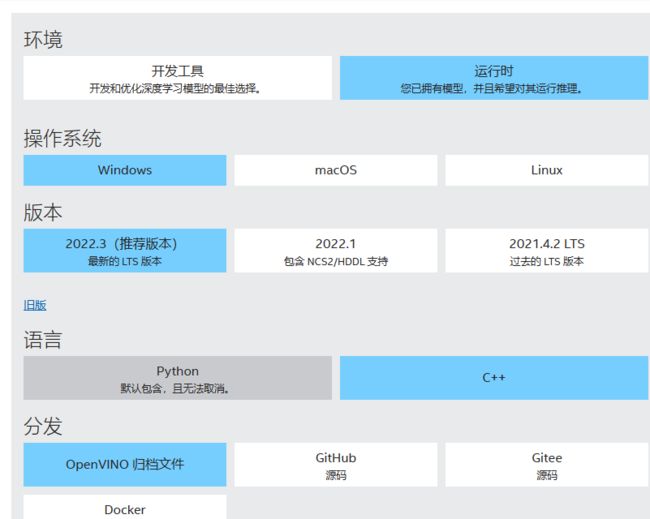
openvino下载
链接:下载英特尔® 发行版 OpenVINO™ 工具套件 (intel.cn)
下载后同样解压,出现下面文件内容证明下载正确
vs2019下载(网上搜索)
二、环境配置(主要配置release,debug同理)
opencv的环境配置
网上有教程
openvino的环境配置
在vs2019中的属性包含目录中添加以下内容
属性库目录中包含以下内容
附加依赖项中添加以下内容
openvino.lib
openvino_c.lib
openvino_onnx_frontend.lib
openvino_paddle_frontend.lib
openvino_tensorflow_frontend.lib
此时openvino配置完成
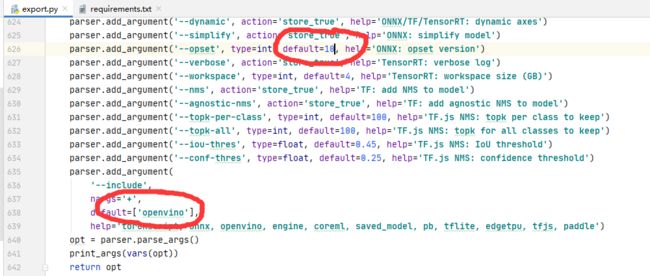
三、模型导出,直接通过yolov5的export.py导出
注意将opset版本改为10
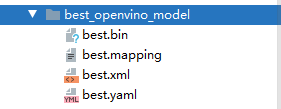
导出后会得到以下文件
四、编程推理
用vs2019创建一个控制台程序
将推理文件放入到程序文件夹下,下边放出yolov5推理文件夹内的图片并输出测试时间程序
yolo_openvino.h
#pragma once
#pragma once
#include
#include
#include

using namespace std;

class YOLO_OPENVINO
{
public:
    YOLO_OPENVINO();
    ~YOLO_OPENVINO();

public:
    struct Detection
    {
        int class_id;
        float confidence;
        cv::Rect box;
    };

    struct Resize
    {
        cv::Mat resized_image;
        int dw;
        int dh;
    };

    Resize resize_and_pad(cv::Mat& img, cv::Size new_shape);
    void yolov5_compiled(std::string xml_path, ov::CompiledModel& compiled_model);
    void yolov5_detector(ov::CompiledModel compiled_model, cv::Mat input_detect_img, cv::Mat output_detect_img, vector& nms_box);

private:

    const float SCORE_THRESHOLD = 0.4;
    const float NMS_THRESHOLD = 0.4;
    const float CONFIDENCE_THRESHOLD = 0.1;

    //vectorimages;//图像容器
    //vector boxes;
    //vector class_ids;
    //vector confidences;
    //vectoroutput_box;
    Resize resize;

};
yolo_openvino.cpp
#include"yolo_openvino.h"

YOLO_OPENVINO::YOLO_OPENVINO()
{
}

YOLO_OPENVINO::~YOLO_OPENVINO()
{
}


YOLO_OPENVINO::Resize YOLO_OPENVINO::resize_and_pad(cv::Mat& img, cv::Size new_shape)
{
    float width = img.cols;
    float height = img.rows;
    float r = float(new_shape.width / max(width, height));
    int new_unpadW = int(round(width * r));
    int new_unpadH = int(round(height * r));

    cv::resize(img, resize.resized_image, cv::Size(new_unpadW, new_unpadH), 0, 0, cv::INTER_AREA);

    resize.dw = new_shape.width - new_unpadW;//w方向padding值
    resize.dh = new_shape.height - new_unpadH;//h方向padding值
    cv::Scalar color = cv::Scalar(100, 100, 100);
    cv::copyMakeBorder(resize.resized_image, resize.resized_image, 0, resize.dh, 0, resize.dw, cv::BORDER_CONSTANT, color);

    return resize;
}

void YOLO_OPENVINO::yolov5_compiled(std::string xml_path, ov::CompiledModel& compiled_model)
{
    // Step 1. Initialize OpenVINO Runtime core
    ov::Core core;
    // Step 2. Read a model
    //std::shared_ptr model = core.read_model("best.xml");
    std::shared_ptr model = core.read_model(xml_path);
    // Step 4. Inizialize Preprocessing for the model 初始化模型的预处理
    ov::preprocess::PrePostProcessor ppp = ov::preprocess::PrePostProcessor(model);
    // Specify input image format 指定输入图像格式
    ppp.input().tensor().set_element_type(ov::element::u8).set_layout("NHWC").set_color_format(ov::preprocess::ColorFormat::BGR);
    // Specify preprocess pipeline to input image without resizing 指定输入图像的预处理管道而不调整大小
    ppp.input().preprocess().convert_element_type(ov::element::f32).convert_color(ov::preprocess::ColorFormat::RGB).scale({ 255., 255., 255. });
    //  Specify model's input layout 指定模型的输入布局
    ppp.input().model().set_layout("NCHW");
    // Specify output results format 指定输出结果格式
    ppp.output().tensor().set_element_type(ov::element::f32);
    // Embed above steps in the graph 在图形中嵌入以上步骤
    model = ppp.build();
    compiled_model = core.compile_model(model, "CPU");
}

void YOLO_OPENVINO::yolov5_detector(ov::CompiledModel compiled_model, cv::Mat input_detect_img, cv::Mat output_detect_img, vector& nms_box)
{
    // Step 3. Read input image
    cv::Mat img = input_detect_img.clone();
    int img_height = img.rows;
    int img_width = img.cols;
    vectorimages;
    vector boxes;
    vector class_ids;
    vector confidences;

    if (img_height < 5000 && img_width < 5000)
    {
        images.push_back(img);
    }
    else
    {
        images.push_back(img(cv::Range(0, 0.6 * img_height), cv::Range(0, 0.6 * img_width)));
        images.push_back(img(cv::Range(0, 0.6 * img_height), cv::Range(0.4 * img_width, img_width)));
        images.push_back(img(cv::Range(0.4 * img_height, img_height), cv::Range(0, 0.6 * img_width)));
        images.push_back(img(cv::Range(0.4 * img_height, img_height), cv::Range(0.4 * img_width, img_width)));
    }

    for (int m = 0; m < images.size(); m++)
    {
        // resize image
        Resize res = resize_and_pad(images[m], cv::Size(640, 640));
        // Step 5. Create tensor from image
        float* input_data = (float*)res.resized_image.data;//缩放后图像数据
        ov::Tensor input_tensor = ov::Tensor(compiled_model.input().get_element_type(), compiled_model.input().get_shape(), input_data);


        // Step 6. Create an infer request for model inference
        ov::InferRequest infer_request = compiled_model.create_infer_request();
        infer_request.set_input_tensor(input_tensor);

        //计算推理时间
        auto start = std::chrono::system_clock::now();
        infer_request.infer();
        auto end = std::chrono::system_clock::now();
        std::cout << std::chrono::duration_cast(end - start).count() << "ms" << std::endl;


        //Step 7. Retrieve inference results
        const ov::Tensor& output_tensor = infer_request.get_output_tensor();
        ov::Shape output_shape = output_tensor.get_shape();
        float* detections = output_tensor.data();

        for (int i = 0; i < output_shape[1]; i++)//遍历所有框
        {
            float* detection = &detections[i * output_shape[2]];//bbox(x y w h obj cls)

            float confidence = detection[4];//当前bbox的obj
            if (confidence >= CONFIDENCE_THRESHOLD) //判断是否为前景
            {
                float* classes_scores = &detection[5];
                cv::Mat scores(1, output_shape[2] - 5, CV_32FC1, classes_scores);
                cv::Point class_id;
                double max_class_score;
                cv::minMaxLoc(scores, 0, &max_class_score, 0, &class_id);//返回最大得分和最大类别

                if (max_class_score > SCORE_THRESHOLD)//满足得分
                {
                    confidences.push_back(confidence);

                    class_ids.push_back(class_id.x);

                    float x = detection[0];//框中心x
                    float y = detection[1];//框中心y
                    float w = detection[2];//49
                    float h = detection[3];//50

                    float rx = (float)images[m].cols / (float)(res.resized_image.cols - res.dw);//x方向映射比例
                    float ry = (float)images[m].rows / (float)(res.resized_image.rows - res.dh);//y方向映射比例

                    x = rx * x;
                    y = ry * y;
                    w = rx * w;
                    h = ry * h;

                    if (m == 0)
                    {
                        x = x;
                        y = y;
                    }
                    else if (m == 1)
                    {
                        x = x + 0.4 * img_width;
                        y = y;

                    }
                    else if (m == 2)
                    {
                        x = x;
                        y = y + 0.4 * img_height;
                    }
                    else if (m == 3)
                    {
                        x = x + 0.4 * img_width;
                        y = y + 0.4 * img_height;
                    }

                    float xmin = x - (w / 2);//bbox左上角x
                    float ymin = y - (h / 2);//bbox左上角y
                    boxes.push_back(cv::Rect(xmin, ymin, w, h));
                }
            }
        }
    }

    std::vector nms_result;
    cv::dnn::NMSBoxes(boxes, confidences, SCORE_THRESHOLD, NMS_THRESHOLD, nms_result);
    std::vector output;

    for (int i = 0; i < nms_result.size(); i++)
    {
        Detection result;
        int idx = nms_result[i];
        result.class_id = class_ids[idx];
        result.confidence = confidences[idx];
        result.box = boxes[idx];
        nms_box.push_back(result.box);//传给Qt NMS后的box
        output.push_back(result);
    }


    // Step 9. Print results and save Figure with detections
    for (int i = 0; i < output.size(); i++)
    {
        auto detection = output[i];
        auto box = detection.box;
        auto classId = detection.class_id;
        auto confidence = detection.confidence;


        float xmax = box.x + box.width;
        float ymax = box.y + box.height;

        cv::rectangle(img, cv::Point(box.x, box.y), cv::Point(xmax, ymax), cv::Scalar(0, 255, 0), 3);
        cv::rectangle(img, cv::Point(box.x, box.y - 20), cv::Point(xmax, box.y), cv::Scalar(0, 255, 0), cv::FILLED);
        cv::putText(img, std::to_string(classId), cv::Point(box.x, box.y - 5), cv::FONT_HERSHEY_SIMPLEX, 0.5, cv::Scalar(0, 0, 0));

    }
    img.copyTo(output_detect_img);


}
main.cpp
#include"yolo_openvino.h"
#include
#include
#include
using namespace cv;
using namespace std;
YOLO_OPENVINO yolo_openvino;
std::string path = "yolov5s_openvino_model/yolov5s.xml";
ov::CompiledModel model;
cv::Mat input_img, output_img;
vectoroutput_box;
int main()
{
    String path1 = "./pic";//文件夹路径
    vectorsrc_test;
    glob(path1, src_test, false);//将文件夹路径下的所有图片路径保存到src_test中

    if (src_test.size() == 0) {//判断文件夹里面是否有图片
        printf("error!!!\n");
        exit(1);
    }
   /* input_img = cv::imread("3.jpg");
    yolo_openvino.yolov5_compiled(path, model);
    yolo_openvino.yolov5_detector(model, input_img, output_img, output_box);*/

    yolo_openvino.yolov5_compiled(path, model);
    for (int i = 0; i < src_test.size(); i++) {//依照顺序读取文价下面的每张图片,并显示
        int pos = src_test[i].find_last_of("\\");
        std::string img_name(src_test[i].substr(pos + 1));
        Mat frame = imread(src_test[i]);
        yolo_openvino.yolov5_detector(model, frame, output_img, output_box);
        for (int i = 0; i < output_box.size(); i++)
         {
             cv::rectangle(frame, cv::Point(output_box[i].x, output_box[i].y), cv::Point(output_box[i].x + output_box[i].width, output_box[i].y + output_box[i].height), cv::Scalar(0, 255, 0), 3);
         }
        output_box.clear();
        cv::imwrite("./out/" + img_name, frame);

    }


}
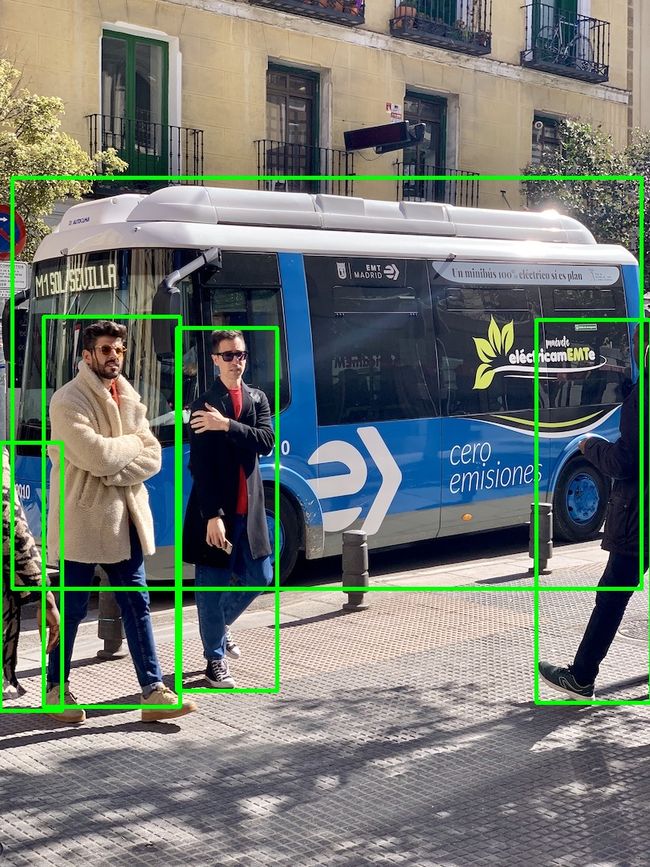
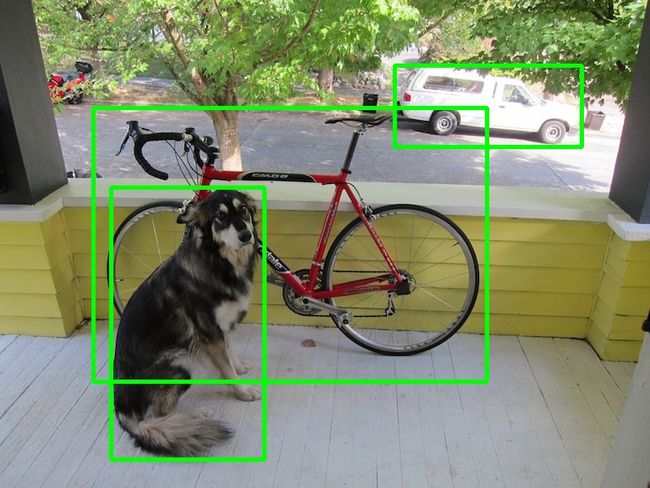
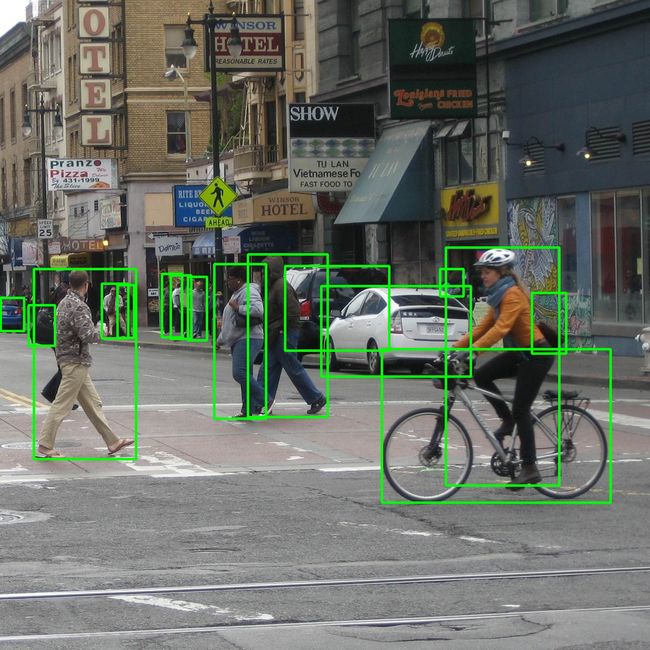
输出测试结果图:
针对其他需求可以自行修改代码。
在代码运行可能会出现一些丢失dll的bug 直接将openvino的dll放到文件夹下即可解决
