Spring-Boot-admin学习
源码地址
https://gitee.com/libo9829/bozai_study/tree/hacker/springbootadmin
一、介绍
-
主要是用于管理和监控SpringBoot的应用
-
是在Spring Boot Actuator端点上监控和管理的应用程序。
-
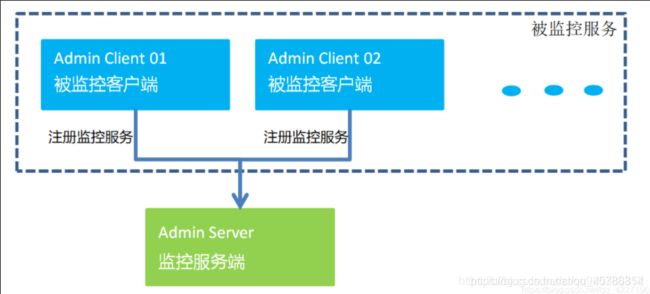
由两部分组成,
1.客户端(admin client)
    a.将SpringBoot的应用注册到admin server
	b.位于受监视的应用程序中
 2.服务器(admin server)
    a.统一监控这SpringBoot服务状态和配置
    b.包含管理员用户界面,并独立于受监视的应用程序运行
1.1、 场景
- 适用小型应用
- 对于大型分布式集群应用不建议使用,而是使用下面的
1.Apache Skywalking
2.Prometheus Grafana
二、向Admin Server注册的方式
- 使用 Spring Boot Admin Client 来注册
- 使用 Eureka 注册中心 来注册
- 使用 Consul 注册中心 来注册
三、Spring Boot Admin 提供的功能
3.1、显示健康状况
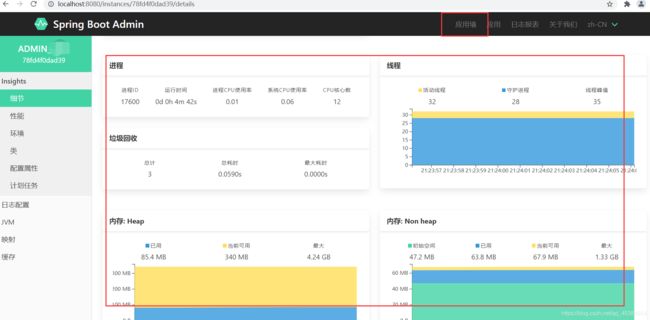
3.2、显示详细信息
- JVM和内存指标
- micrometer.io指标
- 数据源指标
- 缓存指标
3.3、显示内部编号
3.4、关注并下载日志文件
3.5、查看JVM系统和环境属性
3.6、查看Spring Boot配置属性
3.7、支持Spring Cloud的可发布/ env-&/ refresh-endpoint
3.8、轻松的日志级别管理
3.9、与JMX-beans交互
3.10、查看线程转储
3.11、查看http-traces
3.12、查看审核事件
3.13、查看http端点
3.14、查看预定的任务
3.15、查看和删除活动会话(使用spring-session)
3.16、查看Flyway / Liquibase数据库迁移
3.17、下载heapdump
3.18、状态更改通知(通过电子邮件,Slack,Hipchat等)
3.19、状态更改的事件日志(非持久性)
四、配置Spring Boot Admin Server
4.1、核心代码
pom.xml
    org.springframework.boot
    spring-boot-starter-web


    de.codecentric
    spring-boot-admin-starter-server
    2.3.1
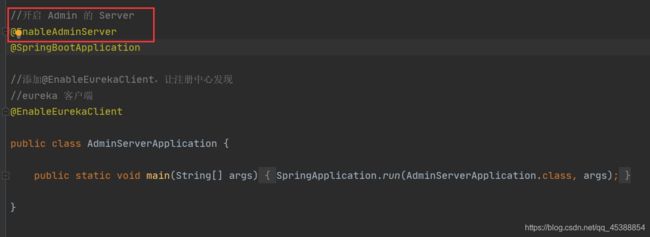
AdminServerApplication
//开启 Admin 的 Server
@EnableAdminServer
@SpringBootApplication
public class AdminServerApplication {

    public static void main(String[] args) {
        SpringApplication.run(AdminServerApplication.class, args);
    }

}
五、配置Spring Boot Admin Client
5.1、核心代码
pom.xml
        de.codecentric
        spring-boot-admin-starter-client
        2.3.1


        org.springframework.boot
        spring-boot-starter-web
application.yml
# 应用程序名称
spring:
  application:
    name: admin_fengyun   #当前项目名称

#6-15行注释掉的是自身的注册,下面通过注册中心注册就不需要自己注册了
#  boot:
#
#    admin:
#      client:
#        # Admin Server的URL,若是要注册到多个admin服务端上,用逗号分隔就可以
#        # url: http://localhost:8080,http://localhost:8081
#        url: http://localhost:8080   #服务器地址
#        instance:
#        # 使用IP的方式,默认是以hostname形式展示
#        prefer-ip: true

# 应用程序端口
server:
  port: 9090

#  默认情况下,大多数Actuator端点都不通过http公开,这里我们公开了所有端点。
#  对于生产,您应该仔细选择要公开的端点。

management:
  endpoints:
    web:
      exposure:
        include: ["*"]

# eureka客户端配置,这个为:注册中心注册
eureka:
  client:
    service-url:
      defaultZone: http://127.0.0.1:9091/eureka
  instance:
    # iP方式显示
    ip-address: true
    #注册中心显示的实例ID,可以用ip地址加端口来区别
    instance-id: ${spring.cloud.client.ip-address}:${server.port}
    # 检查健康的actuator端点地址
    health-check-url-path: /actuator/health
    # admin 中已ip显示
    hostname: ${spring.cloud.client.ip-address}
六、Eureka注册中心使用
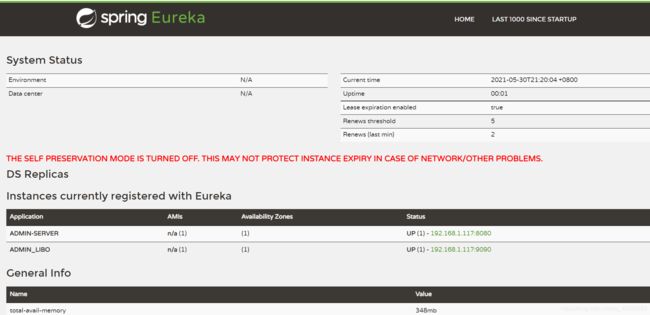
- admin-server 会自己拉取 Eureka 上注册的 服务信息,自动完成注册。
- admin-client 端 不需要配置 admin 地址了,一切全部由 admin-server 自己实现。
6.1 Admin Server注册到Eureka注册中心
添加Eureka Client依赖
    org.springframework.cloud
    spring-cloud-starter-netflix-eureka-client
    2.2.6.RELEASE
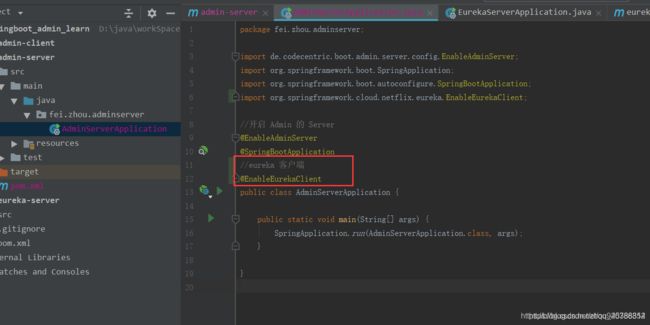
启动类,添加@EnableEurekaClient,让注册中心发现
//eureka 客户端
@EnableEurekaClient
# 应用程序名称
spring:
  application:
    name: admin-server
# 应用程序端口
server:
  port: 8080

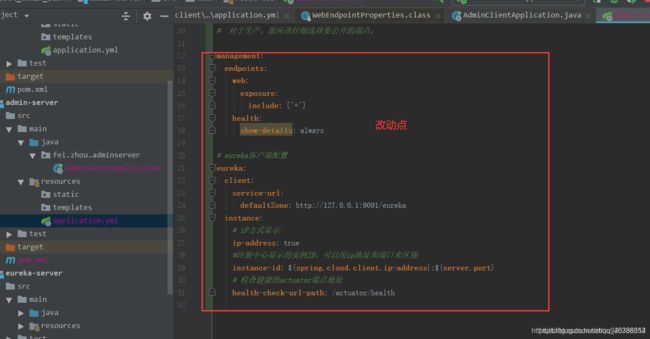
#  默认情况下,大多数端点都不通过http公开,我们公开了所有端点。
#  对于生产,您应该仔细选择要公开的端点。

management:
  endpoints:
    web:
      exposure:
        include: ["*"]
    health:
      show-details: always

# eureka客户端配置
eureka:
  client:
    service-url:
      defaultZone: http://127.0.0.1:9091/eureka
  instance:
    # iP方式显示
    ip-address: true
    #注册中心显示的实例ID,可以用ip地址加端口来区别
    instance-id: ${spring.cloud.client.ip-address}:${server.port}
    # 检查健康的actuator端点地址
    health-check-url-path: /actuator/health
6.2 Admin Client注册到Eureka注册中心
添加Eureka Client依赖
    org.springframework.cloud
    spring-cloud-starter-netflix-eureka-client
    2.2.6.RELEASE
修改配置文件
# 应用程序名称
spring:
  application:
    name: admin-client

# 应用程序端口
server:
  port: 9090


# 通过注册中心发现,就不需要自己注册了
#  boot:
#    admin:
#      client:
#        # admin 的server地址
#        url: http://localhost:8080
#        instance:
#          # 使用IP的方式
#          prefer-ip: true


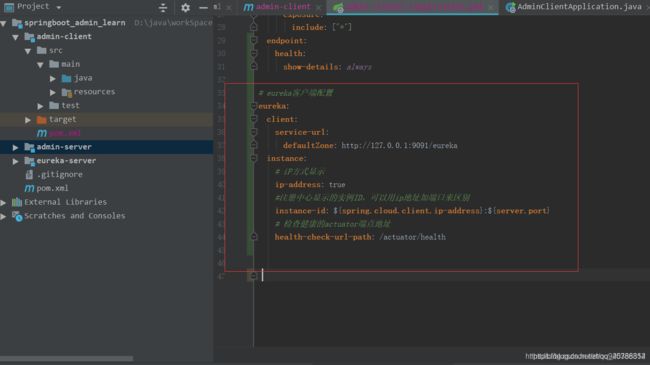
#  默认情况下,大多数端点都不通过http公开,我们公开了所有端点。
#  对于生产,您应该仔细选择要公开的端点。

management:
  endpoints:
    web:
      exposure:
        include: ["*"]
  endpoint:
    health:
      show-details: always
# 通过注册中心发现,就不需要自己注册了
# eureka客户端配置
eureka:
  client:
    service-url:
      defaultZone: http://127.0.0.1:9091/eureka
  instance:
    # iP方式显示
    ip-address: true
    #注册中心显示的实例ID,可以用ip地址加端口来区别
    instance-id: ${spring.cloud.client.ip-address}:${server.port}
    # 检查健康的actuator端点地址
    health-check-url-path: /actuator/health
//  Eureka 客户端
@EnableEurekaClient
# admin 中已ip显示
hostname: ${spring.cloud.client.ip-address}
七、集成Security
7.1 集成Security介绍
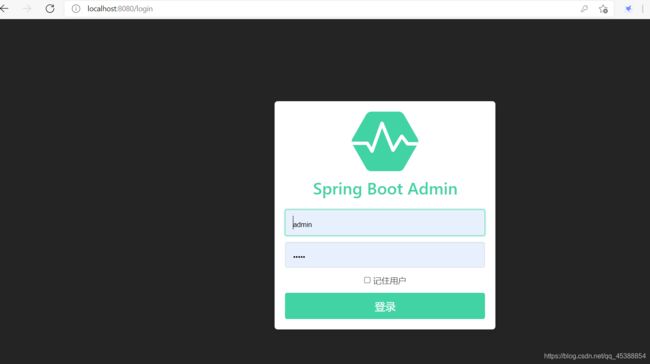
1、 spring-boot-admin-server-ui提供登录页面和注销按钮。结合 Spring Security 实现需要用户名和密码登录的安全认证。
7.2 核心配置以及代码
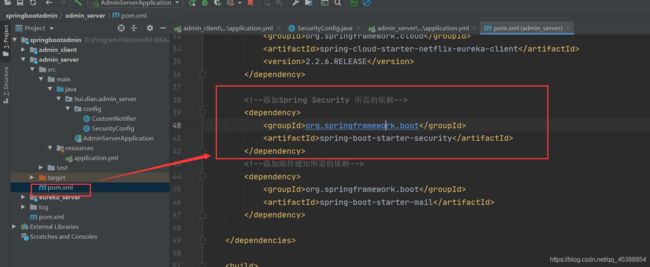
pom.xml
	org.springframework.boot
	spring-boot-starter-security
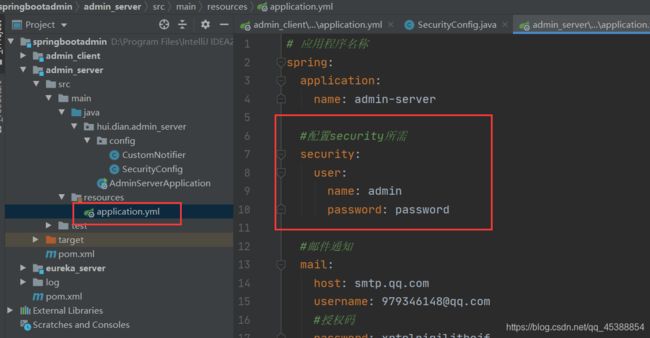
application.yml
  #配置security所需
  spring:
  	security:
    	user:
      		name: admin
      		password: password
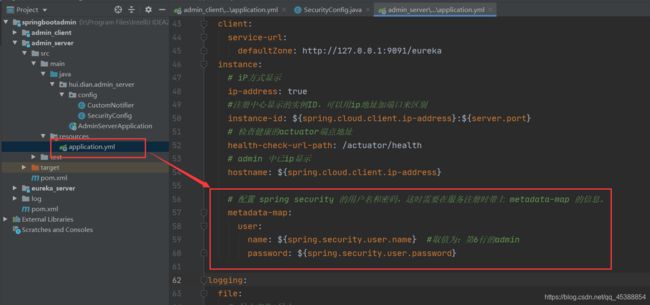
eureka:
# 配置 spring security 的用户名和密码,这时需要在服务注册时带上 metadata-map 的信息。
metadata-map:
  user:
    name: ${spring.security.user.name}
    password: ${spring.security.user.password}
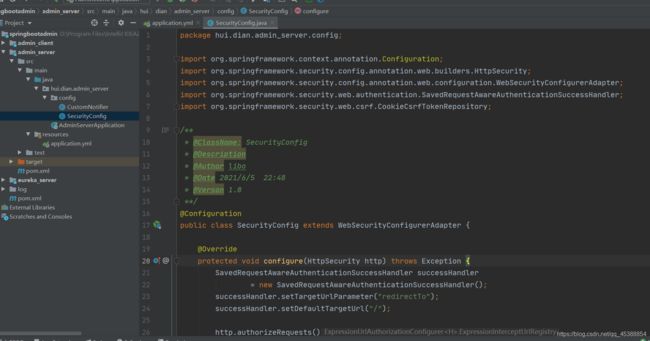
SecurityConfig
package hui.dian.admin_server.config;

import org.springframework.context.annotation.Configuration;
import org.springframework.security.config.annotation.web.builders.HttpSecurity;
import org.springframework.security.config.annotation.web.configuration.WebSecurityConfigurerAdapter;
import org.springframework.security.web.authentication.SavedRequestAwareAuthenticationSuccessHandler;
import org.springframework.security.web.csrf.CookieCsrfTokenRepository;

/**
 * @ClassName: SecurityConfig
 * @Description
 * @Author fengxue
 * @Date 2021/6/5  02:48
 * @Verson 1.0
 **/
@Configuration
public class SecurityConfig extends WebSecurityConfigurerAdapter {

    @Override
    protected void configure(HttpSecurity http) throws Exception {
        SavedRequestAwareAuthenticationSuccessHandler successHandler
                = new SavedRequestAwareAuthenticationSuccessHandler();
        successHandler.setTargetUrlParameter("redirectTo");
        successHandler.setDefaultTargetUrl("/");

        http.authorizeRequests()
                //授予公众对所有静态资产和登录页面的访问权限。
                .antMatchers("/assets/**").permitAll()
                //登陆页面排除
                .antMatchers("/login").permitAll()
                // 其他所有请求都必须经过验证。
                .anyRequest().authenticated().and()
                .formLogin().loginPage("/login")
                .successHandler(successHandler).and()
                .logout().logoutUrl("/logout").and()
                .httpBasic().and()
                .csrf()
                // 使用Cookies启用CSRF保护
                .csrfTokenRepository(CookieCsrfTokenRepository.withHttpOnlyFalse())
                //对执行器端点禁用CSRF-Protection。
                .ignoringAntMatchers(
                        "/instances",
                        "/actuator/**"
                );
    }
}
八、邮件通知以及自定义通知
8.1、配置
Admin Server服务中,添加邮件相关依赖
    org.springframework.boot
    spring-boot-starter-mail
新增相关配置项
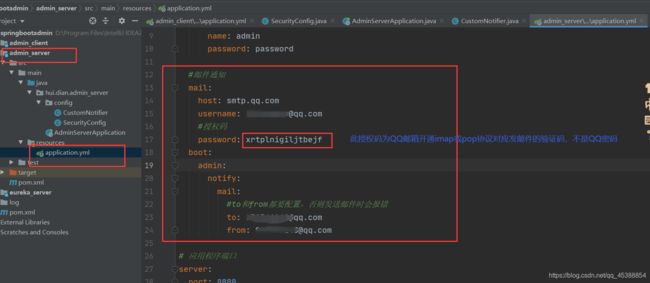
  #邮件通知
  mail:
    host: smtp.qq.com
    username: [email protected]
    #授权码
    password: lxrtplnigiljtbejf
  boot:
    admin:
      notify:
        mail:
          #to和from都要配置,否则发送邮件时会报错
          to: [email protected]
          from: [email protected]
8.2自定义通知
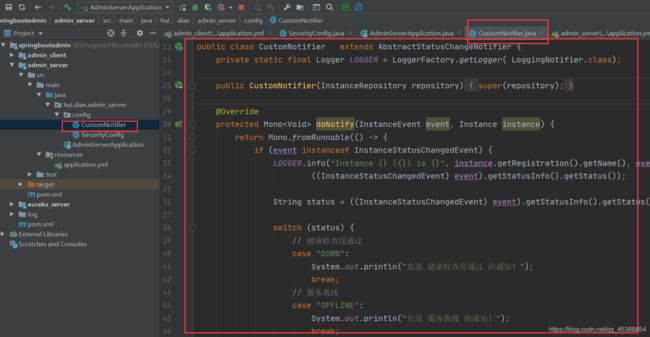
实现方式
package hui.dian.admin_server.config;

import de.codecentric.boot.admin.server.domain.entities.Instance;
import de.codecentric.boot.admin.server.domain.entities.InstanceRepository;
import de.codecentric.boot.admin.server.domain.events.InstanceEvent;
import de.codecentric.boot.admin.server.domain.events.InstanceStatusChangedEvent;
import de.codecentric.boot.admin.server.notify.AbstractStatusChangeNotifier;
import de.codecentric.boot.admin.server.notify.LoggingNotifier;
import org.slf4j.Logger;
import org.slf4j.LoggerFactory;
import org.springframework.stereotype.Component;
import reactor.core.publisher.Mono;

/**
 * @ClassName: SecurityConfig
 * @Description
 * @Author fengxue
 * @Date 2021/6/5  02:48
 * @Verson 1.0
 **/
@Component
public class CustomNotifier   extends AbstractStatusChangeNotifier {
    private static final Logger LOGGER = LoggerFactory.getLogger( LoggingNotifier.class);

    public CustomNotifier(InstanceRepository repository) {
        super(repository);
    }

    @Override
    protected Mono doNotify(InstanceEvent event, Instance instance) {
        return Mono.fromRunnable(() -> {
            if (event instanceof InstanceStatusChangedEvent) {
                LOGGER.info("Instance {} ({}) is {}", instance.getRegistration().getName(), event.getInstance(),
                        ((InstanceStatusChangedEvent) event).getStatusInfo().getStatus());

                String status = ((InstanceStatusChangedEvent) event).getStatusInfo().getStatus();

                switch (status) {
                    // 健康检查没通过
                    case "DOWN":
                        System.out.println("发送 健康检查没通过 的通知!");
                        break;
                    // 服务离线
                    case "OFFLINE":
                        System.out.println("发送 服务离线 的通知!");
                        break;
                    //服务上线
                    case "UP":
                        System.out.println("发送 服务上线 的通知!");
                        break;
                    // 服务未知异常
                    case "UNKNOWN":
                        System.out.println("发送 服务未知异常 的通知!");
                        break;
                    default:
                        break;
                }

            } else {
                LOGGER.info("Instance {} ({}) {}", instance.getRegistration().getName(), event.getInstance(),
                        event.getType());
            }
        });
    }
}
九、集成日志配置
一、介绍
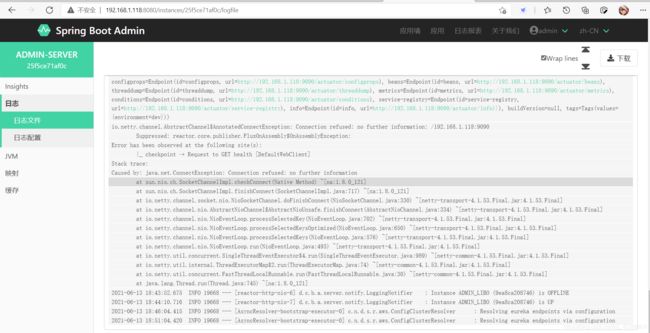
默认情况下,日志文件无法通过执行器端点访问,因此在Spring Boot Admin中不可见。
为了启用日志文件执行器端点,可以这样做
logging:
  file:
    # 日志文件 日志
    path: D:\\Program Files\\IntelliJ IDEA2020\\workSpace\\springbootadmin\\log
      # 日志文件 格式
    pattern:
    file: '%clr(%d{yyyy-MM-dd HH:mm:ss.SSS}){faint} %clr(%5p) %clr(${PID}){magenta} %clr(---){faint} %clr([.15t]){faint} %clr(%-40.40logger{39}){cyan} %clr(:){faint} %m%n%wEx'
十、按应用实例添加标签
一、按应用实例添加标签
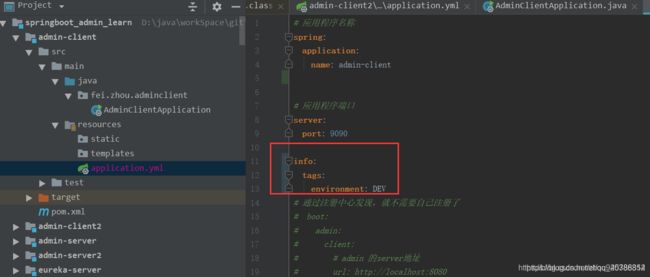
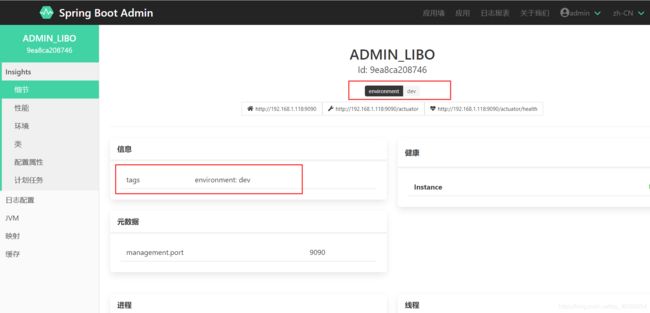
Tags 是我们区别同一应用的不同实例的方法
1.1、举例
监控spring.application.name=admin-client 应用的三个实例,分别是
- 开发(dev)
- 测试(test)
- 生产(prod)
使用信息端点/info
info:
  tags:
    environment: dev
或者这样配置
 spring:
    boot:
       admin:
         client:
           instance:
             metadata:
                tags:
                  environment: dev
