boost:从0到1开发boost(linux、clion)
boost
1、安装包下载
下载地址
并将安装包放到centos的适当目录下
2、设置编译器和所选库
解压
$ tar -xvf boost_1_74_0_b1.tar.bz2
运行解压后生成的bootstrap.sh文件:
$ cd boost_1_74_0/
$ ./bootstrap.sh --with-libraries=all --with-toolset=gcc
--with-libraries指定编译哪些boost库,all的话就是全部编译,一般都会全部编译的吧--with-toolset指定编译时使用哪种编译器,Linux下使用gcc即可,如果系统中安装了多个版本的gcc,在这里可以指定gcc的版本,比如--with-toolset=gcc-4.4
命令执行完成后看到显示如下即为成功:
$ ./bootstrap.sh --with-libraries=all --with-toolset=gcc
Building Boost.Build engine with toolset gcc... tools/build/src/engine/b2
Detecting Python version... 2.7
Detecting Python root... /usr
Unicode/ICU support for Boost.Regex?... not found.
Generating Boost.Build configuration in project-config.jam for gcc...

Bootstrapping is done. To build, run:

    ./b2

To generate header files, run:

    ./b2 headers

To adjust configuration, edit 'project-config.jam'.
Further information:

   - Command line help:
     ./b2 --help

   - Getting started guide:
     http://www.boost.org/more/getting_started/unix-variants.html

   - Boost.Build documentation:
     http://www.boost.org/build/
- 3、编译boost
./b2 toolset=gcc
- 1
编译的时间大概要10多分钟,耐心等待,结束后会有以下提示:
...failed updating 60 targets...
...skipped 21 targets...
...updated 663 targets...
4、安装boost
最后执行以下命令开始安装boost:
./b2 install --prefix=/usr/local/boost
- 1
/usr/local/boost用来指定boost的安装目录,不加此参数的话默认的头文件在/usr/local/include/boost目录下,库文件在/usr/local/lib/目录下.
...failed updating 60 targets...
...skipped 21 targets...
...updated 11593 targets...
5、添加环境变量的方法
添加环境变量

vim ~/.bashrc

文件末尾添加:

# Boost
export BOOST_INCLUDE=/usr/local/boost/include/
export BOOST_LIB=/usr/local/boost/lib
更新一下系统的动态链接库
5.boost使用测试
以boost_thread为例,测试刚安装完的boost库是否能正确使用,测试代码如下:
#include  //包含boost头文件
#include
#include
using namespace std;

volatile bool isRuning = true;

void func1()
{
    static int cnt1 = 0;
    while(isRuning)
    {
        cout << "func1:" << cnt1++ << endl;
        sleep(1);
    }
}

void func2()
{
    static int cnt2 = 0;
    while(isRuning)
    {
        cout << "\tfunc2:" << cnt2++ << endl;
        sleep(2);
    }
}

int main()
{
    boost::thread thread1(&func1);
    boost::thread thread2(&func2);

    system("read");
    isRuning = false;

    thread2.join();
    thread1.join();
    cout << "exit" << endl;
    return 0;
}
# g++ main.cpp -g -o main -lboost_thread
/usr/bin/ld: /tmp/ccZxR9Of.o: undefined reference to symbol 'pthread_condattr_setclock@@GLIBC_2.3.3'
//usr/lib64/libpthread.so.0: error adding symbols: DSO missing from command line
collect2: 错误:ld 返回 1
# g++ main.cpp -g -o main -lboost_thread -L../boost/stage/lib -pthread
hello boost
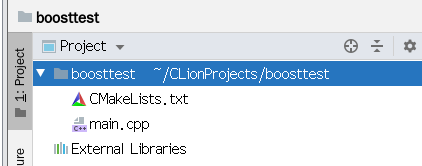
1、使用Clion搭建一个工程
2、编写CMakeLists.txt
cmake_minimum_required(VERSION 3.16)
project(boosttest)

set(CMAKE_CXX_STANDARD 11)
set(SOURCE_FILES main.cpp)
#add_executable(myboost ${SOURCE_FILES})

set(BOOST_ROOT "/usr/local/boost")

#添加头文件搜索路径
include_directories(/usr/local/boost/include)

#添加库文件搜索路径
link_directories(/usr/local/boost/lib)

#用于将当前目录下的所有源文件的名字保存在变量 DIR_SRCS 中
aux_source_directory(. DIR_SRCS)

add_executable(boosttest ${DIR_SRCS})

#在这里根据名字boost_thread去寻找libboost_thread.a文件
target_link_libraries(boosttest boost_thread boost_system)
3、编写测试程序
第一个例子
#include
#include
#include
using namespace std;
int main() {
    cout<< BOOST_LIB_VERSION<
结果:
1_74
linux
GNU C++ version 4.8.5 20150623 (Red Hat 4.8.5-39)
GNU libstdc++ version 20150623
第二个例子【多线程】
#include
#include
#include

using namespace std;
using namespace boost;

void hello()
{
    cout<<"hello boost"<
编译出现: undefined reference to symbol ‘pthread_mutexattr_settype@@GLIBC_2.2.5’
解决方法: 打开CMakeLists.txt ,在所有用到boost_thread 的后面加上 -pthread,如下图,保存并重新编译
https://www.cnblogs.com/Yanfang20180701/p/10596710.html
程序结果:
hello boost
2.56205e+09
1e-06
0.000381
第三个例子
#include
#include
#include

void Thread_Fun1(std::promise &p)
{
    //为了突出效果,可以使线程休眠5s
    std::this_thread::sleep_for(std::chrono::seconds(5));

    int iVal = 233;
    std::cout << "传入数据(int):" << iVal << std::endl;

    //传入数据iVal
    p.set_value(iVal);
}

void Thread_Fun2(std::future &f)
{
    //阻塞函数,直到收到相关联的std::promise对象传入的数据
    auto iVal = f.get();        //iVal = 233

    std::cout << "收到数据(int):" << iVal << std::endl;
}

int main()
{
    //声明一个std::promise对象pr1,其保存的值类型为int
    std::promise pr1;
    //声明一个std::future对象fu1,并通过std::promise的get_future()函数与pr1绑定
    std::future fu1 = pr1.get_future();

    //创建一个线程t1,将函数Thread_Fun1及对象pr1放在线程里面执行
    std::thread t1(Thread_Fun1, std::ref(pr1));
    //创建一个线程t2,将函数Thread_Fun2及对象fu1放在线程里面执行
    std::thread t2(Thread_Fun2, std::ref(fu1));

    //阻塞至线程结束
    t1.join();
    t2.join();

    return 1;
}
参考: https://blog.csdn.net/qq_34715930/article/details/73614828?locationNum=5&fps=1

