Unity编辑器拓展(二)-GUI控件的使用
GUI控件的使用
- 一、效果图
- 二、创建窗口
- 三、使用控件来绘制窗口
-
- 不可输入控件
-
- GUILayout.Label 标签
- 可输入控件
-
- GUILayout系列
-
-
- GUILayout.TextField 单行文本
- GUILayout.TextArea 多行文本
-
- EditorGUILayout系列
-
-
- EditorGUILayout.IntField() 输入整数
- EditorGUILayout.FloatField() 输入浮点数
- EditorGUILayout.TextField() 输入单行文本
- EditorGUILayout.TextArea() 输入多行文本
- EditorGUILayout.Vector3Field() 输入向量
- EditorGUILayout.ColorField() 输入颜色
- EditorGUILayout.CurveField() 输入曲线
-
- 按钮
-
- 带图片的按钮
- 滑动条
-
-
-
- GUILayout.HorizontalSlider() 普通滑动条
- EditorGUILayout.IntSlider() 整型滑动条
- EditorGUILayout.Slider() 浮点滑动条
-
-
- 开关
- 下拉框
-
-
-
- EditorGUILayout.EnumPopup() 枚举下拉框
- EditorGUILayout.Popup() 默认下拉框
- EditorGUILayout.IntPopup() 整型下拉框
-
-
- 提示框
-
-
-
- EditorGUILayout.HelpBox() 提示框
-
-
- 弹出交互框
-
-
-
- EditorUtility.DisplayDialog
- EditorUtility.DisplayDialogComplex()
-
-
- 弹出提示框
-
-
-
- ShowNotification()
-
-
- 折叠功能
-
-
-
- EditorGUILayout.Foldout() 折叠框
-
-
- 单选按钮组
-
-
-
- GUILayout.Toolbar() 单选工具栏
- GUILayout.SelectionGrid() 单选工具栏(可控制一行显示几个)
-
-
- 布局/组
-
-
-
- GUILayout.BeginHorizontal() 水平布局
- GUILayout.BeginVertical() 竖直布局
- GUILayout.BeginArea 控制绘制区域
- GUILayout.BeginScrollView() 添加滚动条
-
-
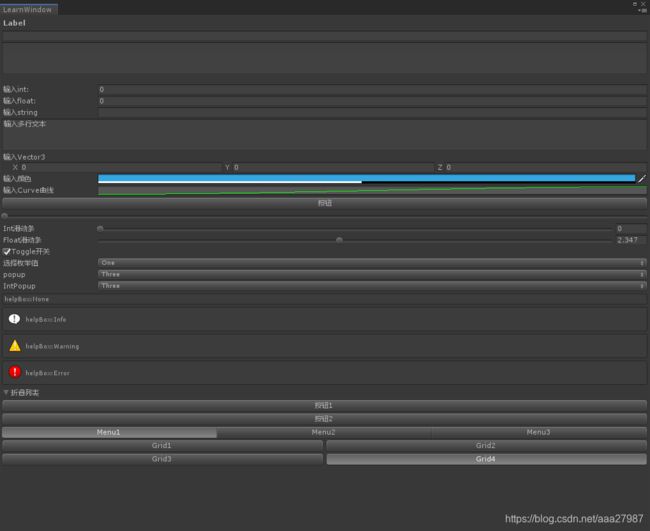
一、效果图
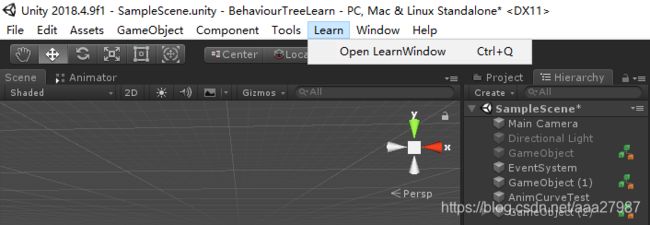
二、创建窗口
首先我们先用第一节介绍的MenuItem来创建窗口
  public class LearnWindow : EditorWindow
    {
        [MenuItem("Learn/Open LearnWindow %q")]
        public static void OpenWindow()
        {
            LearnWindow window = UnityEditor.EditorWindow.GetWindow<LearnWindow>();
        }
    }
三、使用控件来绘制窗口
接下来我们介绍一些控制来绘制窗口
不可输入控件
GUILayout.Label 标签
GUILayout.Label("Label",EditorStyles.boldLabel);
效果如下
![]()
可输入控件
GUILayout系列
GUILayout.TextField 单行文本
GUILayout.TextArea 多行文本
        private string textFieldVal;
        private string textAreaVal;
        private void OnGUI()
        {
            //TextField输入框(最多只能输入一行,不管高度多高)
            textFieldVal = GUILayout.TextField(textFieldVal);
            //TextArea输入框(可以输入多行)
            textAreaVal = GUILayout.TextArea(textAreaVal,GUILayout.Height(50));
         }
效果如下,上面的是TextField,下面的是TextArea

EditorGUILayout系列
上面GUILayout画出来就是一个纯输入框,我们一般需要在输入框加点标题做提示。这时候就需要用到EditorGUILayout系列控件;
EditorGUILayout.IntField() 输入整数
EditorGUILayout.FloatField() 输入浮点数
EditorGUILayout.TextField() 输入单行文本
EditorGUILayout.TextArea() 输入多行文本
        private int editorLabelInt;
        private float editorLabelFloat;
        private string editorLabelText;
        private string editorLabelArea;
        private void OnGUI()
        {
            //EditorGUILayout(既可以显示标题,又可以承接输入内容)
            editorLabelInt = EditorGUILayout.IntField("输入int:",editorLabelInt);
            editorLabelFloat = EditorGUILayout.FloatField("输入float:",editorLabelFloat);
            editorLabelText = EditorGUILayout.TextField("输入string",editorLabelText);
            editorLabelArea = EditorGUILayout.TextArea("输入多行文本",GUILayout.Height(50));
        }
EditorGUILayout.Vector3Field() 输入向量
EditorGUILayout.ColorField() 输入颜色
EditorGUILayout.CurveField() 输入曲线
        private Vector3 editorLabelVct3;
        private Color editorLabelColor;
        private AnimationCurve editorLabelCurve = new AnimationCurve(new Keyframe[]
        {
            new Keyframe(0,0),
            new Keyframe(1,1),
        });

        private void OnGUI()
        {
            editorLabelVct3 = EditorGUILayout.Vector3Field("输入Vector3",editorLabelVct3);
            // editorLabelVct2 = EditorGUILayout.Vector3Field("输入Vector3",editorLabelVct2);
            // editorLabelVct4 = EditorGUILayout.Vector3Field("输入Vector3",editorLabelVct4);

            editorLabelColor = EditorGUILayout.ColorField("输入颜色",editorLabelColor);
            editorLabelCurve = EditorGUILayout.CurveField("输入Curve曲线",editorLabelCurve);
按钮
           //按钮
            if (GUILayout.Button("按钮"))
            {
                Debug.Log($"{GetType()} 按下按钮");
            }
效果图如下
![]()
带图片的按钮
		//除了传入文本之外,我们还可以传入GUIContent。
		//而GUIContent可以携带 图片+文本信息。我们可以用这个来创建带图片的按钮
		public static bool Button(GUIContent content, params GUILayoutOption[] options)
接下来我们封装两个方法,用于快速构建GUIContent
       //代码动态创建一张图片
        public static Texture2D CreateTex(Color color,int size)
        {
            Texture2D tex = new Texture2D(size,size);
            for (int i = 0; i < size; i++)
            {
                for (int j = 0; j < size; j++)
                {
                    tex.SetPixel(i,j,color);
                }
            }
            tex.Apply();
            return tex;
        }
        //创建 图片+文本 的GUIContent
        public static GUIContent CreateImgTextContent(string text,Color color,int size = 16)
        {
            GUIContent guiContent = new GUIContent(text,CreateTex(color,size));
            return guiContent;
        }
实际使用
GUILayout.Button(EditorUtil.CreateImgTextContent(" test",Color.blue,16));
- 封装好方法后,在文本前加上 图片或颜色 是很方便的,可以用来做一些区分。而且实际上创建出来的是GUIContent,可以传入按钮,也可以传入其他组件中去
滑动条
GUILayout.HorizontalSlider() 普通滑动条
EditorGUILayout.IntSlider() 整型滑动条
EditorGUILayout.Slider() 浮点滑动条
        private float sliderVal;
        private int editorSliderInt;
        private float editorSliderFloat;

        private void OnGUI()
        {
            //滑动条
            sliderVal = GUILayout.HorizontalSlider(sliderVal, 0, 5);
            editorSliderInt = EditorGUILayout.IntSlider("Int滑动条", editorSliderInt,0,5);
            editorSliderFloat = EditorGUILayout.Slider("Float滑动条", editorSliderFloat,0,5);
        }
开关
		private bool isToggle;

        private void OnGUI()
        {
                    //Toggle开关
            isToggle = GUILayout.Toggle(isToggle,"Toggle开关");
		}
效果图如下
![]()
下拉框
EditorGUILayout.EnumPopup() 枚举下拉框
EditorGUILayout.Popup() 默认下拉框
EditorGUILayout.IntPopup() 整型下拉框
        public EditorEnum curEditorEnum;
        private int curIntPopupIndex;
        private int curPopupIndex;
        private void OnGUI()
        {
            //枚举值下拉框
            curEditorEnum = (EditorEnum) EditorGUILayout.EnumPopup("选择枚举值",curEditorEnum);

            curPopupIndex = EditorGUILayout.Popup("默认下拉框", curPopupIndex,new[] {"One", "Two", "Three"});

            //整型下拉框较之上面的默认下拉框多了指定序号的功能,由int[]数组定义。其他没多大区别
            curIntPopupIndex = EditorGUILayout.IntPopup("整型下拉框", curIntPopupIndex,new[] {"One", "Two", "Three"},new[]{4,5,6});
        }
提示框
EditorGUILayout.HelpBox() 提示框
            //helpBox
            EditorGUILayout.HelpBox($"helpBox:{MessageType.None}", MessageType.None);
            EditorGUILayout.HelpBox($"helpBox:{MessageType.Info}", MessageType.Info);
            EditorGUILayout.HelpBox($"helpBox:{MessageType.Warning}", MessageType.Warning);
            EditorGUILayout.HelpBox($"helpBox:{MessageType.Error}", MessageType.Error);
弹出交互框
EditorUtility.DisplayDialog
        if (EditorUtility.DisplayDialog("标题", "内容", "确定", "取消"))
        {
            //在这里处理 点击确定按钮
        }
EditorUtility.DisplayDialogComplex()
EditorUtility.DisplayDialog只能写确定按钮事件,当需要更多的点击事件时,可以用这个。接下来上代码
        int select = EditorUtility.DisplayDialogComplex("标题", "内容", "确定", "取消","其他");
        Debug.Log($"click select:{select}");
        switch (select)
        {
            case 0:
                //在这里处理 点击确定按钮
                break;
            case 1:
                //在这里处理 点击取消按钮
                break;
            case 2:
                //在这里处理 点击其他按钮
                break;
        }
弹出提示框
ShowNotification()
有时我们不需要玩家多点击一次确定,只想简单给个提示,比如‘保存成功’。这是我们就可以用ShowNotification(); 这个方法是EditorWindow窗口类的方法,在我们的窗口类里可以用。
ShowNotification(new GUIContent("保存成功"));
折叠功能
EditorGUILayout.Foldout() 折叠框
折叠功能是挺实用的功能,使用起来却很简单。接下来上代码
        private bool isFold;
        private void OnGUI()
        {
            //折叠功能
            isFold = EditorGUILayout.Foldout(isFold,"折叠列表");
            if (isFold)
            {
                GUILayout.Button("按钮1");
                GUILayout.Button("按钮2");
            }
        }
单选按钮组
GUILayout.Toolbar() 单选工具栏
GUILayout.SelectionGrid() 单选工具栏(可控制一行显示几个)
		//Toolbar系列
        private string[] ToolBarTitles = new[] { "Menu1","Menu2","Menu3"};
        private int curToolBarIndex = 0;

        //Grid系列,较之上面的多了个指定一行几个按钮的功能
        private string[] GridBarTitles = new[] { "Grid1","Grid2","Grid3","Grid4"};
        private int curGridBarIndex = 0;
        private void OnGUI()
        {
            //Toolbar
            curToolBarIndex = GUILayout.Toolbar(curToolBarIndex,ToolBarTitles);

            EditorGUILayout.Space();
            EditorGUILayout.Space();

            //Grid, 这里指定一行显示2个
            curGridBarIndex = GUILayout.SelectionGrid(curGridBarIndex, GridBarTitles, 2);

            if (GUI.changed)
            {
                Debug.Log($"{GetType()} curIndex:{curToolBarIndex} curGridBarIndex:{curGridBarIndex}");
            }
        }
效果图如下,上面是Toolbar,下面是SelectionGrid

布局/组
GUILayout.BeginHorizontal() 水平布局
GUI里默认布局是竖直布局,可以用水平布局来包裹控件。布局里的控件将会水平排列
            GUILayout.BeginHorizontal();
            GUILayout.Button("按钮1");
            GUILayout.Button("按钮2");
            GUILayout.EndHorizontal();
效果图如下
![]()
GUILayout.BeginVertical() 竖直布局
            GUILayout.BeginVertical();
            GUILayout.Button("按钮1");
            GUILayout.Button("按钮2");
            GUILayout.EndVertical();
GUILayout.BeginArea 控制绘制区域
控制绘制区域也是一个比较实用的功能。可以控制在哪个区域画,和控制新的起点。
            float width = 300;
            float height = 300;
            GUILayout.BeginArea(new Rect(0,0,width,height));
            // GUI.Box(new Rect(0,0,width,height),"");
            GUILayout.BeginVertical();

            //在这里绘制实际内容

            GUILayout.EndVertical();
            GUILayout.EndArea();
效果图如下,是不是空的什么都看不到。一般画BeginArea,我们都搭配一个Box盒子,这样可以有个背景,比较好看清楚区域在哪里

把注释的 // GUI.Box(new Rect(0,0,width,height),"");解开,就可以看到实际区域多大了。

这里绘制区域GUILayout.BeginArea() 要填入一个Rect()矩形,感觉宽高都定死了,如果想让宽度跟随窗口的变化而变化,有没有办法呢。有的,就是用position.
继承EditorWindow后有个position变量。其实position就是一个矩形Rect.
我们可以拿到四个分量:
position.x : 窗口X起点;
position.y: 窗口Y起点;
position.width:窗口宽度;
position.height:窗口高度;
修改下代码,区域就能自适应了
            float offsetX = 10;
            float offsetY = 10;
            Rect rect = new Rect(offsetX,offsetX,position.width - 2 * offsetX,position.height - 2 * offsetY);

            GUILayout.BeginArea(rect);
            GUI.Box(rect,"");
            GUILayout.BeginVertical();

            //在这里绘制实际内容

            GUILayout.EndVertical();
            GUILayout.EndArea();
GUILayout.BeginScrollView() 添加滚动条
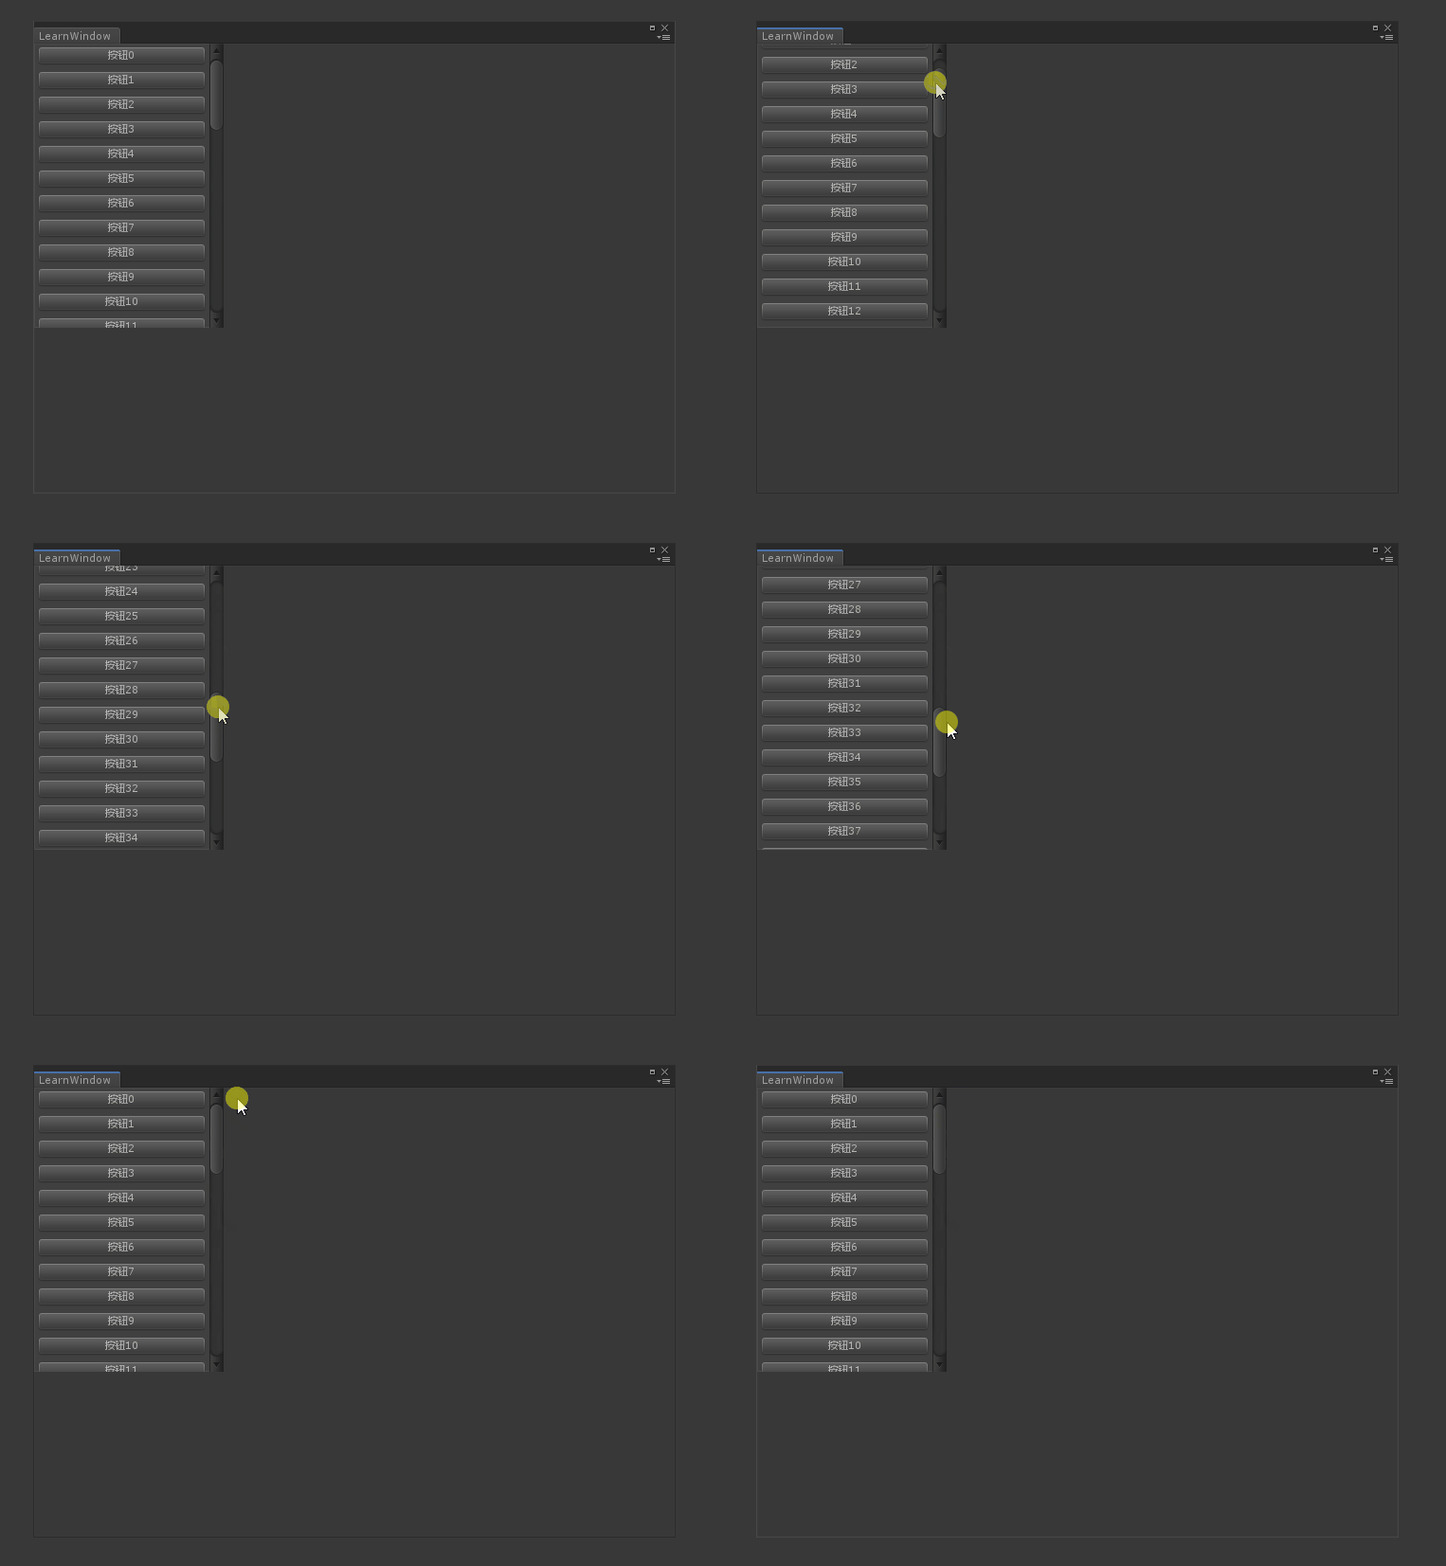
如果要绘制的内容很多,超出可视窗口,也是常见的事。这时就需要加上滚动条。
	 	private Vector2 scrollViewPos;

        private void OnGUI()
        {
            float width = 200;
            float height = 300;

            Rect rect = new Rect(0,0,width,height);

            GUILayout.BeginArea(rect);
            GUI.Box(rect,"");
            scrollViewPos = GUILayout.BeginScrollView(scrollViewPos,false,true,GUILayout.Height(height));
            GUILayout.BeginVertical();

            //在这里绘制实际内容
            for (int i = 0; i < 50; i++)
            {
                GUILayout.Button($"按钮{i}");
                GUILayout.Space(5);
            }


            GUILayout.EndVertical();
            GUILayout.EndScrollView();
            GUILayout.EndArea();
		}


