SpringBoot基础(四、整合RabbitMQ)
目录
环境安装
SpringBoot集成RabbitMQ
添加消息队列
创建消息发送者
创建消息接收者
测试结果
简要说一下四种模式
因为在做一个秒杀项目,优化环节需要使用到RabbitMQ,所以这里也记录一下。
环境安装
RabbitMQ是用Erlang语言编写的,所以需要安装此语言,
下载地址:Erlang语言,下载地址:RabbitMQ。
先安装Erlang语言(一路确定即可),再安装RabbitMQ服务(一路确定即可,注意WIN10是否中文名字)。
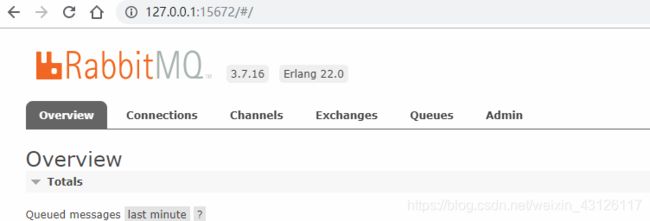
安装完RabbitMQ后,启动管理插件和RabbitMQ服务看看。
C:\Program Files\RabbitMQ Server\rabbitmq_server-3.7.16\sbin>rabbitmq-plugins enable rabbitmq_managementC:\Program Files\RabbitMQ Server\rabbitmq_server-3.7.16\sbin>net start RabbitMQ进入http://127.0.0.1:15672 ,默认密码为guest/guest
SpringBoot集成RabbitMQ
安装完成,那么我们就开始Springboot集成RabbitMQ。
(可以接着前一章的项目开始)
使用Maven并添加SpringBoot的父依赖,web的起步依赖也可以加上,方便后续是使用。
spring推出一个amqp的标准,消息队列的标准,只需要添加此依赖即可使用RabbitMQ服务。
        org.springframework.boot
        spring-boot-starter-parent
        1.5.8.RELEASE


            org.springframework.boot
            spring-boot-starter-web


            org.springframework.boot
            spring-boot-starter-amqp
配置Rabbitmq的参数,需要配什么可以在官网查,这里只介绍一点。
#rabbitmq
#4个最基础配置
spring.rabbitmq.host=127.0.0.1
spring.rabbitmq.port=5672
spring.rabbitmq.username=guest
spring.rabbitmq.password=guest
添加消息队列
package com.yingqi.rabbitmq;

import org.springframework.amqp.core.Queue;
import org.springframework.context.annotation.Bean;
import org.springframework.context.annotation.Configuration;

@Configuration
public class MQConfig {
    public static final String QUEUE = "queue";
    @Bean
    public Queue queue() {
        return new Queue(QUEUE, true);
    }
}
创建消息发送者
package com.yingqi.rabbitmq;

import org.springframework.amqp.core.AmqpTemplate;
import org.springframework.beans.factory.annotation.Autowired;
import org.springframework.stereotype.Service;

@Service
public class MQSender {
    @Autowired
    AmqpTemplate amqpTemplate;
    public void send(String message) {
        amqpTemplate.convertAndSend(MQConfig.QUEUE,message);
    }
}
创建消息接收者
package com.yingqi.rabbitmq;

import org.springframework.amqp.rabbit.annotation.RabbitListener;
import org.springframework.stereotype.Service;

@Service
public class MQReceiver {
    @RabbitListener(queues = MQConfig.QUEUE)
    public void receive(String message) {
        System.out.println("接收者"+message);
    }
}
使用SpringBootTest测试,就不要web起步依赖了
import com.yingqi.QuickStartOneApplication;
import com.yingqi.rabbitmq.MQSender;
import org.junit.Test;
import org.junit.runner.RunWith;
import org.springframework.beans.factory.annotation.Autowired;
import org.springframework.boot.test.context.SpringBootTest;
import org.springframework.test.context.junit4.SpringRunner;

@RunWith(SpringRunner.class)
@SpringBootTest(classes = QuickStartOneApplication.class)
public class RabbitMQTest {
    @Autowired
    private MQSender sender;
    @Test
    public void mq(){
        sender.send("hello,flash");
    }

}

//启动spring boot
@SpringBootApplication
@MapperScan("com.yingqi.mapper")
public class QuickStartOneApplication {
    public static void main(String[] args) {
        SpringApplication.run(QuickStartOneApplication.class);
    }
}
测试结果
![]()
SpringBoot整合RabbitMQ就介绍完毕了,下面的是四种消息队列的伪代码。
简要说一下四种模式
config:添加消息队列
/**
 * 配置消息交换机
 * 针对消费者配置
 FanoutExchange: 将消息分发到所有的绑定队列,无routingkey的概念
 HeadersExchange :通过添加属性key-value匹配
 DirectExchange:按照routingkey分发到指定队列
 TopicExchange:多关键字匹配
 **/
@Configuration
public class MQConfig {
    public static final String QUEUE = "queue";
    public static final String TOPIC_QUEUE1 = "topic.queue1";
    public static final String TOPIC_QUEUE2 = "topic.queue2";
    public static final String HEADERS_QUEUE = "headers.queue2";
    public static final String TOPIC_EXCHAGE = "topic.exchage";
    public static final String FANOUT_EXCHAGE = "fanout.exchage";
    public static final String HEADERS_EXCHAGE = "headers.exchage";
    public static final String ROUTING_KEY1 = "topic.key1";
    public static final String ROUTING_KEY2 = "topic.#";

    //Direct模式 交换机模式 exchange
    @Bean
    public Queue quese() {
        return new Queue(QUEUE, true);
    }

    //Fanout 模式
    @Bean
    public FanoutExchange fanoutExchange() {
        return  new FanoutExchange(FANOUT_EXCHAGE);
    }
    @Bean
    public Binding fanoutBinding1() {
        return BindingBuilder.bind(topicQueue1()).to(fanoutExchange());
    }
    @Bean
    public Binding fanoutBinding2() {
        return BindingBuilder.bind(topicQueue2()).to(fanoutExchange());
    }

    //topic模式 交换机模式 exchange
    @Bean
    public Queue topicQueue1() {
        return new Queue(TOPIC_QUEUE1, true);
    }
    @Bean
    public Queue topicQueue2() {
        return new Queue(TOPIC_QUEUE2, true);
    }
    @Bean
    public TopicExchange topicExchange() {
        return  new TopicExchange(TOPIC_EXCHAGE);
    }
    @Bean
    public Binding topicBinding1() {
        return BindingBuilder.bind(topicQueue1()).to(topicExchange()).with("topic.key1");
    }
    @Bean
    public Binding topicBinding2() {
        return BindingBuilder.bind(topicQueue2()).to(topicExchange()).with("topic.#");
    }

    //Header模式
    @Bean
    public HeadersExchange headersExchange() {
        return new HeadersExchange(HEADERS_EXCHAGE);
    }
    @Bean
    public Queue queueHeaders() {
        return new Queue(HEADERS_QUEUE);
    }
    @Bean
    public Binding headersBinding() {
        Map map = new HashMap();
        map.put("key", "123321");
        return BindingBuilder.bind(queueHeaders()).to(headersExchange()).whereAll(map).match();
    }
}
sender: 创建消息发送者
@Service
public class MQSender {

    @Autowired
    AmqpTemplate amqpTemplate;

    public void send(Object message) {
        String msg = JSON.toJSONString(message);
        System.out.println(msg);
        amqpTemplate.convertAndSend(MQConfig.QUEUE,msg);
    }

    //topic模式 交换机模式 exchange
    public void sendTopic(Object message) {
        String msg = JSON.toJSONString(message);
        System.out.println("send+topic模式"+msg+new Date());
        //发两条不同key消息,接收者收到3条
        amqpTemplate.convertAndSend(MQConfig.TOPIC_EXCHAGE,"topic.key1",msg+"topic.key1"+new Date());//发送的时候topicQueue1和2都接收到了
        amqpTemplate.convertAndSend(MQConfig.TOPIC_EXCHAGE,"topic.key2",msg+"topic.key2"+new Date());
    }

    //Fanout 模式
    public void sendFanout(Object message) {
        String msg = JSON.toJSONString(message);
        System.out.println("send+Fanout 模式:"+msg+new Date());
        amqpTemplate.convertAndSend(MQConfig.FANOUT_EXCHAGE,"",msg+new Date());
    }

    //Header模式
    public void sendHeaders(Object message, String key ,String val) {
        String msg = JSON.toJSONString(message);
        MessageProperties messageProperties = new MessageProperties();
        messageProperties.setHeader(key,val);
        Message s = new Message(msg.getBytes(),messageProperties);
        System.out.println("send+Header模式:"+s.toString()+new Date()+"请验证,是否提交队列");
        amqpTemplate.convertAndSend(MQConfig.HEADERS_EXCHAGE,"",s);
    }
receiver:创建消息接收者
@Service
public class MQReceiver {

    @RabbitListener(queues = MQConfig.QUEUE )
    public void receive(String message) {
        System.out.println(message);
    }
 //topic模式 交换机模式 exchange
    @RabbitListener(queues = MQConfig.TOPIC_QUEUE1 )
    public void receiveTopic1(String message) {
        System.out.println("Receiver:TOPIC_QUEUE1-"+message);
    }
    //Fanout 模式
    @RabbitListener(queues = MQConfig.TOPIC_QUEUE2 )
    public void receiveTopic2(String message) {
        System.out.println("Receiver:TOPIC_QUEUE2-"+message);
    }
    //Header模式
    @RabbitListener(queues = MQConfig.HEADERS_QUEUE )
    public void receiveHeaders(String message) {
        System.out.println("Receiver:HEADERS_QUEUE-"+message);
    }
测试结果
public static void main(String[] args) {

        sender.send("hello,flash");
//输出hello,flash

        sender.sendTopic("hello,flash");
//send+topic模式hello,flashSat Jul 13 16:52:03 CST 2019
//Receiver:TOPIC_QUEUE1-hello,flashtopic.key1Sat Jul 13 16:52:03 CST 2019
//Receiver:TOPIC_QUEUE2-hello,flashtopic.key2Sat Jul 13 16:52:03 CST 2019
//Receiver:TOPIC_QUEUE2-hello,flashtopic.key1Sat Jul 13 16:52:03 CST 2019

        sender.sendFanout("hello,flash");
//send+Fanout 模式:hello,flashSat Jul 13 16:52:17 CST 2019
//Receiver:TOPIC_QUEUE2-hello,flashSat Jul 13 16:52:17 CST 2019
//Receiver:TOPIC_QUEUE1-hello,flashSat Jul 13 16:52:17 CST 2019
        String key = "key";
        String val = "123321";

        sender.sendHeaders("hello,flash",key,val);
//send+Header模式:。。。。。
//Receiver:HEADERS_QUEUE-104,101,108,108,111,44,102,108,97,115,104

}