FlutterUnit 周边 | 收录排序算法可视化
theme: cyanosis
1. FlutterUnit 更新:排序算法可视化
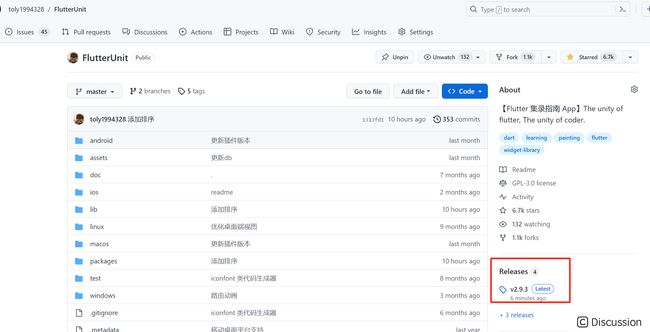
排序算法可视化是用视图层表现出算法执行过程中排序的过程,感谢 编程的平行世界 在 《十几种排序算法的可视化效果,快来看看!》》 一文中提供的算法支持。我进行了一些代码和交互上的优化,将其集成到了 FlutterUnit 中,大家可以在 release v2.9.3 下载全平台应用查看体验 ~
掘金目前已经支持插入视频了,但目前支持西瓜视频。下面通过两个视频来看一下效果:
移动端: 交互视频
jvideo
桌面端: 交互视频
jvideo
2. 交互界面介绍
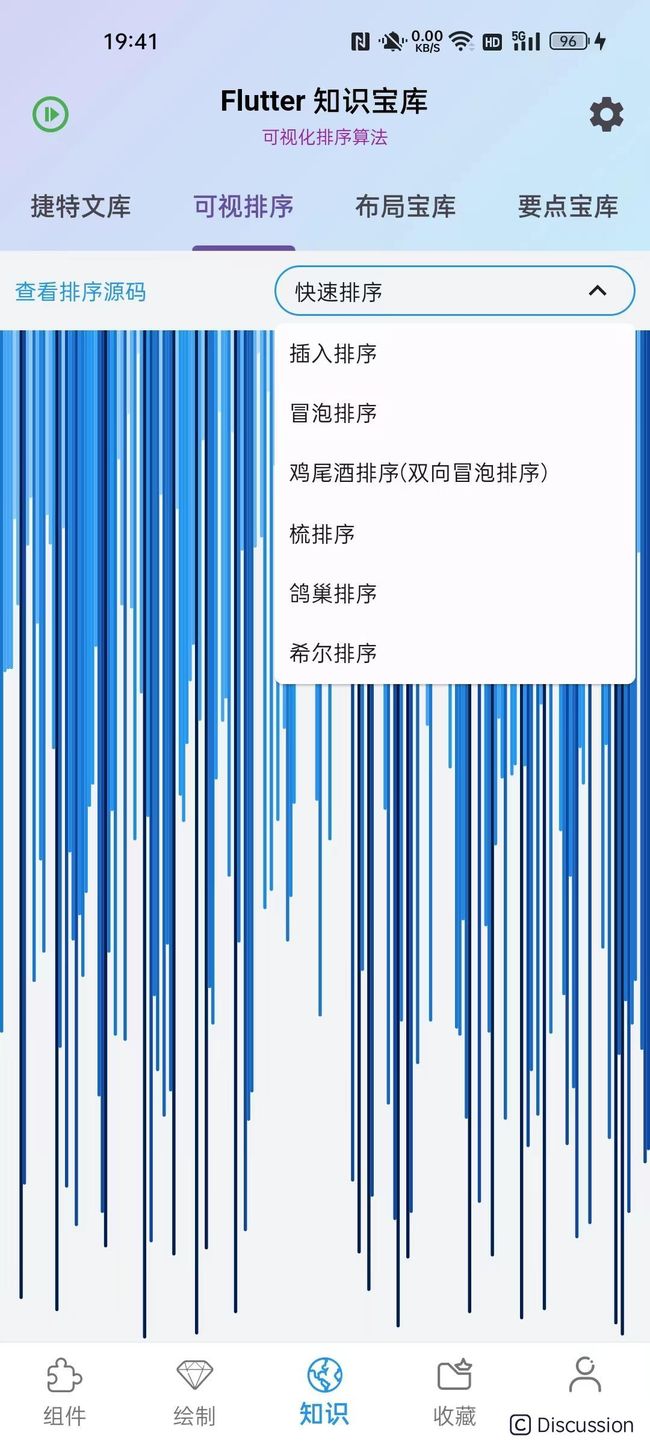
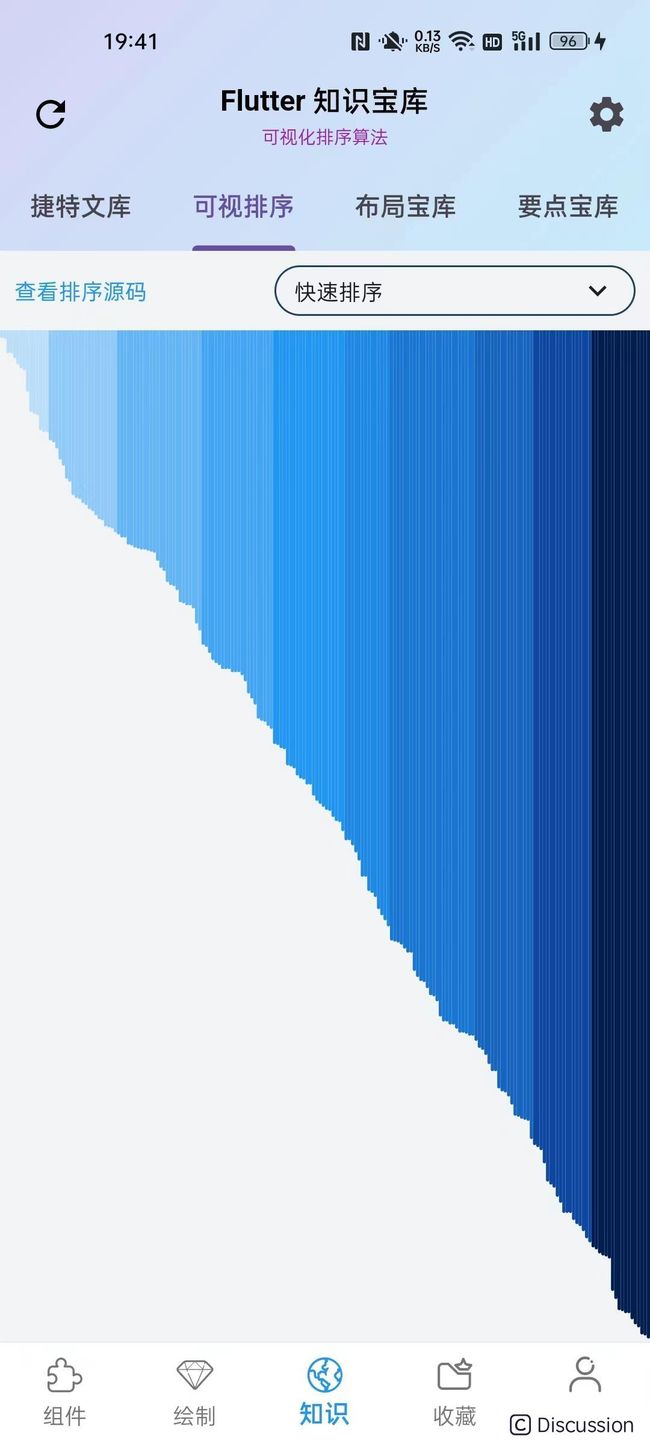
在移动端,排序算法可视化被放在 知识/可视排序 页签下,左上角的绿色按钮点击后启动排序,从而驱动数字列表数据变化,更新主界面产生排序的动态效果。下拉可以展开排序算法列表,选择对应的算法进行排序:
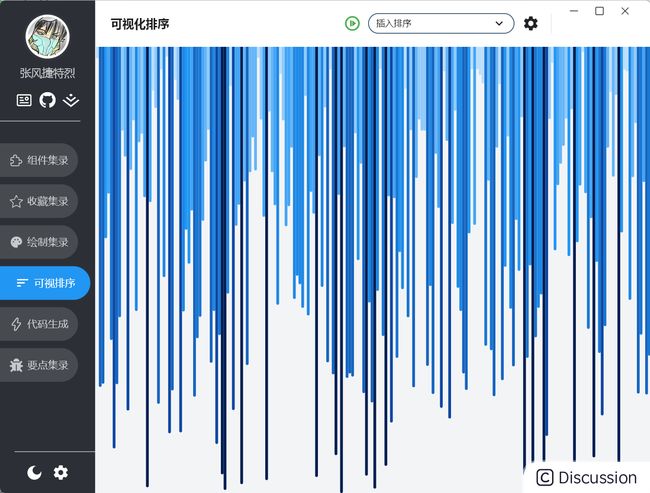
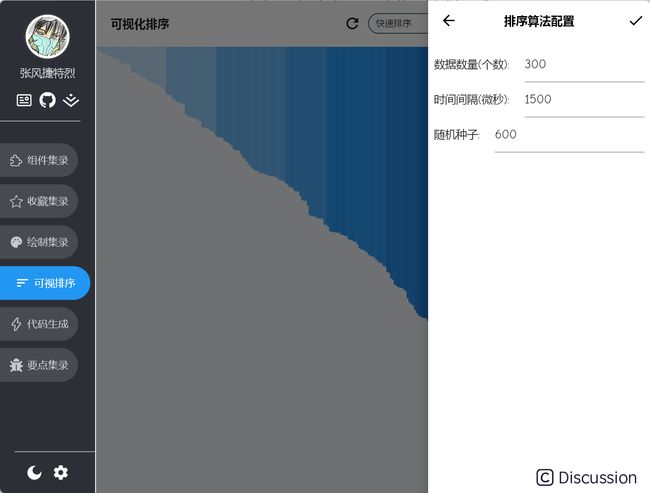
在桌面端,排序算法可视化先放在 可视排序 侧栏导航下,以后可能会拓展其他的有趣案例。
另外排序有设置界面,可以设置配置参数。
个数表示数据的数量,每个数据对应主界面中的一个线条。
间隔时长是排序过程中每步间的停顿时间,单位是微秒。
随机种子是随机数的种子,不为 -1 的话,相同的种子,每次重置生成的随机数列表一致。便于比较不排序算法下,同一组数据表现。
3. 项目的结构
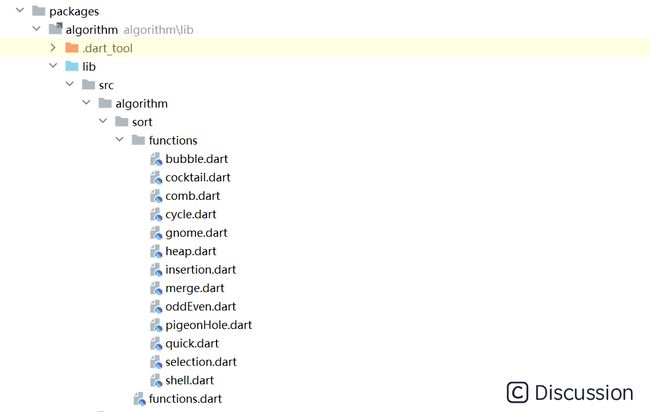
这里核心代码新建了一个 algorithm 的包来单独维护,其中 algorithm/sort 文件夹中盛放排序的具体算法。把它们分文件放置,更便于阅读。
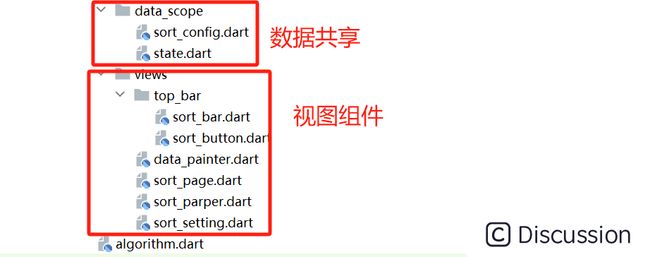
在 algorithm/data_scope 中,用于维护界面中的数据;在 algorithm/views 中处理视图组件的构建。
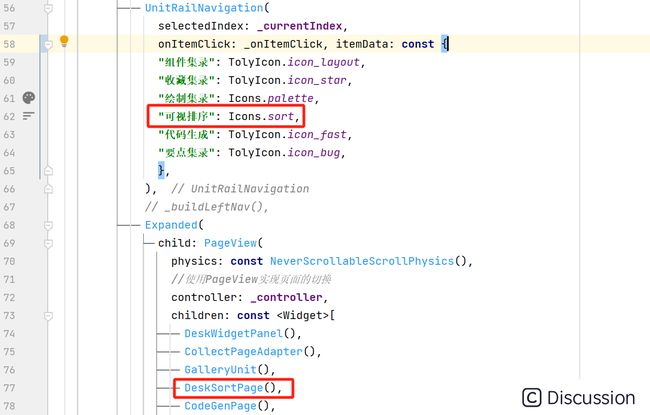
最后在 pubspec.yaml 中通过 path 引入本地的包,就可以在主项目中使用 algorithm 包中的组件进行展示。比如下面,在侧栏导航中添加一个 可视排序 的菜单栏,对应 DeskSortPage 组件。
yaml algorithm: path: packages/algorithm
4. 代码实现细节:算法方面
可视化排序的思路是:在每次排序列表数据发生变化时,通过回调来通知处理。这里定义 SortCallback 类型方便维护,其返回 Future 对象,可以回调排序过程中此时的列表数据。
dart typedef SortCallback = Future
拿冒泡排序来说,定义 bubbleSort 函数,传入待排序的数字列表,每次循环完成,出发 callback 通知调用者。比如想要放慢排序的过程,每一步可以等待一定的时间,也就是设置中的间隔微秒数。
dart ///冒泡排序 Future
另外排序的函数结构都是一致的,输入待排序列表与回调,可以通过 typedef 定义一个排序函数类型 SortFunction:
dart typedef SortFunction = Future
这样就可以维护排序的名称和排序函数间的映射关系:
dart Map
5. 代码实现细节:数据方面
数据方面的代码在 data_scope 包中,这里排序界面中的数据有三大类:
其一是待排序数字列表。
其二是配置的参数。
其三是排序状态。
配置参数包括四个,通过 SortConfig 类维护:
```dart class SortConfig { final int count; // 列表数字数量 final int seed; // 随机数种子 final Duration duration; // 间隔时长 final String name; // 算法名称
SortConfig({ this.count = 100, this.duration = const Duration(microseconds: 1500), this.seed = -1, this.name = 'insertion', });
SortConfig copyWith({ int? count, int? seed, Duration? duration, String? name, }) => SortConfig( count:count??this.count, seed:seed??this.seed, duration:duration??this.duration, name:name??this.name, ); } ```
排序状态通过 SortStatus 枚举定义:
dart enum SortStatus{ none, // 未操作 sorting, // 排序中 sorted, // 排序完成 }
排序界面整体的数据状态通过 SortState 维护,它继承自 ChangeNotifier,可以在数据变化时调用 notifyListeners 通知监听者,从而实现界面的更新。 SortState 调用 sort 方法触发排序,会根据排序算法名,从 sortFunctionMap 中拿到排序算法调用。每次回调时触发 notifyListeners 方法通知更新。
```dart class SortState with ChangeNotifier{
SortState(){ reset(); }
SortStatus status = SortStatus.none; List data = []; SortConfig _config = SortConfig(); SortConfig get config => _config; Random random = Random();
set config(SortConfig config){ _config = config; reset(); notifyListeners(); }
void reset(){ data.clear(); status = SortStatus.none; notifyListeners(); int count = config.count; if(config.seed!=-1){ random = Random(config.seed); } for (int i = 0; i < count; i++) { data.add(random.nextInt(1000)); } }
void sort() async{ status = SortStatus.sorting; notifyListeners(); SortFunction? sortFunction = sortFunctionMap[config.name]; if(sortFunction!=null){ await sortFunction(data,(arr) async { await Future.delayed(config.duration); notifyListeners(); }); } status = SortStatus.sorted; notifyListeners(); } } ```
6. 代码实现细节:界面方面
这里目前没有使用三方状态管理包,而是通过 Flutter 内部的 InheritedNotifier 完成子树共享可监听数据的任务。
```dart class SortStateScope extends InheritedNotifier { const SortStateScope({ required super.notifier, required super.child, super.key, });
static SortState of(BuildContext context) => context.dependOnInheritedWidgetOfExactType ()!.notifier!; } ```
如果某个组件是数据的依赖者,在可监听对象发生变化时,会通知其更新。拿 SortButton 来说,他需要依赖排序状态 SortStatus 数据来展示不同的图标,或响应不同的事件。使用 SortStateScope.of(context) 相当于依赖了数据,那么数据(SortState)在 notifyListeners 时,就会通知 SortButton 进行重新构建,这就是 InheritedNotifier 组件的功能。
| none | sorting |sorted | | --- | --- |--- | |  |
|  |
|![]()
```dart class SortButton extends StatelessWidget { const SortButton({super.key});
@override Widget build(BuildContext context) { SortState state = SortStateScope.of(context); VoidCallback? action; IconData icon; Color color; switch (state.status) { case SortStatus.none: icon = Icons.notstartedoutlined; color = Colors.green; action = state.sort; break; case SortStatus.sorting: icon = Icons.stopcircleoutlined; color = Colors.grey; action = null; break; case SortStatus.sorted: icon = Icons.refresh; color = Colors.black; action = state.reset; break; }
return GestureDetector(
  onTap: action,
  child: Icon(
    icon,
    color: color,
  ),
);
} } ```
最后,主体界面通过 CustomPainter 对数字列表进行绘制,遍历数据根据数值大小绘制不同高度的线条。
```dart class DataPainter extends CustomPainter { final List data;
DataPainter({required this.data});
@override void paint(Canvas canvas, Size size) { canvas.clipRect(Offset.zero & size); double itemWidth = size.width / data.length;
Paint paint = Paint();
paint.strokeWidth = itemWidth;
paint.strokeCap = StrokeCap.round;

for (int i = 0; i < data.length; i++) {
  int value = data[i];
  if (value < 1000 * .10) {
    paint.color = Colors.blue.shade100;
  } else if (value < 1000 * .20) {
    paint.color = Colors.blue.shade200;
  } else if (value < 1000 * .30) {
    paint.color = Colors.blue.shade300;
  } else if (value < 1000 * .40) {
    paint.color = Colors.blue.shade400;
  } else if (value < 1000 * .50) {
    paint.color = Colors.blue.shade500;
  } else if (value < 1000 * .60) {
    paint.color = Colors.blue.shade600;
  } else if (value < 1000 * .70) {
    paint.color = Colors.blue.shade700;
  } else if (value < 1000 * .80) {
    paint.color = Colors.blue.shade800;
  } else if (value < 1000 * .90) {
    paint.color = Colors.blue.shade900;
  } else {
    paint.color = const Color(0xFF011E51);
  }
  canvas.drawLine(
      Offset(i * itemWidth + itemWidth / 2, 0),
      Offset(
        i * itemWidth + itemWidth / 2,
        size.height * (value / 1000),
      ),
      paint);
}
}
@override bool shouldRepaint(covariant DataPainter oldDelegate) { return true; } } ```
整个核心的逻辑就是这些,有兴趣的可以自己查阅 FlutterUnit 中的相关代码,那么本文就到这里,谢谢观看,我们下次再见~
