使用openlayers加载离线瓦片地图
一、需求背景
我们现在的项目就说使用openlayer + geoServer自己发布的矢量地图,是和公安合作的项目,由于政府大都使用的是天地图,所以需要将geoServer的矢量地图改为天地图,搭配openlayers使用,openlayers还可以切换不同地图数据源,虽然文档不够友好。
二、下载离线瓦片资源
这里 我给个百度云链接 下载后解压
链接: https://pan.baidu.com/s/1Mjiu0v2uQA3f2JAyreDgOQ?pwd=j18c 提取码: j18c
三、发布离线瓦片数据
要把自己下载的地图资源放在服务器上才行
自己本地测试的话,本地起一个服务就好
npm i http-server -g
http-server --cors

这里我再唠叨下
为什么是 http-server --cors 为什么要加 --cors
因为我们的地图资源问卷有跨域的限制
虽然百度了说设置img.setAttribute(‘crossOrigin’, ‘anonymous’)这个有用,但是经过实验其实没什么用
所以…
好了 服务有了
四、页面渲染(vue2)
自己创建一个vue2项目,或者直接拉取我的demo,劳驾给我一个star⭐
https://github.com/ZhangMin1998/openlayers_somedemo
安装 ol
npm install ol
我直接上代码吧
<template>
  <div class="home">
    <div style="width: 100%; height: 100%">
      <div class="map" id="map"></div>
    </div>
  </div>
</template>

<script>
import 'ol/ol.css'
import Map from 'ol/Map'
import { Tile as TileLayer } from 'ol/layer'
import View from 'ol/View'
import XYZ from 'ol/source/XYZ'

export default {
  name: 'HomeView',
  components: {},
  data () {
    return {
      mapObj: null,
      mapDom: null,
      mapPointList: [],
      pointLayerSource: null,
      pointLayer: null
    }
  },
  mounted () {
    this.initMap()
  },
  methods: {
    // 清除地图 某些情况 地图容器会存在两个 导致地图无法正常显示 这个问题折腾了我半天。
    // 找了半天官方貌似也没有提供 对应的 api,自己动手了。
    mapClear () {
      if (this.mapDom) {
        this.mapDom.innerHTML = ''
        this.mapDom = null
      }
    },

    // 初始化地图
    initMap () {
      // 先尝试清除
      // this.mapClear()
      // 获取地图容器
      this.mapDom = document.getElementById('map')

      // 初始化地图配置
      this.mapObj = new Map({
        target: this.mapDom, // 地图容器
        view: new View({
          center: [114.759, 25.522], // 地图中心点
          zoom: 8, // 缩放
          projection: 'EPSG:4326' // 坐标系
        })
      })

      // 添加一个使用离线瓦片地图的层
      const offlineMapLayer = new TileLayer({
        source: new XYZ({
          url: 'http://192.168.7.34:8081' + '/{z}/{x}/{y}.png' // 设置本地离线瓦片所在路径,前面的地址是你输入http-server之后的服务地址
          // tileLoadFunction: (imageTile, src) => {
          //   console.log(imageTile, src)
          //   // 使用滤镜 将白色修改为深色
          //   const img = new Image()
          //   // img.crossOrigin = ''
          //   // 设置图片不从缓存取,从缓存取可能会出现跨域,导致加载失败
          //   img.setAttribute('crossOrigin', 'anonymous')
          //   img.onload = () => {
          //     const canvas = document.createElement('canvas')
          //     const w = img.width
          //     const h = img.height
          //     canvas.width = w
          //     canvas.height = h
          //     const context = canvas.getContext('2d')
          //     context.filter = 'grayscale(98%) invert(100%) sepia(20%) hue-rotate(180deg) saturate(1600%) brightness(80%) contrast(90%)'
          //     context.drawImage(img, 0, 0, w, h, 0, 0, w, h)
          //     imageTile.getImage().src = canvas.toDataURL('image/png')
          //   }
          //   img.onerror = () => {
          //     imageTile.getImage().src = require('@/assets/logo.png')
          //   }
          //   img.src = src
          // }
        })
      })
      // 将图层添加到地图
      this.mapObj.addLayer(offlineMapLayer)

      // 加载地理坐标
      // this.addPoint()
    }
  },
  beforeDestroy () {
    this.mapClear()
  }
}
</script>
<style lang="less">
.map {
  width: 1900px;
  height: 1000px;
  // background-color: red;
}
</style>
npm run serve
我的demo的路由是 ‘/offlineMap’
五、修改地图样式
参考文章:
https://www.cnblogs.com/m7777/p/16280817.html
https://blog.csdn.net/qq_32077521/article/details/123224974
https://blog.csdn.net/weixin_43239880/article/details/129247279
https://juejin.cn/post/7017301189406490655
利用openlayers中的tileLoadFunction 的函数回调进行变色,结合css的filter属性来进行变色
// 添加一个使用离线瓦片地图的层
const offlineMapLayer = new TileLayer({
  source: new XYZ({
    url: 'http://192.168.7.34:8081' + '/{z}/{x}/{y}.png', // 设置本地离线瓦片所在路径,前面的地址是你输入http-server之后的服务地址
    tileLoadFunction: (imageTile, src) => {
      console.log(imageTile, src)
      // 使用滤镜 将白色修改为深色
      const img = new Image()
      // img.crossOrigin = ''
      // 设置图片不从缓存取,从缓存取可能会出现跨域,导致加载失败
      img.setAttribute('crossOrigin', 'anonymous')
      img.onload = () => {
        const canvas = document.createElement('canvas')
        const w = img.width
        const h = img.height
        canvas.width = w
        canvas.height = h
        const context = canvas.getContext('2d')
        context.filter = 'grayscale(98%) invert(100%) sepia(20%) hue-rotate(180deg) saturate(1600%) brightness(80%) contrast(90%)'
        context.drawImage(img, 0, 0, w, h, 0, 0, w, h)
        imageTile.getImage().src = canvas.toDataURL('image/png')
      }
      img.onerror = () => {
        imageTile.getImage().src = require('@/assets/logo.png')
      }
      img.src = src
    }
  })
})
offlineMapLayer函数:在加载瓦片的时候进行修改
css的filter属性解释:大概就是改变你图片的色相,饱和度,黑白,通透性等等,来实现图片变色的效果。【缺点,不能让地图指定哪个颜色,只能调个大概的好看的颜色。】
效果:

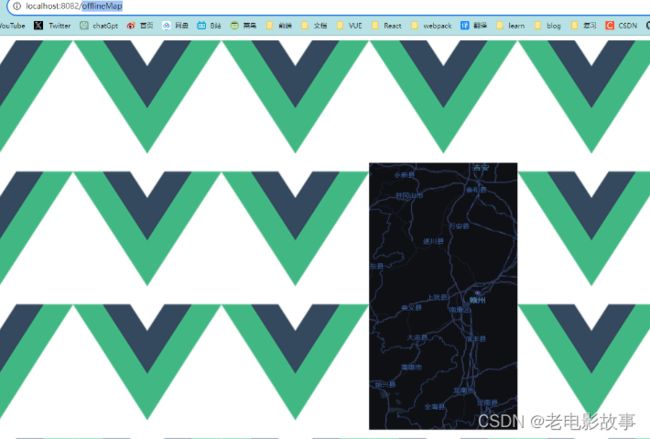
为什么多了这些图片??
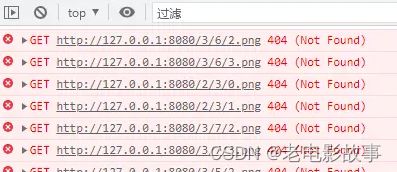
目的是解决加了这个函数后,有些瓦片不全时会加载404的瓦片图,缩放后就没了的问题。
所以添加img.onerror事件,
把imageTile.getImage().src = require(‘@/assets/logo.png’)设置为一个图片出错时的替换图片就ok。对于404的图片,大家也可以这样子设置,设置成需要替换的图片就行。
六、demo地址 记得给个star⭐
https://github.com/ZhangMin1998/openlayers_somedemo


