Hive2.3.0安装笔记
前期准备
完成hadoop的安装
完成mysql的安装
下载Hive
wget http://mirror.bit.edu.cn/apache/hive/hive-2.3.0/apache-hive-2.3.0-bin.tar.gz
或者去官网安装
解压到指定安装目录
用xftp将安装包传到opt/hadoop中
解压:
tar -zxvf apache-hive-2.3.0-bin.tar.gz
修改文件夹名称:
mv ./apache-hive-2.3.0-bin ./hive-2.3.0
修改环境变量
vi /etc/profile
插入
export HIVE_HOME=/opt/hadoop/hive-2.3.0
export PATH=$HIVE_HOME/bin:$PATH
使其修改立即生效
source /etc/profile
登录mysql数据库
并创建metastore数据库,关闭新主库的只读属性,为其授权(用于存储hive的初始化配置)
create database metastore;
set global read_only=0;
grant all on metastore.* to hive@'%'  identified by 'hive';
grant all on metastore.* to hive@'localhost'  identified by 'hive';
flush privileges;

如果不关闭数据库的只读属性,执行
grant all on metastore.* to hive@'%' identified by 'hive';时,会报错
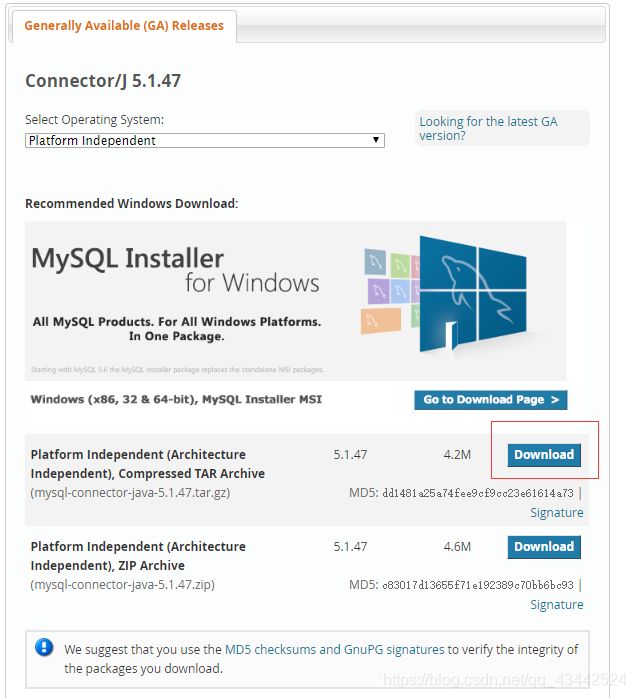
下载jdbc connector
点击链接Connector/J 5.1.44下载至本地主机,然后再传至
修改hive配置文件
cd /opt/hadoop/hive-2.3.0/conf/
重命名配置文件
cp hive-env.sh.template hive-env.sh
cp hive-default.xml.template hive-site.xml
cp hive-log4j2.properties.template hive-log4j2.properties
cp hive-exec-log4j2.properties.template hive-exec-log4j2.properties
修改hive-env.sh文件
export JAVA_HOME=/opt/java/jdk1.8.0_201    ##Java路径,根据自己jdk安装的路径配置
export HADOOP_HOME=/opt/hadoop/hadoop-2.8.0   ##Hadoop安装路径
export HIVE_HOME=/opt/hadoop/hive-2.3.0    ##Hive安装路径
export HIVE_CONF_DIR=/opt/hadoop/hive-2.3.0/conf   ##Hive配置文件路径
hadoop   fs   -mkdir   -p   /usr/hive/warehouse
hadoop   fs   -chmod   777   /usr/hive/warehouse
hadoop   fs   -mkdir  -p   /tmp/hive/
hadoop   fs   -chmod  777   /tmp/hive
hadoop   fs   -ls   /usr/hive/
hadoop   fs   -ls   /tmp/
修改hive-site.xml中的临时目录
将hive-site.xml文件中的${system:java.io.tmpdir}替换为hive的临时目录,例如我替换为/root/hive/tmp,该目录如果不存在则要自己手工创建,并且赋予读写权限。
将${system:user.name}都替换为root
修改hive-site.xml数据库相关的配置
搜索javax.jdo.option.ConnectionURL,将该name对应的value修改为MySQL的地址,例如我修改后是:
javax.jdo.option.ConnectionURL
jdbc:mysql://172.18.74.236:3306/hive?createDatabaseIfNotExist=true
搜索javax.jdo.option.ConnectionDriverName,将该name对应的value修改为MySQL驱动类路径,例如我的修改后是:
       javax.jdo.option.ConnectionDriverName
       com.mysql.jdbc.Driver
搜索javax.jdo.option.ConnectionUserName,将对应的value修改为MySQL数据库登录名:
javax.jdo.option.ConnectionUserName
root
搜索javax.jdo.option.ConnectionPassword,将对应的value修改为MySQL数据库的登录密码:
     javax.jdo.option.ConnectionPassword
     ******
修改为自己的密码
搜索hive.metastore.schema.verification,将对应的value修改为false:
    hive.metastore.schema.verification
     false
启动和测试
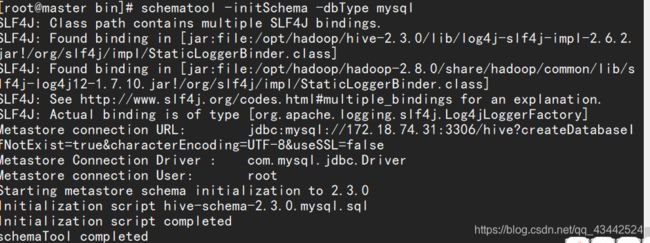
对MySQL数据库进行初始化
进入到hive的bin目录 执行命令:
schematool -initSchema -dbType mysql
第一个:
Fri Mar 30 14:55:35 CST 2018 WARN: Establishing SSL connection without server's identity verification is not recommended. According to MySQL 5.5.45+, 5.6.26+ and 5.7.6+ requirements SSL connection must be established by default if explicit option isn't set. For compliance with existing applications not using SSL the verifyServerCertificate property is set to 'false'. You need either to explicitly disable SSL by setting useSSL=false, or set useSSL=true and provide truststore for server certificate verification.
仔细看了看,发现是字符串中没有配置SSL这个配置项。
需要在连接字符串中加上useSSL=false/true配置。
jdbc:mysql://172.18.74.236:3306/hive?createDatabaseIfNotExist=true
修改为
jdbc:mysql://172.18.74.236:3306/hive?createDatabaseIfNotExist=true&characterEncoding=UTF-8&useSSL=false
第二个:
在安装Hive的时候报错:
org.apache.hadoop.hive.metastore.HiveMetaException: Failed to get schema version.
Underlying cause: java.sql.SQLException : Access denied for user 'root'@'master.hadoop' (using password: YES)
解决方案:


