linux-安防监控实现之boa服务器移植
一、 概述
硬件资源:arm 开发板
宿主机:ubuntu18.04
交叉编译工具:aarch64-linux-gnu-gcc
二、 BOA搭建
1、源码下载
http://www.boa.org/

News! (last updated 23 February 2005)

Latest Released Version (0.94.13) here (signature here)  --- 下载地址
1.1 boa简介:
其可执行代码只有大约60KB左右,Boa是一个单任务的HTTP服务器,Boa只能依次完成用户的请求,而不会fork出新的进程来处理并发连接请求。Boa支持CGI。
Boa的设计目标是速度和安全。(CGI只是一个进程,用来提供接口),自动目录生成和自动文件枪支进行拼接。
Boa的主要设计目标是速度和安全性。安全性在“不能被恶意用户破坏”的意义上,不是“细粒度访问控制和加密通信”。
特点:可靠性和可移植性,Boa不是作为功能强大的服务器。开发平台:GNU / Linux是目前的开发平台。
推荐:GoAhead Apache22、解压源码:
tar -xvf boa-0.94.13.tar.gz3、进入源码目录下的src目录:
cd boa-0.94.13/src/修改文件
(1)修改 src/compat.h
找到 #define TIMEZONE_OFFSET(foo) foo##->tm_gmtoff
修改成 #define TIMEZONE_OFFSET(foo) (foo)->tm_gmtoff
(2)修改 src/log.c
注释
if (dup2(error_log, STDERR_FILENO) == -1) {

DIE("unable to dup2 the error log");

}
为:
/*if (dup2(error_log, STDERR_FILENO) == -1) {

DIE("unable to dup2 the error log");

}*/
(3)修改src/boa.c
注释掉下面两句话:
if (passwdbuf == NULL) {

DIE(”getpwuid”);

}

if (initgroups(passwdbuf->pw_name, passwdbuf->pw_gid) == -1) {

DIE(”initgroups”);

}
为
#if 0

if (passwdbuf == NULL) {

DIE(”getpwuid”);

}

if (initgroups(passwdbuf->pw_name, passwdbuf->pw_gid) == -1) {

DIE(”initgroups”);

}

#endif
注释掉下面语句:
if (setuid(0) != -1) {

DIE(”icky Linux kernel bug!”);

}

为

#if 0

if (setuid(0) != -1) {

DIE(”icky Linux kernel bug!”);

}

#endif
(4)修改src/defines.h (修改boa传输文件的大小限制,默认1MB修改为16MB)
找到
 #define SERVER_ROOT "/etc/boa"

修改为

  #define SERVER_ROOT "/boa"
4、生成Makefile文件
执行:
cd boa-0.94.13/src./configure修改Makefile
cd srcvim Makefile
修改CC = gcc 为 CC = aarch64-linux-gnu-gcc
修改CPP = gcc -E 为 CC = aarch64-linux-gnu-gcc -E
编译
make然后为生成的二进制文件boa
三、 BOA移植
1、建立安装目录
sudo mkdir -p /boa /boa/www /boa/cgi-bin /boa/log (这样boa程序启动时会在/boa目录下寻找boa.conf配置文件,并且将/boa文件夹作为服务器的根目录)。
2、将需要的文件复制到安装目录中
将boa-0.94.13/src目录下生成的boa、boa_indexer二进制文件复制到/boa下
sudo  cp  boa boa_indexer  /boa
将boa-0.94.13目录下的boa.conf文件复制到/boa下
sudo  cp  boa.conf  /boa
可选项: arm-linux-strip boa(去掉boa中的调试信息,只是减小文件的大小可以执行也可以不执行)
将/etc/mime.types复制到/boa目录下
sudo cp  /etc/mime.types  /boa
创建log文件夹
mkdir log
在log文件夹创建文件
touch /log/access_log
touch /log/error_log
将/src/log复制到/boa目录下
sudo cp  /src/log/  /boa
3、返回boa的顶层目录 --- 修改配置文件
vi boa.conf, //几乎全部指定到boa的目录下,这样方便我们进行管理
重新指定一些文件的生成路径,因为重新指定这些路径后会帮助我们深刻的理解关于boa服务器的工作机制
Port  80
User  0
Group 0
# bind调用的IP地址,一般注释掉,表明绑定到INADDR_ANY,通配于服务器的所有IP地址
#Listen 192.68.0.5
##### error_log和access_log会自动生成,只要指定生成路径就可以了。
ErrorLog /boa/log/error_log
AccessLog /boa/log/access_log
##### 存放HTML文件的根路径
DocumentRoot /boa/www
UserDir public_html
##### 默认页面,若之输入http://127.0.0.1/则会自动返回给浏览器默认页面index.html
DirectoryIndex index.html
##### 保持默认
DirectoryMaker /boa/boa_indexer   //被修改
KeepAliveMax 1000
KeepAliveTimeout 10
MimeTypes /boa/mime.types   //被修改
DefaultType text/plain
#####指定传给cgi程序的PATH环境变量
CGIPath /bin:/usr/bin:/usr/local/bin
#####保持默认
Alias /doc /usr/doc
#####如果输入http://127.0.0.1/cgi-bin/test.cgi, 则boa服务器会到/boa/cgi-bin中寻找test.cgi程序。
ScriptAlias /cgi-bin/ /boa/cgi-bin/
4、建立测试页面
(1)index.html ,将index.html 放在/boa/www目录下
sudo cp index.html image.jpg /boa/www


this is a test!


tree picture

to cgi page    //指定了cgi可执行文件存放的路径,默认从/boa的根目录开始查找
注意: 笔记本打开,另存为utf-8格式,自己添加一张图片到当前的目录下
(2)test.c, 使用gcc -o test.cgi test.c,将test.c编译生成test.cgi,后缀为cgi的类型
编译后得到的test.cgi放在/boa/cgi-bin目录下,
sudo cp test.cgi  /boa/cgi-bin/


#include
int main()
{
  printf("Content-type:text/html\n\n"); //这句一定要加上
  printf("");
  printf("Hello, CGI!
");
  printf("return index.html");
  printf("");
  return 0;
}
5、安装tree软件
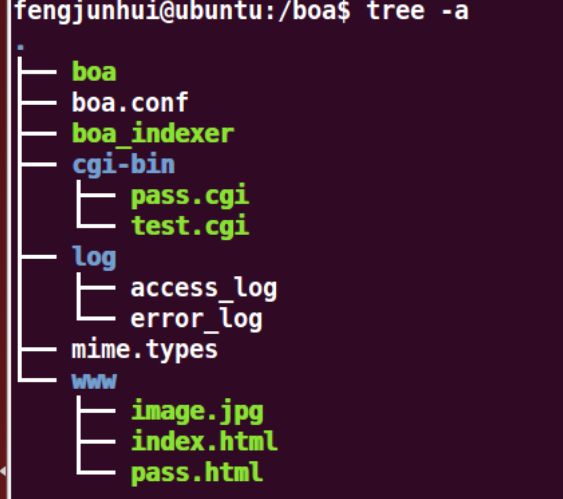
sudo apt-get install tree查看tree
tree -a
四、测试效果
进入/boa目录,使用./boa来运行boa服务器(当然也可将/boa路径加入系统PATH环境变量,这样不用进入/boa目录,直接输入boa就可以了)
在浏览器中输入开发板ip便可访问到默认的页面index.html,
点击index.html页面中的超链接便可访问到cgi测试页面,点击test.cgi中的超链接又可返回index.html页面。
如何关闭boa服务器:
	fengjunhui@ubuntu:~$ ps -axj | grep "boa"
	 2102 24862 24860 24255 pts/18   24255 S    65534   0:00 ./boa
	 2102 25735 25733 24255 pts/18   24255 S    65534   0:00 ./boa
	25753 25793 25792 25753 pts/4    25792 S+    1000   0:00 grep --color=auto boa

	kill -9 pid(boa)
	fengjunhui@ubuntu:~$ sudo kill -9 24862
	fengjunhui@ubuntu:~$ sudo kill -9 25733
重新启动boa,再次通过浏览器访问cgi,访问成功!
fengjunhui@ubuntu:~/Boa-0.94/boa-0.94.13/src$ sudo cp boa_indexer boa /boa
	cp: cannot create regular file ‘/boa/boa’: Text file busy
	cp并不改变目标文件的inode,事实上它的实现是这样的:
	# strace cp test2 test 2&1 | grep open.*test
	open("test2", O_RDONLY|O_LARGEFILE) = 3
	Linux由于Demand Paging机制的关系,必须确保正在运行中的程序镜像(注意,并非文件本身)不被意外修改,
因此内核在启动程序后会锁定这个程序镜像的inode。这就是为什么cp在用“O_WRONLYO_TRUNC”模式open目标文件时会失败。
而先rm再cp的话,新文件的inode其实已经改变了,原inode并没有被真正删除,直到内核释放对它的引用。
	fengjunhui@ubuntu:/boa$ sudo rm boa
	sudo cp boa_indexer boa /boa