非常简洁的Ubuntu配置Visual Studio Code C++的开发环境
文章目录
- 前言
- 一、安装Visual Studio
- 二、配置代码步骤
-
- 1.编写待处理程序
- 2.配置launch.json文件
- 三、运行程序
-
- 步骤如下
- 注释
前言
笔者初次在Ubuntu中配置VS Code,阅读网上的许多教程后,经过数十次的尝试,总结出一个较为普适、简洁的方法,这里只提供了一个概括性总结,适用于16.04,18.04,20.04等多个版本的Ubuntu系统
一、安装Visual Studio
安装过程较为基础,这里提供一个教程以供参考,在Ubuntu中安装VS,适用于虚拟机和非虚拟机的Ubuntu系统
二、配置代码步骤
1.编写待处理程序
1.打开Visual Studio, 点击左上角File-Open Folder,打开目的文件夹;
2.在该文件夹中创建cpp文件,并编写你的程序内容
如:
#include 2.配置launch.json文件
1.点击左侧Run and Debug(Ctrl + Shift +D)
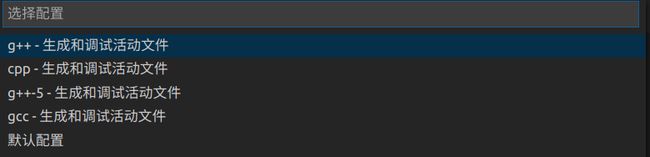
2.配置环境时选择C++(GDB/LLDB)
并选择默认配置g+±生成和调试活动文件
3.生成launch.json文件后,重新编写“program”所属行
代码如下(示例):
{
    // Use IntelliSense to learn about possible attributes.
    // Hover to view descriptions of existing attributes.
    // For more information, visit: https://go.microsoft.com/fwlink/?linkid=830387
    "version": "0.2.0",
    "configurations": [
        {
            "name": "g++ - 生成和调试活动文件",
            "type": "cppdbg",
            "request": "launch",
            "program": "${fileDirname}/a.out",
            "args": [],
            "stopAtEntry": false,
            "cwd": "${workspaceFolder}",
            "environment": [],
            "externalConsole": false,/*false 代表结果将会在VS终端中显示
改为true后,结果将会以Ubuntu系统的终端形式弹窗出结果*/
            "MIMode": "gdb",
            "setupCommands": [
                {
                    "description": "为 gdb 启用整齐打印",
                    "text": "-enable-pretty-printing",
                    "ignoreFailures": true
                }
            ],
            "preLaunchTask": "C/C++: g++ 生成活动文件",
            "miDebuggerPath": "/usr/bin/gdb"
        }
    ]
}
将
"program": "${fileDirname}/${fileBasenameNoExtension}",
改写为
"program": "${fileDirname}/a.out",
三、运行程序
步骤如下
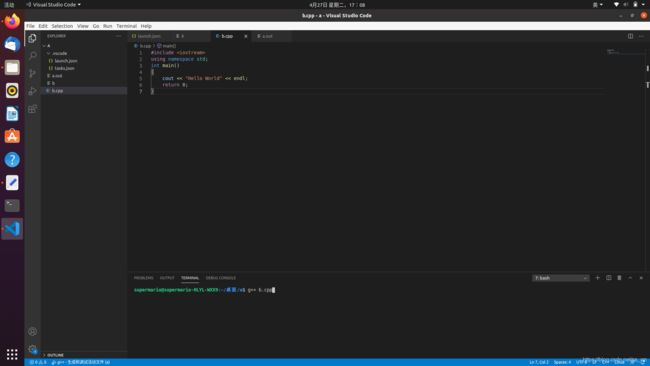
1.选中已编写好的cpp文件
2.点击上方的Terminal-New Terminal
3.在下方的终端中输入
g++ 文件名.cpp
之后会自动生成a.out 文件
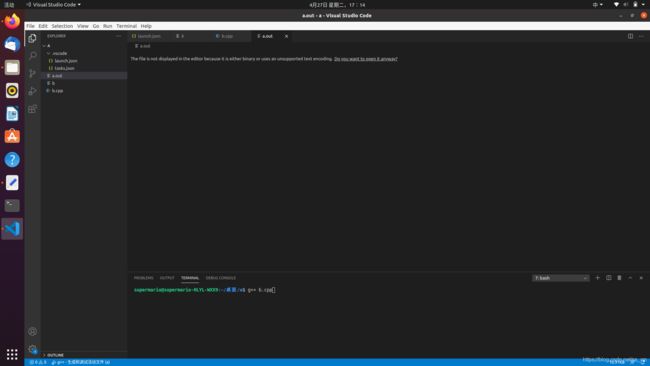
4.运行a.out 文件即可运行程序
注释
1.此方法存在一个缺陷:即一次只能编译一个cpp文件,无法同时编译多个cpp文件
2.在launch.json文件中,
"externalConsole": false,
false 代表结果将会在VS终端中显示
改为true后,结果将会以Ubuntu系统的终端形式弹窗出结果