eureka,springboot admin搭建
上一篇:springcloud多模块项目搭建(一)
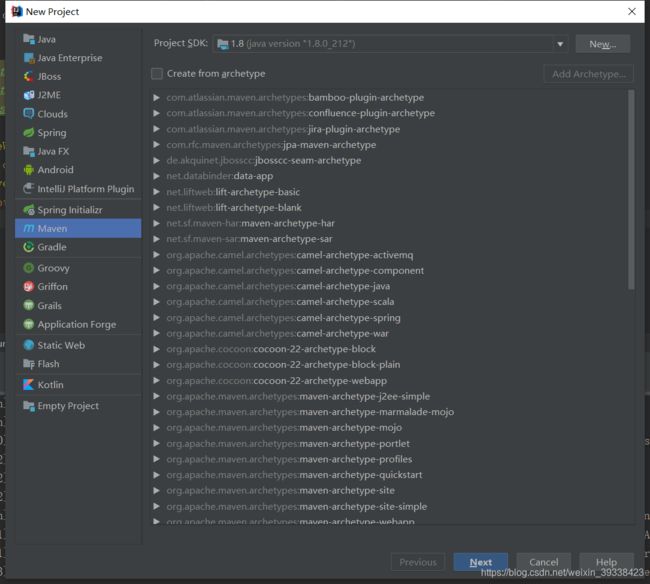
创建maven父工程
父工程只是用户汇总eureka,springcloud config sever等之类的基础设施,通过maven创建即可。
- idea -> file -> new -> project,选maven方式,直接点击next
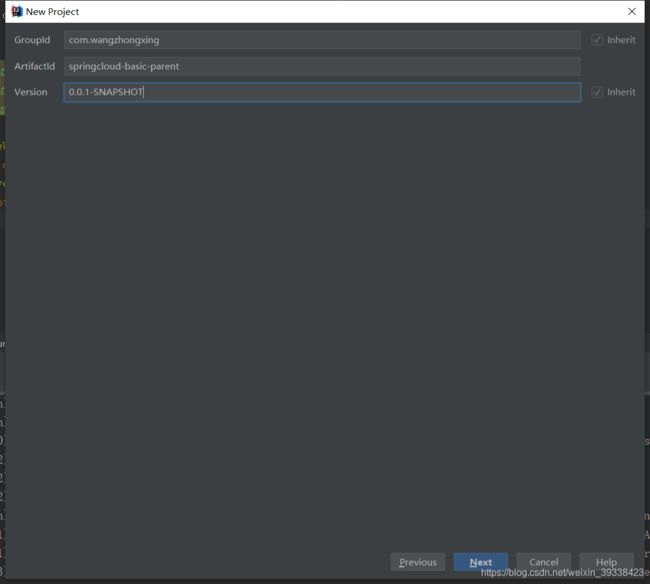
- 输入GroupID,AritfactId,Version,点击next
- 输入工程名和本地存放地址,点击finish
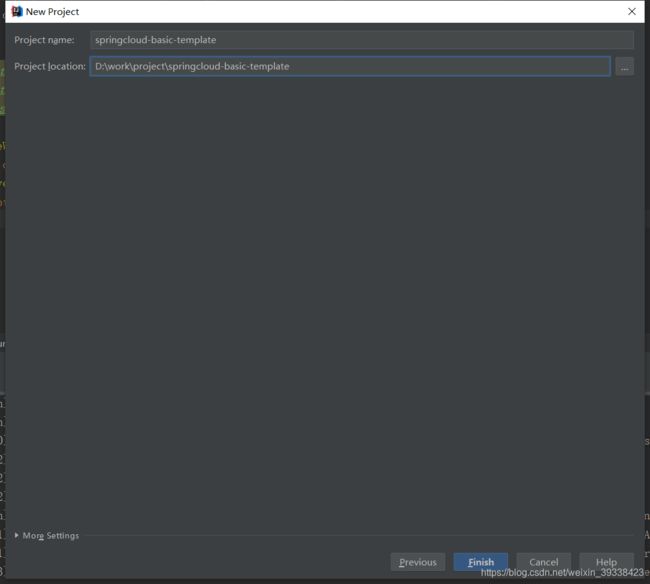
- 生成父工程后可删除src目录和pom.xml文件
创建eureka模块
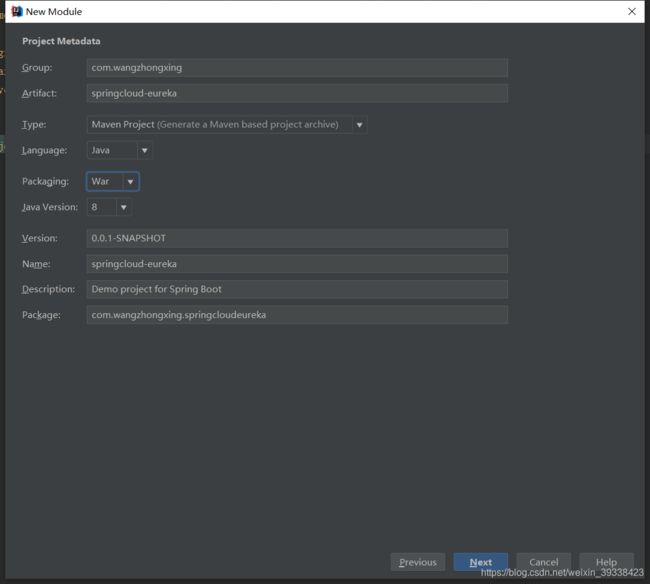
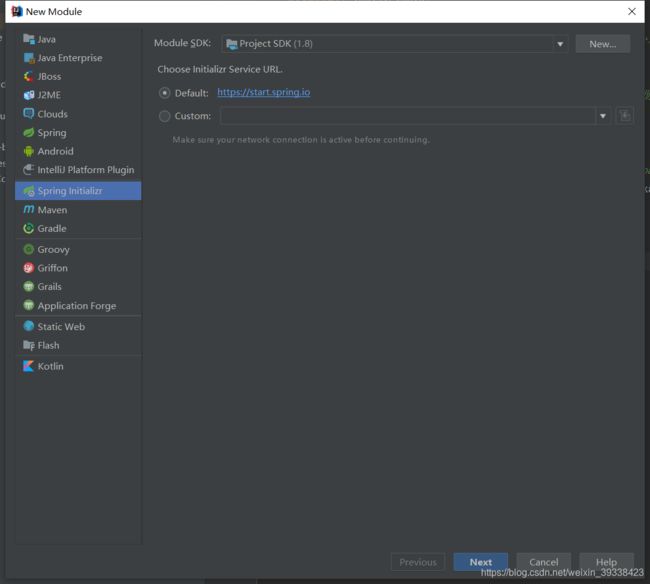
- 点击父工程根目录,右键 new -> Module,选择Spring Initializr,点击next

- 设置对应的选项,点击next
- 左上角选择Spring Boot版本,这里选用的是2.1.8,并添加Eureka Sever依赖(由于springboot和springcloud间的版本依赖关系较为混乱,不同版本之间有时候互不兼容,这里让idea自动去生成两者的版本映射),我后来做过eureka版本升级,当前我用的spring boot版本是2.4.6,点击next
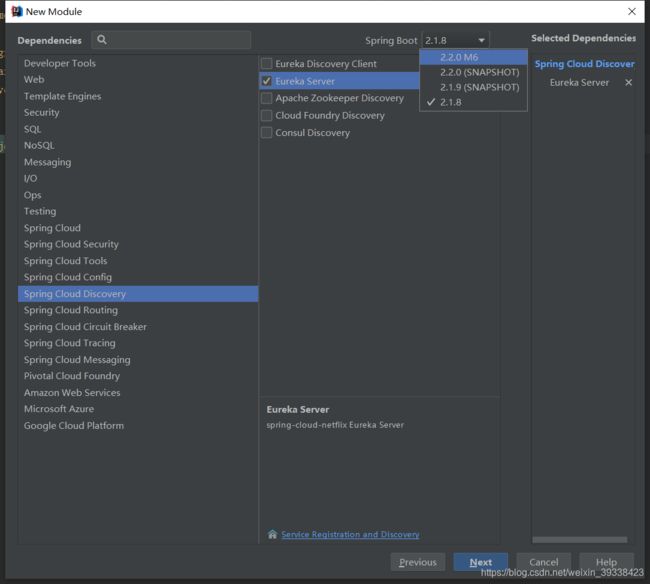
- 检查配置后点击finish
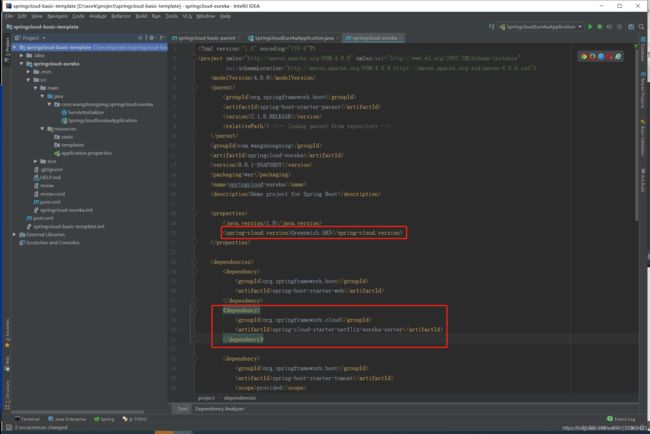
生成后的文件目录和pom依赖如下,会自动生成当前springboot适合的springcloud版本,关于两者的版本之间的映射关系可以在网上查找。springcloud各版本之间是有区别的,这里生成的eureka的aritifactId为spring-cloud-starter-netflix-eureka-server,springboot1x对应的springcloud版本依赖的eureka的aritifactId为spring-cloud-starter-eureka-server,不同版本之间依赖的包名有会不一样,给版本升级、维护带来一定的困难和风险。
- 在resource目录下分别添加application.yml, application-server1.yml, application-server2.yml 配置文件,配置信息如下:
application.yml代码配置:
spring.profiles.active属性可以指定引入的配置文件
spring:
  application:
    name: eureka-service
  # 安全认证相关配置
  security:
    basic:
      enabled: true
    user:
      # eureka管理后台登录用户名
      name: admin
      # eureka管理后台登录用户密码
      password: 1234567
  profiles:
    # 部署eureka server1时引入server1配置文件,部署eureka server2时引入server2配置文件,来启动不同的eureka实例
    active: eurekaServer1

server:
  port: 8090
  servlet:
    # 配置访问路径,如果配置该选项,则访问eureka server管理平台,访问路径中需要多加上 context-path 配置的路径
    # eureka client 配置 eureka.client.service-url.defaultZone 时也要多加上 context-path 配置的路径
    context-path: /eureka
application-eurekaServer1.yml代码配置:
eureka:
  server:
    # 关闭自我保护机制,默认值开启自我保护机制
    # 自我保护机制:默认情况下,如果Eureka Server在一定时间内没有接收到某个微服务实例的心跳,Eureka Server将会注销该实例(默认90秒)。
    # 当Eureka Server在短时间内丢失过多的客户端时(可能发生了网络故障),Eureka Server将进入自我保护模式,不再注销任何微服务,
    # 网络故障回复后Eureka Server会自动退出自我保护模式。如果Eureka Server和客户端是部署在同一局域网下,网络故障的可能性较低,可以关闭自我保护机制。
    enable-self-preservation: false
    # 清理无效节点的时间间隔(单位毫秒,默认是60*1000)
    eviction-interval-timer-in-ms: 60000
  instance:
    # hostname 服务实例唯一标识,不能重复,
    # 这里配置的hostname必须要在部署服务器的 /etc/hosts 文件中绑定对应的主机名,否则分布式部署的时候会导致 unavailable-replicas
    hostname: eurekaServer1
    # preferIpAddress=true时,将ipAddress配置的IP地址注册到eureka server,
    # preferIpAddress=false时,将eureka.instance.hostname注册到eureka server
    prefer-ip-address: false
  client:
    # 是否向注册中心注册自己,设为false则能从集群注册中心发现其它服务的实例,但自己无法被其它服务所发现
    # eureka server单机部署时该项配置可设置为false
    # eureka server分布式部署时该项配置必须设置为true,否则不同eureka server实例之间无法互相备份
    register-with-eureka: true
    # 是否从集群注册中心拉取注册服务信息
    # eureka server单机部署时该项配置可设置为false
    # eureka server分布式部署时该项配置必须设置为true,否则不同eureka server实例之间无法互相备份
    fetch-registry: true
    service-url:
      # register self to eureka_server1, 格式为http://username:password@ip:port/eureka
      defaultZone: http://admin:1234567@eurekaServer2:8090/eureka/eureka
application-eurekaServer2.yml代码配置:
eureka:
  server:
    # 关闭自我保护机制,默认值开启自我保护机制
    # 自我保护机制:默认情况下,如果Eureka Server在一定时间内没有接收到某个微服务实例的心跳,Eureka Server将会注销该实例(默认90秒)。
    # 当Eureka Server在短时间内丢失过多的客户端时(可能发生了网络故障),Eureka Server将进入自我保护模式,不再注销任何微服务,
    # 网络故障回复后Eureka Server会自动退出自我保护模式。如果Eureka Server和客户端是部署在同一局域网下,网络故障的可能性较低,可以关闭自我保护机制。
    enable-self-preservation: false
    # 清理无效节点的时间间隔(单位毫秒,默认是60*1000)
    eviction-interval-timer-in-ms: 60000
  instance:
    # hostname 服务实例唯一标识,不能重复,
    # 这里配置的hostname必须要在部署服务器的 /etc/hosts 文件中绑定对应的主机名,否则分布式部署的时候会导致 unavailable-replicas
    hostname: eurekaServer2
    # preferIpAddress=true时,将ipAddress配置的IP地址注册到eureka server,
    # preferIpAddress=false时,将eureka.instance.hostname注册到eureka server
    prefer-ip-address: false
  client:
    # 是否向注册中心注册自己,设为false则能从集群注册中心发现其它服务的实例,但自己无法被其它服务所发现
    # eureka server单机部署时该项配置可设置为false
    # eureka server分布式部署时该项配置必须设置为true,否则不同eureka server实例之间无法互相备份
    register-with-eureka: true
    # 是否从集群注册中心拉取注册服务信息
    # eureka server单机部署时该项配置可设置为false
    # eureka server分布式部署时该项配置必须设置为true,否则不同eureka server实例之间无法互相备份
    fetch-registry: true
    service-url:
      # register self to eureka_server1, 格式为http://username:password@ip:port/eureka
      defaultZone: http://admin:1234567@eurekaServer1:8090/eureka/eureka
- 在springboot启动类上加上 @EnableEurekaServer注解
启动工程,会报:com.netflix.discovery.shared.transport.TransportException: Cannot execute request on any known server 的错误,是由于springboot2x以上的版本,的security默认启用了csrf检验,要在eurekaServer端配置security的csrf检验为false,改动如下:
pom引入依赖:
        <dependency>
            <groupId>org.springframework.bootgroupId>
            <artifactId>spring-boot-starter-securityartifactId>
        dependency>
添加WebSecurityConfig 类,继承WebSecurityConfigurerAdapter,重写configure 方法,在configure方法里关闭csrf
package com.wangzhongxing.springcloud.eureka;

import org.springframework.security.config.annotation.web.builders.HttpSecurity;
import org.springframework.security.config.annotation.web.configuration.EnableWebSecurity;
import org.springframework.security.config.annotation.web.configuration.WebSecurityConfigurerAdapter;

/**
 * @Auther: wangzhongxing
 * @Date: 2019/9/16 16:43
 * @Description: springboot2x以上的版本,的security默认启用了csrf检验,要在eurekaServer端配置security的csrf检验为false
 *
 */
@EnableWebSecurity
public class WebSecurityConfig extends WebSecurityConfigurerAdapter {
    @Override
    protected void configure(HttpSecurity http) throws Exception {
        http.csrf().disable();
        super.configure(http);
    }
}
- 本地模拟多节点集群,hosts文件绑定
#eureka模拟集群绑定hosts
127.0.0.1 eurekaServer1
127.0.0.1 eurekaServer2
idea配置两个springboot启动类,将application.yml中的spring.profiles.active属性值设为server1,启动第一个启动类,在将spring.profiles.active属性值设为server2,启动第二个启动类,访问
http://localhost:8761/ 和 http://localhost:8762/ ,输入用户名密码登录eureka管理界面。

pom文件完整配置如下:
<project xmlns="http://maven.apache.org/POM/4.0.0" xmlns:xsi="http://www.w3.org/2001/XMLSchema-instance"
         xsi:schemaLocation="http://maven.apache.org/POM/4.0.0 https://maven.apache.org/xsd/maven-4.0.0.xsd">
    <modelVersion>4.0.0modelVersion>
    <parent>
        <groupId>org.springframework.bootgroupId>
        <artifactId>spring-boot-starter-parentartifactId>
        <version>2.4.6version>
        <relativePath/>
    parent>
    <groupId>com.wangzhongxinggroupId>
    <artifactId>springcloud-eurekaartifactId>
    <version>1.0.0version>
    <packaging>jarpackaging>
    <name>springcloud-eurekaname>
    <description>Demo project for Spring Bootdescription>

    <properties>
        <java.version>1.8java.version>
        <spring-cloud.version>2020.0.2spring-cloud.version>
    properties>

    <dependencies>
        <dependency>
            <groupId>org.springframework.bootgroupId>
            <artifactId>spring-boot-starter-webartifactId>
            <exclusions>
                <exclusion>
                    <groupId>org.springframework.bootgroupId>
                    <artifactId>spring-boot-starter-tomcatartifactId>
                exclusion>
            exclusions>
        dependency>
        <dependency>
            <groupId>org.springframework.cloudgroupId>
            <artifactId>spring-cloud-starter-netflix-eureka-serverartifactId>
        dependency>

        <dependency>
            <groupId>org.springframework.bootgroupId>
            <artifactId>spring-boot-starter-tomcatartifactId>
            <scope>providedscope>
        dependency>
        <dependency>
            <groupId>org.springframework.bootgroupId>
            <artifactId>spring-boot-starter-testartifactId>
            <scope>testscope>
        dependency>

        <dependency>
            <groupId>org.springframework.bootgroupId>
            <artifactId>spring-boot-starter-securityartifactId>
        dependency>

    dependencies>

    <dependencyManagement>
        <dependencies>
            <dependency>
                <groupId>org.springframework.cloudgroupId>
                <artifactId>spring-cloud-dependenciesartifactId>
                <version>${spring-cloud.version}version>
                <type>pomtype>
                <scope>importscope>
            dependency>
        dependencies>
    dependencyManagement>

    <build>
        <plugins>
            <plugin>
                <groupId>org.apache.maven.pluginsgroupId>
                <artifactId>maven-compiler-pluginartifactId>
                <version>3.1version>
                <configuration>
                    <source>${java.version}source>
                    <target>${java.version}target>
                configuration>
            plugin>
            <plugin>
                <groupId>org.apache.maven.pluginsgroupId>
                <artifactId>maven-surefire-pluginartifactId>
                <version>2.19.1version>
                <configuration>

                    <skipTests>trueskipTests>
                configuration>
            plugin>
            <plugin>
                <groupId>org.springframework.bootgroupId>
                <artifactId>spring-boot-maven-pluginartifactId>
                <configuration>

                    <mainClass>com.wangzhongxing.springcloud.eureka.SpringcloudEurekaApplicationmainClass>
                    <layout>ZIPlayout>
                configuration>
                <executions>
                    <execution>
                        <goals>
                            <goal>repackagegoal>
                        goals>
                    execution>
                executions>
            plugin>
        plugins>
    build>

project>
创建springboot admin模块
- 点击父工程根目录,右键 new -> Module,选择Spring Initializr,点击next
- 输入Group, Artifact, Packaging选择war,点击next

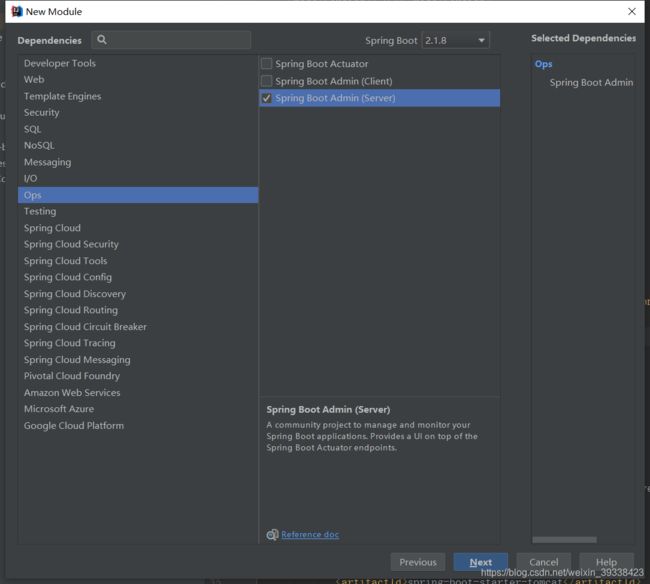
- 选择Spring Boot Admin(Server)相关依赖,Spring Boot版本选择2.1.8,点击next
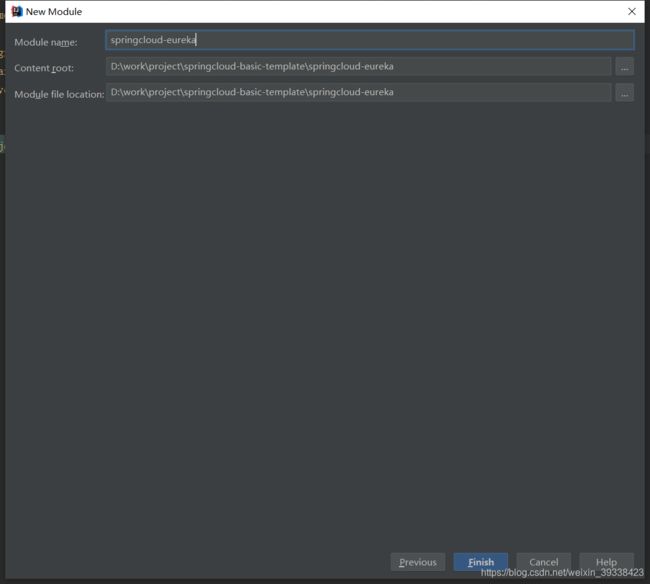
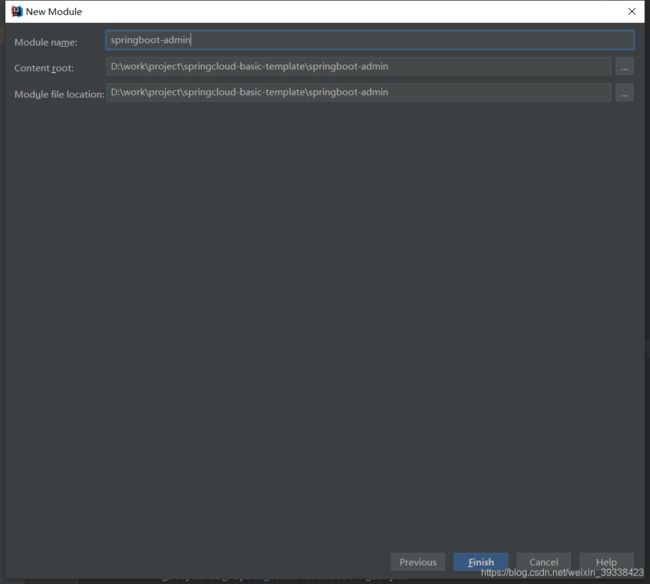
- 设置模块名称和存储路径,点击Finish
spring boot admin 2.1.5 官方文档
集成Spring Security
spring boot admin默认不提供身份验证和授权机制,需要自己集成Spring Security实现登录权限管控。
- 在生成好的pom文件中添加springboot 安全认证相关依赖,设置登录监控管理平台的账号和密码,不然默认是免密码登录的,spring-boot-starter-security的版本号会自动根据springboot的版本选取
        <dependency>
            <groupId>org.springframework.bootgroupId>
            <artifactId>spring-boot-starter-securityartifactId>
        dependency>
- 添加安全配置类SpringBootAdminWebSecurityConfig,不然启动client后授权会失败
package com.wangzhongxing.springbootadmin;

import org.springframework.security.config.annotation.web.builders.HttpSecurity;
import org.springframework.security.config.annotation.web.configuration.EnableWebSecurity;
import org.springframework.security.config.annotation.web.configuration.WebSecurityConfigurerAdapter;

/**
 * @Auther: wangzhongxing
 * @Date: 2019/9/16 16:43
 * @Description: springboot2x以上的版本,默认启用了csrf检验,要在springboot admin端配置security的csrf检验为false
 *
 */
@EnableWebSecurity
public class SpringBootAdminWebSecurityConfig extends WebSecurityConfigurerAdapter {

    @Override
    protected void configure(HttpSecurity http) throws Exception {
        // @formatter:off
        SavedRequestAwareAuthenticationSuccessHandler successHandler = new SavedRequestAwareAuthenticationSuccessHandler();
        successHandler.setTargetUrlParameter("redirectTo");
        successHandler.setDefaultTargetUrl(adminContextPath + "/");

        http.authorizeRequests()
                // 	授予对所有静态资产和登录页面的公共访问权限
                .antMatchers(adminContextPath + "/assets/**").permitAll()
                .antMatchers(adminContextPath + "/login").permitAll()
                // 其他所有请求都必须经过验证
                .anyRequest().authenticated()
                .and()
                // 配置登录和注销
                .formLogin().loginPage(adminContextPath + "/login").successHandler(successHandler).and()
                .logout().logoutUrl(adminContextPath + "/logout").and()
                // 启用HTTP基本支持。这是Spring Boot Admin Client注册所必需的。
                .httpBasic().and()
                // 使用Cookies启用CSRF保护
                .csrf().csrfTokenRepository(CookieCsrfTokenRepository.withHttpOnlyFalse())
                .ignoringAntMatchers(
                        // 禁用CRSF保护Spring Boot Admin Client用于注册的端点。
                        adminContextPath + "/instances",
                        // 对执行器端点禁用CRSF-Protection。
                        adminContextPath + "/actuator/**"
                );
        // @formatter:on
    }
}
- application.yml添加如下配置:
spring:
  application:
    # 应用名
    name: springboot-admin-server
  # 安全认证相关配置
  security:
    basic:
      enabled: true
    user:
      # eureka管理后台登录用户名
      name: admin
      # eureka管理后台登录用户密码
      password: 123456

# 定义日志文件输出路径,服务端不配置该路径监控界面显示红字提示:Fetching logfile failed.Request failed with status code 404
logging:
  file: /opt/apache-tomcat-8.5.28/logs/openapiGateway/springbootAdmin.log

server:
  port: 8763
在springboot启动类上加上@EnableAdminServer注解,运行启动类,
访问:http://localhost:8763
输入登录账号密码,界面信息如下:
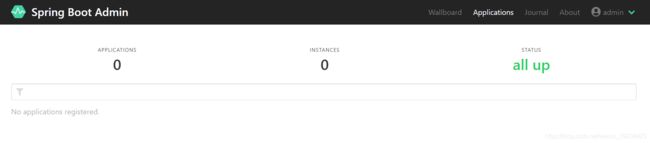
当前没有任何监控中的应用
创建监控的client应用
- client添加spring-boot-admin-starter-client依赖,在上一篇创建的springcloud模板工程的web模块中添加添加相关的配置,web模块的pom文件中添加依赖(springboot版本是2.1.8.RELEASE):
        <dependency>
            <groupId>de.codecentricgroupId>
            <artifactId>spring-boot-admin-starter-clientartifactId>
            <version>2.1.5version>
        dependency>
- 在web模块下添加一个application-springbootadmin.yml文件用于配置springboot admin,在application.yml的active配置中引入application-springbootadmin.yml相关配置,application-springbootadmin.yml完整配置信息如下:
spring:
  # spring boot admin配置
  boot:
    admin:
      client:
        # spring boot admin server地址,如果spring boot server是部署到外部Tomcat中,需要带上Tomcat中webapp的路径
        url: http://ip:8080/springbootAdmin
        # spring boot admin管理平台登录账号名
        username: admin
        # spring boot admin管理平台登录账号密码
        password: 123456
        instance:
          # Base url for computing the service-url to register with. The path is inferred at runtime, and appended to the base url.
          # spring boot admin client的地址,该属性值与client的hostname, server.port有关,与访问路径无关
          # client部署在Tomcat时也只要配置hostname:port即可,无需配置Tomcat的访问路径
          service-base-url: http://ip:8080
          metadata:
            # These two are needed so that the server can access the protected client endpoints
            user.name: admin
            user.password: 123456

# spring boot admin 监控信息相关配置
management:
  health:
    # 忽略redis健康检查,只要有一项的健康检查不通过,系统整体就是down的状态,会触发报警邮件
    redis:
      enabled: false
  endpoints:
    web:
      exposure:
        # actuator开放端点配置,默认只开放health,info两个端点,*表示监控所有端点(必须加单引号,不然启动会报错)
        include: '*'
  endpoint:
    logfile:
      # spring boot admin  client不配置日志文件路径(同时配置logback-spring.xml对应的日志输出配置,否则无法输出日志),
      # 控制台上的Logging模块下的Logfile会报错:Fetching logfile failed.Request failed with status code 404
      external-file: /opt/apache-tomcat-8.5.28/logs/springbootAdmin.log
      enabled: true
    health:
      # Always show full health details.
      show-details: always
在logback-spring.xml文件中添加日志打印相关的配置:
    <appender name="SPRINGBOOT-ADMIN-LOGGER" class="ch.qos.logback.core.rolling.RollingFileAppender">
        <append>trueappend>

        <filter class="ch.qos.logback.classic.filter.ThresholdFilter">
            <level>infolevel>
        filter>

        <file>${logging.path}/springbootAdmin.logfile>

        <rollingPolicy class="ch.qos.logback.core.rolling.TimeBasedRollingPolicy">

            <FileNamePattern>${logging.path}/springbootAdmin.log.%d{yyyy-MM-dd}
            FileNamePattern>

            <MaxHistory>7MaxHistory>
        rollingPolicy>
        <encoder class="ch.qos.logback.classic.encoder.PatternLayoutEncoder">

            <pattern>%d{yyyy-MM-dd HH:mm:ss.SSS} [%thread] %-5level %logger{50} - %msg%npattern>

            <charset>UTF-8charset>
        encoder>
    appender>
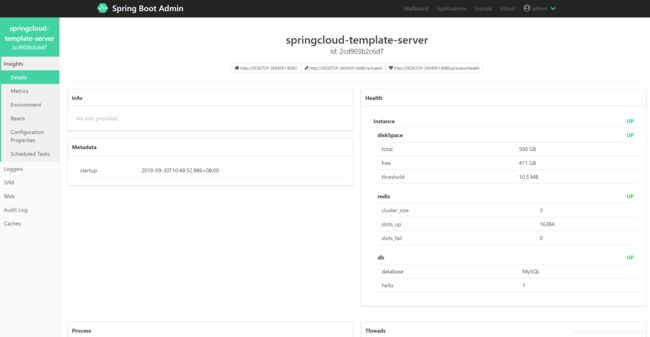
- 启动client应用,刷新spring boot admin监控平台,发现已经监控到一个应用了
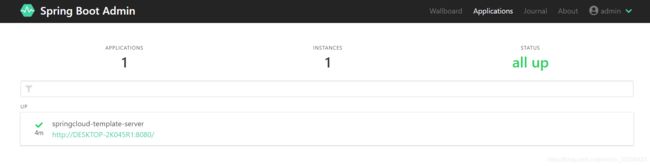
点击Wallboard,选择对应的应用,可以监控到系统、JVM、springboot配置等相关的内容。
服务下线发送邮件通知
- spring boot admin server pom文件引入mail相关依赖:
        <dependency>
            <groupId>org.springframework.bootgroupId>
            <artifactId>spring-boot-starter-mailartifactId>
        dependency>
- 在spring bootadmin server web模块下的application-springbootadmin.yml文件中增加发送邮件相关的配置,完整配置如下:
spring:
  application:
    name: springboot-admin-server
  # spring security安全认证相关配置
  security:
    basic:
      enabled: true
    user:
      # eureka管理后台登录用户名
      name: admin
      # eureka管理后台登录用户密码
      password: 123456
  # spring boot admin发送监控邮件配置
  mail:
    # 邮箱服务器地址
    host: smtp.163.com
    # 发送邮件的邮箱账号
    username: [email protected]
    # 发送邮件的邮箱密码(授权码)
    password: xxx
    properties:
      mail:
        smtp:
          # 安全认证,默认为true
          auth: true
          # starttls:对纯文本通信协议的扩展。它提供一种方式将纯文本连接升级为加密连接(TLS或SSL)
          starttls:
            # #关闭ssl加密
            enable: false
            required: false
    # 邮件服务器端口号,根据邮件服务商该端口号会有所不同
#    port: 80
    protocol: smtp
  boot:
    admin:
      notify:
        mail:
          # 邮件发送发
          from: [email protected]
          # 邮件接收方
          to: [email protected]
          enabled: true
          # List of changes to ignore. Must be in Format OLD:NEW, for any status use * as wildcard,e.g. *:UP or OFFLINE:*,
          # default value UNKNOWN:UP
          ignore-changes: UNKNOWN:UP,UNKNOWN:OFFLINE,OFFLINE:UP
#      monitor:
        # 被监控的应用信息的过期时间,单位毫秒,默认10S
#        status-lifetime:


# 定义日志文件输出路径,服务端不配置该路径监控界面显示红字提示:Fetching logfile failed.Request failed with status code 404
logging:
  file: /opt/apache-tomcat-8.5.28/logs/springbootAdmin.log


# 内置Tomcat时需要配置端口号,外部Tomcat部署无需配置
#server:
#  port: 8080
#  servlet:
#    context-path: /springbootAdmin
- 启动client应用,再停掉client应用,就会收到服务上线、下线的邮件通知

springcloud多模块项目搭建(一)
源码下载地址
https://gitee.com/joshua2019/springcloud-basic-template