Dubbo
Dubbo 实战
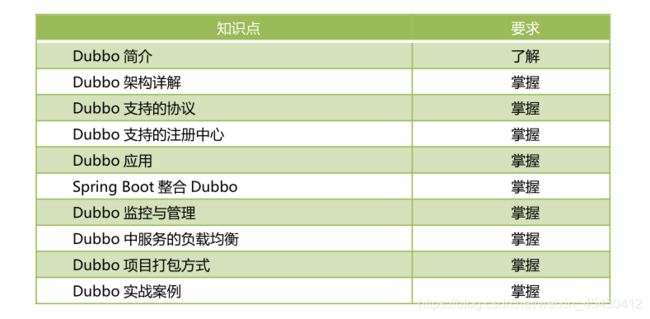
主要内容
Dubbo 简介
Dubbo 架构详解
Dubbo 支持的协议
Dubbo 支持的注册中心
Dubbo 应用
Spring Boot 整合 Dubbo
Dubbo 监控与管理
Dubbo 中服务的负载均衡
Dubbo 项目打包方式
Dubbo 实战案例
学习目标
一、 Dubbo 简介
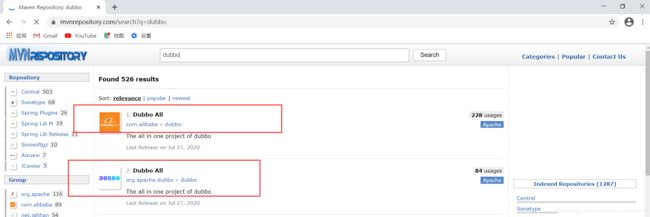
1 Dubbo 是什么

Dubbo 官网地址: http://dubbo.apache.org/zh-cn/
Dubbo 最早是 Alibaba 开源的分布式服务框架,它最大的特点是按照分层的方式来架构,
使用这种方式可以使各个层之间解耦合(或者最大限度地松耦合)。从服务模型的角度来看,
Dubbo 采用的是一种非常简单的模型,要么是提供方提供服务,要么是消费方消费服务,所以基于这一点可以抽象出服务提供方(Provider)和服务消费方(Consumer)两个角色。
2 发展历史
Dubbo 是最开始是阿里巴巴内部使用的 RPC 框架。
2011 年对外提供。
2012 年停止更新。
2017 年开始继续更新。
2019 年捐献给 Apache,由 Apache 维护 2.7 以上版本。
3 Dubbo 能做什么
Dubbo 可实现透明化的远程方法调用,就像调用本地方法一样调用远程方法,只需简单配置即可,没有任何 API 侵入。
软负载均衡及容错机制,可在内网替代 F5 等硬件负载均衡器,降低成本,减少单点。
服务自动注册与发现,不再需要写死服务提供方地址,注册中心基于接口名查询服务提供者的 IP 地址并且能够平滑添加或删除服务提供者。
4 Dubbo 产生的背景
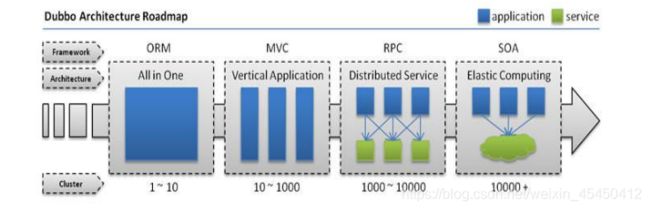
单一应用架构(单体架构)
当网站流量很小时,只需一个应用,将所有功能都部署在一起,以减少部署节点和成本。
此时,用于简化增删改查工作量的数据访问框架(ORM) 是关键。
垂直应用架构
当访问量逐渐增大,单一应用增加机器带来的加速度越来越小,将应用拆成互不相干的几个应用,以提升效率。此时,用于加速前端页面开发的 Web 框架(MVC) 是关键。
分布式服务架构(RPC 架构)
当垂直应用越来越多,应用之间交互不可避免,将核心业务抽取出来,作为独立的服务,逐渐形成稳定的服务中心,使前端应用能更快速的响应多变的市场需求。此时,用于提高业务复用及整合的分布式服务框架(RPC) 是关键。
流动计算架构(SOA 架构)
当服务越来越多,容量的评估,小服务资源的浪费等问题逐渐显现,此时需增加一个调度中心基于访问压力实时管理集群容量,提高集群利用率。此时,用于提高机器利用率的资源调度和治理中心(SOA) 是关键。
二、 Dubbo 架构讲解
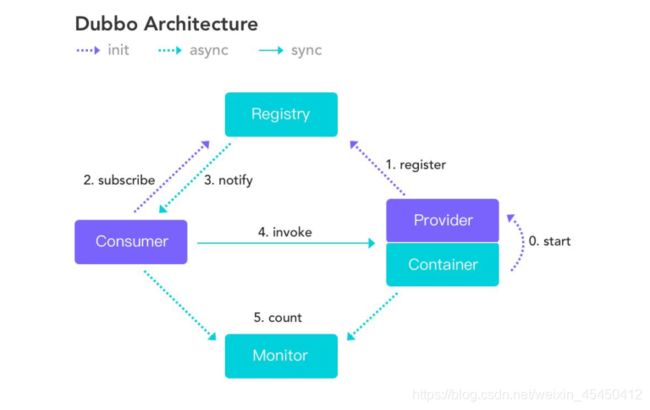
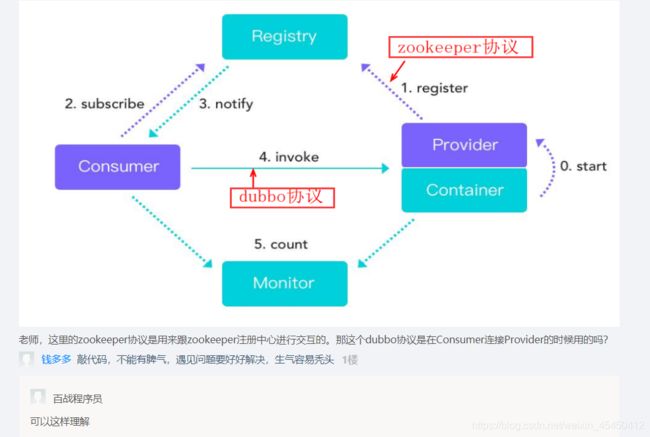
1 架构图
2 架构说明
2.1虚线
虚线表示异步,实线表示同步。异步不阻塞线程性能高,同步阻塞线程必须等待响应结果才能继续执行,相对性能低。
2.2Provider
暴露服务的服务提供方。
2.3Container
服务运行容器。Dubbo 完全基于 Spring 实现的。相当于Spring的IOC容器
2.4Registry
服务注册与发现的注册中心。注册中心,放置所有 Provider 对外提供的信息。包含Provider 的 IP,访问端口,访问遵守的协议,对外提供的接口,接口中有哪些方法等相关信息。
2.5Consumer
调用远程服务的服务消费方。
2.6Monitor
统计服务的调用次调和调用时间的监控中心。监控中心,监控 Provider 的压力情况等。
每隔 2 分钟 Consumer 和 Provider 会把调用次数发送给 Monitor,由 Monitor 进行统计。
3 执行流程
-
start:启动 Spring 容器时会把 Provider 启动。
-
register:把 Provider 相关信息注册到 Registry 里 服务的注册与发布
-
subscribe:Consumer 从 Registry 中订阅 Provider 的信息
-
notify:通知给 Consumer
-
invoke:Consumer 根据 Registry 通知的信息进行调用 Provider 中方法。基于同步的方式调用
Consumer调用Provider有线程阻塞,只有Provider执行完了,Consumer的代码才会继续往下走
-
count:Consumer 和 Provider 把调用次数信息异步发送给 Monitor 进行统计。
三、 Dubbo 支持的协议
1 Dubbo 协议(官方推荐协议)
优点:
采用 NIO 复用单一长连接,并使用线程池并发处理请求,减少握手和加大并发效率,
性能较好(推荐使用)
缺点:
大文件上传时,可能出现问题(不使用 Dubbo 文件上传)
2 RMI(Remote Method Invocation)协议
优点:
JDK 自带的能力。
缺点:
偶尔连接失败.
3 Hessian 协议
优点:
可与原生 Hessian 互操作,基于 HTTP 协议
缺点:
需 hessian.jar 支持,http 短连接的开销大
四、 Dubbo 支持的注册中心
1 Zookeeper(官方推荐)
1) 优点:
支持分布式.很多周边产品.
2) 缺点:
受限于 Zookeeper 软件的稳定性。Zookeeper 是一款专门为分布式架构提供辅助型处理的软件,稳定较优。
2 Multicast
1) 优点:
去中心化,不需要单独安装软件.
2) 缺点:
2.2.1 Provider 和 Consumer 和 Registry 不能跨机房(路由)
3 Redis
1) 优点:
支持集群,性能高
2) 缺点:
要求服务器时间同步.否则可能出现集群失败问题.
4 Simple
1) 优点:
标准 RPC 服务.没有兼容问题
2) 缺点:
不支持集群.
五、 Dubbo 应用
Dubbo 在不同的版本中对于添加的依赖也是不同的。
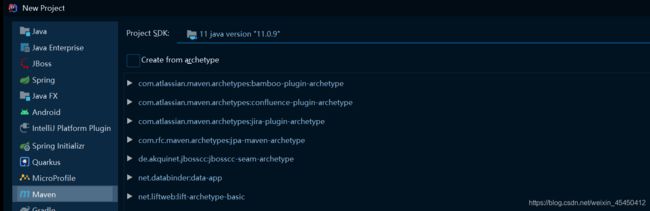
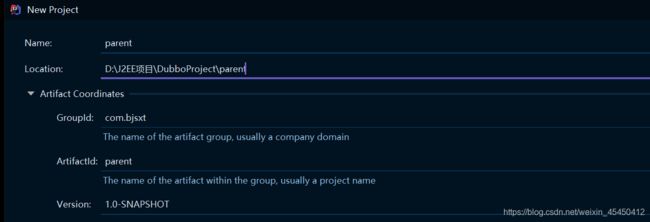
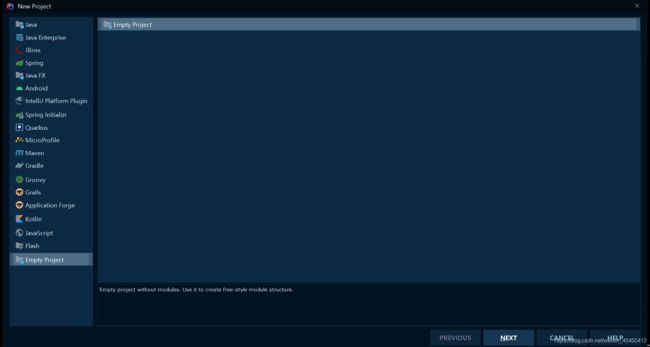
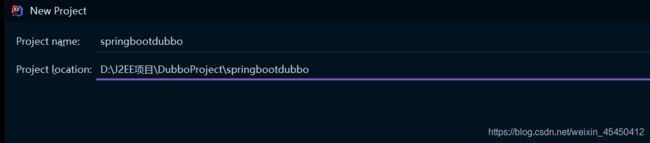
1 创建父工程
1.1创建项目

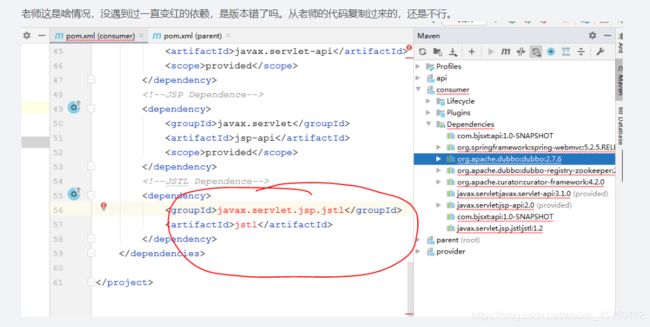
1.2修改 POM 文件添加依赖
<project xmlns="http://maven.apache.org/POM/4.0.0"
xmlns:xsi="http://www.w3.org/2001/XMLSchema-instance"
xsi:schemaLocation="http://maven.apache.org/POM/4.0.0 http://maven.apache.org/xsd/maven-4.0.0.xsd">
<modelVersion>4.0.0modelVersion>
<groupId>com.bjsxtgroupId>
<artifactId>parentartifactId>
<version>1.0-SNAPSHOTversion>
<packaging>pompackaging>
<properties>
<spring.version>5.2.5.RELEASEspring.version>
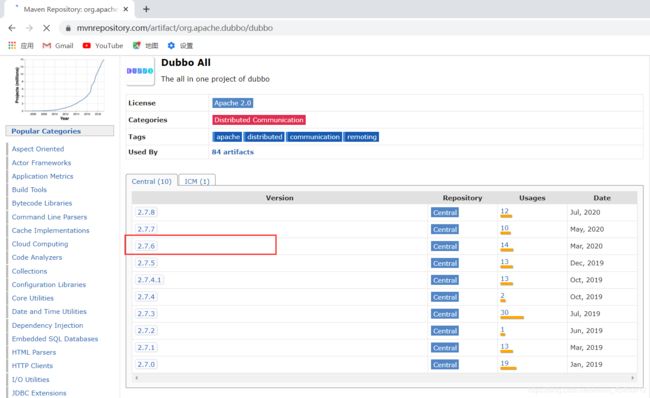
<dubbo.version>2.7.6dubbo.version>
<curator.version>4.2.0curator.version>
<registry-zookeeper.version>2.7.6registry-zookeeper.version>
<servlet.version>3.1.0servlet.version>
<jsp.version>2.0jsp.version>
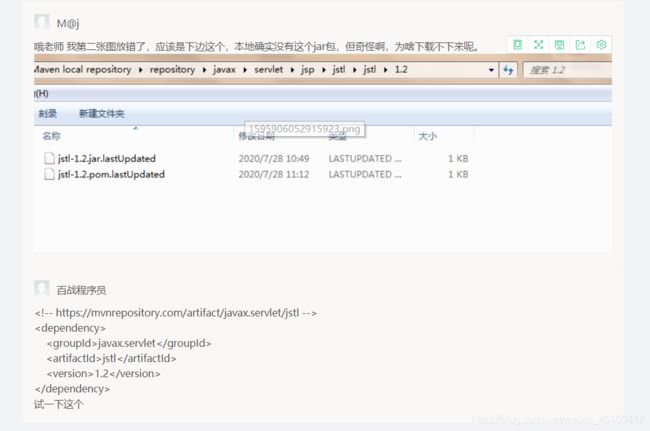
<jstl.version>1.2jstl.version>
properties>
<dependencyManagement>
<dependencies>
<dependency>
<groupId>org.springframeworkgroupId>
<artifactId>spring-contextartifactId>
<version>${spring.version}version>
dependency>
<dependency>
<groupId>org.springframeworkgroupId>
<artifactId>spring-webmvcartifactId>
<version>${spring.version}version>
dependency>
<dependency>
<groupId>org.apache.dubbogroupId>
<artifactId>dubboartifactId>
<version>${dubbo.version}version>
dependency>
<dependency>
<groupId>org.apache.dubbogroupId>
<artifactId>dubbo-registry-zookeeperartifactId>
<version>${registry-zookeeper.version}version>
dependency>
<dependency>
<groupId>org.apache.curatorgroupId>
<artifactId>curator-frameworkartifactId>
<version>${curator.version}version>
dependency>
<dependency>
<groupId>javax.servletgroupId>
<artifactId>javax.servlet-apiartifactId>
<version>${servlet.version}version>
<scope>providedscope>
dependency>
<dependency>
<groupId>javax.servletgroupId>
<artifactId>jsp-apiartifactId>
<version>${jsp.version}version>
<scope>providedscope>
dependency>
<dependency>
<groupId>javax.servlet.jsp.jstlgroupId>
<artifactId>jstlartifactId>
<version>${jstl.version}version>
dependency>
dependencies>
dependencyManagement>
<build>
<pluginManagement>
<plugins>
<plugin>
<groupId>org.apache.tomcat.mavengroupId>
<artifactId>tomcat7-maven-pluginartifactId>
<version>2.2version>
plugin>
plugins>
pluginManagement>
build>
project>
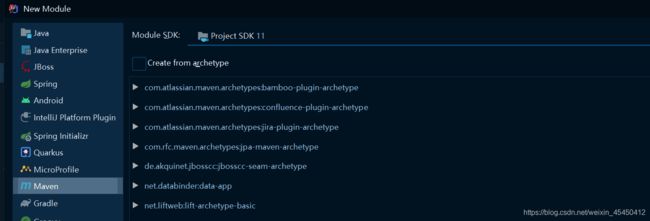
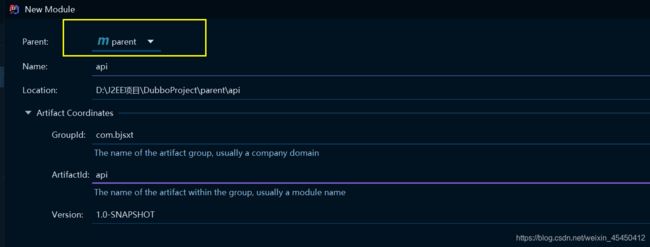
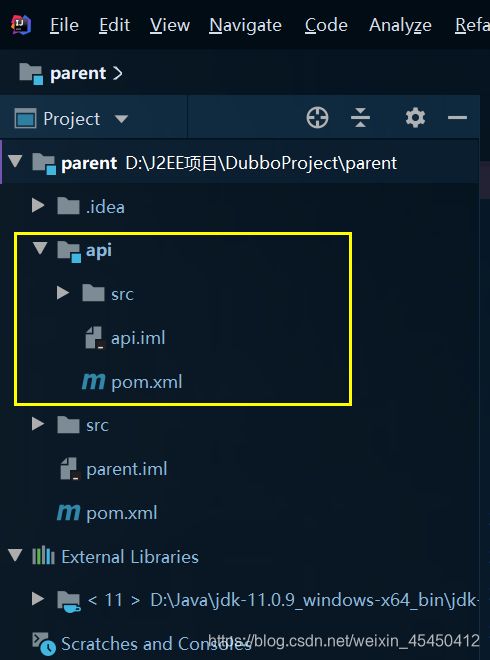
2 创建服务接口
2.1创建项目
在parent中创建模块
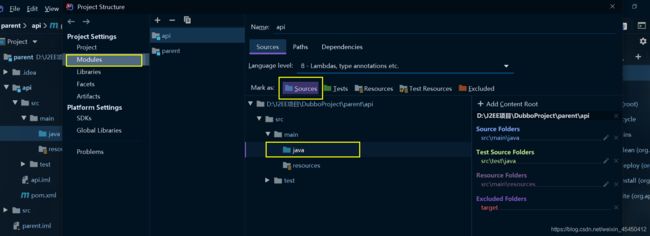
设置某个文件夹为存放源码的文件夹
2.2添加接口
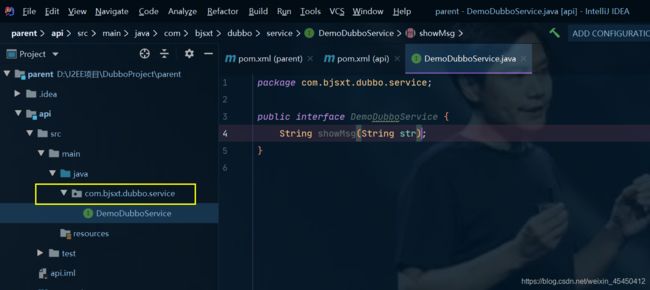
package com.bjsxt.dubbo.service;

public interface DemoDubboService {
    String showMsg(String str);
}
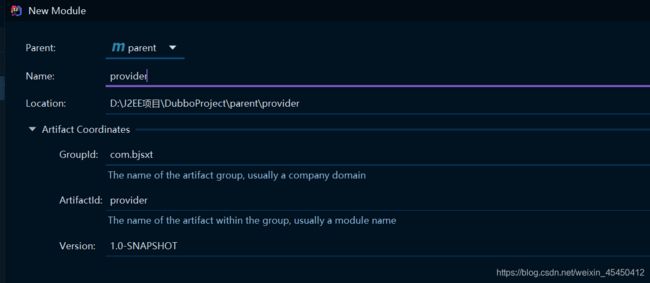
3 创建 Provider
3.1创建项目

3.2修改 POM 文件添加依赖
<project xmlns="http://maven.apache.org/POM/4.0.0"
xmlns:xsi="http://www.w3.org/2001/XMLSchema-instance"
xsi:schemaLocation="http://maven.apache.org/POM/4.0.0 http://maven.apache.org/xsd/maven-4.0.0.xsd">
<parent>
<artifactId>parentartifactId>
<groupId>com.bjsxtgroupId>
<version>1.0-SNAPSHOTversion>
parent>
<modelVersion>4.0.0modelVersion>
<artifactId>providerartifactId>
<dependencies>
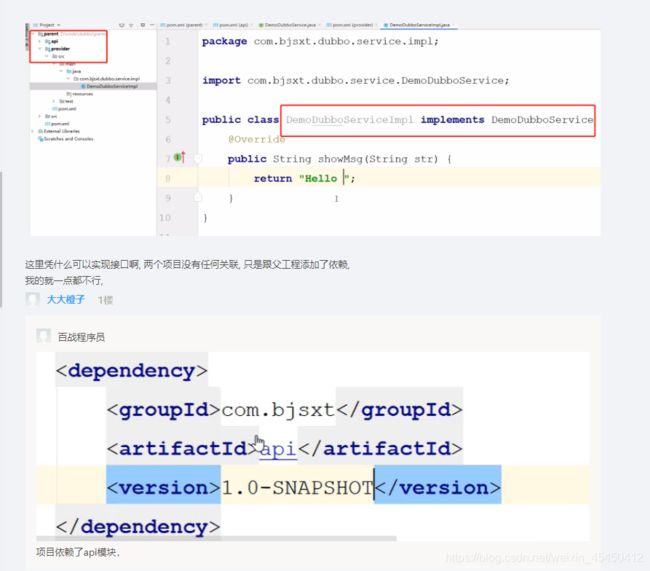
<dependency>
<groupId>com.bjsxtgroupId>
<artifactId>apiartifactId>
<version>1.0-SNAPSHOTversion>
dependency>
<dependency>
<groupId>org.springframeworkgroupId>
<artifactId>spring-webmvcartifactId>
dependency>
<dependency>
<groupId>org.apache.dubbogroupId>
<artifactId>dubboartifactId>
dependency>
<dependency>
<groupId>org.apache.dubbogroupId>
<artifactId>dubbo-registry-zookeeperartifactId>
dependency>
<dependency>
<groupId>org.apache.curatorgroupId>
<artifactId>curator-frameworkartifactId>
dependency>
dependencies>
project>
3.3添加接口实现
package com.bjsxt.dubbo.service.impl;

import com.bjsxt.dubbo.service.DemoDubboService;

public class DemoDubboServiceImpl implements DemoDubboService {

    @Override
    public String showMsg(String str) {
        return "Hello Dubbo " + str;
    }
}

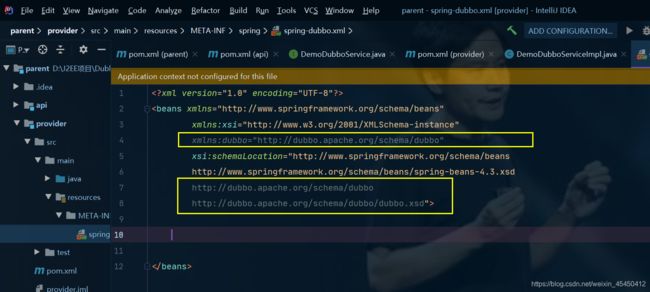
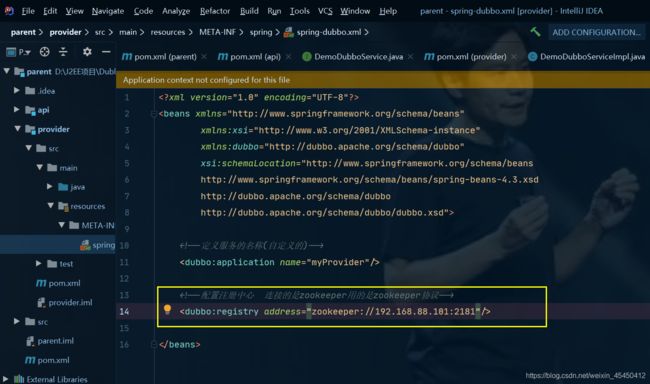
4 添加 Dubbo 的配置文件
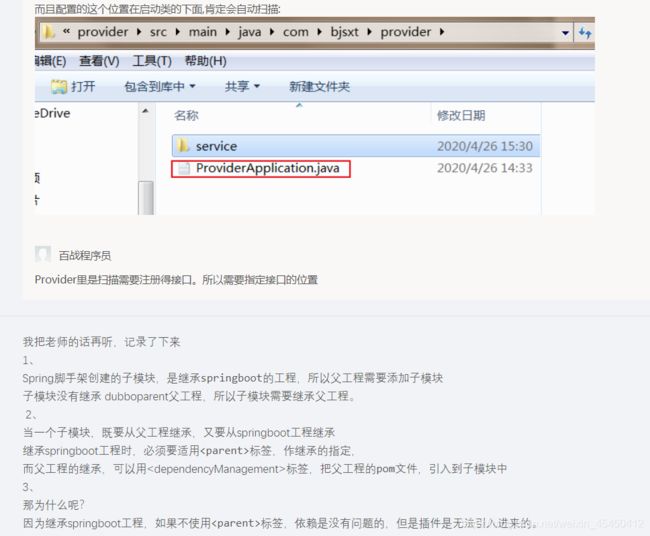
4.1Dubbo 配置文件的存放位置
配置文件类型就是spring的配置文件
配置文件必须放到 resources/META-INF/spring/*.xml 文件夹必须叫META-INF

开启命名空间
这样配置是链接单机版的zookeeper
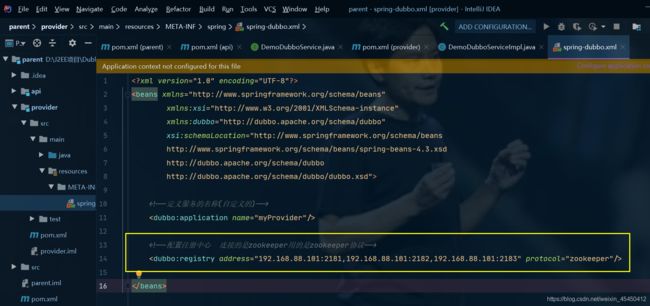
这样配置会以zookeeper协议链接集群中的每一个zookeeper结点
4.2配置文件内容
4.2.1 使用配置 bean 标签配置接口实现类
<beans xmlns="http://www.springframework.org/schema/beans"
        xmlns:xsi="http://www.w3.org/2001/XMLSchema-instance"
        xmlns:dubbo="http://dubbo.apache.org/schema/dubbo"
        xsi:schemaLocation="http://www.springframework.org/schema/beans
        http://www.springframework.org/schema/beans/spring-beans-4.3.xsd
        http://dubbo.apache.org/schema/dubbo
        http://dubbo.apache.org/schema/dubbo/dubbo.xsd">


    <dubbo:application name="myProvider"/>


    <dubbo:registry address="192.168.88.101:2181,192.168.88.101:2182,192.168.88.101:2183" protocol="zookeeper"/>


    <dubbo:protocol name="dubbo" port="20880"/>


    <dubbo:service interface="com.bjsxt.dubbo.service.DemoDubboService" ref="demoDubboService"/>


    <bean id="demoDubboService" class="com.bjsxt.dubbo.service.impl.DemoDubboServiceImpl"/>


beans>
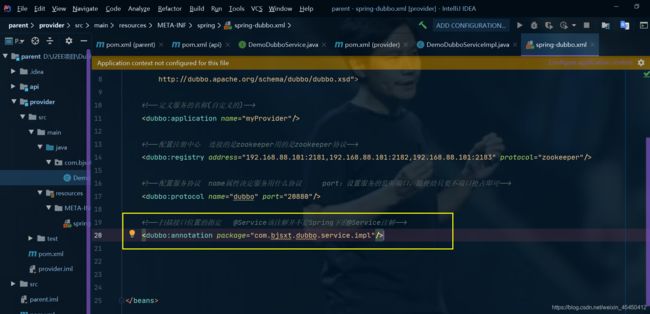
4.2.2 使用注解方式开发服务接口
4.2.2.1 需改配置文件
<beans xmlns="http://www.springframework.org/schema/beans"
        xmlns:xsi="http://www.w3.org/2001/XMLSchema-instance"
        xmlns:dubbo="http://dubbo.apache.org/schema/dubbo"
        xsi:schemaLocation="http://www.springframework.org/schema/beans
        http://www.springframework.org/schema/beans/spring-beans-4.3.xsd
        http://dubbo.apache.org/schema/dubbo
        http://dubbo.apache.org/schema/dubbo/dubbo.xsd">


    <dubbo:application name="myProvider"/>


    <dubbo:registry address="192.168.88.101:2181,192.168.88.101:2182,192.168.88.101:2183" protocol="zookeeper"/>


    <dubbo:protocol name="dubbo" port="20880"/>


    <dubbo:annotation package="com.bjsxt.dubbo.service.impl"/>


beans>
4.2.2.2 修改接口实现类
provider项目中的接口实现类用的注解并不是Spring下的@Service注解而是Dubbo下的注解
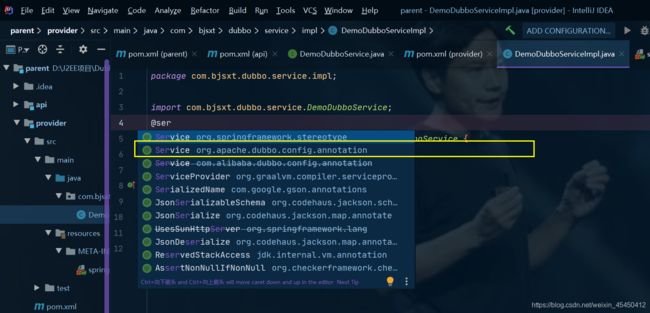
package com.bjsxt.dubbo.service.impl;

import com.bjsxt.dubbo.service.DemoDubboService;
import org.apache.dubbo.config.annotation.Service;

@Service    //使用的是Dubbo下的@Service注解
public class DemoDubboServiceImpl implements DemoDubboService {

    @Override
    public String showMsg(String str) {
        return "Hello Dubbo " + str;
    }
}
4.3启动 Provider
4.3.1 创建 Dubbo 启动类
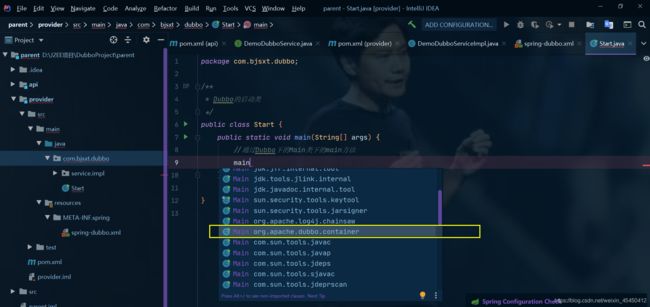
package com.bjsxt.dubbo;

import org.apache.dubbo.container.Main;

/**
 * Dubbo的启动类
 */
public class Start {
    public static void main(String[] args) {
        //通过Dubbo下的Main类下的main方法    会自动去META-INF下的spring目录下找dubbo的配置文件,所以dubbo的配置文件必须放到META-INF下的spring目录下
        Main.main(args);
    }

}
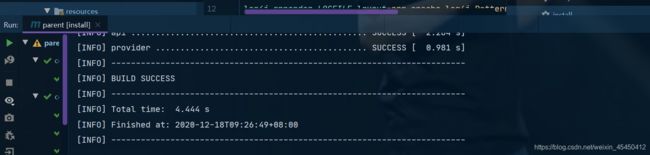
在启动之前在parent项目下安装这个项目

启动provider要保证zookeeper集群启动了
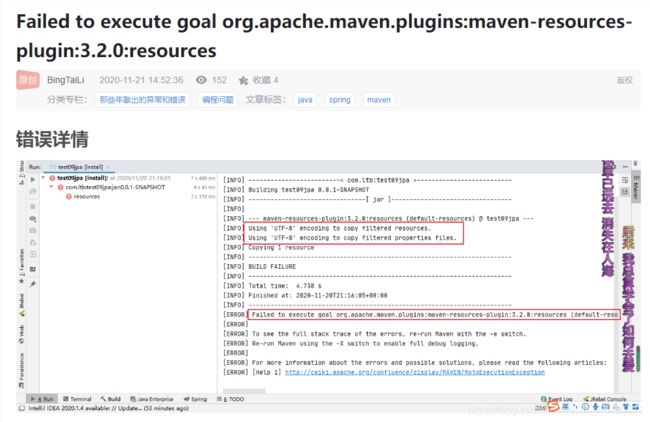
没有启动成功,但也没打印启动失败的原因,是因为没有添加日志配置文件

将日志配置文件放到resources目录下

重新安装
再运行启动类

在dubbo中默认连接zookeeper的超时时间是5秒,5秒之后如果没连接上就不会去连接了,连接失败的原因是超时时间
修改dubbo的配置文件设置超时时间
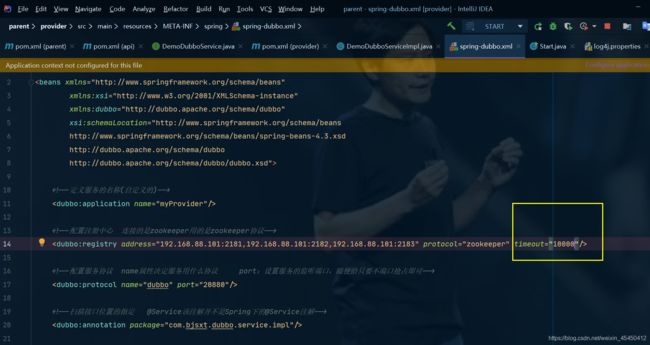
启动成功

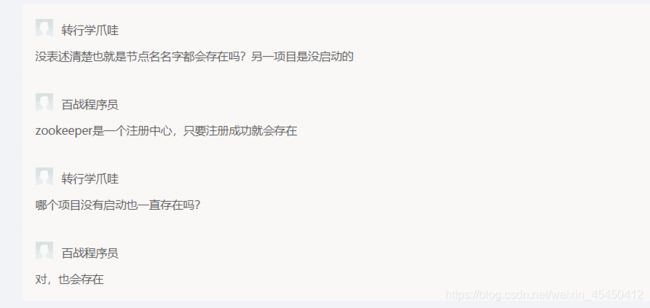
5 使用 Zookeeper 客户端工具查看注册信息
ls /dubbo/服务接口名称/providers
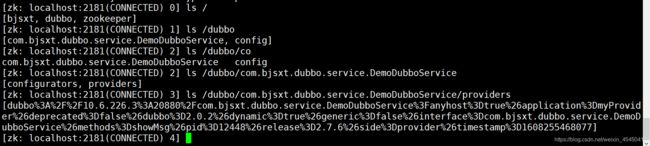
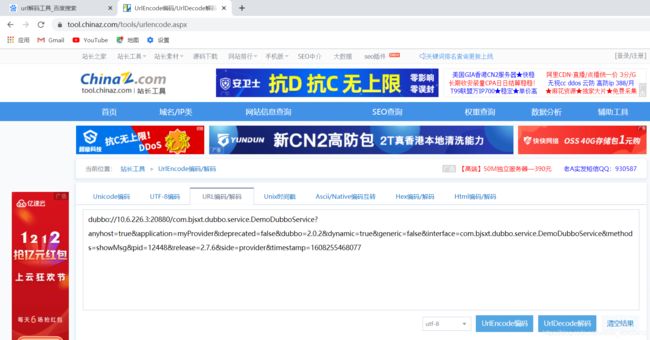
5.1解码前
dubbo%3A%2F%2F10.6.226.3%3A20880%2Fcom.bjsxt.dubbo.service.DemoDubboService%3Fanyhost%3Dtrue%26application%3DmyProvider%26deprecated%3Dfalse%26dubbo%3D2.0.2%26dynamic%3Dtrue%26generic%3Dfalse%26interface%3Dcom.bjsxt.dubbo.service.DemoDubboService%26methods%3DshowMsg%26pid%3D12448%26release%3D2.7.6%26side%3Dprovider%26timestamp%3D1608255468077
5.2解码后
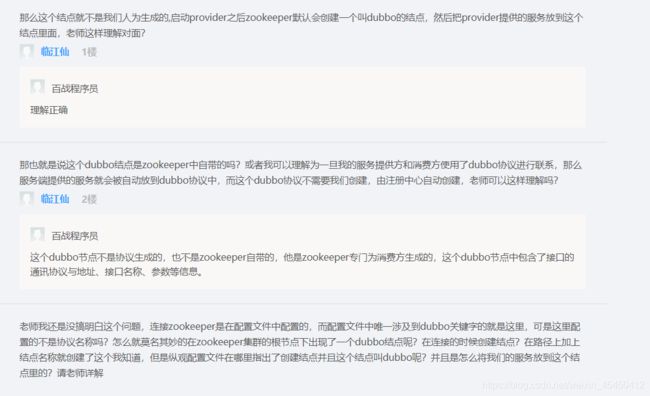
会将注册信息以一个结点的名字体现 所以用ls 命令查看,而不是将注册信息存放到结点中
6 创建 Consumer
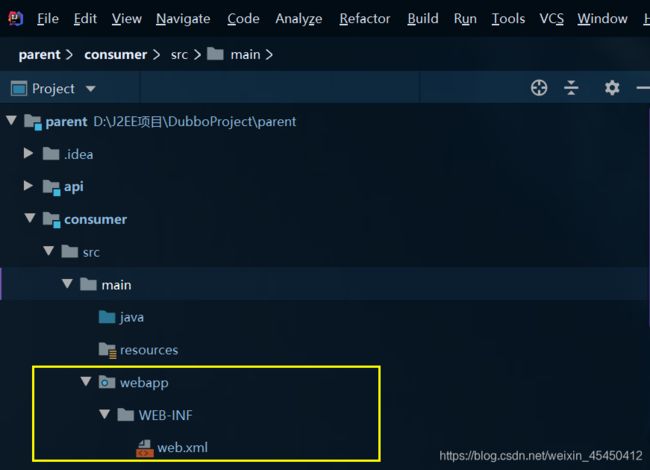
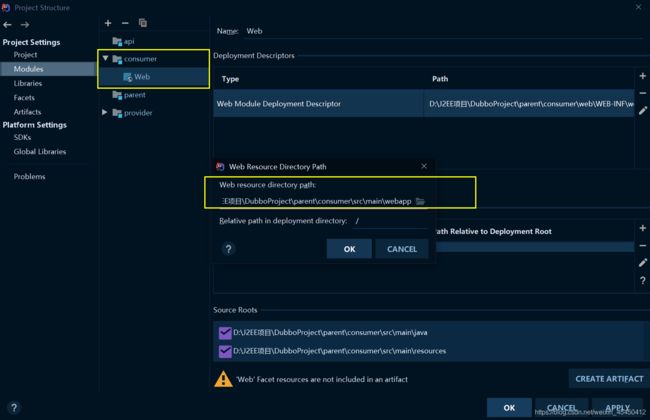
6.1创建项目
war类型的项目
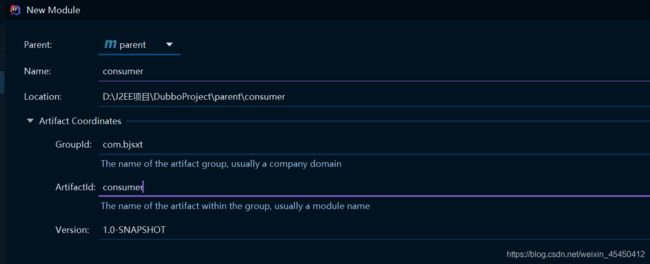
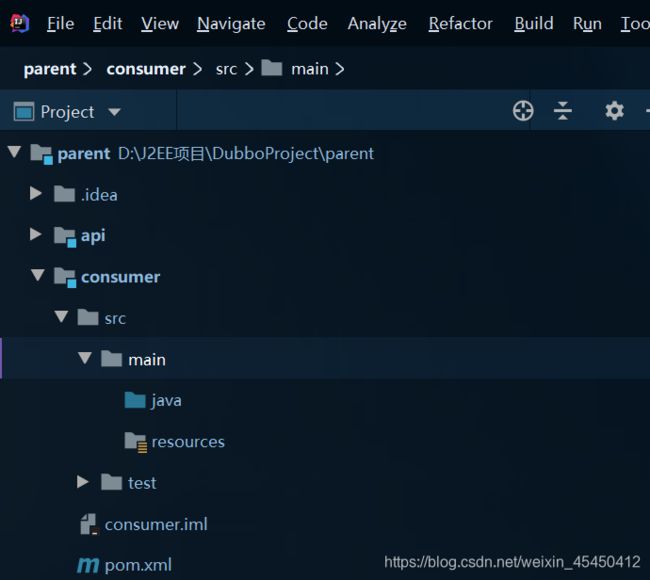
将项目结构改成WEB项目
6.2修改 POM 文件添加依赖
<project xmlns="http://maven.apache.org/POM/4.0.0"
         xmlns:xsi="http://www.w3.org/2001/XMLSchema-instance"
         xsi:schemaLocation="http://maven.apache.org/POM/4.0.0 http://maven.apache.org/xsd/maven-4.0.0.xsd">
    <parent>
        <artifactId>parentartifactId>
        <groupId>com.bjsxtgroupId>
        <version>1.0-SNAPSHOTversion>
    parent>
    <modelVersion>4.0.0modelVersion>

    <artifactId>consumerartifactId>


    <packaging>warpackaging>

    <dependencies>
        <dependency>
            <groupId>com.bjsxtgroupId>
            <artifactId>apiartifactId>
            <version>1.0-SNAPSHOTversion>
        dependency>

        <dependency>
            <groupId>org.springframeworkgroupId>
            <artifactId>spring-webmvcartifactId>
        dependency>

        <dependency>
            <groupId>org.apache.dubbogroupId>
            <artifactId>dubboartifactId>
        dependency>

        <dependency>
            <groupId>org.apache.dubbogroupId>
            <artifactId>dubbo-registry-zookeeperartifactId>
        dependency>

        <dependency>
            <groupId>org.apache.curatorgroupId>
            <artifactId>curator-frameworkartifactId>
        dependency>

        <dependency>
            <groupId>javax.servletgroupId>
            <artifactId>javax.servlet-apiartifactId>
            <scope>providedscope>
        dependency>

        <dependency>
            <groupId>javax.servletgroupId>
            <artifactId>jsp-apiartifactId>
            <scope>providedscope>
        dependency>

        <dependency>
            <groupId>javax.servletgroupId>
            <artifactId>jstlartifactId>
            <version>1.2version>
        dependency>
    dependencies>

    <build>
        <plugins>

            <plugin>
                <groupId>org.apache.tomcat.mavengroupId>
                <artifactId>tomcat7-maven-pluginartifactId>
                <version>2.2version>
                <configuration>
                    <port>8080port>
                    <path>/path>
                configuration>
            plugin>
        plugins>
    build>


project>
6.3编写配置文件
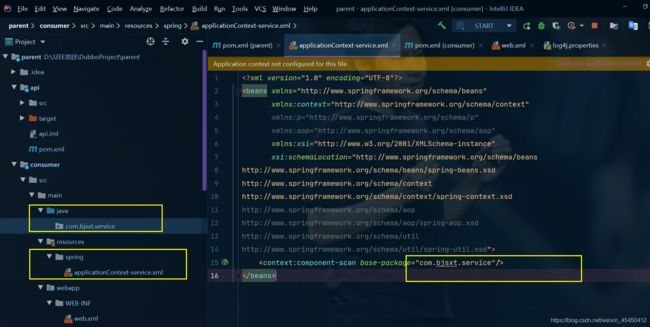
6.3.1 Spring 配置文件
applicationContext-service.xml
这个配置文件的作用是指定一个位置扫描@Service注解
在resources目录下新建目录spring
<beans xmlns="http://www.springframework.org/schema/beans"
       xmlns:context="http://www.springframework.org/schema/context"
       xmlns:p="http://www.springframework.org/schema/p"
       xmlns:aop="http://www.springframework.org/schema/aop"
       xmlns:xsi="http://www.w3.org/2001/XMLSchema-instance"
       xsi:schemaLocation="http://www.springframework.org/schema/beans
http://www.springframework.org/schema/beans/spring-beans.xsd
http://www.springframework.org/schema/context
http://www.springframework.org/schema/context/spring-context.xsd
http://www.springframework.org/schema/aop
http://www.springframework.org/schema/aop/spring-aop.xsd
http://www.springframework.org/schema/util
http://www.springframework.org/schema/util/spring-util.xsd">
    <context:component-scan base-package="com.bjsxt.service"/>
beans>
6.3.2 SpringMVC 配置文件
springmvc.xml 放到resources/spring包下
<beans xmlns="http://www.springframework.org/schema/beans"
        xmlns:context="http://www.springframework.org/schema/context"
        xmlns:p="http://www.springframework.org/schema/p"
        xmlns:aop="http://www.springframework.org/schema/aop"
        xmlns:mvc="http://www.springframework.org/schema/mvc"
        xmlns:xsi="http://www.w3.org/2001/XMLSchema-instance"
        xsi:schemaLocation="http://www.springframework.org/schema/beans
        http://www.springframework.org/schema/beans/spring-beans.xsd
        http://www.springframework.org/schema/context
        http://www.springframework.org/schema/context/spring-context.xsd
        http://www.springframework.org/schema/aop
        http://www.springframework.org/schema/aop/spring-aop.xsd
        http://www.springframework.org/schema/util
        http://www.springframework.org/schema/util/spring-util.xsd
        http://www.springframework.org/schema/mvc
        http://www.springframework.org/schema/mvc/spring-mvc.xsd">

<context:component-scan base-package="com.bjsxt.web.controller"/>
        <mvc:annotation-driven/>

        <bean class="org.springframework.web.servlet.view.InternalResourceViewResolver">
            <property name="prefix" value="/WEB-INF/jsp/"/>
            <property name="suffix" value=".jsp"/>
        bean>
beans>
6.3.3 Dubbo 配置文件
applicationContext-dubbo.xml
<beans xmlns="http://www.springframework.org/schema/beans"
       xmlns:xsi="http://www.w3.org/2001/XMLSchema-instance"
       xmlns:dubbo="http://dubbo.apache.org/schema/dubbo"
       xmlns:context="http://www.springframework.org/schema/context"
       xmlns:dubbot="http://dubbo.apache.org/schema/dubbo"
       xsi:schemaLocation="http://www.springframework.org/schema/beans
http://www.springframework.org/schema/beans/spring-beans-4.3.xsd
http://dubbo.apache.org/schema/dubbo
http://dubbo.apache.org/schema/dubbo/dubbo.xsd
http://www.springframework.org/schema/context
http://www.springframework.org/schema/context/spring-context.xsd">

    <dubbo:application name="myConsumer"/>


    <dubbo:registry address="192.168.88.101:2181,192.168.88.101:2182,192.168.88.101:2183" protocol="zookeeper" timeout="10000"/>


    <dubbo:annotation package="com.bjsxt.service.impl"/>
beans>
6.3.4 Web.xml 配置文件
web.xml
<web-app xmlns="http://java.sun.com/xml/ns/javaee"
         xmlns:xsi="http://www.w3.org/2001/XMLSchema-instance"
         xsi:schemaLocation="http://java.sun.com/xml/ns/javaee
http://java.sun.com/xml/ns/javaee/web-app_3_0.xsd" version="3.0">

    <context-param>
        <param-name>contextConfigLocationparam-name>

        <param-value>classpath:spring/applicationContext-*.xmlparam-value>
    context-param>
    <listener>
        <listener-class>org.springframework.web.context.ContextLoaderListenerlistener-class>
    listener>
    <servlet>
        <servlet-name>springmvcservlet-name>
        <servlet-class>org.springframework.web.servlet.DispatcherServletservlet-class>
        <init-param>
            <param-name>contextConfigLocationparam-name>
            <param-value>classpath:spring/springmvc.xmlparam-value>
        init-param>
        <load-on-startup>1load-on-startup>
    servlet>
    <servlet-mapping>
        <servlet-name>springmvcservlet-name>
        <url-pattern>/url-pattern>
    servlet-mapping>

    <filter>
        <filter-name>encodeFilterfilter-name>
        <filter-class>org.springframework.web.filter.CharacterEncodingFilterfilter-class>
        <init-param>
            <param-name>encodingparam-name>
            <param-value>utf-8param-value>
        init-param>
    filter>
    <filter-mapping>
        <filter-name>encodeFilterfilter-name>
        <url-pattern>/*url-pattern>
    filter-mapping>
web-app>
7 实现远程调用
7.1创建业务层

package com.bjsxt.service;

public interface DemoService {
    String showInfo(String str);
}
package com.bjsxt.service.impl;
import com.bjsxt.dubbo.service.DemoDubboService;
import com.bjsxt.service.DemoService;
import org.apache.dubbo.config.annotation.Reference;
import org.springframework.beans.factory.annotation.Autowired;
import org.springframework.stereotype.Service;
/**
* Consumer的业务层
*/
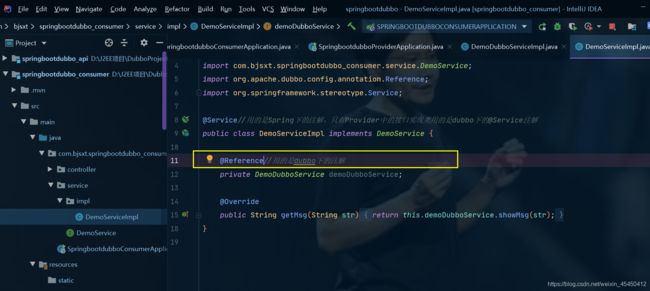
@Service//加的Spring包下的@Service注解,dubbo下的@Service注解仅仅在Provider项目下使用
public class DemoServiceImpl implements DemoService {
@Reference//dubbo下的注解,因为该对象是远程调用并不在IOC容器中所以不能使用@Autowired注解
private DemoDubboService demoDubboService;
@Override
public String showInfo(String str) {
//调用的是provider中的showMsg()方法
return this.demoDubboService.showMsg(str);
}
}
7.2创建 Controller 层
package com.bjsxt.web.controller;
import com.bjsxt.service.DemoService;
import org.springframework.beans.factory.annotation.Autowired;
import org.springframework.web.bind.annotation.RequestMapping;
import org.springframework.web.bind.annotation.RestController;
@RestController
public class DemoController {
@Autowired//该对象在SpringIOC容器中
private DemoService demoService;
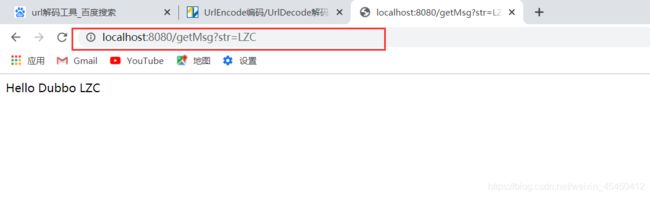
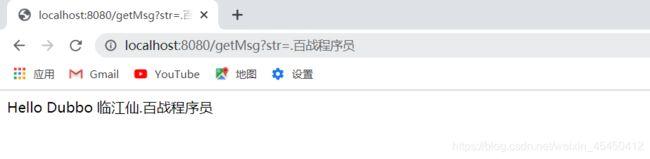
@RequestMapping("/getMsg")
public String getMsg(String str) {
return this.demoService.showInfo(str);
}
}
7.3测试结果
启动Consumer项目之前安装

启动Tomcat运行Consumer项目之前确保Provider项目是启动的

手动绑定参数
六、 Spring Boot 整合 Dubbo
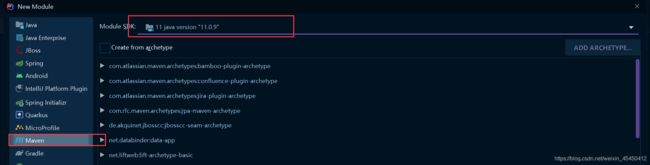
1 创建服务接口
1.1创建项目
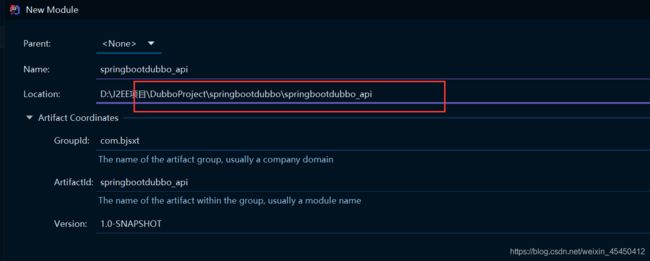

1.2添加接口
package com.bjsxt.dubbo.service;

public interface DemoDubboService {
    String showMsg(String str);
}
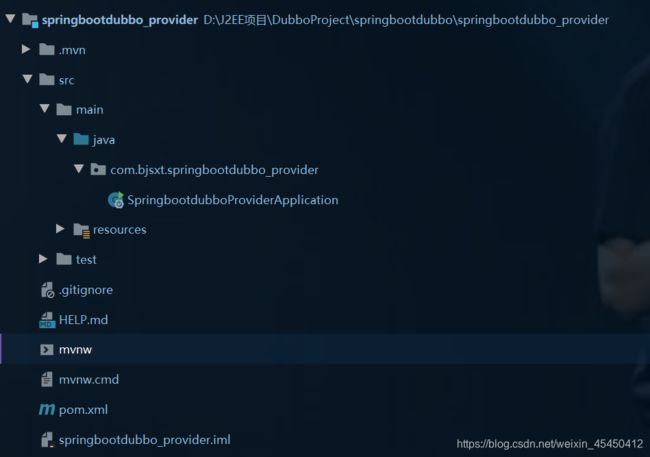
2 创建 Provider
2.1创建项目
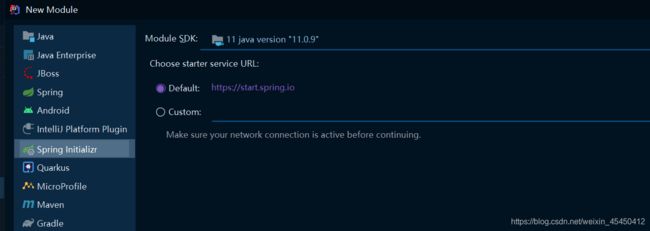
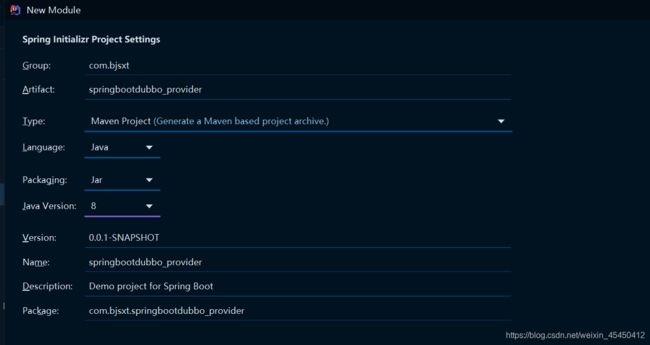
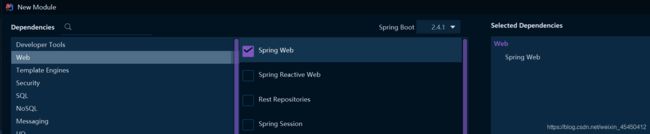
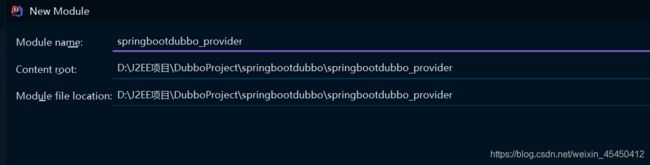
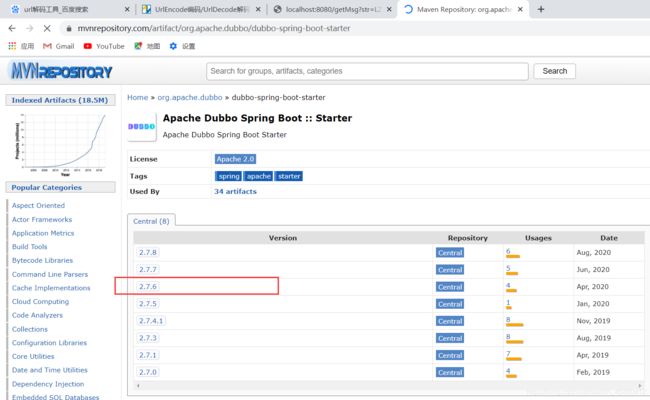
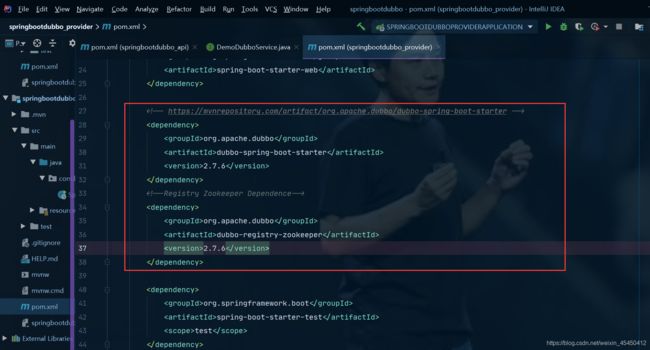
2.2修改 POM 文件添加依赖
启动器版本不同里面包含的dubbo版本也不同
SpringBoot整合dubbo只需要这两个依赖即可
<project xmlns="http://maven.apache.org/POM/4.0.0" xmlns:xsi="http://www.w3.org/2001/XMLSchema-instance"
         xsi:schemaLocation="http://maven.apache.org/POM/4.0.0 https://maven.apache.org/xsd/maven-4.0.0.xsd">
    <modelVersion>4.0.0modelVersion>
    <parent>
        <groupId>org.springframework.bootgroupId>
        <artifactId>spring-boot-starter-parentartifactId>
        <version>2.4.1version>
        <relativePath/>
    parent>
    <groupId>com.bjsxtgroupId>
    <artifactId>springbootdubbo_providerartifactId>
    <version>0.0.1-SNAPSHOTversion>
    <name>springbootdubbo_providername>
    <description>Demo project for Spring Bootdescription>

    <properties>
        <java.version>1.8java.version>
    properties>

    <dependencies>

        <dependency>
            <groupId>com.bjsxtgroupId>
            <artifactId>springbootdubbo_apiartifactId>
            <version>1.0-SNAPSHOTversion>
        dependency>
        <dependency>
            <groupId>org.springframework.bootgroupId>
            <artifactId>spring-boot-starter-webartifactId>
        dependency>


        <dependency>
            <groupId>org.apache.dubbogroupId>
            <artifactId>dubbo-spring-boot-starterartifactId>
            <version>2.7.6version>
        dependency>

        <dependency>
            <groupId>org.apache.dubbogroupId>
            <artifactId>dubbo-registry-zookeeperartifactId>
            <version>2.7.6version>
        dependency>

        <dependency>
            <groupId>org.springframework.bootgroupId>
            <artifactId>spring-boot-starter-testartifactId>
            <scope>testscope>
        dependency>
    dependencies>

    <build>
        <plugins>
            <plugin>
                <groupId>org.springframework.bootgroupId>
                <artifactId>spring-boot-maven-pluginartifactId>
            plugin>
        plugins>
    build>

project>
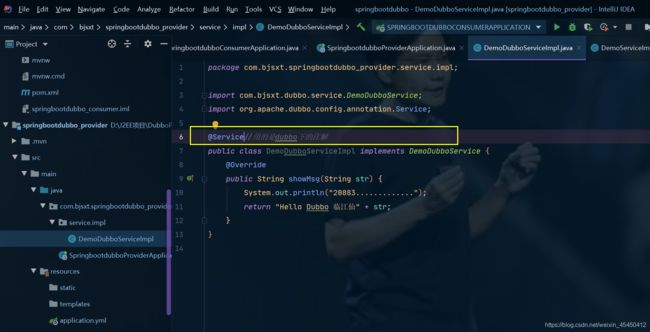
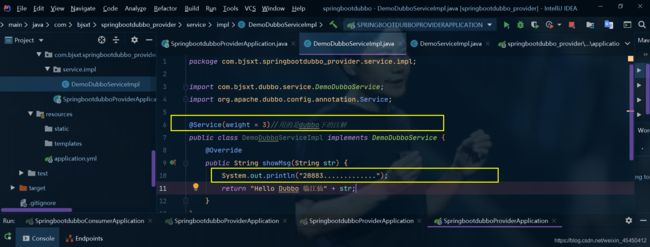
2.3添加接口实现
dubbo的依赖存在于 dubbo-spring-boot-starter启动器中
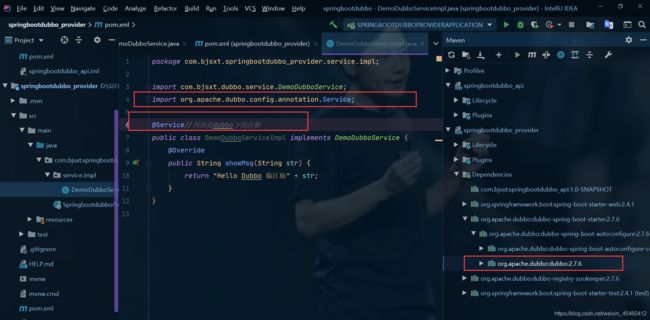
package com.bjsxt.springbootdubbo_provider.service.impl;
import com.bjsxt.dubbo.service.DemoDubboService;
import org.apache.dubbo.config.annotation.Service;
@Service//用的是dubbo下的注解
public class DemoDubboServiceImpl implements DemoDubboService {
@Override
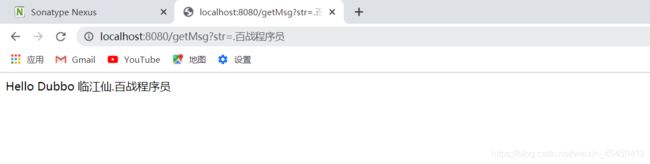
public String showMsg(String str) {
return "Hello Dubbo 临江仙" + str;
}
}
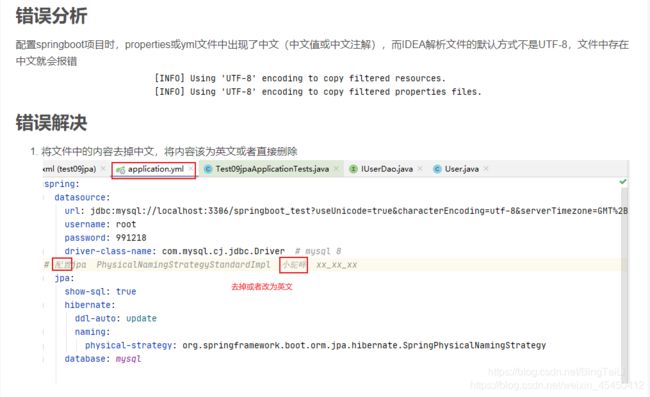
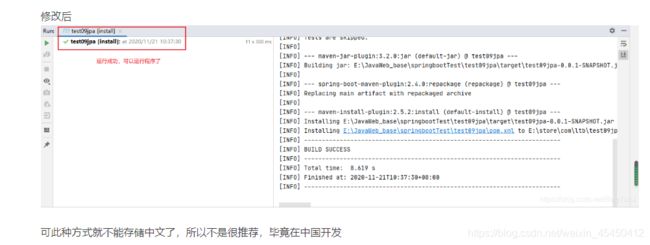
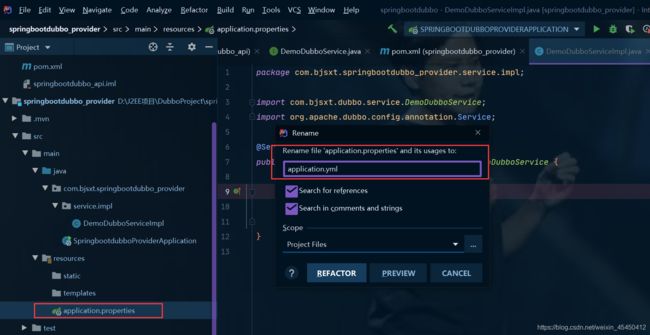
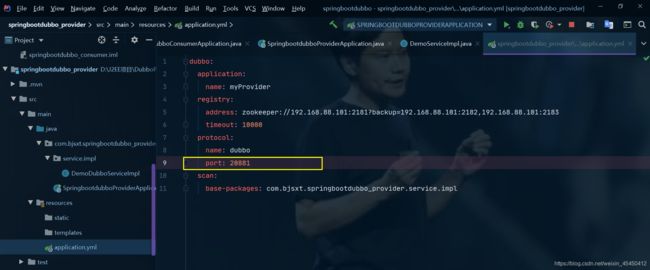
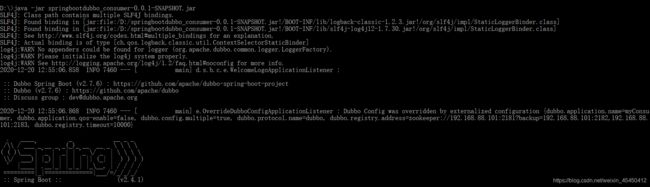
2.4在配置文件中配置 Dubbo
application.yml
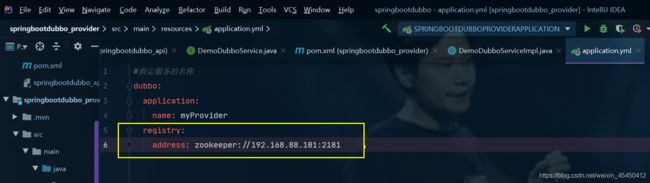
连接单机版的zookeeper
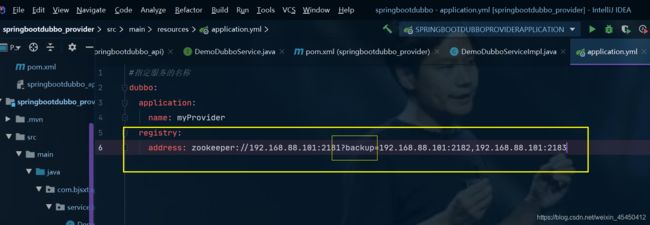
连接集群版的zookeeper 在任意一个集群结点后面用 ?backup= 连接剩下的结点,剩余结点之间逗号分隔
#指定服务的名称
dubbo:
  application:
    name: myProvider
  registry:
    address: zookeeper://192.168.88.101:2181?backup=192.168.88.101:2182,192.168.88.101:2183
    timeout: 10000
  #配置服务所使用的协议
  protocol:
    name: dubbo
    port: 20880
  scan:
    base-packages: com.bjsxt.springbootdubbo_provider.service.impl
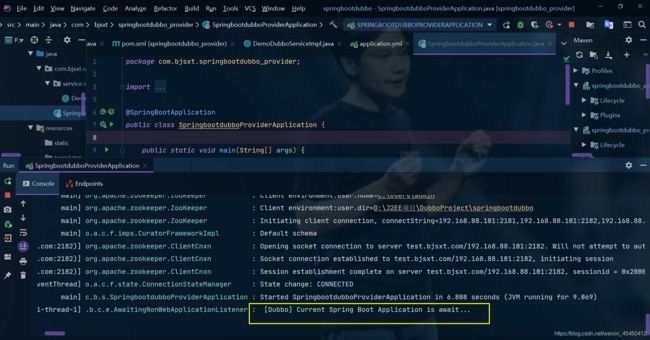
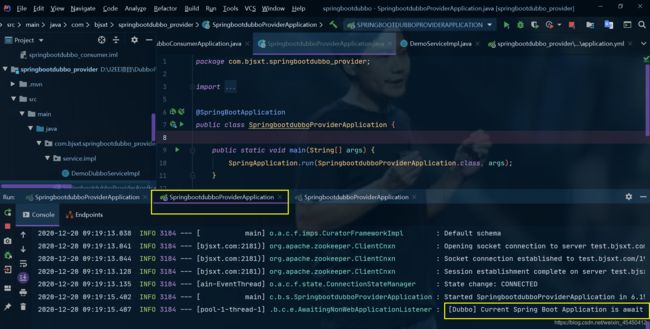
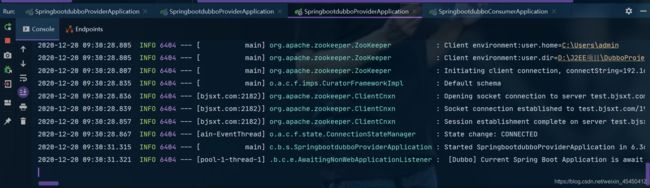
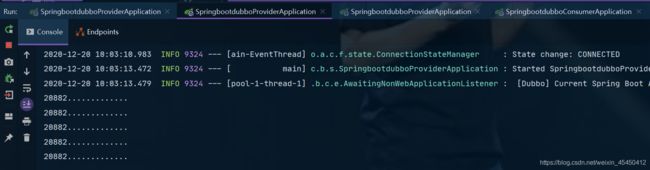
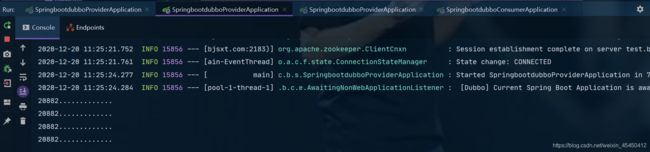
2.5启动 Provider
2.5.1 通过 spring-boot-starter-web 启动 Dubbo
先启动zookeeper集群,关掉防火墙
如果在项目中添加的是 spring-boot-starter-web 启 动器,那么在启动 dubbo 后还会监听一个端口,因为在 web 启动器中内置了一个 Tomcat,Tomcat 的启动不会影响 dubbo 的运行,但是会多占用一个端口,未来在其他的 Provider 中还需要考虑端口分配的问题,避免端口抢占。
由于现在选择的是WEB启动器所以启动器内嵌的Tomcat还在监听8080端口
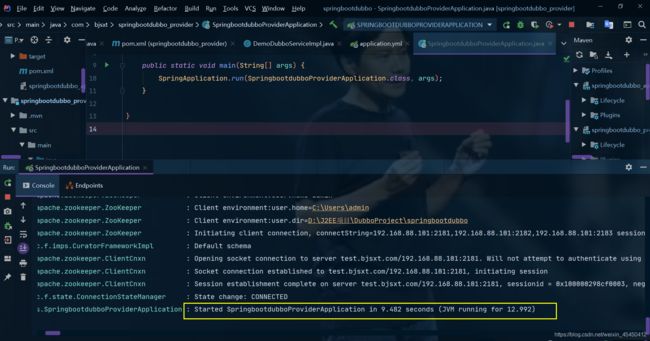

不影响注册

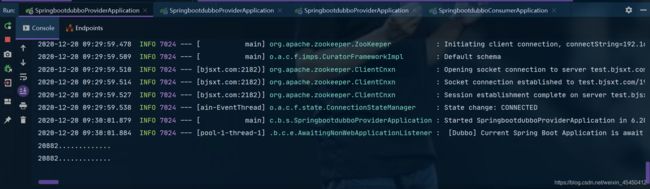
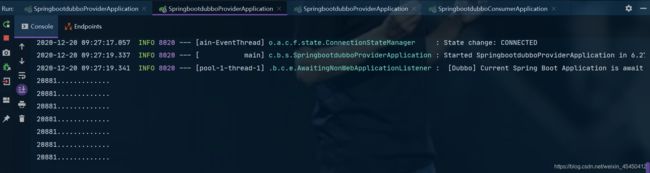
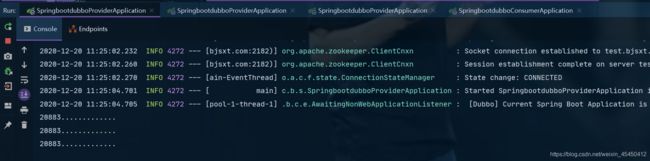
2.5.2 通过 spring-boot-starter 启动 Dubbo
可以使用 spring-boot-starter 起来启动 Dubbo,在该启动器中并未包含 Tomcat 所以并不会监听端口。

停掉项目再次启动 启动成功
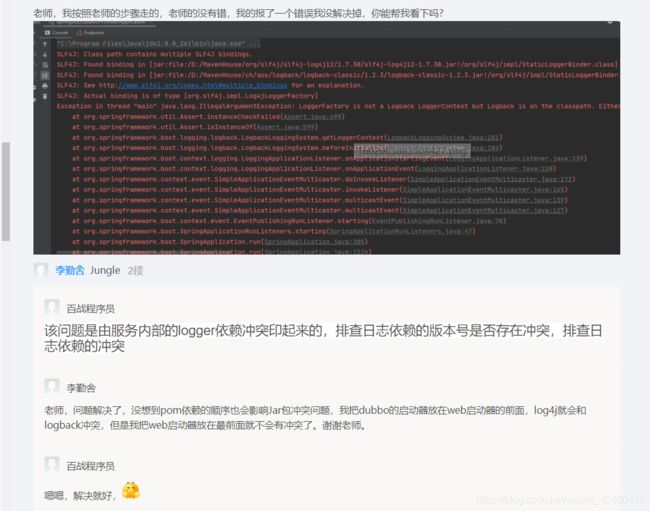
Dubbo的启动器不可在web启动器前面,否则报错

3 创建 Consumer
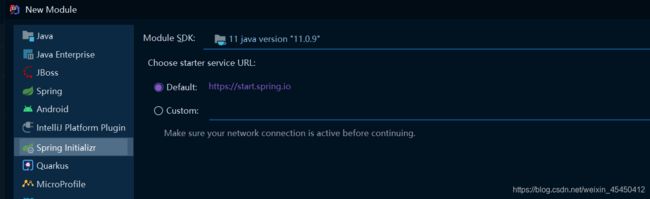
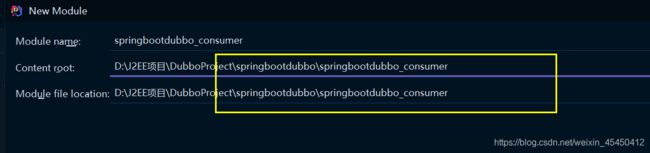
3.1创建项目


3.2修改 POM 文件添加依赖
<project xmlns="http://maven.apache.org/POM/4.0.0" xmlns:xsi="http://www.w3.org/2001/XMLSchema-instance"
         xsi:schemaLocation="http://maven.apache.org/POM/4.0.0 https://maven.apache.org/xsd/maven-4.0.0.xsd">
    <modelVersion>4.0.0modelVersion>
    <parent>
        <groupId>org.springframework.bootgroupId>
        <artifactId>spring-boot-starter-parentartifactId>
        <version>2.4.1version>
        <relativePath/>
    parent>
    <groupId>com.bjsxtgroupId>
    <artifactId>springbootdubbo_consumerartifactId>
    <version>0.0.1-SNAPSHOTversion>
    <name>springbootdubbo_consumername>
    <description>Demo project for Spring Bootdescription>

    <properties>
        <java.version>1.8java.version>
    properties>

    <dependencies>

        <dependency>
            <groupId>com.bjsxtgroupId>
            <artifactId>springbootdubbo_apiartifactId>
            <version>1.0-SNAPSHOTversion>
        dependency>
        <dependency>
            <groupId>org.springframework.bootgroupId>
            <artifactId>spring-boot-starter-webartifactId>
        dependency>

        <dependency>
            <groupId>org.apache.dubbogroupId>
            <artifactId>dubbo-spring-boot-starterartifactId>
            <version>2.7.6version>
        dependency>

        <dependency>
            <groupId>org.apache.dubbogroupId>
            <artifactId>dubbo-registry-zookeeperartifactId>
            <version>2.7.6version>
        dependency>

        <dependency>
            <groupId>org.springframework.bootgroupId>
            <artifactId>spring-boot-starter-testartifactId>
            <scope>testscope>
        dependency>
    dependencies>

    <build>
        <plugins>
            <plugin>
                <groupId>org.springframework.bootgroupId>
                <artifactId>spring-boot-maven-pluginartifactId>
            plugin>
        plugins>
    build>

project>
3.3编写配置文件
application.yml

#指定服务的名称
dubbo:
  application:
    name: myConsumer
  registry:
    address: zookeeper://192.168.88.101:2181?backup=192.168.88.101:2182,192.168.88.101:2183
    timeout: 10000
  #配置服务所使用的协议
  protocol:
    name: dubbo
3.4实现远程调用
3.4.1 创建业务层
package com.bjsxt.springbootdubbo_consumer.service;

public interface DemoService {
    String getMsg(String str);
}
package com.bjsxt.springbootdubbo_consumer.service.impl;

import com.bjsxt.dubbo.service.DemoDubboService;
import com.bjsxt.springbootdubbo_consumer.service.DemoService;
import org.apache.dubbo.config.annotation.Reference;
import org.springframework.stereotype.Service;

@Service//用的是Spring下的注解,只有Provider中的接口实现类用的是dubbo下的@Service注解
public class DemoServiceImpl implements DemoService {

    @Reference//用的是dubbo下的注解
    private DemoDubboService demoDubboService;

    @Override
    public String getMsg(String str) {
        return this.demoDubboService.showMsg(str);
    }
}
3.4.2 创建 Controller 层
package com.bjsxt.springbootdubbo_consumer.controller;

import com.bjsxt.springbootdubbo_consumer.service.DemoService;
import org.springframework.beans.factory.annotation.Autowired;
import org.springframework.web.bind.annotation.RequestMapping;
import org.springframework.web.bind.annotation.RestController;

@RestController
public class DemoController {

    @Autowired
    private DemoService demoService;

    @RequestMapping("/getMsg")
    public String getMsg(String str) {
        return this.demoService.getMsg(str);
    }
}
3.4.3 测试结果
启动Consumer 启动成功 Tomcat监听8080端口


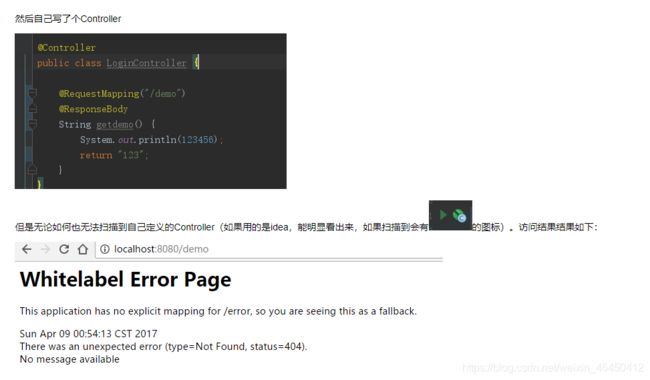
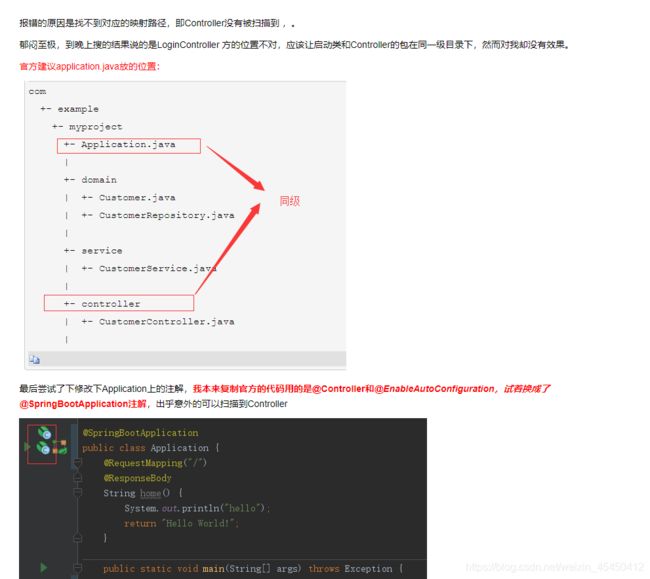
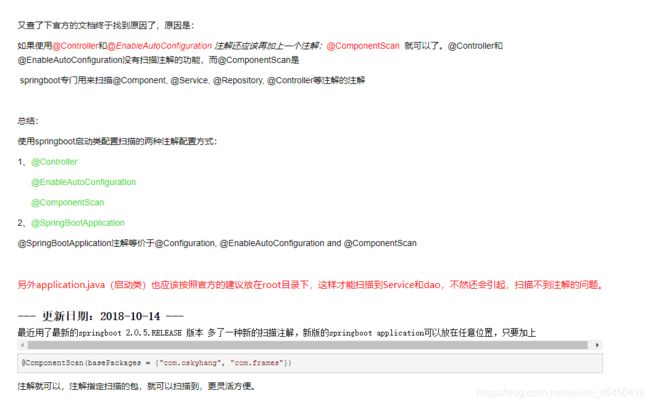
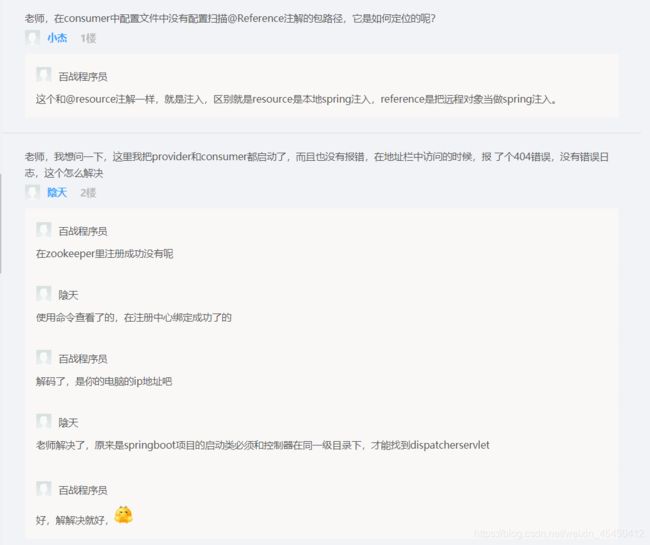
BUG:SpringBoot项目启动类必须和控制器在同一级目录下,才能找到dispatcherservlet否则报404

七、 Dubbo 监控与管理
1 监控平台: dubbo-monitor
用来监控Consumer和Provider
1.1Dubbo Monitor 简介
主要用来统计服务的调用次数和调用时间,服务消费者和提供者,在内存中累计调用次数和调用时间,定时每分钟发送一次统计数据到监控中心,监控中心则使用数据绘制图表来显示。
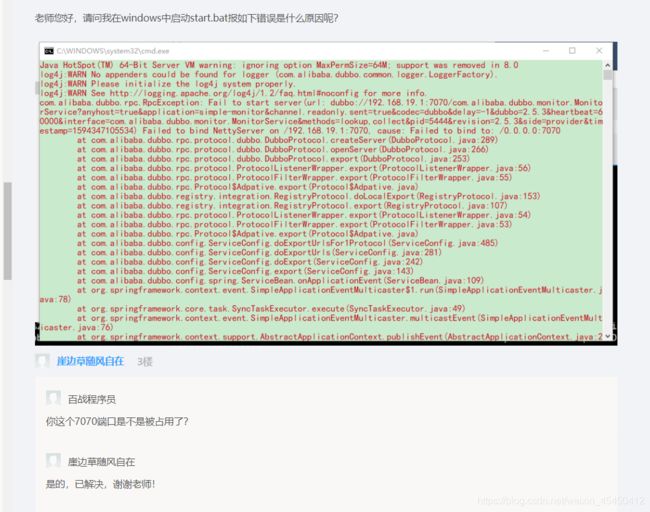
1.2Dubbo Monitor 的使用
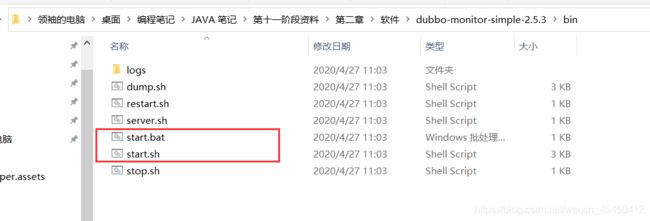
基于Windows使用Monitor运行start.bat 基于Linux使用Monitor运行start.sh
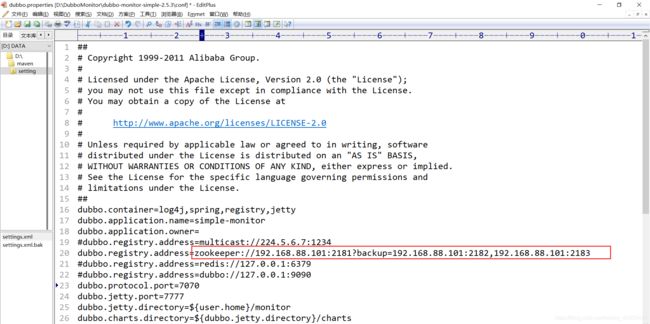
修改 Monitor 的配置文件
连接zookeeper时以192.168.88.101:2181注册中心为主,如果这个注册中心宕机了再以backup 后面的注册中心为主
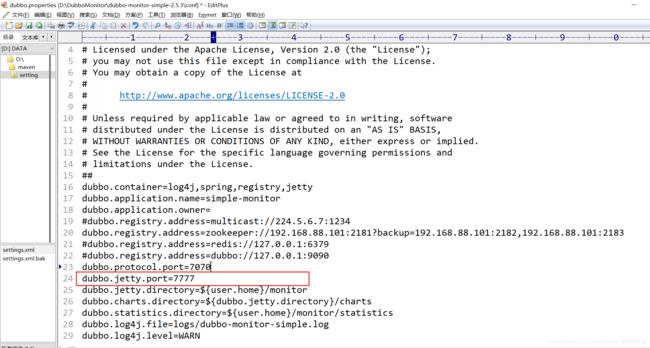
在Monitor中内嵌了Jetty服务器,配置监听端口,自定义,只要不和Consumer的监听端口发生端口抢占即可
1.3启动 Monitor
双击start.bat 启动集群,关闭防火墙
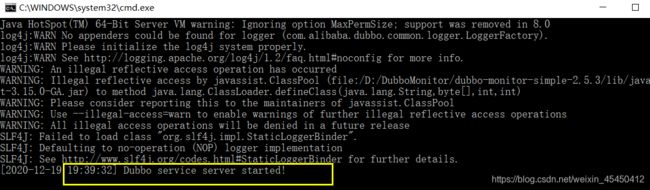
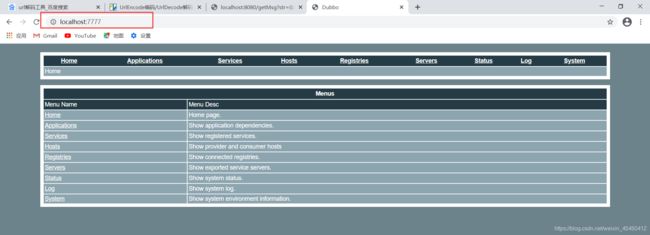
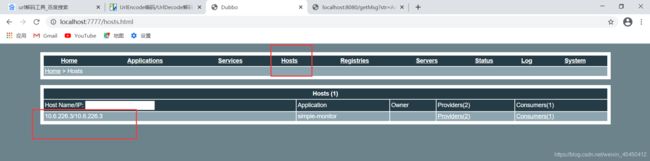
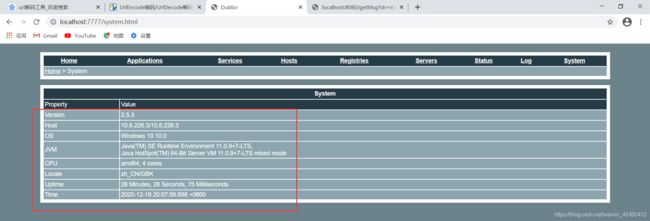
1.4Monitor 监控界面
Monitor监听的服务端口是7777
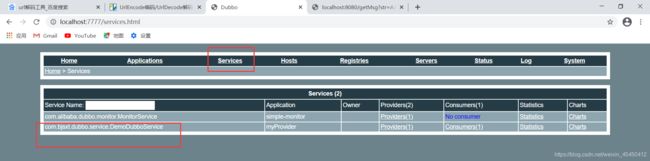
显示zookeeper中有两个服务 myConsumer需要依赖myProvider simple-monitor是当前监控中心的服务
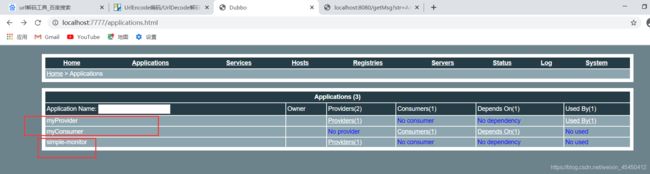
显示当前注册的服务 myProvider myConsumer不是服务的注册
显示监控中心所在的位置
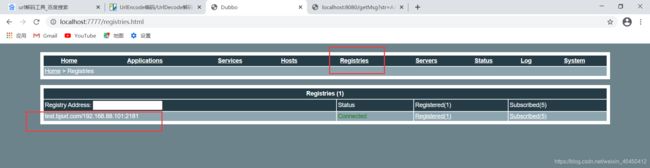
显示注册中心的地址 不管是配置集群还是单机版的结点provider和Consumer都是先链接一个结点如果这个结点出现问题再去链接剩下的结点
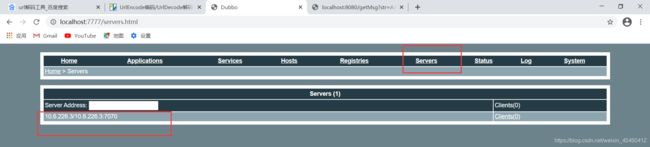
显示当前Monitor服务的信息
显示当前系统状态

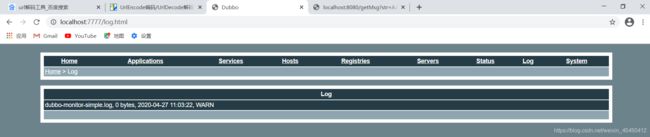
显示当前服务的日志信息
显示系统环境信息
2 管理控制台:dubbo-admin
2.1Dubbo-Admin 简介
主要包含:路由规则、动态配置、服务降级、访问控制、权重调整、负载均衡等管理功能。
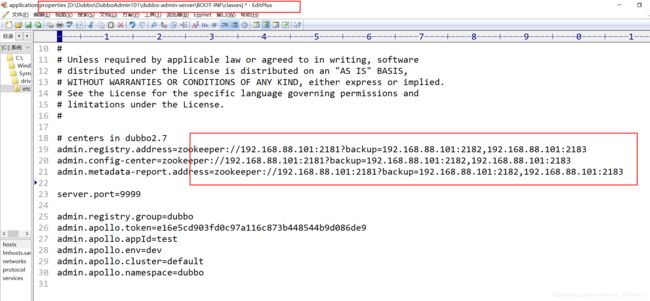
2.2Dubbo Admin 的使用
基于SpringBoot开发的
用360压缩打开jar做修改

配置注册中心地址
修改服务监听端口
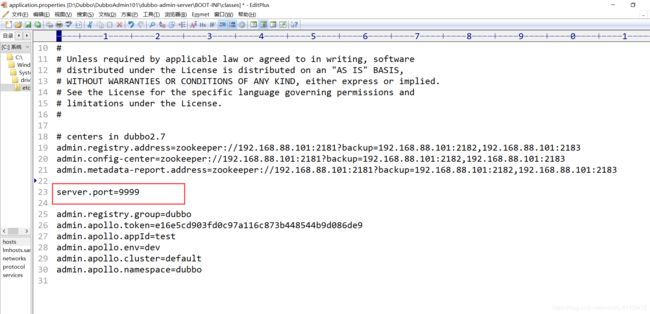
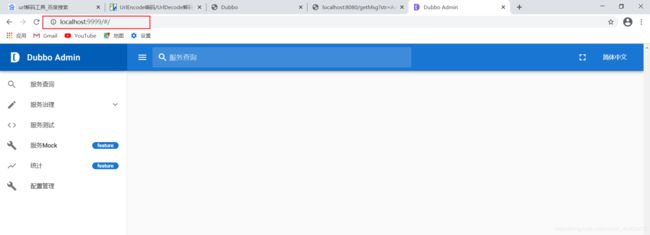
2.3启动 Admin
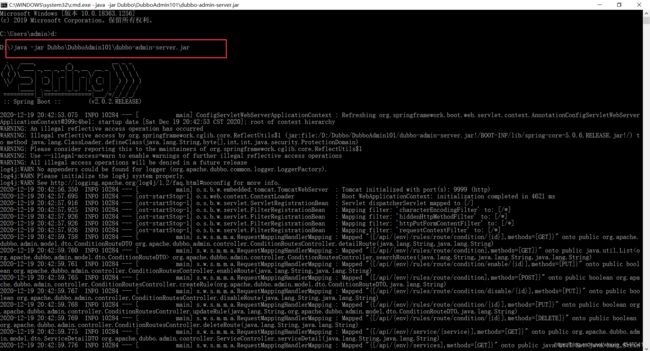
端口是9999

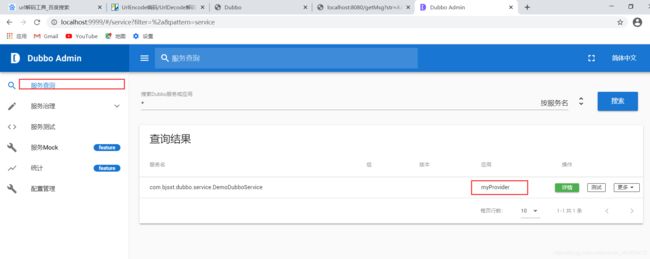
2.4Admin 管理界面
八、 Dubbo 中服务的负载均衡
1 什么是服务集群
一个服务,部署多次,形成的整体称为服务集群。
1.1服务集群优点
避免出现单点故障:如果集群中有某个服务宕机,其他服务可继续运行。
提高效率:在集群模式下有多个服务处理业务,相比非集群模式下可分担单个服务的压力,提高服务效率。
1.2集群模式
1.2.1 真实集群
真实集群是指在集群中,每一个节点在一个独立的物理机中运行,当某个物理机出现设备故障并不会影响其他节点的运行。建议在生产环境中使用。
优点:单个硬件出现故障并不会影响集群中其他节点的运行。
缺点:加大硬件成本的开销。
1.2.2 伪集群
集群中所有的服务都部署到同一台设备上,通过不同端口区分不同个体。当设备出现问题会导致整个集群不可用。学习阶段可以使用,但不建议在生产环境中使用。
优点:可节省硬件成本开销。
缺点:硬件出现故障会影响正个集群的使用。
2 什么是负载均衡
2.1负载均衡简介
负载均衡(Load Balance),是指将负载(工作任务,访问请求)进行平衡、分摊到多个操作单元(服务器,组件)上进行执行。
最常见的负载均衡
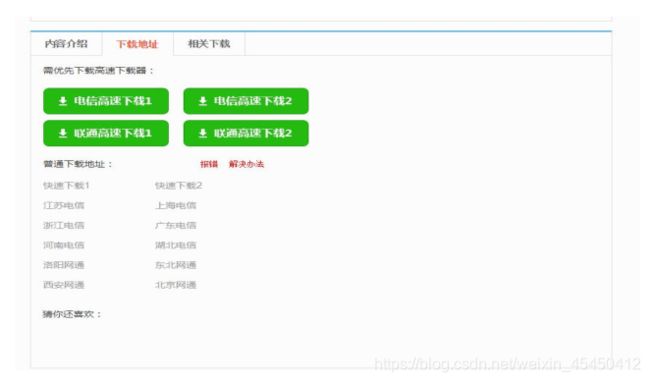
这一种古老的方式,通过入口提供不同线路、不同服务器链接的方式,来实现负载均衡,一般在提供下载业务的网站比较常见。
3 负载均衡解决方案分类及特征
3.1集中式负载均衡
依赖外界的某种技术实现负载均衡
即在客户端和服务端之间使用独立的负载均衡设施(可以是硬件,如 F5, 也可以是软件如 nginx), 由该设施负责把访问请求通过某种策略转发至服务端。
3.1.1 常见的集中式负载均衡方式
3.1.1.1 DNS 轮询
大多域名注册商都支持 DNS 轮询,DNS 服务器将解析请求按照配置顺序,逐一分配到不同的 IP 上,这样就完成了简单的负载均衡。
3.1.1.2 反向代理负载均衡

使用代理服务器,可以将请求转发给内部的服务器。Nginx 是比较常见的服务反向代理技术。在 Nginx 中是支持对代理的服务的负载均衡处理的。
3.1.1.3 基于硬件的负载均衡
Load Balance Device负载均衡设备
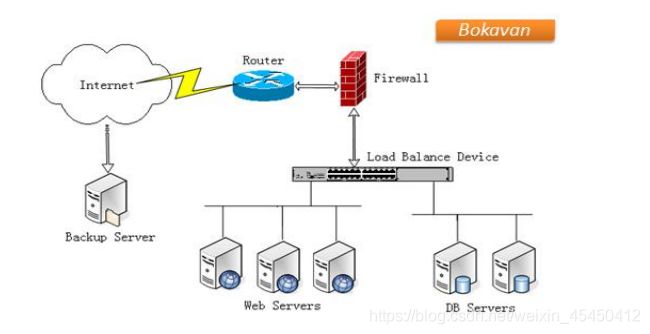
硬件负载均衡解决方案是直接在服务器和外部网络间安装负载均衡设备,这种设备我们通常称之为负载均衡器,由于专门的设备完成专门的任务,独立于操作系统,整体性能得到大量提高,加上多样化的负载均衡策略,智能化的流量管理,可达到最佳的负载均衡需求。
常见的主流产品:
F5 BIG-IP 负载均衡器(LTM)

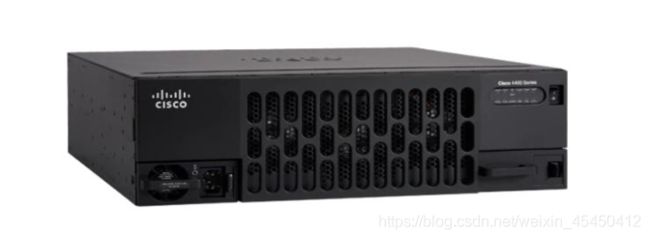
思科 IOS 路由器
Radware 的 AppDirector 系列

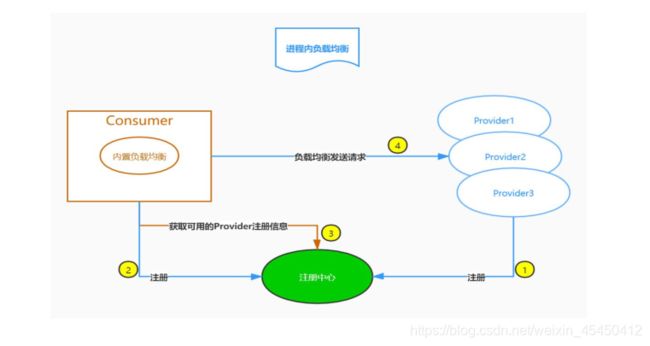
3.2进程内负载均衡
不需要依赖外部的某个技术实现负载均衡
将负载均衡逻辑集成到服务组件中,服务组件从服务注册中心获知有哪些地址可用,然后根据指定的负载均衡策略选择出一个合适的服务来调用。
4 Dubbo 的内置负载均衡策略
4.1Random
随机访问集群中节点。访问概率和权重有关。是 Dubbo 的默认负载均衡策略。
权重(weight):占有比例。集群中每个项目部署的服务器的性能可能是不同,性能好的服务器权重应该高一些。 能者多劳
4.2RoundRobin
轮询。访问频率和权重有关。
4.3LeastActive
最少活跃调用数,相同活跃数的随机。
如果某个机器性能越差,那么接收的请求越少,越不活跃,此时就会给不活跃的性能差的机器分配更少的请求。
4.4ConsistentHash
一致性 Hash 算法,相同参数的请求一定分发到同一个 Provider 如果需要某一类请求都到一个节点,那么可以使用一致性 Hash 策略。
5 Dubbo 负载均衡的使用
Dubbo 的负载均衡可以在 Consumer 或者 Provider 中通过配置文件或者注解来配置。
5.1在 Consumer 中配置负载均衡
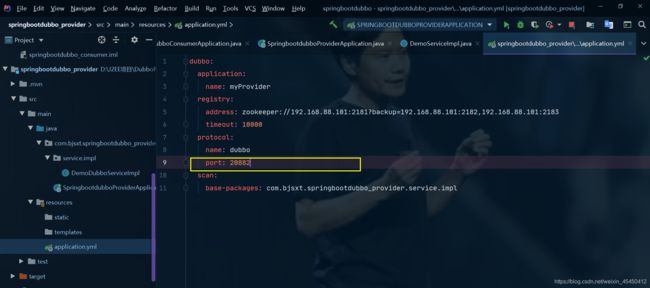
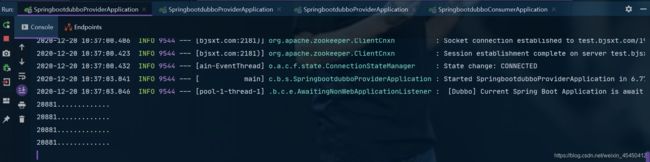
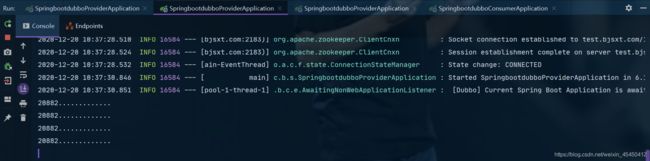
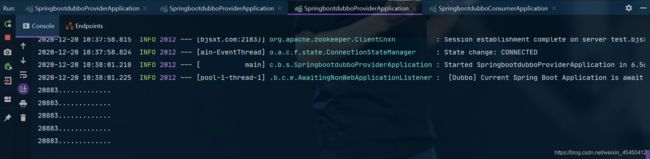
将 Provider 启动三次,在启动时注意修改 dubbo.protocol.port 的值。
5.1.1 启动 Provider 集群
5.1.1.1 通过创建多个启动类启动
可以为 Provider 创建多个启动类来启动,通过不同的启动类来启动集群中不同的节点。
5.1.1.2 通过一个启动类启动多次
打开配置启动项
如果停掉再去启动这样集群始终就一个provider服务

修改启动类配置

允许并行运行 选择需要多次运行的启动类,将 Allow parallel run 选中,开启允许并行运行。
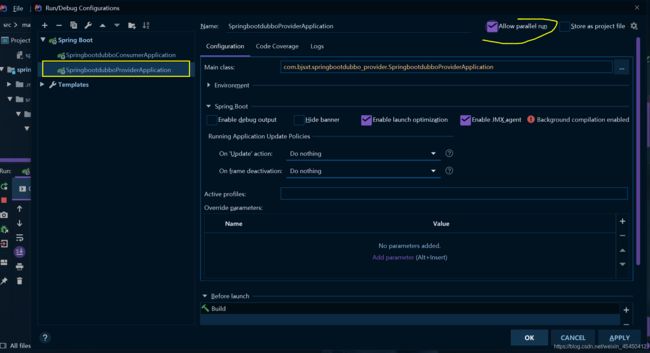
第二次运行启动类之前必须修改服务监听端口避免端口抢占
第三次运行启动类之前必须修改服务监听端口避免端口抢占

5.1.2 通过注解配置负载均衡
在 Dubbo 中,如果没有指定负载均衡策略,那么 Dubbo 默认的使用随机策略调用Provider。
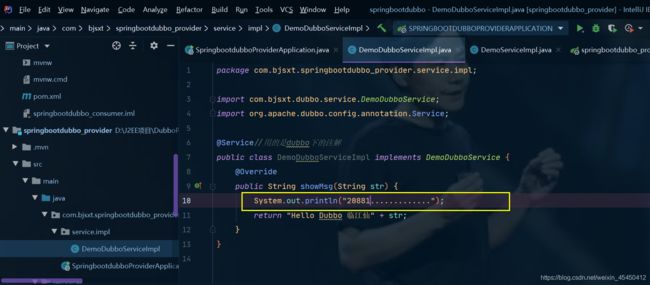
测试,先停掉之前三个服务,然后增加一条打印语句
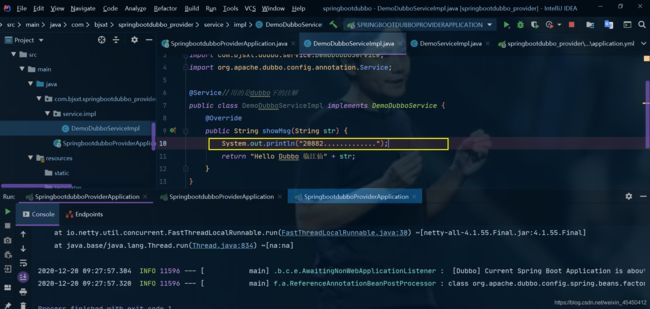
再启动Consumer 访问 多次刷新 默认是随机负载均衡的
20883一次没被调用
20882
20881
清空控制台,再刷新


5.1.2.1 指定负载均衡策略
修改@Refrence 注解添加 loadbalance 属性指定负载均衡策略。
@Reference(loadbalance = "负载均衡策略")//用的是dubbo下的注解
随机负载均衡 里面的负载均衡策略的值全部小写
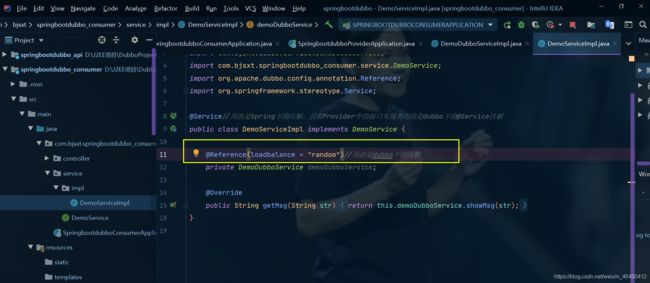
重启Consumer


5.1.2.2 随机策略配置权重
配置权重是为了能者多劳
随机获取一个[0, totalWeight)之间的数, offset = offset - weight,如果 offset 小于 0,则选中,很明显 weight 大的更容易让 offset 的值小于 0。
举个例子 有 4 权重分别为(1,2, 3, 4),totalWeight = 10, 假如 offset = 6, 6 - 1 = 5,
5 大于 0,继续 5 - 2 = 3 大于 0,3 - 3 = 0, 0 - 4 小于 0 ,所以选择权重为 4 的 invoker, 这里可以发现只要 offset >= 6 则选择权重为 4 的 invoker, 正好是 40%。
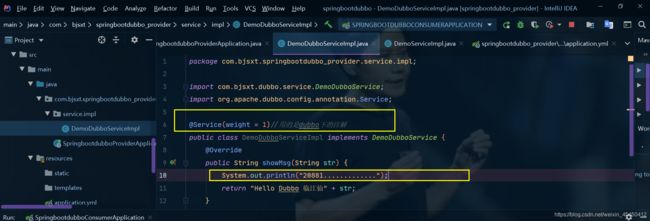
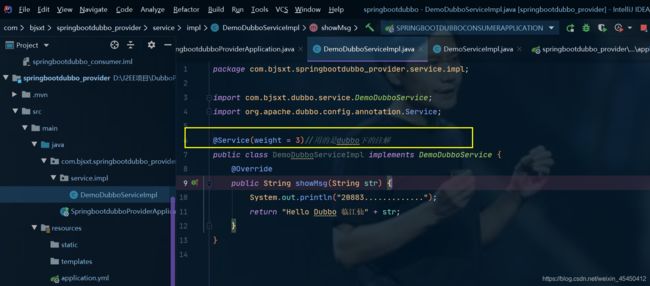
5.1.2.3 通过 Provider 的@Service 注解配置权重
先停止所有的provider和Consumer修改代码
权重为1同时修改端口为20881
启动Consumer 负载均衡是随机

刷新请求


5.1.2.4 配置轮询策略
所谓轮询是指将请求轮流分配给每台服务器。举个例子,我们有三台服务器 A、B、C。
我们将第一个请求分配给服务器 A,第二个请求分配给服务器 B,第三个请求分配给服务器 C,第四个请求再次分配给服务器 A。这个过程就叫做轮询。
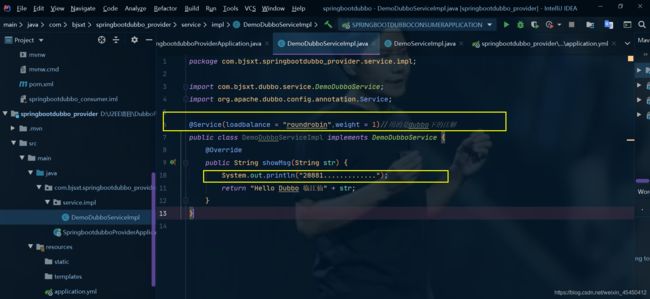
@Reference(loadbalance = "roundrobin")
停掉Consumer和所有provider去掉权重
修改启动配置文件端口(20881,20882,20883)和打印语句(20881,20882,20883)启动三个provider
修改重启Consumer
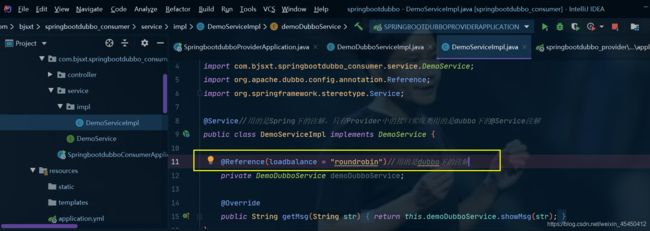
多次刷新


5.1.2.5 轮询策略加权
如果我们将等量的请求分配给性能较差的服务器,这显然是不合理的。因此,这个时候我们需要对轮询过程进行加权,以调控每台服务器的负载。经过加权后,每台服务器能够得到的请求数比例,接近或等于他们的权重比。
停掉所有provider 修改权重(1,2,3)端口(20881,20882,20883),打印语句(20881,20882,20883)
Consumer用的就是轮询

多次刷新请求
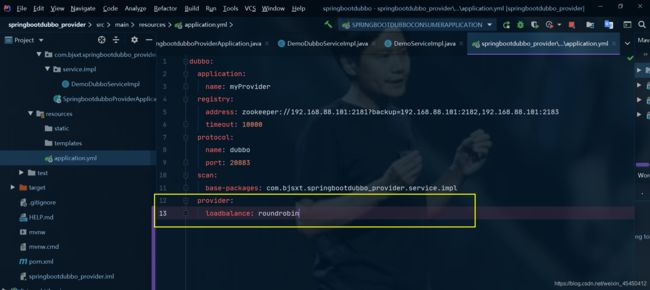
5.1.3 通过配置文件配置配置负载均衡
***在 SpringBoot 的配置文件中可以配置全局的负载均衡。*Consumer 中所有调用 Provider集群的业务层都会使用该负载均衡策略。
与注解配置方式区别: 局部和全局的负载均衡策略都配置了以局部的为主
注解配置方式:局部,只针对当前业务层生效。
配置文件方式:全局,对所有业务层生效。
去掉之前的负载均衡策略
修改配置文件设置负载均衡策略

重启Consumer 多次刷新请求


负载均衡策略改为轮询

重启Consumer provider的权重依次为1,2,3


5.2在 Provider 中配置负载均衡
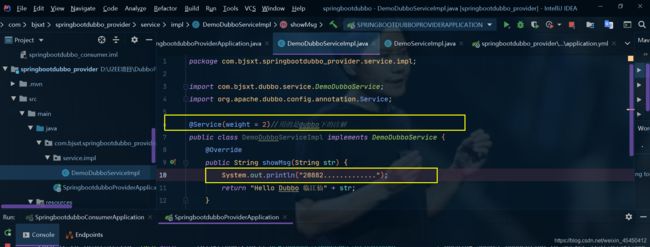
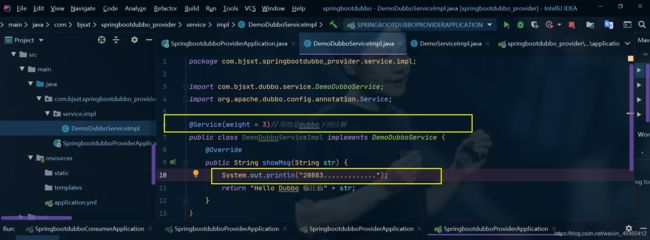
5.2.1 在 Dubbo 的@Service 注解中配置负载均衡以及权重
@Service(loadbalance = "roundrobin",weight = 3)//用的是dubbo下的注解
停掉所有provider和Consumer
三个provider的权重和端口打印语句依次是(1,2,3)(20881,20882,20883)(20881,20882,20883)
去掉consumer配置文件中的负载均衡策略 启动consumer

多次刷新请求


5.2.2 通过配置文件配置负载均衡
停掉所有provider 修改配置文件 停止consumer
去掉provider中的负载均衡策略
三个provider的权重,端口,打印语句分别是(1,2,3)(20881,20882,20883)(20881,20882,20883)

九、 项目打包
1 基于 SpringBoot 整合 Dubbo 的打包方式
通过 SpringBoot 打包插件打包项目
<build>
    <plugins>
        <plugin>
            <groupId>org.springframework.bootgroupId>
            <artifactId>spring-boot-maven-pluginartifactId>
        plugin>
    plugins>
build>

将打包好的consumer的jar包放到D盘根目录下,cmd窗口java -jar启动访问项目
2 基于 Assembly 插件打包
2.1Assembly 插件
Assembly是Mave的打包插件,他的作用是可以帮助我们对jar项目做打包处理。在Spring整合 dubbo 的项目中,需要使用 Assembly 打包插件来对项目做打包处理。
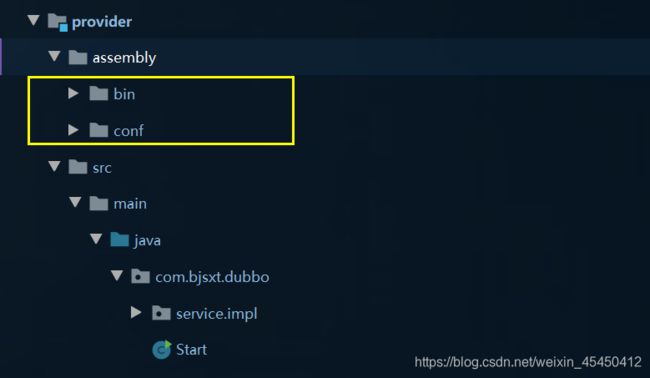
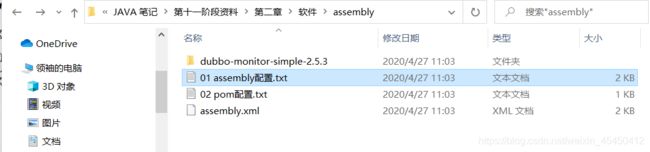
2.2使用步骤
- 需要在项目根下创建一个目录,名称为 assembly

- 将示例中 bin,conf 目录拷贝到 assembly 的根目录中
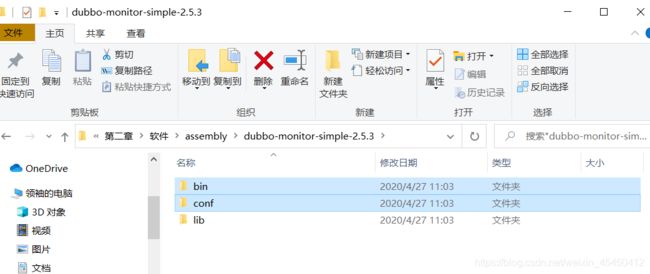
- 删除 conf 目录中 dubbo.properties 配置文件中的内容

- 修改项目的 POM 文件添加 assembly 的打包插件
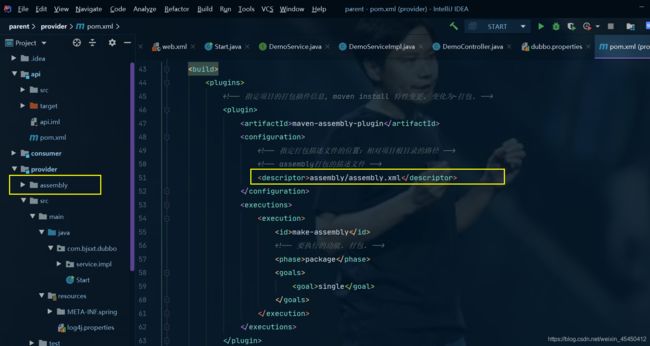
    <build>
	<plugins>

		<plugin>
			<artifactId>maven-assembly-pluginartifactId>
			<configuration>


				<descriptor>assembly/assembly.xmldescriptor>
			configuration>
			<executions>
				<execution>
					<id>make-assemblyid>

					<phase>packagephase>
					<goals>
						<goal>singlegoal>
					goals>
				execution>
			executions>
		plugin>
	plugins>
build>
- 在 assembly 目录下添加 assembly.xml 配置文件
约束文件找不到不影响插件运行

<assembly
	xmlns="http://maven.apache.org/plugins/maven-assembly-plugin/assembly/1.1.3"
	xmlns:xsi="http://www.w3.org/2001/XMLSchema-instance"
	xsi:schemaLocation="http://maven.apache.org/plugins/maven-assembly-plugin/assembly/1.1.3 http://maven.apache.org/xsd/assembly-1.1.3.xsd">

	<id>assemblyid>

	<formats>
		<format>tar.gzformat>
	formats>

	<includeBaseDirectory>trueincludeBaseDirectory>
	<fileSets>

		<fileSet>

			<directory>assembly/bindirectory>
			<outputDirectory>binoutputDirectory>

			<fileMode>0755fileMode>
		fileSet>

		<fileSet>
			<directory>assembly/confdirectory>
			<outputDirectory>confoutputDirectory>

			<fileMode>0644fileMode>
		fileSet>
	fileSets>


	<dependencySets>
		<dependencySet>
			<outputDirectory>liboutputDirectory>
		dependencySet>
	dependencySets>
assembly>
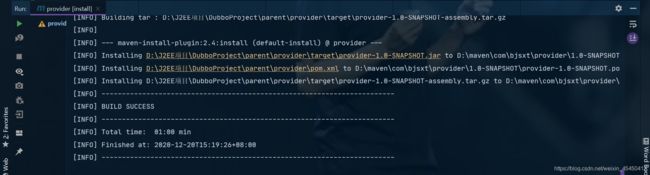
- 运行打包插件,对项目进行打包处理。可以使用 maven 的 install 命令,也可以使用插件的命令
如果在maven中配置了打包插件就以我们配置的打包插件为主,如果没配置就以maven的打包插件为主

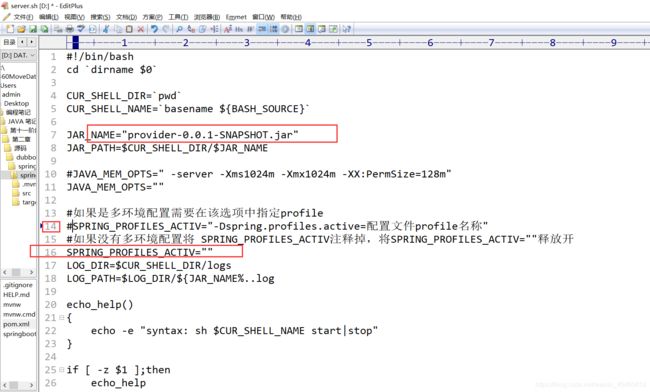
- 修改 start.sh 或 start.bat 中配置信息,将启动类修改为当前 dubbo 版本的启动类
基于Windows运行修改start.bat 基于Linux运行修改start.sh
修改前

修改后

先清除再打包

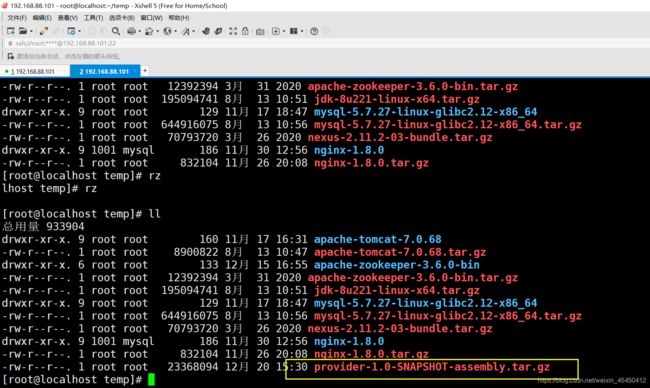
上传到Linux下
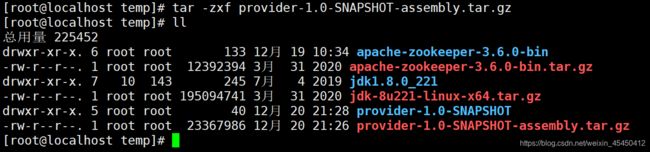
解压
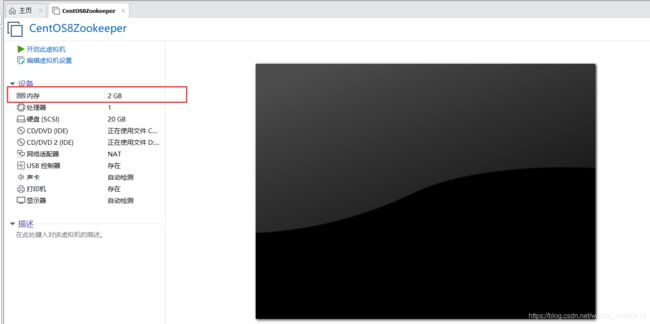
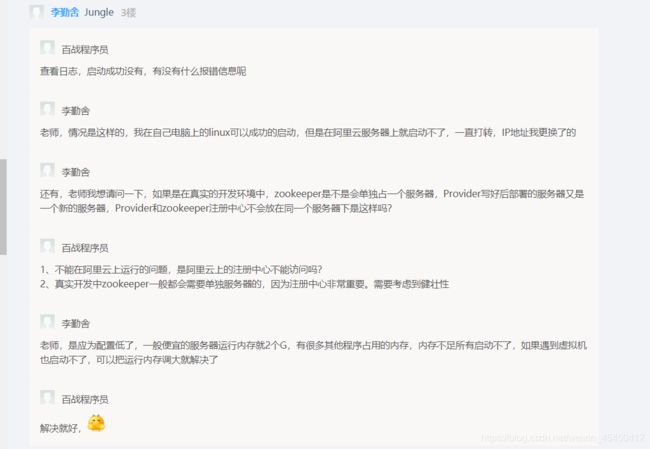
报错显示内存不足 原先Linux内存为1G不够后改为2G


又遇到下面的问题
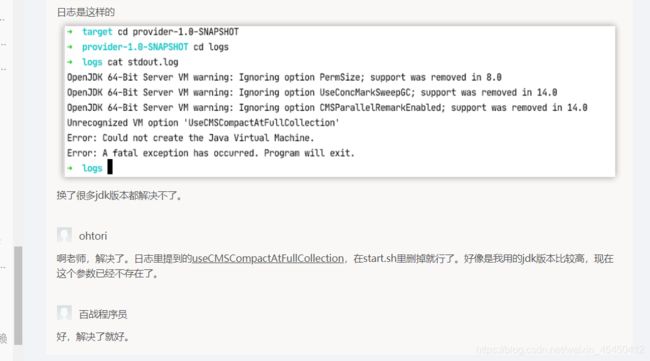


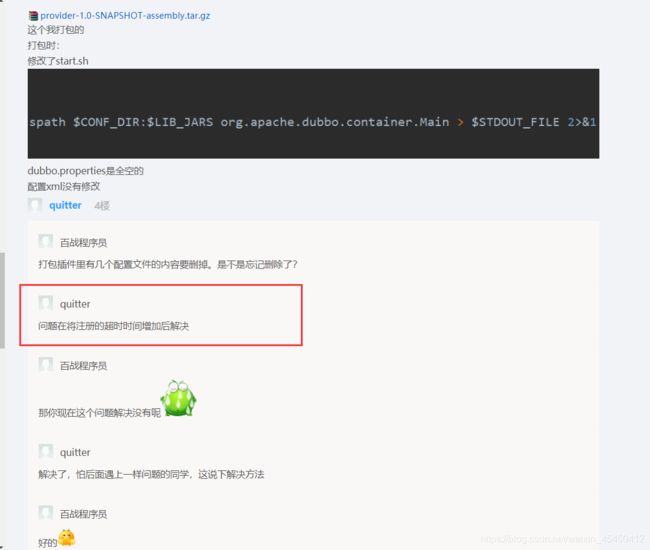
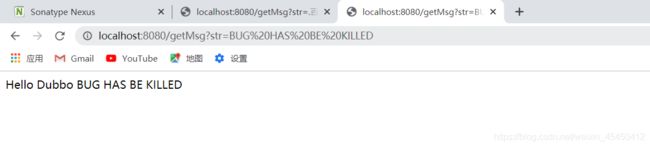
之前超时时间是10000毫秒现在修改为150000毫秒成功解决BUG

启动consumer访问测试
关掉虚拟机之前停止服务

十、 Dubbo 实战案例
1 案例介绍
1.1需求
完成对用户表的 CRUD 操作。
1.2架构方式
使用分布式架构方式。
1.3技术选型
Maven、Spring Boot、Thymeleaf、Zookeeper、Dubbo、MySql
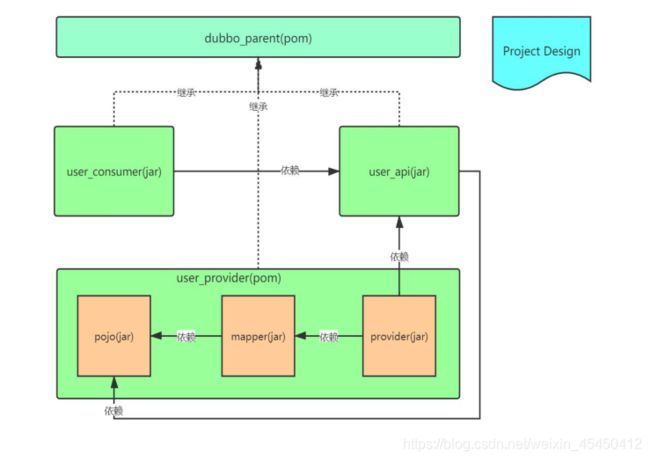
1.4项目结构设计
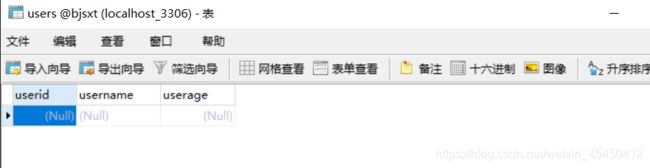
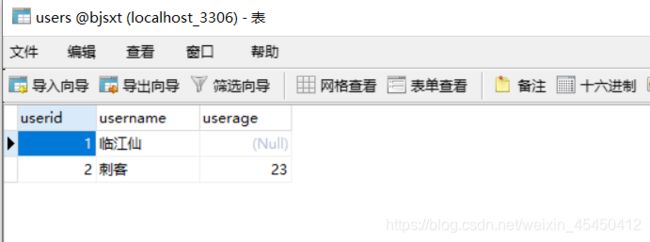
2 创建表
CREATE TABLE `users` (
`userid` int(11) NOT NULL AUTO_INCREMENT,
`username` varchar(30) DEFAULT NULL,
`userage` int(11) DEFAULT NULL,
PRIMARY KEY (`userid`)
) ENGINE=InnoDB AUTO_INCREMENT=5 DEFAULT CHARSET=utf8;
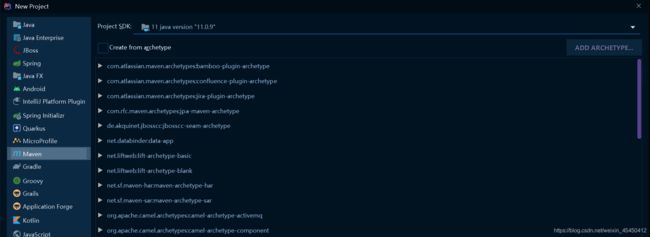
3 创建项目
3.1创建 dubbo_parent 父项目
3.1.1 创建项目
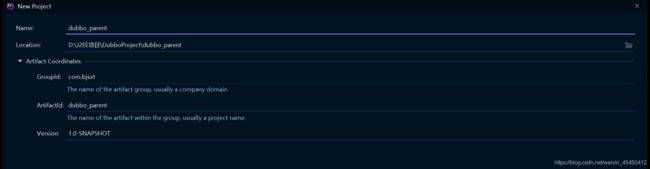
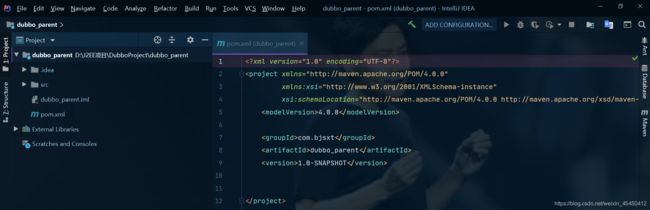
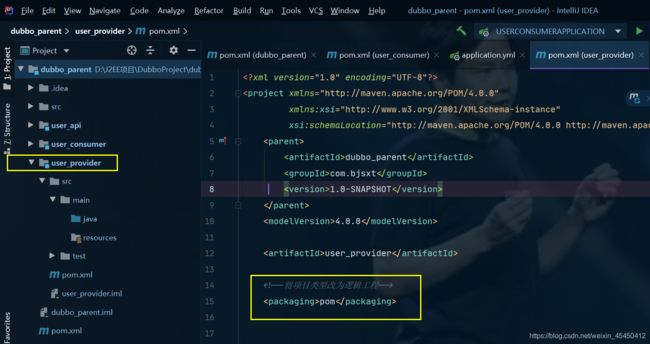
3.1.2 修改 POM 文件
将项目类型修改为POM逻辑工程
<project xmlns="http://maven.apache.org/POM/4.0.0"
         xmlns:xsi="http://www.w3.org/2001/XMLSchema-instance"
         xsi:schemaLocation="http://maven.apache.org/POM/4.0.0 http://maven.apache.org/xsd/maven-4.0.0.xsd">
    <modelVersion>4.0.0modelVersion>

    <groupId>com.bjsxtgroupId>
    <artifactId>dubbo_parentartifactId>
    <version>1.0-SNAPSHOTversion>


    <packaging>pompackaging>

    <properties>
        <dubbo.spring.starter.version>2.7.6dubbo.spring.starter.version>
        <dubbo.registry.zookeeper.version>2.7.6dubbo.registry.zookeeper.version>
        <mybatis.spring.starter.version>2.1.2mybatis.spring.starter.version>
        <mysql.connector.version>5.1.38mysql.connector.version>
        <mybatis-generator.version>1.3.5mybatis-generator.version>
    properties>
    <dependencyManagement>
        <dependencies>

            <dependency>
                <groupId>org.apache.dubbogroupId>
                <artifactId>dubbo-spring-boot-starterartifactId>
                <version>${dubbo.spring.starter.version}version>
            dependency>

            <dependency>
                <groupId>org.apache.dubbogroupId>
                <artifactId>dubbo-registry-zookeeperartifactId>
                <version>${dubbo.registry.zookeeper.version}version>
            dependency>

            <dependency>
                <groupId>org.mybatis.spring.bootgroupId>
                <artifactId>mybatis-spring-boot-starterartifactId>
                <version>${mybatis.spring.starter.version}version>
            dependency>

            <dependency>
                <groupId>mysqlgroupId>
                <artifactId>mysql-connector-javaartifactId>
                <version>${mysql.connector.version}version>
            dependency>
        dependencies>
    dependencyManagement>
    <build>
        <pluginManagement>
            <plugins>

                <plugin>
                    <groupId>org.mybatis.generatorgroupId>
                    <artifactId>mybatis-generator-maven-pluginartifactId>
                    <version>${mybatis-generator.version}version>
                plugin>
            plugins>
        pluginManagement>
    build>

project>
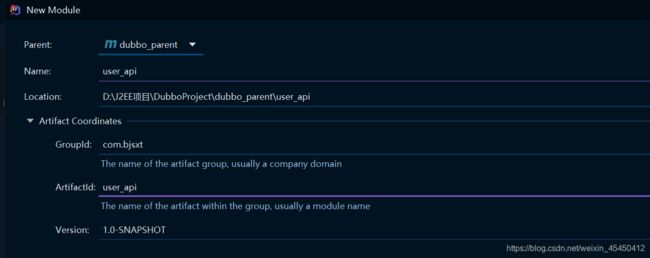
3.2创建 user_api
3.2.1 创建项目
只是用来存放服务的接口Maven项目即可

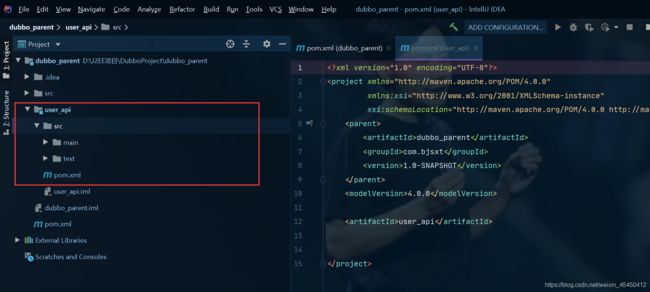
3.2.2 修改 POM 文件
将dubbo的启动器依赖和zookeeper的注册中心依赖放到这里面未来Consumer和Provider继承api项目就不用添加这些依赖了,依赖的传递性
<project xmlns="http://maven.apache.org/POM/4.0.0"
         xmlns:xsi="http://www.w3.org/2001/XMLSchema-instance"
         xsi:schemaLocation="http://maven.apache.org/POM/4.0.0 http://maven.apache.org/xsd/maven-4.0.0.xsd">
    <parent>
        <artifactId>dubbo_parentartifactId>
        <groupId>com.bjsxtgroupId>
        <version>1.0-SNAPSHOTversion>
    parent>
    <modelVersion>4.0.0modelVersion>

    <artifactId>user_apiartifactId>

    <dependencies>

        <dependency>
            <groupId>org.apache.dubbogroupId>
            <artifactId>dubbo-registry-zookeeperartifactId>
        dependency>

        <dependency>
            <groupId>org.apache.dubbogroupId>
            <artifactId>dubbo-spring-boot-starterartifactId>
        dependency>
    dependencies>


project>
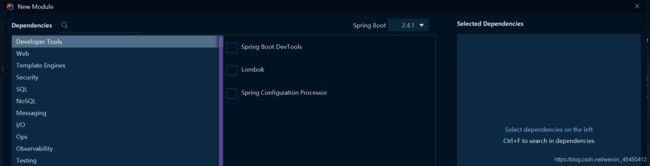
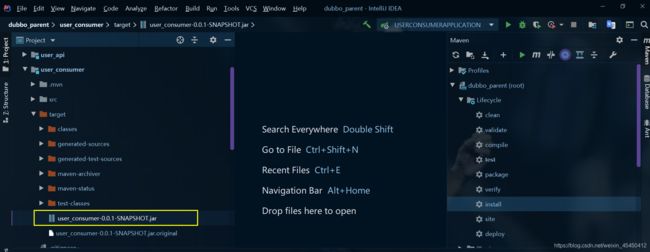
3.3创建 user_consumer
3.3.1 创建项目
springboot项目

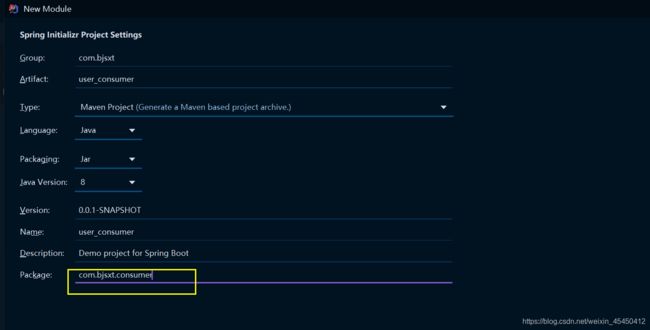
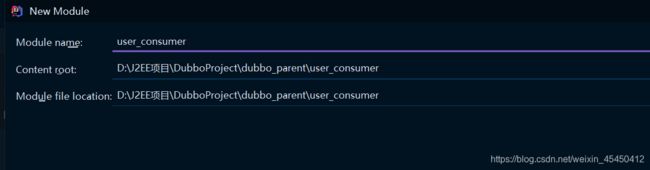
user_consumer直接通过IDEA的脚手架工具创建的SpringBoot项目这时会直接从自己的父工程中做继承不会将dubbo_parent认为是自己的父工程,因此在dubbo_parent的pom.xml文件里就不会有模块的指定
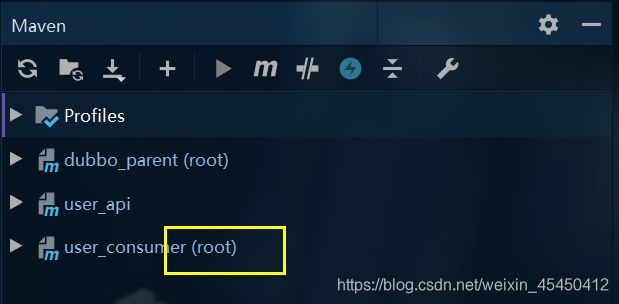

修改dubbo_parent项目的pom文件 修改前

修改后

修改user_consumer的pom文件继承dubbo_parent
一个项目既要继承SpringBoot的父工程也要继承自己的项目时注意:
继承SpringBoot的父工程时必须用标签,继承自己的项目时可以用标签,因为如果我们要通过pom方式引入项目的父工程时依赖可以成功引入但是插件无法引入进来,这时SpringBoot项目的打包插件就会失效user_consumer项目无法打包成SpringBoot项目,而自己的项目dubbo_parent只有一个MybatisGenerator插件,这个插件对user_parent项目无用,使用标签即使打包时不包含此插件也无妨,而使用标签可以将父工程的打包插件导入
3.3.2 修改 POM 文件
<project xmlns="http://maven.apache.org/POM/4.0.0" xmlns:xsi="http://www.w3.org/2001/XMLSchema-instance"
         xsi:schemaLocation="http://maven.apache.org/POM/4.0.0 https://maven.apache.org/xsd/maven-4.0.0.xsd">
    <modelVersion>4.0.0modelVersion>
    <parent>
        <groupId>org.springframework.bootgroupId>
        <artifactId>spring-boot-starter-parentartifactId>
        <version>2.4.1version>
        <relativePath/>
    parent>
    <groupId>com.bjsxtgroupId>
    <artifactId>user_consumerartifactId>
    <version>0.0.1-SNAPSHOTversion>
    <name>user_consumername>
    <description>Demo project for Spring Bootdescription>

    <properties>
        <java.version>1.8java.version>
    properties>

    <dependencyManagement>


        <dependencies>
            <dependency>
                <groupId>com.bjsxtgroupId>
                <artifactId>dubbo_parentartifactId>
                <version>1.0-SNAPSHOTversion>
                <type>pomtype>
                <scope>importscope>
            dependency>
        dependencies>
    dependencyManagement>
    <dependencies>

        <dependency>
            <groupId>com.bjsxtgroupId>
            <artifactId>user_apiartifactId>
            <version>1.0-SNAPSHOTversion>
        dependency>

        <dependency>
            <groupId>org.springframework.bootgroupId>
            <artifactId>spring-boot-starter-webartifactId>
        dependency>

        <dependency>
            <groupId>org.springframework.bootgroupId>
            <artifactId>spring-boot-starter-thymeleafartifactId>
        dependency>

        <dependency>
            <groupId>org.springframework.bootgroupId>
            <artifactId>spring-boot-starter-testartifactId>
            <scope>testscope>
            <exclusions>
                <exclusion>
                    <groupId>org.junit.vintagegroupId>
                    <artifactId>junit-vintage-engineartifactId>
                exclusion>
            exclusions>
        dependency>
    dependencies>
    <build>
        <plugins>
            <plugin>
                <groupId>org.springframework.bootgroupId>
                <artifactId>spring-boot-maven-pluginartifactId>
            plugin>
        plugins>
    build>

project>
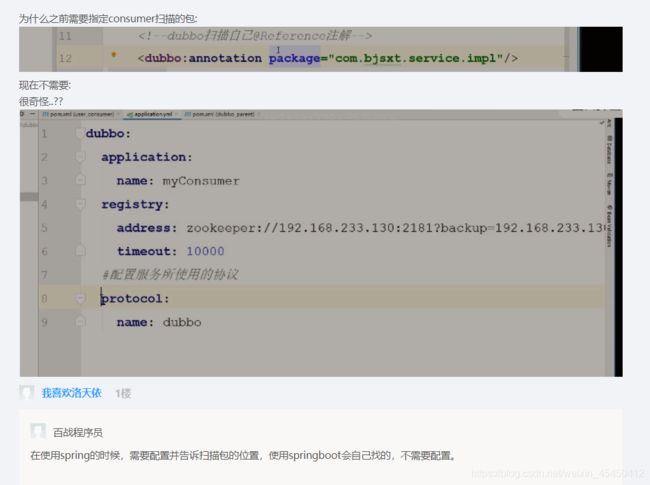
3.3.3 修改配置文件
dubbo:
  application:
    name: myConsumer
  registry:
    address: zookeeper://192.168.88.101:2181?backup=192.168.88.101:2182,192.168.88.101:2183
    timeout: 10000
# 配置服务所使用的协议
  protocol:
    name: dubbo
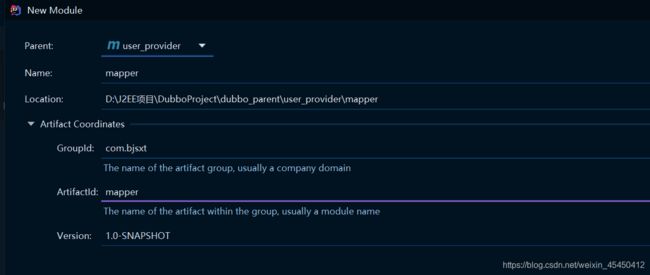
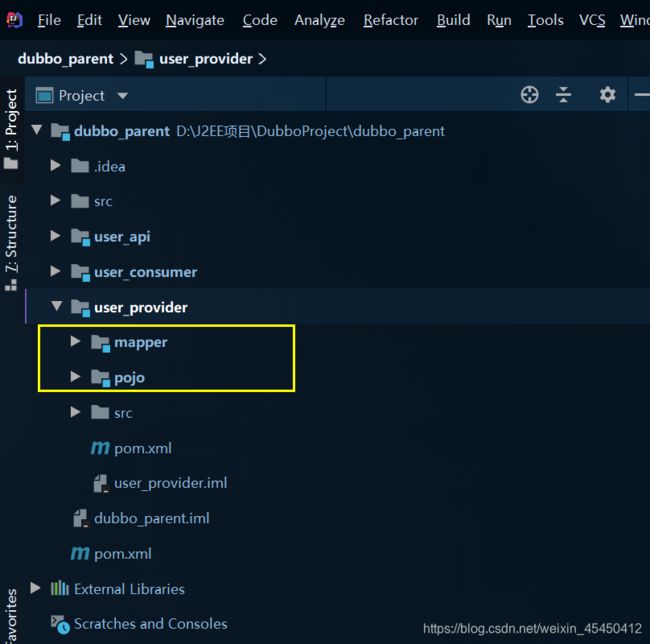
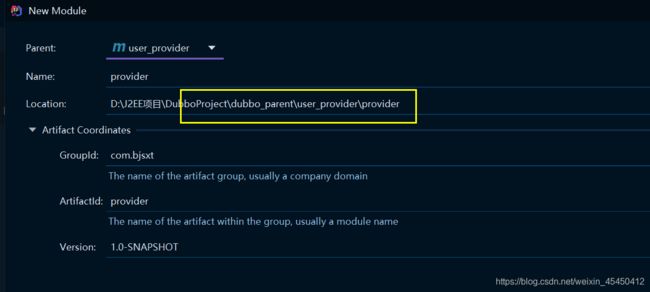
3.4创建 user_provider 项目及模块
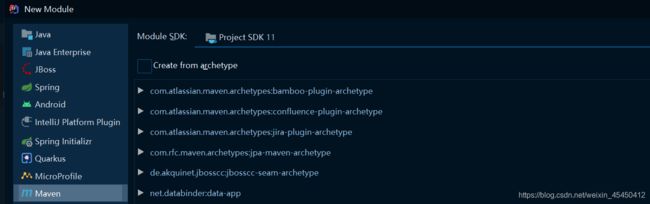
3.4.1 创建项目及模块

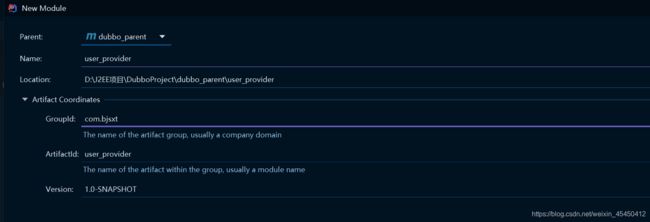
在user_provider下创建pojo模块
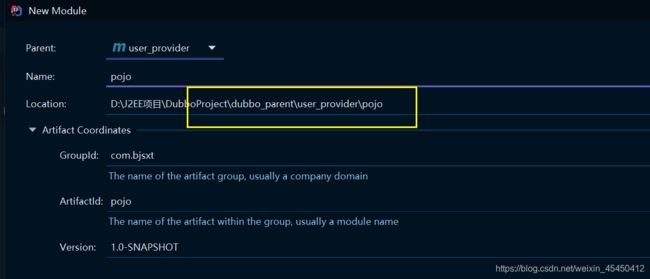
在user_provider下创建mapper模块
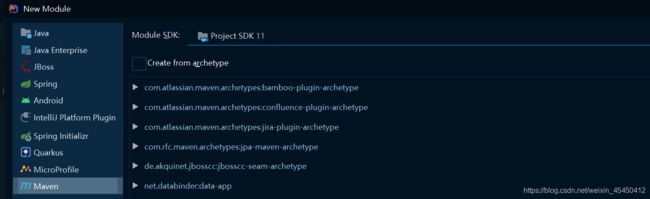
user_consumer是SpringBoot项目但是在user_provider下不能再通过IDEA脚手架创建SpringBoot项目了,因为一旦通过脚手架创建SpringBoot项目意味着该SpringBoot项目有两级父目录这是不允许的会将user_provider项目变成SpringBoot项目,而user_consumer项目只有一级父目录是dubbo_parent项目可以通过脚手架创建SpringBoot项目,可以在user_provider下创建一个Maven工程然后改造成SpringBoot项目


3.4.2 修改项目模块的 POM 文件
3.4.2.1 修改 Mapper 项目的 POM 文件
<project xmlns="http://maven.apache.org/POM/4.0.0"
         xmlns:xsi="http://www.w3.org/2001/XMLSchema-instance"
         xsi:schemaLocation="http://maven.apache.org/POM/4.0.0 http://maven.apache.org/xsd/maven-4.0.0.xsd">
    <parent>
        <artifactId>user_providerartifactId>
        <groupId>com.bjsxtgroupId>
        <version>1.0-SNAPSHOTversion>
    parent>
    <modelVersion>4.0.0modelVersion>

    <artifactId>mapperartifactId>

    <dependencies>

        <dependency>
            <groupId>com.bjsxtgroupId>
            <artifactId>pojoartifactId>
            <version>1.0-SNAPSHOTversion>
        dependency>

        <dependency>
            <groupId>org.mybatis.spring.bootgroupId>
            <artifactId>mybatis-spring-boot-starterartifactId>
        dependency>

        <dependency>
            <groupId>mysqlgroupId>
            <artifactId>mysql-connector-javaartifactId>
        dependency>
    dependencies>
    <build>
        <plugins>

            <plugin>
                <groupId>org.mybatis.generatorgroupId>
                <artifactId>mybatis-generator-maven-pluginartifactId>
                <dependencies>
                    <dependency>
                        <groupId>mysqlgroupId>
                        <artifactId>mysql-connector-javaartifactId>
                        <version>5.1.48version>
                    dependency>
                dependencies>

                <configuration>
                    <configurationFile>${project.basedir}/src/main/resources/generatorConfig.xmlconfigurationFile>
                    <verbose>trueverbose>
                    <overwrite>trueoverwrite>
                configuration>
            plugin>
        plugins>
        <resources>

            <resource>
                <directory>src/main/javadirectory>
                <includes>
                    <include>**/*.xmlinclude>
                includes>
            resource>
        resources>
    build>

project>
3.4.2.2 修改 Provider 项目的 POM 文件
继承 Spring Boot 父工程

<parent>
    <groupId>org.springframework.bootgroupId>
    <artifactId>spring-boot-starter-parentartifactId>
    <version>2.2.6.RELEASEversion>
    <relativePath/>
parent>
继承 dubbo_parent 工程
<dependencyManagement>
    <dependencies>
        <dependency>
            <groupId>com.bjsxtgroupId>
            <artifactId>user_providerartifactId>
            <version>1.0-SNAPSHOTversion>
            <type>pomtype>
            <scope>importscope>
        dependency>
    dependencies>
dependencyManagement>
添加其他依赖
<properties>
    <java.version>1.8java.version>
properties>
<dependencies>

    <dependency>
        <groupId>com.bjsxtgroupId>
        <artifactId>mapperartifactId>
        <version>1.0-SNAPSHOTversion>
    dependency>

    <dependency>
        <groupId>com.bjsxtgroupId>
        <artifactId>user_apiartifactId>
        <version>1.0-SNAPSHOTversion>
    dependency>

    <dependency>
        <groupId>org.springframework.bootgroupId>
        <artifactId>spring-boot-starterartifactId>
    dependency>

    <dependency>
        <groupId>org.springframework.bootgroupId>
        <artifactId>spring-boot-starter-testartifactId>
        <scope>testscope>
        <exclusions>
            <exclusion>
                <groupId>org.junit.vintagegroupId>
                <artifactId>junit-vintage-engineartifactId>
            exclusion>
        exclusions>
    dependency>
dependencies>
<build>
    <plugins>
        <plugin>
            <groupId>org.springframework.bootgroupId>
            <artifactId>spring-boot-maven-pluginartifactId>
        plugin>
    plugins>
build>
<project xmlns="http://maven.apache.org/POM/4.0.0"
         xmlns:xsi="http://www.w3.org/2001/XMLSchema-instance"
         xsi:schemaLocation="http://maven.apache.org/POM/4.0.0 http://maven.apache.org/xsd/maven-4.0.0.xsd">
    <parent>
        <groupId>org.springframework.bootgroupId>
        <artifactId>spring-boot-starter-parentartifactId>
        <version>2.2.6.RELEASEversion>
        <relativePath/>
    parent>
    <modelVersion>4.0.0modelVersion>


    <groupId>com.bjsxtgroupId>
    <artifactId>providerartifactId>
    <version>0.0.1-SNAPSHOTversion>

    <dependencyManagement>
        <dependencies>
            <dependency>
                <groupId>com.bjsxtgroupId>
                <artifactId>user_providerartifactId>
                <version>1.0-SNAPSHOTversion>
                <type>pomtype>
                <scope>importscope>
            dependency>
        dependencies>
    dependencyManagement>

    <properties>
        <java.version>1.8java.version>
    properties>
    <dependencies>

        <dependency>
            <groupId>com.bjsxtgroupId>
            <artifactId>mapperartifactId>
            <version>1.0-SNAPSHOTversion>
        dependency>

        <dependency>
            <groupId>com.bjsxtgroupId>
            <artifactId>user_apiartifactId>
            <version>1.0-SNAPSHOTversion>
        dependency>

        <dependency>
            <groupId>org.springframework.bootgroupId>
            <artifactId>spring-boot-starterartifactId>
        dependency>

        <dependency>
            <groupId>org.springframework.bootgroupId>
            <artifactId>spring-boot-starter-testartifactId>
            <scope>testscope>
            <exclusions>
                <exclusion>
                    <groupId>org.junit.vintagegroupId>
                    <artifactId>junit-vintage-engineartifactId>
                exclusion>
            exclusions>
        dependency>
    dependencies>
    <build>
        <plugins>
            <plugin>
                <groupId>org.springframework.bootgroupId>
                <artifactId>spring-boot-maven-pluginartifactId>
            plugin>
        plugins>
    build>


project>
3.4.3 配置 Provider
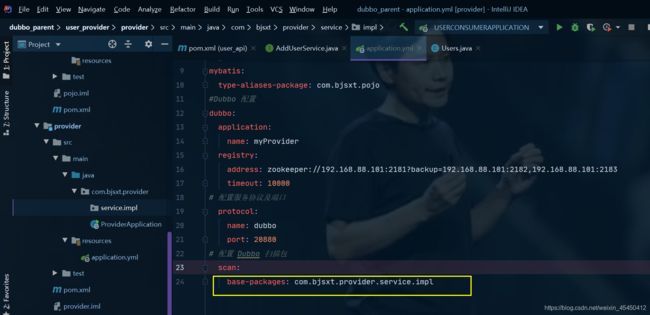
3.4.3.1 添加 application.yml 配置文件
因为是基于Maven项目改造的,没有这个配置文件得自己创建

# 配置数据源
spring:
datasource:
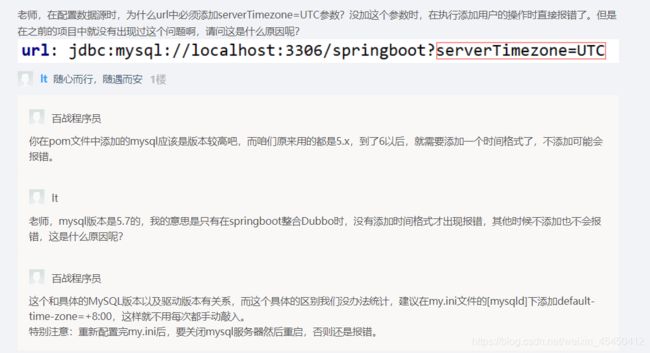
driver-class-name: com.mysql.jdbc.Driver
url: jdbc:mysql://localhost:3306/bjsxt?serverTimezone=UTC
username: root
password: root
#Mybatis 配置
mybatis:
type-aliases-package: com.bjsxt.pojo
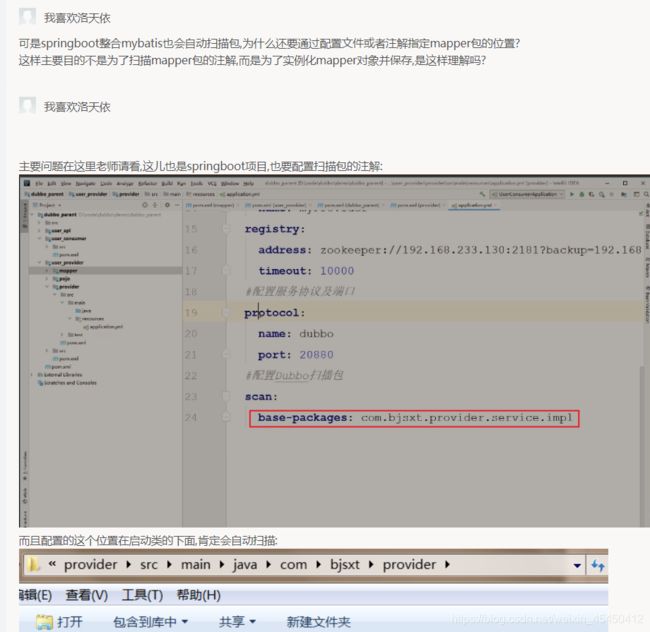
#Dubbo 配置
dubbo:
application:
name: myProvider
registry:
address: zookeeper://192.168.88.101:2181?backup=192.168.88.101:2182,192.168.88.101:2183
timeout: 10000
# 配置服务协议及端口
protocol:
name: dubbo
port: 20880
# 配置 Dubbo 扫描包
scan:
base-packages: com.bjsxt.provider.service.impl
3.4.3.2 需改启动类
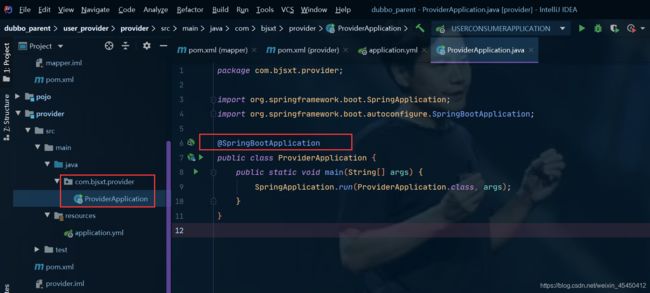
package com.bjsxt.provider;

import org.springframework.boot.SpringApplication;
import org.springframework.boot.autoconfigure.SpringBootApplication;

@SpringBootApplication
public class ProviderApplication {
    public static void main(String[] args) {
        SpringApplication.run(ProviderApplication.class, args);
    }
}
配置SpringBoot和Mybatis整合之后指定扫描接口和映射配置文件的包的注解

3.5通过 Mybatis Generator 插件生成 Mapper 与 POJO
3.5.1 添加 generatorConfig.xml 配置文件

添加约束文件


<generatorConfiguration>
   <context id="testTables" targetRuntime="MyBatis3">

      <plugin type="org.mybatis.generator.plugins.SerializablePlugin"  />

      <plugin type="org.mybatis.generator.plugins.ToStringPlugin" >plugin>
      <commentGenerator>

         <property name="suppressAllComments" value="true" />
      commentGenerator>

      <jdbcConnection driverClass="com.mysql.jdbc.Driver"
         connectionURL="jdbc:mysql://localhost:3306/bjsxt" userId="root" password="root">
      jdbcConnection>

      <javaTypeResolver>
         <property name="forceBigDecimals" value="false" />
      javaTypeResolver>


      <javaModelGenerator targetPackage="com.bjsxt.pojo" targetProject=".\src\main\java">

         <property name="enableSubPackages" value="false" />

         <property name="trimStrings" value="true" />
      javaModelGenerator>

      <sqlMapGenerator targetPackage="com.bjsxt.mapper" targetProject=".\src\main\java">

         <property name="enableSubPackages" value="false" />
      sqlMapGenerator>

      <javaClientGenerator type="XMLMAPPER" targetPackage="com.bjsxt.mapper" targetProject=".\src\main\java">

         <property name="enableSubPackages" value="false" />
      javaClientGenerator>

      <table schema="" tableName="users">table>

   context>
generatorConfiguration>
3.5.2 运行 Mybatis Generator 插件

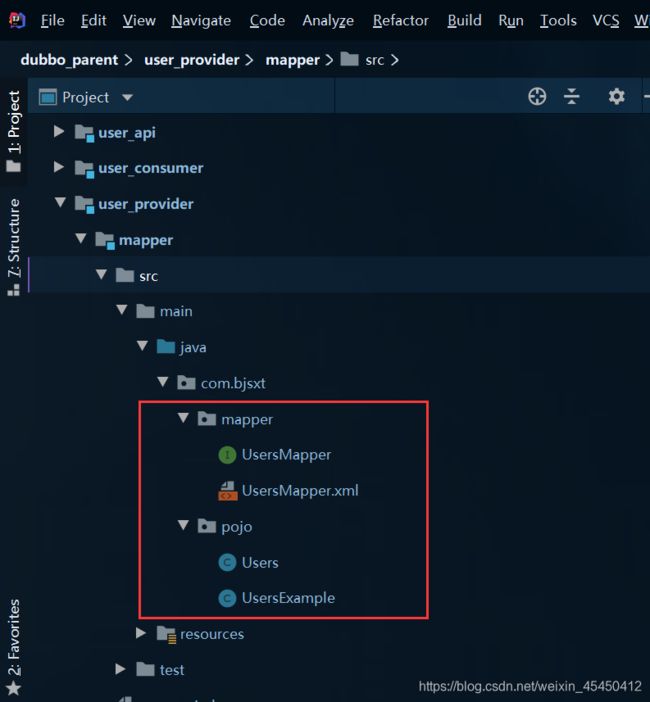
3.5.3 将实体类拷贝到 pojo 项目中

4 修改 user_api 的 POM 文件添加 pojo 依赖
4.1添加 pojo 依赖
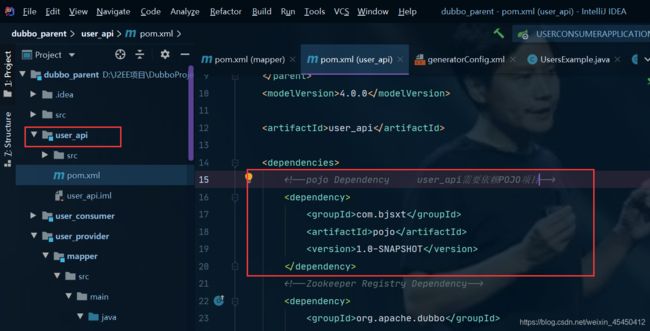
<dependency>
    <groupId>com.bjsxtgroupId>
    <artifactId>pojoartifactId>
    <version>1.0-SNAPSHOTversion>
dependency>
4.2排除冲突依赖
使用图形展示maven依赖关系


红色的线表示Jar包有冲突
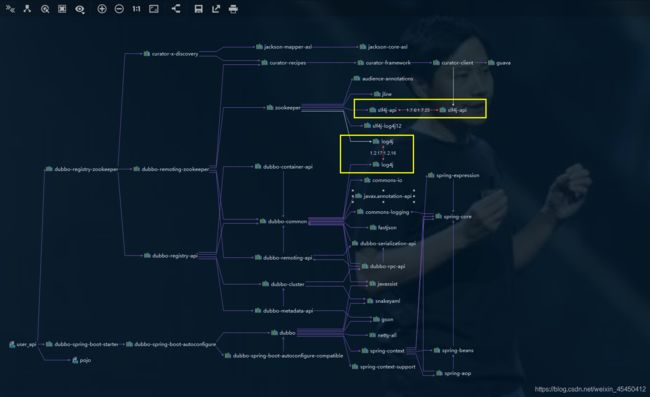
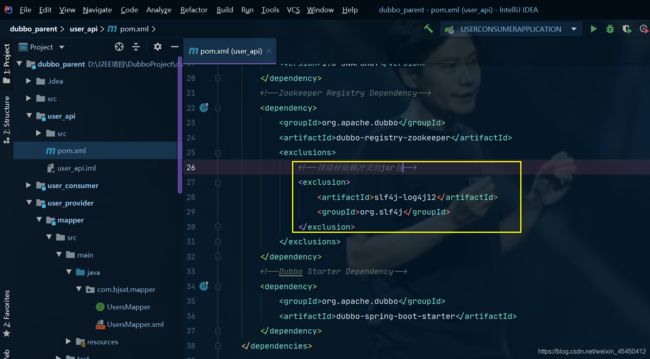
<dependency>
    <groupId>org.apache.dubbogroupId>
    <artifactId>dubbo-registry-zookeeperartifactId>
    <exclusions>

        <exclusion>
            <artifactId>slf4j-log4j12artifactId>
            <groupId>org.slf4jgroupId>
        exclusion>
    exclusions>
dependency>
5 实现业务
5.1添加用户业务
5.1.1 创建添加用户业务接口
5.1.1.1 在 user_api 项目中创建添加用户接口
如果项目是基于Dubbo做的分布式架构用dubbo作为RPC服务的调用,consumer未来需要调用provider并且传递一个Users对象,这时POJO必须实现Serializable接口,此项目POJO的生成是基于Generator工具生成自带实现序列化接口

package com.bjsxt.api;

import com.bjsxt.pojo.Users;

public interface AddUserService {
    void addUser(Users users);
}
5.1.1.2 在 provider 中实现添加用户业务接口
接口实现类的位置需要放在配置文件指定的位置
package com.bjsxt.provider.service.impl;

import com.bjsxt.api.AddUserService;
import com.bjsxt.mapper.UsersMapper;
import com.bjsxt.pojo.Users;
import org.apache.dubbo.config.annotation.Service;
import org.springframework.beans.factory.annotation.Autowired;

/**
 * 添加用户业务
 */
@Service    //dubbo下的注解
public class AddUserServiceImpl implements AddUserService {

    @Autowired//mapper项目已经依赖给provider所以可以直接拿到
    private UsersMapper usersMapper;

    @Override
    public void addUser(Users users) {
        this.usersMapper.insert(users);
    }
}
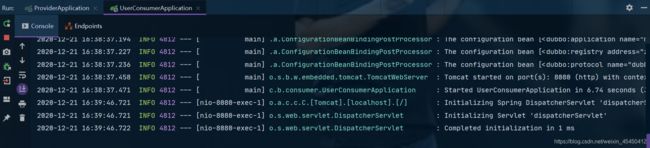
启动provider

5.1.2 在 Consumer 中调用添加用户业务接口
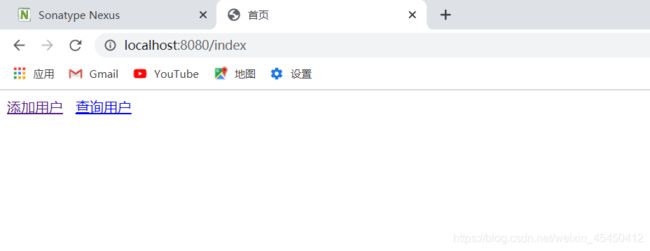
5.1.2.1 创建首页
在resources目录下创建templates目录
index.html
<html lang="en" xmlns:th="http://www.thymeleaf.org">
<link rel="shortcut icon" href="../resources/favicon.ico"
      th:href="@{/static/favicon.ico}"/>
<head>
    <meta charset="UTF-8">
    <title>首页title>
head>
<body>
<a href="/addUser">添加用户a>   <a href="/user/getUser">查询用户a>
body>
html>
5.1.2.2 创建页面跳转 Controller
package com.bjsxt.consumer.web.controller;

import org.springframework.stereotype.Controller;
import org.springframework.web.bind.annotation.PathVariable;
import org.springframework.web.bind.annotation.RequestMapping;

/**
 * 页面跳转控制器
 */
@Controller
public class PageController {

    /**
     * 完成页面跳转
     */
    @RequestMapping("/{page}")
    public String showPage(@PathVariable String page) {
        return page;
    }
}
5.1.2.3 解决项目无法获取 favicon.ico 的异常
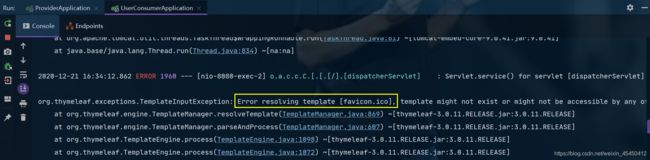

在页面中开启th的命名空间
<html lang="en" xmlns:th="http://www.thymeleaf.org">
<link rel="shortcut icon" href="../resources/favicon.ico"
      th:href="@{/static/favicon.ico}"/>
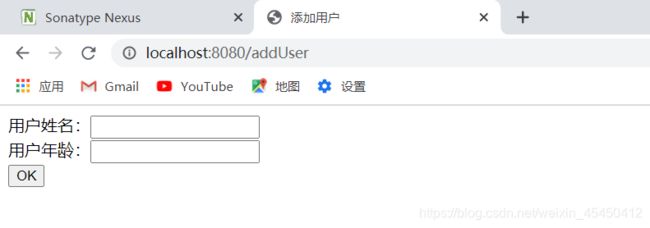
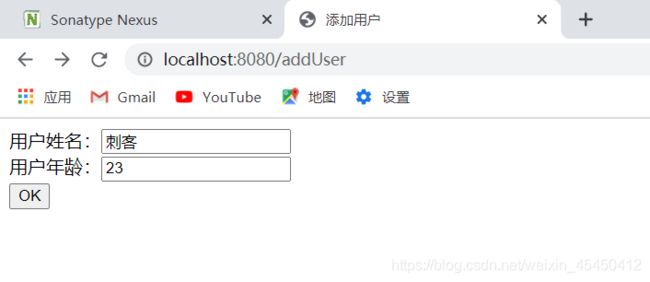
5.1.2.4 创建添加用户页面
addUser.html
<html lang="en" xmlns:th="http://www.thymeleaf.org">
<link rel="shortcut icon" href="../resources/favicon.ico" th:href="@{/static/favicon.ico}"/>
<head>
    <meta charset="UTF-8">
    <title>添加用户title>
head>
<body>
    <form method="post" action="/user/addUser">

        用户姓名:<input type="text" name="username"/><br/>
        用户年龄:<input type="text" name="userage"/><br/>
        <input type="submit" value="OK"/>
    form>
body>
html>
5.1.2.5 创建 Consumer 业务层
package com.bjsxt.consumer.service;

import com.bjsxt.pojo.Users;

public interface UserService {
    void addUser(Users users);
}
package com.bjsxt.consumer.service.impl;

import com.bjsxt.api.AddUserService;
import com.bjsxt.consumer.service.UserService;
import com.bjsxt.pojo.Users;
import org.apache.dubbo.config.annotation.Reference;
import org.springframework.stereotype.Service;

/**
 * 用户操作业务层
 */
@Service//用的是spring下的注解
public class UserServiceImpl implements UserService {

    @Reference//dubbo下的注解
    private AddUserService addUserService;

    @Override
    public void addUser(Users users) {
        this.addUserService.addUser(users);
    }
}
5.1.2.6 创建添加用户 Controller
package com.bjsxt.consumer.web.controller;

import com.bjsxt.consumer.service.UserService;
import com.bjsxt.pojo.Users;
import org.springframework.beans.factory.annotation.Autowired;
import org.springframework.stereotype.Controller;
import org.springframework.web.bind.annotation.RequestMapping;

/**
 * 处理用户操作控制器
 */
@Controller
@RequestMapping("/user")
public class UsersController {

    @Autowired//注入consumer的业务层对象
    private UserService userService;

    /**
     * 处理添加用户请求
     */
    @RequestMapping("/addUser")
    public String addUser(Users users) {
        this.userService.addUser(users);
        //重定向防止表单重复提交
        return "redirect:/ok";
    }
}
5.1.2.7 创建成功页面
ok.html
<html lang="en" xmlns:th="http://www.thymeleaf.org">
<link rel="shortcut icon" href="../resources/favicon.ico" th:href="@{/static/favicon.ico}"/>
<head>
    <meta charset="UTF-8">
    <title>成功页面title>
head>
<body>
    操作成功请<a href="/index">返回a>
body>
html>
5.2查询用户业务
5.2.1 创建查询用户业务接口
5.2.1.1 在 user_api 项目中添加查询用户业务接口
package com.bjsxt.api;

import com.bjsxt.pojo.Users;

import java.util.List;

public interface FindUserService {
    List<Users> findUserAll();
}
5.2.1.2 在 provider 中实现查询用户业务接口
package com.bjsxt.provider.service.impl;

import com.bjsxt.api.FindUserService;
import com.bjsxt.mapper.UsersMapper;
import com.bjsxt.pojo.Users;
import com.bjsxt.pojo.UsersExample;
import org.apache.dubbo.config.annotation.Service;
import org.springframework.beans.factory.annotation.Autowired;

import java.util.List;

/**
 * 查询所有用户业务
 */
@Service//dubbo下的注解
public class FindUserServiceImpl implements FindUserService {

    @Autowired
    private UsersMapper usersMapper;

    /**
     * 查询全部用户
     * @return
     */
    @Override
    public List<Users> findUserAll() {
        UsersExample example = new UsersExample();
        return this.usersMapper.selectByExample(example);
    }
}
5.2.2 在 Consumer 中调用查询用户业务
5.2.2.1 修改 Consumer 业务层添加查询用户业务
List<Users> getUsersAll();
/**
 * 查询所有用户
 * @return
 */
@Override
public List<Users> getUsersAll() {
    return this.findUserService.findUserAll();
}
5.2.2.2 修改 Consumer 添加处理查询用户请求
/**
* 处理查询用户请求
*/
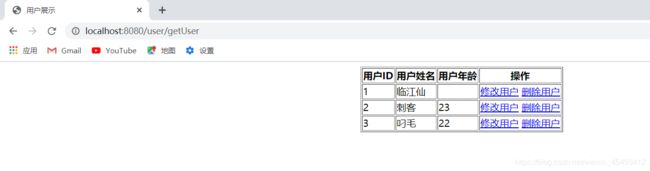
@RequestMapping("/getUser")
public String getUser(Model model) {
List<Users> list = this.userService.getUsersAll();
model.addAttribute("list", list);
/**
* /基于请求转发跳转页面带根路径在Windows下没问题,但是基于Linux下就报错
* 因为在Thymeleaf中所有页面的相对路径已经指定了默认就是templates
* 如果在这里给个根路径表示去请求项目的根下的showUser页面了
* 所以未来项目部署到Linux下千万不能加根路径
*
* 而对于重定向带根路径是没问题的,因为重定向是让客户端浏览器再发一个请求去请求指定页面
* 所以在重定向中得加根路径
*/
/*return "/showUser";*/
return "showUser";//未来基于Linux部署不能带根
}
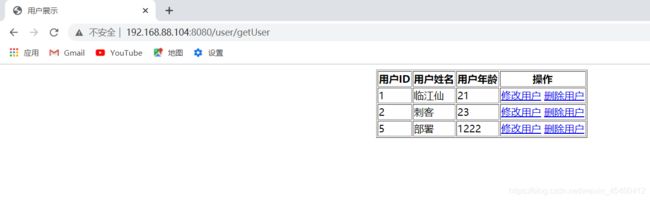
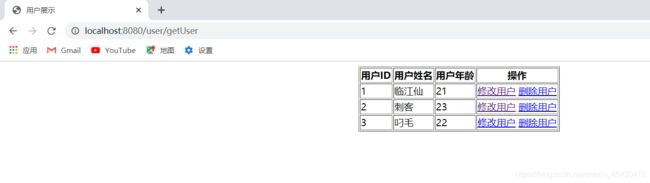
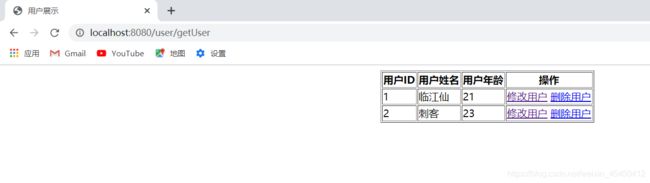
5.2.2.3 创建 showUser 页面
showUser.html
<html lang="en" xmlns:th="http://www.thymeleaf.org">
<link rel="shortcut icon" href="../resources/favicon.ico" th:href="@{/static/favicon.ico}"/>
<head>
    <meta charset="UTF-8">
    <title>用户展示title>
head>
<body>
    <table border="1" align="center">
        <tr>
            <th>用户IDth>
            <th>用户姓名th>
            <th>用户年龄th>
            <th>操作th>
        tr>
        <tr th:each="user:${list}">
            <td th:text="${user.userid}">td>
            <td th:text="${user.username}">td>
            <td th:text="${user.userage}">td>
            <td>
                <a th:href="@{/user/preUpdateUser(userid=${user.userid})}">修改用户a>
                <a th:href="@{/user/deleteUser(userid=${user.userid})}">删除用户a>
            td>
        tr>
    table>
body>
html>
5.3更新用户业务
5.3.1 创建更新用户业务接口
5.3.1.1.1 在 user_api 项目中添加更新用户业务接口
package com.bjsxt.api;

import com.bjsxt.pojo.Users;

public interface UpdateUsersService {
    Users preUpdateUsers(Integer userid);

    void updateUser(Users users);
}
5.3.1.1.2 在 provider 中实现更新用户业务接口
package com.bjsxt.provider.service.impl;

import com.bjsxt.api.UpdateUsersService;
import com.bjsxt.mapper.UsersMapper;
import com.bjsxt.pojo.Users;
import org.apache.dubbo.config.annotation.Service;
import org.springframework.beans.factory.annotation.Autowired;

/**
 * 更新用户业务
 */
@Service//dubbo下的注解
public class UpdateUsersServiceImpl implements UpdateUsersService {

    @Autowired
    private UsersMapper usersMapper;

    /**
     * 预更新查询
     * @param userid
     * @return
     */
    @Override
    public Users preUpdateUsers(Integer userid) {
        return this.usersMapper.selectByPrimaryKey(userid);
    }

    /**
     * 更新用户
     * @param users
     */
    @Override
    public void updateUser(Users users) {
        this.usersMapper.updateByPrimaryKey(users);
    }
}
5.3.2 在 Consumer 中调用更新用户业务
5.3.2.1 修改 Consumer 业务层添加预更新查询用户业务
Users preUpdateUser(Integer userid);
/**
 * 根据ID预更新查询用户
 * @param userid
 * @return
 */
@Override
public Users preUpdateUser(Integer userid) {
    return this.updateUsersService.preUpdateUsers(userid);
}
5.3.2.2 修改 Consumer 添加处理查询用户请求
/**
* 处理预更新查询
*/
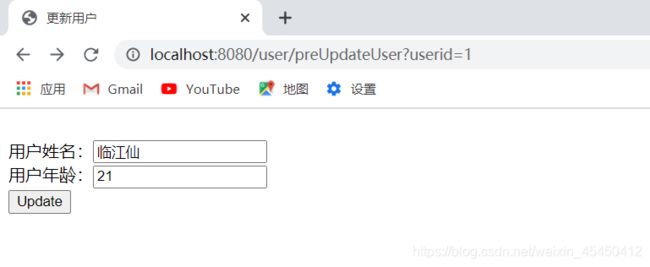
@RequestMapping("/preUpdateUser")
public String preUpdateUser(Model model,Integer userid) {
Users users = this.userService.preUpdateUser(userid);
model.addAttribute("user", users);
return "updateUsers";
}

5.3.2.3 创建更新用户页面
updateUsers.html
<html lang="en" xmlns:th="http://www.thymeleaf.org">
<link rel="shortcut icon" href="../resources/favicon.ico" th:href="@{/static/favicon.ico}"/>
<head>
    <meta charset="UTF-8">
    <title>更新用户title>
head>
<body>
    <form action="/user/updateUser" method="post">
        <input type="hidden" name="userid" th:value="${user.userid}"/><br/>
        用户姓名:<input type="text" name="username" th:value="${user.username}"/><br/>
        用户年龄:<input type="text" name="userage" th:value="${user.userage}"/><br/>
        <input type="submit" value="Update"/>
    form>
body>
html>
5.3.2.4 修改 Consumer 业务层添加更新用户业务
void updateUser(Users users);
/**
 * 更新用户
 * @param users
 */
@Override
public void updateUser(Users users) {
    this.updateUsersService.updateUser(users);
}
5.3.2.5 修改 Consumer 添加处理更新用户请求
/**
 * 更新用户
 */
@RequestMapping("/updateUser")
public String updateUser(Users users) {
    this.userService.updateUser(users);
    return "redirect:/ok";
}
5.4删除用户业务
5.4.1 创建删除用户业务接口
5.4.1.1 在 user_api 项目中添加删除用户业务接口
package com.bjsxt.api;

public interface DeleteUserService {
    void deleteUsersById(Integer userid);
}
5.4.1.2 在 provider 中实现删除用户业务接口
package com.bjsxt.provider.service.impl;

import com.bjsxt.api.DeleteUserService;
import com.bjsxt.mapper.UsersMapper;
import org.apache.dubbo.config.annotation.Service;
import org.springframework.beans.factory.annotation.Autowired;

/**
 * 删除用户业务
 */
@Service//dubbo下的注解
public class DeleteUserServiceImpl implements DeleteUserService {

    @Autowired
    private UsersMapper usersMapper;

    /**
     * 更加用户id删除用户
     * @param userid
     */
    @Override
    public void deleteUsersById(Integer userid) {
        this.usersMapper.deleteByPrimaryKey(userid);
    }
}
5.4.2 在 Consumer 中调用删除用户业务
5.4.2.1 修改 Consumer 业务层添加删除用户业务
void deleteUserById(Integer userid);
/**
 * 删除用户
 * @param userid
 */
@Override
public void deleteUserById(Integer userid) {
    this.deleteUserService.deleteUsersById(userid);
}
5.4.2.2 修改 Consumer 添加处理删除用户请求
/**
 * 删除用户
 */
@RequestMapping("/deleteUser")
public String deleteUser(Integer userid) {
    this.userService.deleteUserById(userid);
    return "redirect:/ok";
}
5.5项目部署
5.5.1 部署环境
安装三台 Linux 操作系统,并正确安装 JDK。
192.168.88.101:部署 Zookeeper
192.168.88.103:部署 Provider
192.168.88.104:部署 Consumer
5.5.2 部署 Provider
5.5.2.1 在配置文件中修改数据库连接地址
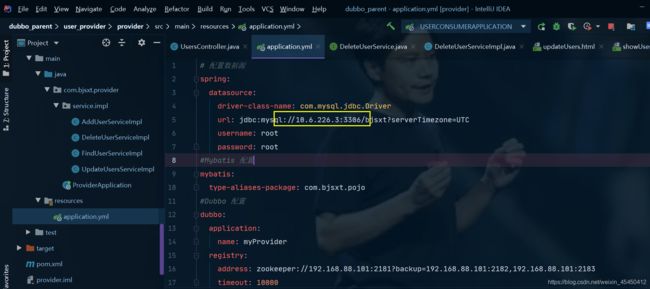
# 配置数据源
spring:
  datasource:
    driver-class-name: com.mysql.jdbc.Driver
    url: jdbc:mysql://10.6.226.3:3306/bjsxt?serverTimezone=UTC
    username: root
    password: root
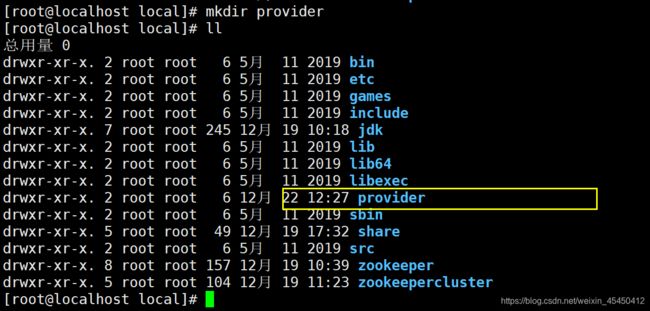
5.5.2.2 在 Linux 系统中创建 Provider 目录
5.5.2.3 项目打包
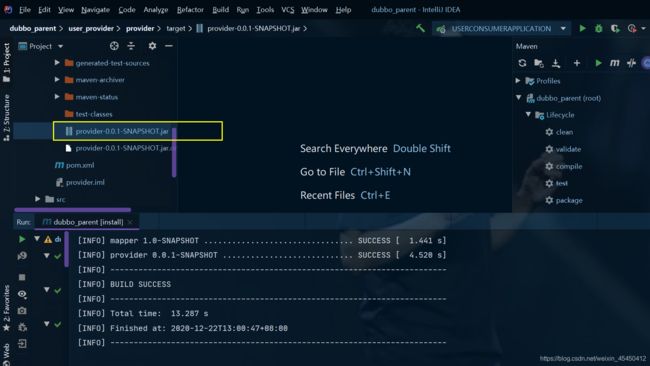
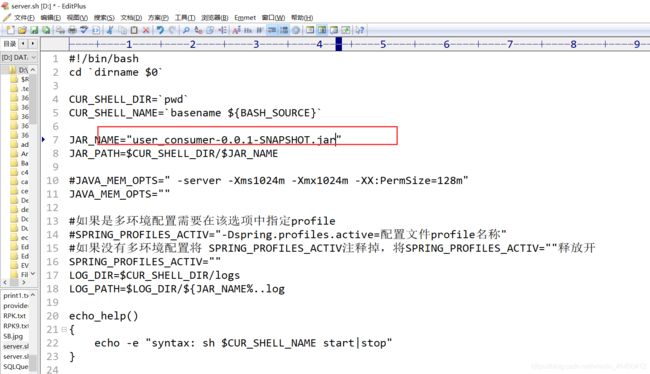
修改启动脚本
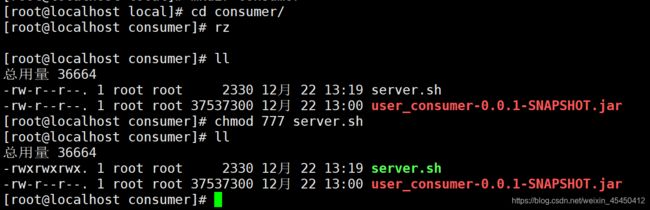
5.5.2.4 上传启 Provider 项目与启动脚本

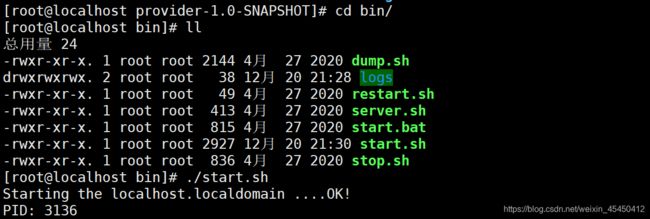
给启动脚本分配权限

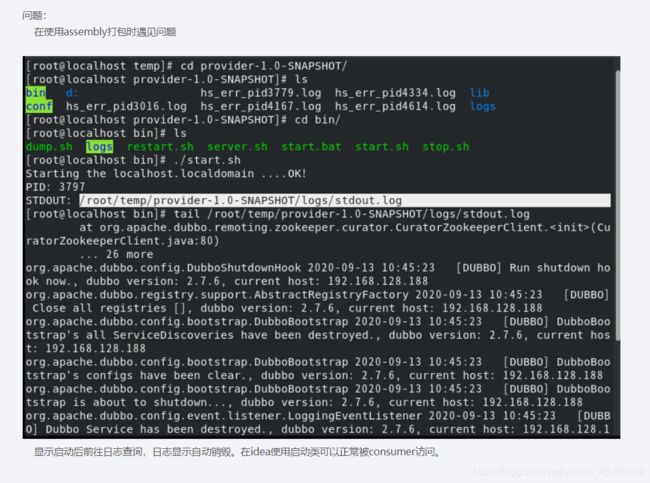
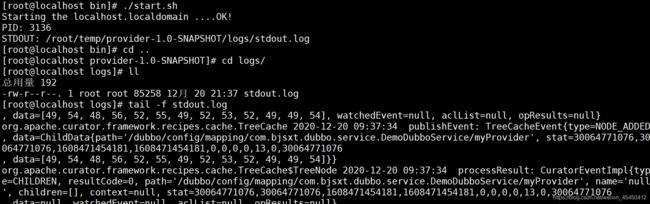
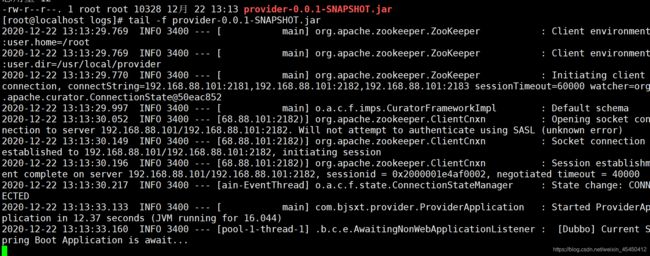
5.5.2.6 启动 Provider

查看日志
5.5.3 部署 Consumer
5.5.3.1 在 Linux 系统中创建 Consumer 目录

5.5.3.2 项目打包
5.5.3.3 上传启 Provider 项目与启动脚本
修改启动脚本

5.5.3.4 为启动脚本分配执行权限
5.5.3.5 启动 Consumer

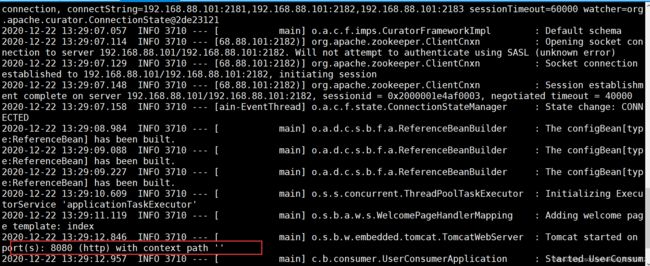
5.5.3.6 测试