- 组件化开发之02 cocoapods 远程私有库
dzb1060545231
iOS开发专栏免费
上一讲我们讲到了如何创建本地私有仓库,关于远程私有库就是我们按照cocoapods的一些规范创建一个自己的私有索引文件库和一个自己的私有库代码仓库,私有索引库存放我们私有库的podspec索引文件,后边更改了私有库版本内容,就将私有库的podsepc文件提交到这个私有索引库仓库里.接下来我会具体的讲解如何去生成这样一个远程私有索引库仓库,方便公司内部开发人员去使用这个远程私有库.///这是笔者电脑
- nginx性能优化有哪些方式?
企鹅侠客
linux面试nginx性能优化php
0.运维干货分享软考高级系统架构设计师备考学习资料软考高级网络规划设计师备考学习资料KubernetesCKA认证学习资料分享信息安全管理体系(ISMS)制度模板分享免费文档翻译工具(支持word、pdf、ppt、excel)PuTTY中文版安装包MobaXterm中文版安装包pinginfoview网络诊断工具中文版Nginx是一个高性能的HTTP服务器和反向代理服务器,但在高并发场景下,仍然有
- 使用码云搭建CocoaPods远程私有库
倾云鹤
IOScocoapodsxcodeios
一、创建远程私有索引库用来存放私有框架的详细描述信息.podspec文件1.创建私有库假设码云上创建的私有库为repo-spec2.查看本地已存在的索引库podrepolist3.将远程私有索引库添加到本地podrepoadd[https://gitee.com/jingluoguo/repo-spec.git](https://gitee.com/lsapp_dev/repo-spec.git)
- 在德国观看中文视频的免费网站总结--涵盖几乎中文各类所有视频
zilan23
1.独播库https://www.duboku.tv/2.欧乐影院https://www.olevod.com/3.一帆视频https://www.ifsp.tv/tv-series
- Vue3 + ECharts 数据可视化实战指南
念九_ysl
Vueecharts信息可视化前端
一、为什么选择ECharts?百度开源的成熟可视化库支持30+种图表类型完善的文档和社区支持与Vue3完美兼容二、环境搭建1.创建Vue3项目npmcreatevue@latest#选择TypeScript、Pinia等按需配置2.安装核心依赖npminstallechartsvue-echarts@vueuse/core#推荐版本:#
[email protected]#
[email protected]
- JVM内存溢出(OOM)的场景
KBkongbaiKB
jvmjava开发语言
一、JVM内存结构快速复盘1.1运行时数据区核心架构JVMMemory线程私有区线程共享区程序计数器虚拟机栈本地方法栈堆内存方法区/元空间1.2各区域默认容量(JDK8)内存区域默认最大值调整参数堆内存(Heap)物理内存1/4-Xmx元空间(Metaspace)无限制(受物理内存约束)-XX:MaxMetaspaceSize栈内存(Stack)1MB(不同OS有差异)-Xss直接内存(Direc
- localStorage在上面位置?数据存放文件名是什么?
2301_79698214
htmljava
在上述代码中,数据并不是以传统文件的形式存放在某个具体的文件里,而是存储在浏览器的localStorage中。localStorage是HTML5新增的一个会话存储对象,它用于临时保存同一窗口(或标签页)的数据,在关闭窗口或标签页后数据仍然存在。数据存储位置和文件名存储位置:localStorage是浏览器提供的一个存储机制,数据存储在浏览器的本地存储区域,不同的浏览器存储位置不同,例如:Chro
- 学习使用 Git 和 GitHub 开发项目的教程推荐
vortex5
学习gitgithub
Git和GitHub是现代软件开发中不可或缺的工具,无论你是个人开发者还是团队成员,掌握它们都能极大提升效率。本文精选了一系列优质教程资源,涵盖从基本Git命令到进阶多人协作的内容。这些教程既有文字形式,也有视频或交互式资源,适合不同学习风格的人。一、为何要学习Git和GitHub?Git是一个分布式版本控制系统,让你追踪代码变更、回滚错误并与他人协作;GitHub则将其扩展为一个云端平台,支持代
- 自己搭建react + antd + less + ts项目
可缺不可滥
react框架逻辑前端项目框架reactantdlessts
文章目录第一步通过官方的create-react-app,找个喜欢的目录,执行:第二步暴露配置的文件,执行:第三步支持less第四步创建路由第五步解决跨域问题第六步实现mockjs分离式开发第七步axios请求后台接口或mock接口第八步(可选):配置antd,及其按需加载第九步将项目改造为typescript第一步通过官方的create-react-app,找个喜欢的目录,执行:/**最后面是项
- 微前端 qiankun vite vue3
可缺不可滥
前端项目框架前端
文章目录简介主应用qiankun-mainvue3vite子应用qiankun-app-vue2webpack5子应用qiankun-reactwebpack5子应用quankun-vue3vite遇到的问题简介主要介绍以qiankun框架为基础,vite搭建vue3项目为主应用,wepackvue2和webpackreact搭建的子应用,形成的一个微前端框架。主应用qiankun-mainvue
- Python获取tiktok视频数据信息 api 爬虫
程序媛了了
python开发语言
Tiktok通过ID爬取视频信息api采集页面如图:https://www.tiktok.com/@basketwithball2.0/video/7273119444522650912?q=irving&t=1706683319923请求APIhttp://api.xxxx.com/tt/video/info?video_id=7273119444522650912&token=test请求参数
- 如何在 Node.js 中使用 .env 文件管理环境变量 ?
鸠摩智首席音效师
node.js
Node.js应用程序通常依赖于环境变量来管理敏感信息或配置设置。.env文件已经成为一种流行的本地管理这些变量的方法,而无需在代码存储库中公开它们。本文将探讨.env文件为什么重要,以及如何在Node.js应用程序中有效的使用它。为什么使用.env文件?Security在源代码中保留敏感信息(如API密钥、数据库凭据)可能会将它们暴露给意想不到的访问者。将此数据分离到特定于环境的文件中,您可以使
- 【Vue+TypeScript实战指南:提高代码质量和开发效率】
小怪兽9699
typescriptvue.js前端
前言在现代前端开发中,Vue.js是一个非常流行且强大的框架,而TypeScript则是增强代码类型安全性和可维护性的利器。本文将详细介绍如何结合Vue和TypeScript来构建高质量的应用程序。无论你是有一定基础的开发者还是希望进一步提升技能的高手,本文都将为你提供详细的步骤和代码示例。1.环境搭建首先,确保你已经安装了Node.js和npm。然后,全局安装VueCLI:npminstall-
- Node.js 中使用 RabbitMQ
海上彼尚
node.jsnode.jsrabbitmq分布式
目录一、RabbitMQ简介二、核心概念解析三、环境搭建(以Ubuntu为例)四、Node.js实战:生产者与消费者1.安装依赖2.生产者代码(发送消息)3.消费者代码(处理消息)五、高级配置与最佳实践六、常见问题与解决方案七、总结一、RabbitMQ简介RabbitMQ是一个基于AMQP协议的开源消息代理工具,专为分布式系统设计。它通过解耦生产者和消费者实现异步通信,支持流量削峰、任务队列、服务
- 在线视频创作平台(Vidnami)
deepdata_cn
视频生成视频剪辑视频创作
Vidnami是一款功能强大的在线视频创作平台,前身为ContentSamurai,于2015年推出,2020年更名为Vidnami。它运用人工智能技术,能够分析输入的文本,自动从大量素材中选取合适的图像和视频片段,将文字快速转化为具有专业外观的视频,无需用户具备视频编辑经验。该平台提供多种视频模板、全主题定制功能以及内置的免版权媒体库,包括3000万张图片和3万首音乐,还支持自动配音,用户可以录
- 如何申请内网 IP 证书
ssl证书
一、明确需求与规划在企业或特定内部网络环境中,开启申请内网IP证书流程的首要任务是明确自身需求并做好精细规划。要仔细确定内网中究竟哪些服务器、应用程序或服务亟待IP证书的加持,这可能涉及到企业内部的办公系统、数据库服务器、关键业务应用等诸多关键节点。二、选择合适的证书颁发机构(CA)完成需求规划后,紧接着便是抉择恰当的证书颁发机构。对于内网场景,有两种主流途径:一是企业自主搭建内部CA二是选用专业
- 基于Puppeteer与Selenium的跨浏览器自动化测试全攻略——从环境搭建到实战优化,万字详解自动化测试落地
追寻向上
selenium测试工具
自动化测试的价值与工具选型为什么需要自动化测试?效率提升:减少重复人工操作,回归测试耗时降低80%精准覆盖:支持高频次、多场景、多设备验证质量保障:避免人为疏忽导致的漏测问题Puppeteer与Selenium的互补性Puppeteer:专精Chrome生态,适用于高性能截图、动态渲染、复杂交互场景Selenium:支持多浏览器(Firefox/Safari/Edge),适合跨平台兼容性测试协同方
- OpenCV第1课OpenCV 介绍及其树莓派下环境的搭建
嵌入式老牛
树莓派之OpenCVopencv人工智能计算机视觉
1.机器是如何“看”的我们人类可以通过眼睛看到五颜六色的世界,是因为人眼的视觉细胞中存在分别对红、绿、蓝敏感的3种细胞。其中的光感色素根据光线的不同进行不同比例的分解,从而让我们识别到各种颜色。对人工智能而言,学会“看”也是非常关键的一步。那么机器人是如何看到这个世界的呢?这就涉及到人工智能方向重要的分支--机器视觉。机器视觉即用机器人代替人眼来做测量和判断,通过机器视觉产品(即图像摄取装置,分C
- Nginx限流与鉴权(Nginx Traffic Limiting and Authentication)
Linux运维老纪
奋力拼搏让企业网站更好nginx运维云计算linux运维开发数据库
Nginx限流与鉴权:2分钟搞定流量洪峰与安全防护在现代互联网架构中,Nginx已经成为了非常重要的组件,广泛应用于负载均衡、反向代理以及静态资源的服务。除了这些基本功能,Nginx还提供了丰富的配置选项来处理限流(RateLimiting)和鉴权(Authentication)。这两项技术对于确保服务的可用性和安全性至关重要,特别是在高并发和敏感数据访问场景中。本文将详细介绍如何在Nginx中配
- 21.7 ChatGLM3-6B私有化部署实战:2小时快速搭建200 QPS高可用模型服务
少林码僧
AI大模型应用实战专栏人工智能gpt语言模型
ChatGLM3-6B私有化部署实战:2小时快速搭建200QPS高可用模型服务ChatGLM3-6B私有化部署实战指南关键词:ChatGLM3-6B部署,私有化模型服务,性能优化,容器化部署,API服务封装1.部署环境准备与硬件规划ChatGLM3-6B私有化部署需要充分考虑算力资源与软件生态的适配性,以下是推荐配置方案:
- Opencv计算机视觉编程攻略-第一节 图像读取与基本处理
weixin_44242403
深度学习opencv计算机视觉
1.图像读取导入依赖项的h文件#include#include#include#include项目Valuecore.hpp基础数据结构和操作(图像存储、矩阵运算、文件I/O)highgui.hpp图像显示、窗口管理、用户交互(图像/视频显示、用户输入处理、结果保存)imgproc.hpp图像处理算法(图像滤波、几何变换、边缘检测、形态学操作)二读取图片Matimage;//图像矩阵std::co
- 一款适用于 Windows 、Mac 和 Linux 的屏幕录制与截图软件。
Mbblovey
开发语言开源软件电脑java
Screenrec是一款适用于Windows、Mac和Linux的屏幕录制与截图软件。软件本身可以免费使用,只需要登录即可使用全部功能。当咱们打开软件后,电脑右边就会出现一个小漂浮窗。点击上方的图标就能一键开启视频录制、截屏等功能。Screenrec很有意思的是可以在开始录制屏幕的同时录制咱们的网络摄像头视频和麦克风音频。在录制完成后大家可能会发现右下角软件会给大家发出一个提醒。这就是它的另一个特
- 【Flutter】从安卓与iOS包体优化到一键自动打包脚本的一条龙服务
sugood
Flutterandroidflutterios
系统信息Systemversion:MacOS12Flutterversion:1.22.5Dartversion:2.10.4AndroidStudioversion:4.1.1介绍APK优化包体大小APK多渠道打包APK一键打包脚本IPA优化包体大小IPA无签名打包IPA一键打包脚本脚本地址github脚本地址安卓APK优化包体大小优化图片等资源大小,删除无用资源只选择保留必要的so库。第三方
- python-56-基于Vue和Flask进行前后端分离的项目开发示例实战
皮皮冰燃
python3pythonvue.jsflask
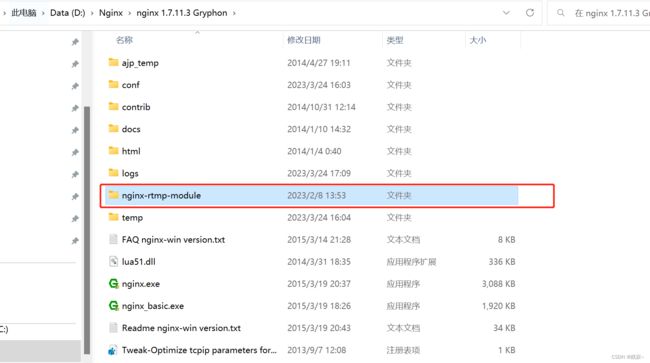
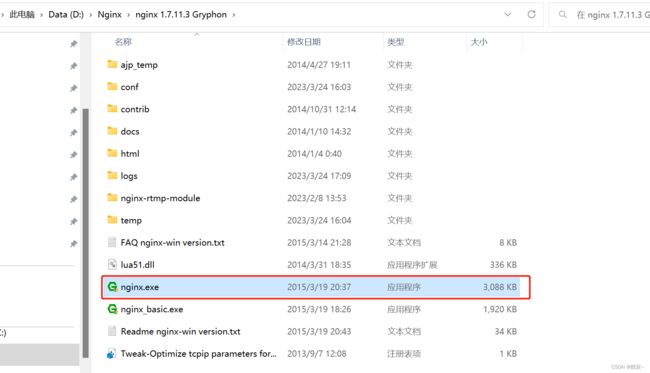
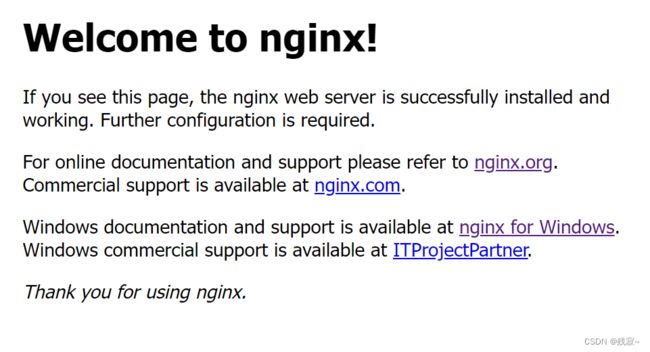
文章目录1创建Vue前端项目1.1运行demo1.2实现需求2flask部署上述dist(前后端未分离)2.1代码app.py2.2运行访问3nginx部署(前后端分离)3.1nginx前端服务3.3.1windows安装nginx3.3.2修改nginx.conf配置文件3.3.3启动nginx3.3.3停止nginx3.2启动后端服务3.2.1app.py(去除前端渲染)3.2.2启动flas
- Chainlink 预言机的原理解析
Chainlink资讯
预言机Chainlink智能合约
本文来自于8月19日Chainlink开发者社区中国负责人Frank,在DAppLearning分享会上对于Chainlink预言机的原理的讲解,以下是这节分享会的总结内容。有兴趣的小伙伴可以结合视频一起学习:为什么区块链无法主动获取外界数据区块链的特点区块链是一个封闭的确定性系统,每一笔交易都需要不同节点共识,只有超过一定数量的节点共识成功,交易才会被真正认可,并写入区块链。因为对于外部API的
- Fastdfs-V5.11使用docker部署集群(X86)
礁之
Linux系列dfsjavadocker
文章目录一、Fastdfs介绍二、部署信息三、步骤tracker/storage机器的compose内容storage机器的composetracker与storage启动目录层级与配置文件client.confstorage.conf查看集群信息测试测试集群扩容与缩减nginx配置一、Fastdfs介绍FastDFS是一款高性能的分布式文件系统,特别适合用于存储和管理大量的文件二、部署信息使用d
- 基于Python拉取tiktok直播视频流,并将视频流切割成一定时长的视频片段
sh_moranliunian
蜘蛛侠网络爬虫后端python爬虫
通过访问tiktok的直播间网页,从网页的script标签内部提取出关于该直播间的相关信息的JSON串,最终从JSON里提取出直播视频流的hls地址和直播间的其他信息。importsysimportrequestsimportjsonimporttimeimportsubprocessfromurllib.parseimporturlunparsefrombs4importBeautifulSou
- 如何轻松爬取 TikTok 评论?手把手教你高效采集数据!
pzhyy
大数据数据分析数据挖掘内容运营新媒体运营
引言随着TikTok的全球火爆,越来越多的数据分析师、营销人员和研究人员希望获取TikTok视频评论,以分析用户反馈、市场趋势或热门内容。然而,手动整理TikTok评论既耗时又低效,因此,使用一款高效的TikTok采集器成为刚需。Tapicker是一款功能强大的TikTok采集软件,可以帮助用户自动爬取TikTok评论,省去繁琐的手工整理工作。本文将详细介绍如何使用Tapicker爬取TikTok
- 史上最全JVM面试八股文合集
Java小海.
面试java职场和发展程序人生后端
简述JVM内存模型线程私有的运行时数据区:程序计数器、Java虚拟机栈、本地方法栈。线程共享的运行时数据区:Java堆、方法区。简述程序计数器程序计数器表示当前线程所执行的字节码的行号指示器。程序计数器不会产生StackOverflowError和OutOfMemoryError。简述虚拟机栈Java虚拟机栈用来描述Java方法执行的内存模型。线程创建时就会分配一个栈空间,线程结束后栈空间被回收。
- 如何合法抓取TikTok视频信息和评论:完整Python爬虫教程
Python爬虫项目
2025年爬虫实战项目音视频python爬虫开发语言
一、引言TikTok是全球最受欢迎的短视频平台之一,每天吸引着数百万的用户上传和分享视频内容。作为内容创作者和数据分析师,抓取TikTok上的视频和评论可以帮助你分析社交趋势、受欢迎的内容类型和用户互动。然而,TikTok明确表示其平台的数据抓取行为受到限制,这也意味着我们不能直接通过常规的网络爬虫技术去抓取其数据。本文将介绍如何在合法的前提下进行TikTok数据抓取。我们将探索TikTok的AP
- 异常的核心类Throwable
无量
java源码异常处理exception
java异常的核心是Throwable,其他的如Error和Exception都是继承的这个类 里面有个核心参数是detailMessage,记录异常信息,getMessage核心方法,获取这个参数的值,我们可以自己定义自己的异常类,去继承这个Exception就可以了,方法基本上,用父类的构造方法就OK,所以这么看异常是不是很easy
package com.natsu;
- mongoDB 游标(cursor) 实现分页 迭代
开窍的石头
mongodb
上篇中我们讲了mongoDB 中的查询函数,现在我们讲mongo中如何做分页查询
如何声明一个游标
var mycursor = db.user.find({_id:{$lte:5}});
迭代显示游标数
- MySQL数据库INNODB 表损坏修复处理过程
0624chenhong
tomcatmysql
最近mysql数据库经常死掉,用命令net stop mysql命令也无法停掉,关闭Tomcat的时候,出现Waiting for N instance(s) to be deallocated 信息。查了下,大概就是程序没有对数据库连接释放,导致Connection泄露了。因为用的是开元集成的平台,内部程序也不可能一下子给改掉的,就验证一下咯。启动Tomcat,用户登录系统,用netstat -
- 剖析如何与设计人员沟通
不懂事的小屁孩
工作
最近做图烦死了,不停的改图,改图……。烦,倒不是因为改,而是反反复复的改,人都会死。很多需求人员不知该如何与设计人员沟通,不明白如何使设计人员知道他所要的效果,结果只能是沟通变成了扯淡,改图变成了应付。
那应该如何与设计人员沟通呢?
我认为设计人员与需求人员先天就存在语言障碍。对一个合格的设计人员来说,整天玩的都是点、线、面、配色,哪种构图看起来协调;哪种配色看起来合理心里跟明镜似的,
- qq空间刷评论工具
换个号韩国红果果
JavaScript
var a=document.getElementsByClassName('textinput');
var b=[];
for(var m=0;m<a.length;m++){
if(a[m].getAttribute('placeholder')!=null)
b.push(a[m])
}
var l
- S2SH整合之session
灵静志远
springAOPstrutssession
错误信息:
Caused by: org.springframework.beans.factory.BeanCreationException: Error creating bean with name 'cartService': Scope 'session' is not active for the current thread; consider defining a scoped
- xmp标签
a-john
标签
今天在处理数据的显示上遇到一个问题:
var html = '<li><div class="pl-nr"><span class="user-name">' + user
+ '</span>' + text + '</div></li>';
ulComme
- Ajax的常用技巧(2)---实现Web页面中的级联菜单
aijuans
Ajax
在网络上显示数据,往往只显示数据中的一部分信息,如文章标题,产品名称等。如果浏览器要查看所有信息,只需点击相关链接即可。在web技术中,可以采用级联菜单完成上述操作。根据用户的选择,动态展开,并显示出对应选项子菜单的内容。 在传统的web实现方式中,一般是在页面初始化时动态获取到服务端数据库中对应的所有子菜单中的信息,放置到页面中对应的位置,然后再结合CSS层叠样式表动态控制对应子菜单的显示或者隐
- 天-安-门,好高
atongyeye
情感
我是85后,北漂一族,之前房租1100,因为租房合同到期,再续,房租就要涨150。最近网上新闻,地铁也要涨价。算了一下,涨价之后,每次坐地铁由原来2块变成6块。仅坐地铁费用,一个月就要涨200。内心苦痛。
晚上躺在床上一个人想了很久,很久。
我生在农
- android 动画
百合不是茶
android透明度平移缩放旋转
android的动画有两种 tween动画和Frame动画
tween动画;,透明度,缩放,旋转,平移效果
Animation 动画
AlphaAnimation 渐变透明度
RotateAnimation 画面旋转
ScaleAnimation 渐变尺寸缩放
TranslateAnimation 位置移动
Animation
- 查看本机网络信息的cmd脚本
bijian1013
cmd
@echo 您的用户名是:%USERDOMAIN%\%username%>"%userprofile%\网络参数.txt"
@echo 您的机器名是:%COMPUTERNAME%>>"%userprofile%\网络参数.txt"
@echo ___________________>>"%userprofile%\
- plsql 清除登录过的用户
征客丶
plsql
tools---preferences----logon history---history 把你想要删除的删除
--------------------------------------------------------------------
若有其他凝问或文中有错误,请及时向我指出,
我好及时改正,同时也让我们一起进步。
email : binary_spac
- 【Pig一】Pig入门
bit1129
pig
Pig安装
1.下载pig
wget http://mirror.bit.edu.cn/apache/pig/pig-0.14.0/pig-0.14.0.tar.gz
2. 解压配置环境变量
如果Pig使用Map/Reduce模式,那么需要在环境变量中,配置HADOOP_HOME环境变量
expor
- Java 线程同步几种方式
BlueSkator
volatilesynchronizedThredLocalReenTranLockConcurrent
为何要使用同步? java允许多线程并发控制,当多个线程同时操作一个可共享的资源变量时(如数据的增删改查), 将会导致数据不准确,相互之间产生冲突,因此加入同步锁以避免在该线程没有完成操作之前,被其他线程的调用, 从而保证了该变量的唯一性和准确性。 1.同步方法&
- StringUtils判断字符串是否为空的方法(转帖)
BreakingBad
nullStringUtils“”
转帖地址:http://www.cnblogs.com/shangxiaofei/p/4313111.html
public static boolean isEmpty(String str)
判断某字符串是否为空,为空的标准是 str==
null
或 str.length()==
0
- 编程之美-分层遍历二叉树
bylijinnan
java数据结构算法编程之美
import java.util.ArrayList;
import java.util.LinkedList;
import java.util.List;
public class LevelTraverseBinaryTree {
/**
* 编程之美 分层遍历二叉树
* 之前已经用队列实现过二叉树的层次遍历,但这次要求输出换行,因此要
- jquery取值和ajax提交复习记录
chengxuyuancsdn
jquery取值ajax提交
// 取值
// alert($("input[name='username']").val());
// alert($("input[name='password']").val());
// alert($("input[name='sex']:checked").val());
// alert($("
- 推荐国产工作流引擎嵌入式公式语法解析器-IK Expression
comsci
java应用服务器工作Excel嵌入式
这个开源软件包是国内的一位高手自行研制开发的,正如他所说的一样,我觉得它可以使一个工作流引擎上一个台阶。。。。。。欢迎大家使用,并提出意见和建议。。。
----------转帖---------------------------------------------------
IK Expression是一个开源的(OpenSource),可扩展的(Extensible),基于java语言
- 关于系统中使用多个PropertyPlaceholderConfigurer的配置及PropertyOverrideConfigurer
daizj
spring
1、PropertyPlaceholderConfigurer
Spring中PropertyPlaceholderConfigurer这个类,它是用来解析Java Properties属性文件值,并提供在spring配置期间替换使用属性值。接下来让我们逐渐的深入其配置。
基本的使用方法是:(1)
<bean id="propertyConfigurerForWZ&q
- 二叉树:二叉搜索树
dieslrae
二叉树
所谓二叉树,就是一个节点最多只能有两个子节点,而二叉搜索树就是一个经典并简单的二叉树.规则是一个节点的左子节点一定比自己小,右子节点一定大于等于自己(当然也可以反过来).在树基本平衡的时候插入,搜索和删除速度都很快,时间复杂度为O(logN).但是,如果插入的是有序的数据,那效率就会变成O(N),在这个时候,树其实变成了一个链表.
tree代码:
- C语言字符串函数大全
dcj3sjt126com
cfunction
C语言字符串函数大全
函数名: stpcpy
功 能: 拷贝一个字符串到另一个
用 法: char *stpcpy(char *destin, char *source);
程序例:
#include <stdio.h>
#include <string.h>
int main
- 友盟统计页面技巧
dcj3sjt126com
技巧
在基类调用就可以了, 基类ViewController示例代码
-(void)viewWillAppear:(BOOL)animated
{
[super viewWillAppear:animated];
[MobClick beginLogPageView:[NSString stringWithFormat:@"%@",self.class]];
- window下在同一台机器上安装多个版本jdk,修改环境变量不生效问题处理办法
flyvszhb
javajdk
window下在同一台机器上安装多个版本jdk,修改环境变量不生效问题处理办法
本机已经安装了jdk1.7,而比较早期的项目需要依赖jdk1.6,于是同时在本机安装了jdk1.6和jdk1.7.
安装jdk1.6前,执行java -version得到
C:\Users\liuxiang2>java -version
java version "1.7.0_21&quo
- Java在创建子类对象的同时会不会创建父类对象
happyqing
java创建子类对象父类对象
1.在thingking in java 的第四版第六章中明确的说了,子类对象中封装了父类对象,
2."When you create an object of the derived class, it contains within it a subobject of the base class. This subobject is the sam
- 跟我学spring3 目录贴及电子书下载
jinnianshilongnian
spring
一、《跟我学spring3》电子书下载地址:
《跟我学spring3》 (1-7 和 8-13) http://jinnianshilongnian.iteye.com/blog/pdf
跟我学spring3系列 word原版 下载
二、
源代码下载
最新依
- 第12章 Ajax(上)
onestopweb
Ajax
index.html
<!DOCTYPE html PUBLIC "-//W3C//DTD XHTML 1.0 Transitional//EN" "http://www.w3.org/TR/xhtml1/DTD/xhtml1-transitional.dtd">
<html xmlns="http://www.w3.org/
- BI and EIM 4.0 at a glance
blueoxygen
BO
http://www.sap.com/corporate-en/press.epx?PressID=14787
有机会研究下EIM家族的两个新产品~~~~
New features of the 4.0 releases of BI and EIM solutions include:
Real-time in-memory computing –
- Java线程中yield与join方法的区别
tomcat_oracle
java
长期以来,多线程问题颇为受到面试官的青睐。虽然我个人认为我们当中很少有人能真正获得机会开发复杂的多线程应用(在过去的七年中,我得到了一个机会),但是理解多线程对增加你的信心很有用。之前,我讨论了一个wait()和sleep()方法区别的问题,这一次,我将会讨论join()和yield()方法的区别。坦白的说,实际上我并没有用过其中任何一个方法,所以,如果你感觉有不恰当的地方,请提出讨论。
&nb
- android Manifest.xml选项
阿尔萨斯
Manifest
结构
继承关系
public final class Manifest extends Objectjava.lang.Objectandroid.Manifest
内部类
class Manifest.permission权限
class Manifest.permission_group权限组
构造函数
public Manifest () 详细 androi
- Oracle实现类split函数的方
zhaoshijie
oracle
关键字:Oracle实现类split函数的方
项目里需要保存结构数据,批量传到后他进行保存,为了减小数据量,子集拼装的格式,使用存储过程进行保存。保存的过程中需要对数据解析。但是oracle没有Java中split类似的函数。从网上找了一个,也补全了一下。
CREATE OR REPLACE TYPE t_split_100 IS TABLE OF VARCHAR2(100);
cr