SpringBoot-21-异步&定时任务
异步任务&定时任务
异步任务
异步任务知识介绍
	在多线程时,后台执行多个任务,我们需要同步等待。此时前台不会给出任何响应,可以采用多线程

的方式解决这个问题。

	SpringBoot采用异步注解的方式来解决这个问题,让我们在同步等待的时候,响应前台页面,无需

等待,后台代码执行依旧
实现异步任务
在SpringBoot实现异步任务很简单,在同步等待的任务中添加@Async注解,然后在SpringBoot添加@EnableAsync
代码实现
在com.liang.service包下创建一个AsyncService类
@Service
public class AsyncService {

    //告诉Spring这是一个异步方法
    @Async
    public void hello()
    {
        System.out.println("需要等待三秒");
        try {
            Thread.sleep(3000);
        } catch (InterruptedException e) {
            e.printStackTrace();
        }
    }
}
在com.liang.controller下创建一个AsyController
@RestController
public class AsyncController {

    @Autowired
    private AsyncService asyncService;

    @GetMapping("/hello")
    public String Hello()
    {
        asyncService.hello();
        return "success";
    }
}
测试结果
在主启动类不添加@EnableAsync注解
前端页面需要等待三秒响应
在主启动添加@EnableAysnc注解
小结
@Async这个注解可以让标注的方法异步执行,开启一个线程池,交给Spring调用,但有以下三个条件:
1.@EnableAsync添加到配置类或主启动类中
2.需要异步处理的方法类交给Spring容器管理
3.需要异步处理的方法添加@Async注解,标记需要进行异步处理
使用异步处理在以下的情况会存在问题:
- 循环依赖报错
- 默认线程池不会复用线程
定时任务
定时任务介绍
	在生活中我们通常会需要按时去做一件事,或者是让机器定时的做某一件事,来完成任务或

者给我们带来方便。

	定时任务处理本着这个思想让我们的程序按指定的时间运行。
实现定时任务的方式
- Java自带的java.util.Timer类,这个类允许你调度一个java.util.Timerask任务。这种方式能让你的代码按照某种频度执行,但不能按时执行,一般不使用这个。
- Quartz ,这是一个功能强大的调度器,可以让你的代码按时执行而且按某种频度执行,但使用起来稍复杂,需要继承org.springframework.scheduling.quartz.QuartzJobBean类,一般使用Spring去集成quartz。
- Spring 3.0自带task,即: spring schedule,可以将它看成一个轻量级的Quartz,而且使用起来比Quartz简单许多。
第一种方式不实用就不介绍啦,主要讲后面两种方式
Cron表达式
既然是定时任务,我们需要定时的规则,Cron表达式可以用来指定定时的规则,以什么时间频度去触发任务。
Cron表达式是一个字符串,字符串以5到6个空格隔开,分为6或7个域,每一个域代表一个含义,Cron有如下两种语法格式:
-
Seconds Minutes Hours DayofMonth Month DayofWeek Year
-
Seconds Minutes Hours DayofMonth Month DayofWeek
通常使用第二种,不指出Year。
-
Cron表达式结构组成:
cron从左到右(用空格隔开):秒 分 小时 月份中的日期 月份 星期中的日期 年份
cron除了可以出现数字外,还可以出现特殊字符
| 特殊字符 | 含义 |
|---|---|
| * | 表示匹配该域范围内的任意值 |
| ? | 只能用在DayMonth和DayofWeek两个域,使用?和*的意义不同 |
| - | 表示匹配域上一个的范围值 |
| / | 设置一个时间间隔 |
| , | 列出触发任务的枚举值 |
| L | 表示有效工作日(周一到周五),只能出现在DayofMonth域,系统将在离指定日期的最近的有效工作日触发事件 |
| LW | 这两个字符可以连用,表示在某个月最后一个工作日,即最后一个星期五 |
| # | 用于确定每个月第几个星期几,只能出现在DayofWeek域。例如在4#2,表示某月的第二个星期三 |
具体的Cron表达式用法,可点击链接
使用Quartz
使用Quartz分为三种种方式:
- 普通使用Quartz
- Spring集成Quartz
- SpringBoot集成Quartz
1.普通使用Quartz
使用Quartz的jar包完成一个简单定时任务
实现
创建一个普通的Maven项目,在pom.xml添加Quartz的依赖
            org.quartz-scheduler
            quartz
            2.3.2
创建一个UseQuartz类,实现注册一个简单的调度器
private static Logger logger =  Logger.getLogger("UseQuartz");
    //获得日志信息
    public static void main(String[] args) {

        //获得调度器,在StdScheduleFactory工厂取
        Scheduler scheduler = null;
        try {
            scheduler = StdSchedulerFactory.getDefaultScheduler();

            //开启调度器
            scheduler.start();
            // 注册一个示例任务和触发器
            registerJobAndTrigger(scheduler);
        } catch (SchedulerException e) {
            e.printStackTrace();
        }
    }

    public static void registerJobAndTrigger(Scheduler scheduler) throws SchedulerException {

        //创建一个示例任务,需要指定任务的位置
        JobDetail job = JobBuilder.newJob(MyJob.class)
                .withIdentity("mySimpleJob", "simpleGroup")
                .build();
        //创建一个触发器
        Trigger trigger = TriggerBuilder.newTrigger()
                .withIdentity("simpleTrigger", "simpleGroup")
                .startNow()
                .withSchedule(simpleSchedule()
                        .withIntervalInSeconds(5)
                .build();
        scheduler.scheduleJob(job, trigger);
        //给调度器添加任务和触发器
    }

    private static SimpleScheduleBuilder simpleSchedule() {
    	//指定日程制定器重复执行
        return SimpleScheduleBuilder.repeatHourlyForever();
    }


    //要实现任务的接口
    public static class MyJob implements Job {

        @Override
        public void execute(JobExecutionContext jobExecutionContext) throws JobExecutionException {
            logger.info("小狗子啃骨头咯!");
        }
    }
测试
可以发现控制台定时输出定时任务里面的消息
思想
注册一个任务调度器,需要给任务调度器分配详细的任务和一个简单触发器,日程触发器指定规则。
2. Spring集成Quartz
集成Quartz时,maven中需要引入:quartz.jar、spring-context-support.jar。
在com.liang.service包下创建一个QuartService类
@Service
public class QuartzService {
    public void test(){
        System.out.println("Now Time" + new Date().toString());

    }
}
在resources目录下创建基于spring-quartz
- SimpleTrigger.xml
<beans xmlns="http://www.springframework.org/schema/beans"
       xmlns:xsi="http://www.w3.org/2001/XMLSchema-instance"
       xmlns:task="http://www.springframework.org/schema/task"
       xsi:schemaLocation="http://www.springframework.org/schema/beans http://www.springframework.org/schema/beans/spring-beans-4.0.xsd
                           http://www.springframework.org/schema/task http://www.springframework.org/schema/task/spring-task-4.0.xsd">
        <bean name="quartzScheduler" class="org.springframework.scheduling.quartz.SchedulerFactoryBean">
                 <property name="triggers" ref="quartzTestTrigger">property>
        bean>
        <bean id="quartzTestTrigger" class="org.springframework.scheduling.quartz.SimpleTriggerFactoryBean">
                <property name="jobDetail" ref="quartzTestJob"/>

                <property name="startDelay" value="20000" />

                <property name="repeatInterval" value="30000" />
        bean>

        <bean id="quartzTestJob" class="org.springframework.scheduling.quartz.MethodInvokingJobDetailFactoryBean">
        <property name="targetObject" ref="quartzService">property>
        <property name="targetMethod" value="test">property>
        <property name="concurrent" value="false">property>
        bean>

        <bean id="quartzService" class="com.liang.service.QuartzService"/>
    <task:annotation-driven/>
beans>
- CronTrigger.xml
<beans xmlns="http://www.springframework.org/schema/beans"
       xmlns:xsi="http://www.w3.org/2001/XMLSchema-instance"
       xmlns:task="http://www.springframework.org/schema/task"
       xsi:schemaLocation="http://www.springframework.org/schema/beans http://www.springframework.org/schema/beans/spring-beans-4.0.xsd
                           http://www.springframework.org/schema/task http://www.springframework.org/schema/task/spring-task-4.0.xsd">
    <bean name="quartzScheduler" class="org.springframework.scheduling.quartz.SchedulerFactoryBean">
        <property name="triggers" ref="quartzTestTrigger">
        property>
        <property name="startupDelay" value="500"/>
    bean>
    <bean id="quartzTestTrigger" class="org.springframework.scheduling.quartz.CronTriggerFactoryBean">
        <property name="jobDetail" ref="quartzTestJob"/>
        <property name="cronExpression">
            <value>0 */1 * * * ?value>
        property>
    bean>

    <bean id="quartzTestJob" class="org.springframework.scheduling.quartz.MethodInvokingJobDetailFactoryBean">
        <property name="targetObject" ref="quartzService">property>
        <property name="targetMethod" value="test">property>
        <property name="concurrent" value="false">property>
    bean>
    <bean id="quartzService" class="com.liang.service.QuartzService"/>
beans>
3.SpringBoot集成Quartz
创建一个SpringBoot项目,在pom.xml导入spring-boot-starte-quartz的jar依赖,这个依赖内部已经有了starter场景依赖
     org.springframework.boot
     spring-boot-starter-quartz
在ExternalLibraris中找到spring-boot-autoconfigure模块下的spring.factories
查看Quarz自动配置原理
搜索找到QuartzAutoConfiguration
查看它类上的注解
//表示这是一个配置类
@Configuration(
    proxyBeanMethods = false
)
//在类路径中存在以下类才生效
@ConditionalOnClass({Scheduler.class, SchedulerFactoryBean.class, PlatformTransactionManager.class})
//让QuartzProperties生效,交给Spring容器管理
@EnableConfigurationProperties({QuartzProperties.class})
// 在以下自动配置类生效之后才生效
@AutoConfigureAfter({DataSourceAutoConfiguration.class, HibernateJpaAutoConfiguration.class, LiquibaseAutoConfiguration.class, FlywayAutoConfiguration.class})
public class QuartzAutoConfiguration {
    public QuartzAutoConfiguration() {
    }
找到带有@Bean的方法
SchedulerFactoryBean
    @Bean		//作为一个Bean对象交给Spring容器管理
    @ConditionalOnMissingBean	//@ConditionalOnMissingBean,它是修饰bean的一个注解,当你注册了相同类型的Bean,SpringBoot自动配置的Bean就会失效
    public SchedulerFactoryBean quartzScheduler(QuartzProperties properties, ObjectProvider<SchedulerFactoryBeanCustomizer> customizers, ObjectProvider<JobDetail> jobDetails, Map<String, Calendar> calendars, ObjectProvider<Trigger> triggers, ApplicationContext applicationContext) {
        SchedulerFactoryBean schedulerFactoryBean = new SchedulerFactoryBean();
        //声明一个调度器工厂的Bean对象
        SpringBeanJobFactory jobFactory = new SpringBeanJobFactory();
        /创建一个任务工厂
        jobFactory.setApplicationContext(applicationContext);
        //给任务工厂设定任务
        schedulerFactoryBean.setJobFactory(jobFactory);
        //调度器工厂Bean对象添加任务工厂对象
        if (properties.getSchedulerName() != null) {
            schedulerFactoryBean.setSchedulerName(properties.getSchedulerName());
            //给调度器设置名字
        }

        schedulerFactoryBean.setAutoStartup(properties.isAutoStartup());
        //调度器是否开启
    	schedulerFactoryBean.setStartupDelay((int)properties.getStartupDelay().getSeconds());
       //
       调度器是否延时开启 schedulerFactoryBean.setWaitForJobsToCompleteOnShutdown(properties.isWaitForJobsToCompleteOnShutdown());
	  //调度器是否等待任务完成后再关闭        schedulerFactoryBean.setOverwriteExistingJobs(properties.isOverwriteExistingJobs());
        if (!properties.getProperties().isEmpty()) {
            schedulerFactoryBean.setQuartzProperties(this.asProperties(properties.getProperties()));
        }

		//给调度器分配具体任务
        schedulerFactoryBean.setJobDetails((JobDetail[])jobDetails.orderedStream().toArray((x$0) -> {
            return new JobDetail[x$0];
        }));
        //给调度器设置日历
        schedulerFactoryBean.setCalendars(calendars);
       //给调度器设置触发器
        schedulerFactoryBean.setTriggers((Trigger[])triggers.orderedStream().toArray((x$0) -> {
            return new Trigger[x$0];
        }));
        customizers.orderedStream().forEach((customizer) -> {
            customizer.customize(schedulerFactoryBean);
        });
        return schedulerFactoryBean;
    }
@ConditionalOnMissingBean 它是修饰bean的一个注解,当你注册了相同类型的Bean,SpringBoot自动配置的Bean就会失效,在这个场景中,如果你向Spring容器中添加了一个SchedulerFactoryBean的Bean对象,那么SpringBoot定义的就会失效。
QuartzDataSourceScriptDatabaseInitializer
@Bean	//交给Spring容器管理
//若Spring容器中有以下类的Bean,当前Bean失效        @ConditionalOnMissingBean({QuartzDataSourceScriptDatabaseInitializer.class, QuartzDataSourceInitializer.class})
//满足以下条件配置类才能生效        @Conditional({QuartzAutoConfiguration.JdbcStoreTypeConfiguration.OnQuartzDatasourceInitializationCondition.class})
        public QuartzDataSourceScriptDatabaseInitializer quartzDataSourceScriptDatabaseInitializer(DataSource dataSource, @QuartzDataSource ObjectProvider<DataSource> quartzDataSource, QuartzProperties properties) {
            DataSource dataSourceToUse = this.getDataSource(dataSource, quartzDataSource);
            return new QuartzDataSourceScriptDatabaseInitializer(dataSourceToUse, properties);
        }
返回一个QuartzDataSourceScriptDatabaseInitializer 的Bean对象,将datasource与properties组合在一起,产生一个QuartzDataSource的数据源。
SchedulerFactoryBeanCustomizer
        @Bean
        @Order(0)
        public SchedulerFactoryBeanCustomizer dataSourceCustomizer(QuartzProperties properties, DataSource dataSource, @QuartzDataSource ObjectProvider<DataSource> quartzDataSource, ObjectProvider<PlatformTransactionManager> transactionManager, @QuartzTransactionManager ObjectProvider<PlatformTransactionManager> quartzTransactionManager) {
            return (schedulerFactoryBean) -> {
                DataSource dataSourceToUse = this.getDataSource(dataSource, quartzDataSource);
                schedulerFactoryBean.setDataSource(dataSourceToUse);
                PlatformTransactionManager txManager = this.getTransactionManager(transactionManager, quartzTransactionManager);
                if (txManager != null) {
                    schedulerFactoryBean.setTransactionManager(txManager);
                }

            };
        }
给SchedulerFactoryBean设置数据源和事务管理器,返回一个ScheduleFactoryBean的定制器
进而我们再观察QuartzProperties对象
QuartzProperties
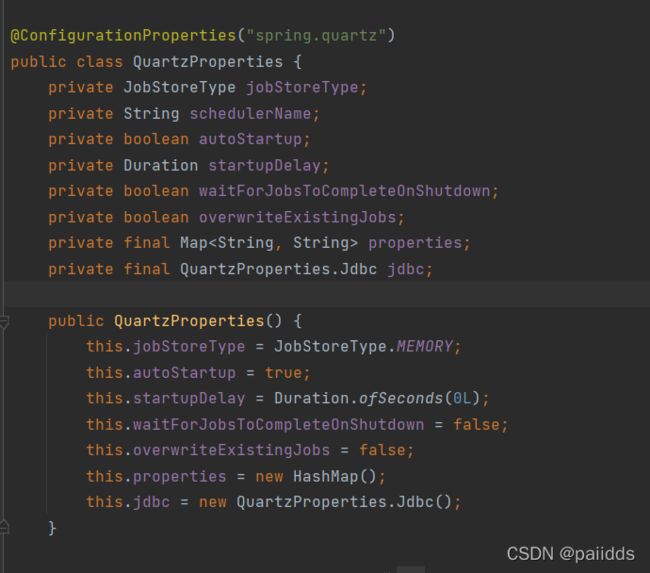
可以发现QuartzProperties对象里面的所有属性与全局配置文件下以spring.quartz开头的属性双向绑定。
自定义ScheduleFactoryBean
通过以上的分析,我们可以自己去定义一个ScheduleFactoryBean,来完成我们指定的定时任务。
- 在com.liang.service创建一个QuartzService类
//加入到spring容器中
@Service
@Slf4j
public class QuartzService {

    //定时任务一,若为单任务,则执行第一个任务
    public void test1()
    {
        log.info("Now Time: "+new Date().toString());
    }

    //定时任务二
    public void test2()
    {
        log.info("当前时间: "+new SimpleDateFormat("yyyy-MM-dd HH:mm:ss").format(new Date()));
    }
}
- 在com.liang.config创建一个QuartzConfig类
@Configuration  //标记配置类
public class QuartzConfig {


    //定时任务的Bean, 在Bean中参数会去Spring容器中找
    @Bean(name = "detailFactoryBean1")
    public MethodInvokingJobDetailFactoryBean detailFactoryBean1(QuartzService quartzService){
        //创建一个MethodInvokingJobDetailFactoryBean对象,来指定要调度的定时任务
        MethodInvokingJobDetailFactoryBean detailFactoryBean = new MethodInvokingJobDetailFactoryBean();
        //指定定时任务的对象
        detailFactoryBean.setTargetObject(quartzService);
        //指定定时任务的方法
        detailFactoryBean.setTargetMethod("test1");
        //concurrent: 为false,多个任务不能并发执行,必须等待前一个定时任务完成才能执行
        //为true.则可以并发执行
        detailFactoryBean.setConcurrent(false);
        return detailFactoryBean;
    }

    @Bean(name = "detailFactoryBean2")
    public MethodInvokingJobDetailFactoryBean detailFactoryBean2(QuartzService quartzService){
        //创建一个MethodInvokingJobDetailFactoryBean对象,来指定要调度的定时任务
        MethodInvokingJobDetailFactoryBean detailFactoryBean = new MethodInvokingJobDetailFactoryBean();
        //指定定时任务的对象
        detailFactoryBean.setTargetObject(quartzService);
        //指定定时任务的方法
        detailFactoryBean.setTargetMethod("test2");
        //concurrent: 为false,多个任务不能并发执行,必须等待前一个定时任务完成才能执行
        //为true.则可以并发执行
        detailFactoryBean.setConcurrent(false);
        return detailFactoryBean;
    }

    //触发器的Bean,为触发器设定触发任务条件 ,使用Cron表达式工厂的Bean
    @Bean(name="cronTriggerBean1")               //有多个相同类型的Bean,通过@Qualifier来指定具体的Bean
    public CronTriggerFactoryBean cronTriggerBean(@Qualifier("detailFactoryBean1")MethodInvokingJobDetailFactoryBean detailFactoryBean)
    {
        //创建一个CronTriggerFactoryBean 触发器工厂对象
        CronTriggerFactoryBean triggerFactory = new CronTriggerFactoryBean();
        //设置Cron表达式
        triggerFactory.setCronExpression("0/4 * * * * ?");      //每五秒执行一次,为触发器指定定时规则
        triggerFactory.setDescription("test1");                 //为触发器设置描述信息
        triggerFactory.setJobDetail(Objects.requireNonNull(detailFactoryBean.getObject()));         //为触发器设置定时任务,从detailFactoryBean得到对象
//        Objects.requireNonNull要求对象不为空 Objects用来处理空值的对象,
        return  triggerFactory;
    }


    //触发器的Bean,为触发器设定触发任务条件 ,使用Cron表达式工厂的Bean
    @Bean(name="cronTriggerBean2")               //有多个相同类型的Bean,通过@Qualifier来指定具体的Bean
    public CronTriggerFactoryBean cronTriggerBean2(@Qualifier("detailFactoryBean2")MethodInvokingJobDetailFactoryBean detailFactoryBean)
    {
        //创建一个CronTriggerFactoryBean 触发器工厂对象
        CronTriggerFactoryBean triggerFactory = new CronTriggerFactoryBean();
        //设置Cron表达式
        triggerFactory.setCronExpression("0/4 * * * * ?");      //每五秒执行一次,为触发器指定定时规则
        triggerFactory.setDescription("test2");                 //为触发器设置描述信息
        triggerFactory.setJobDetail(Objects.requireNonNull(detailFactoryBean.getObject()));         //为触发器设置定时任务,从detailFactoryBean得到对象
//        Objects.requireNonNull要求对象不为空 Objects用来处理空值的对象,
        return  triggerFactory;
    }

    //调度工厂的Bean,调度工厂执行任务

    @Bean
    public SchedulerFactoryBean schedulerFactory(@Qualifier("cronTriggerBean1") CronTrigger cronTrigger1,@Qualifier("cronTriggerBean2") CronTrigger cronTrigger2)
    {
        //创建ScheduleFactoryBean对象
        SchedulerFactoryBean schedulerFactory = new SchedulerFactoryBean();
//        schedulerFactory.setJobDetails();这里也能指定具体的定时任务
        schedulerFactory.setTriggers(cronTrigger1,cronTrigger2);
        //给ScheduleFactory设置名字
        schedulerFactory.setSchedulerName("schedule1");
        return schedulerFactory;
    }
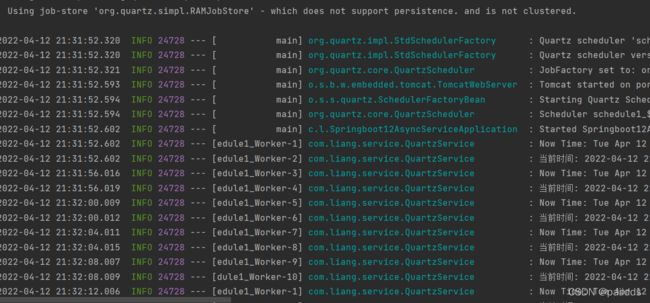
- 测试结果
使用Spring Schedule
1. Spring 使用Schedule
单个定时任务处理
- 在com.liang.service包下创建MyTask类
    public void task1()
    {
        System.out.println("task1"+ new SimpleDateFormat("yyyy-MM-dd MM:hh:ss").format(new Date()) +"GO GO GO");
    }
创建了一个简单任务
2. 在类路径下resources创建application.xml
<beans xmlns="http://www.springframework.org/schema/beans"
       xmlns:xsi="http://www.w3.org/2001/XMLSchema-instance"
       xmlns:task="http://www.springframework.org/schema/task"
       xsi:schemaLocation="http://www.springframework.org/schema/beans http://www.springframework.org/schema/beans/spring-beans-4.0.xsd
                           http://www.springframework.org/schema/task http://www.springframework.org/schema/task/spring-task-4.0.xsd">


    <task:scheduler id="myScheduler"/>

    <task:scheduled-tasks scheduler="myScheduler">
        <task:scheduled ref="myTask" method="task1" cron="0/2 * * * * ?"/>
    task:scheduled-tasks>

    <bean id="myTask" class="com.liang.service.MyTask"/>

    <task:annotation-driven/>
beans>
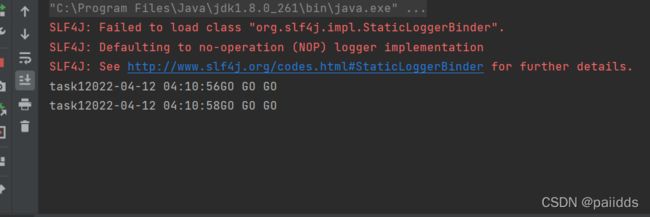
- 创建一个测试类,测试看看定时是否生效了
package com.liang.test;


import org.springframework.context.ApplicationContext;
import org.springframework.context.support.ClassPathXmlApplicationContext;

public class TestDemo {
    public static void main(String[] args) {
        ApplicationContext applicationContext = new ClassPathXmlApplicationContext("application.xml");

    }
}
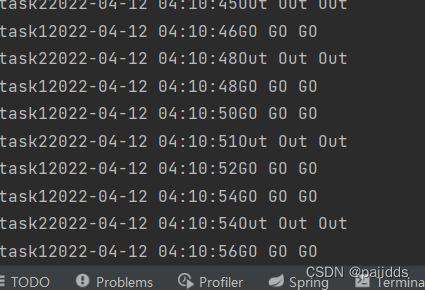
多个定时任务处理
- 在MyTask任务中添加多个task
    public void task2()
    {
        System.out.println("task2"+ new SimpleDateFormat("yyyy-MM-dd MM:hh:ss").format(new Date()) +"Out Out Out");
    }
- application.xml
<beans xmlns="http://www.springframework.org/schema/beans"
       xmlns:xsi="http://www.w3.org/2001/XMLSchema-instance"
       xmlns:task="http://www.springframework.org/schema/task"
       xsi:schemaLocation="http://www.springframework.org/schema/beans http://www.springframework.org/schema/beans/spring-beans-4.0.xsd
                           http://www.springframework.org/schema/task http://www.springframework.org/schema/task/spring-task-4.0.xsd">


    <task:scheduler id="myScheduler" pool-size="2"/>

    <task:scheduled-tasks scheduler="myScheduler">
        <task:scheduled ref="myTask" method="task1" cron="0/2 * * * * ?"/>
    task:scheduled-tasks>

    <task:scheduled-tasks scheduler="myScheduler">
        <task:scheduled ref="myTask" method="task2" cron="0/3 * * * * ?"/>
    task:scheduled-tasks>
    <bean id="myTask" class="com.liang.service.MyTask"/>

    <task:annotation-driven/>
beans>
2.SpringBoot集成Spring Schedule
单线程处理定时任务
在com.liang.service下创建一个ScheduledService类
@Slf4j
@Service
public class ScheduledService {

    //秒 分 时 日 月 周几
    //0 * * * * MON-FRI
    //计划里面使用cron表达式
    // @Scheduled(cron = "0/4 * * * * ?")
    @Scheduled(fixedDelay = 4*1000)    //fixedDelay根据上次任务结束时开始计时
//    @Scheduled(fixedRate= 3000)         //fixedRate指的是间隔时间,根据上一次任务开始时开始计时
    //fixedRate特殊性: 1.间隔时间>任务执行时长,则需要(等待间隔时长-任务执行时长)的时间后执行
    //2. 间隔时间<任务执行时长时,任务执行结束,立马执行
    public void task1()
    {
       log.info("task1运行中");
        try {
            Thread.sleep(4*1000);
        } catch (InterruptedException e) {
            e.printStackTrace();
        }
        log.info("task1运行结束");
    }
}
测试结果:

当同一个Schedule(调度)调用多个任务,结果会怎么样呢?
public class ScheduledService {

    //秒 分 时 日 月 周几
    //0 * * * * MON-FRI
    //计划里面使用cron表达式
    // @Scheduled(cron = "0/4 * * * * ?")
    @Scheduled(fixedDelay = 4*1000)    //fixedDelay根据上次任务结束时开始计时
//    @Scheduled(fixedRate= 3000)         //fixedRate指的是间隔时间,根据上一次任务开始时开始计时
    //fixedRate特殊性: 1.间隔时间>任务执行时长,则需要(等待间隔时长-任务执行时长)的时间后执行
    //2. 间隔时间<任务执行时长时,任务执行结束,立马执行
    public void task1()
    {
       log.info("task1运行中");
        try {
            Thread.sleep(4*1000);
        } catch (InterruptedException e) {
            e.printStackTrace();
        }
        log.info("task1运行结束");
    }
     //多个task也要排队进行,不符合多线程,去配置多个线程池解决
    @Scheduled(fixedDelay=4*1000)
    public void task()
    {
        log.info("task2执行中");
        try {
            Thread.sleep(4*1000);
        } catch (InterruptedException e) {
            e.printStackTrace();
        }
        log.info("task2执行结束");
    }
}
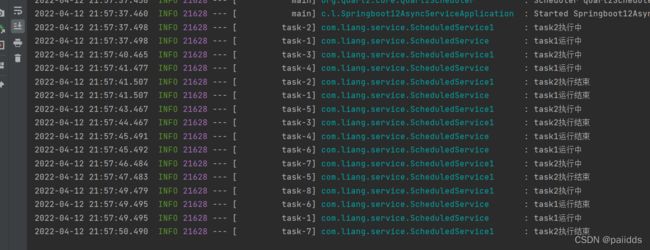
测试结果

发现只有同一个调度器时,只有前面的定时任务执行完成了,其他的定时任务才能够执行,这是因为默认的Spring Schedule是单线程的,所以造成不同的task也不能同时运行。
并发处理定时任务
解决办法:
- 配置多个task 当处于多线程时,可能同一个task还没执行完,后面就被触发啦, SpringBoot全局配置文件中配置
- 给我们的任务添加异步处理
解决方案一
在我们的全局配置文件添加如下代码:
# 把spring的数据源的大小变为2
spring.task.scheduling.pool.size=2
给我们的定时任务添加@Async,然后开启@EnableAsync
总结
trigger 用于触发 Job 的执行。当你准备调度一个 job 时,你创建一个 Trigger 的实例,然后设置调度相关的属性。Trigger 也有一个相关联的 JobDataMap,用于给 Job 传递一些触发相关的参数。Quartz 自带了各种不同类型的 Trigger,最常用的主要是 SimpleTrigger 和 CronTrigger。
SimpleTrigger 主要用于一次性执行的 Job(只在某个特定的时间点执行一次),或者 Job 在特定的时间点执行,重复执行 N 次,每次执行间隔T个时间单位。CronTrigger 在基于日历的调度上非常有用,如“每个星期五的正午”,或者“每月的第十天的上午 10:15”等,同时也能轻松实现SimpleTriggle。

