全网超细,Pytest自动化测试框架入门到精通-实战整理,一篇打通...
目录:导读
-
- 前言
- 一、Python编程入门到精通
- 二、接口自动化项目实战
- 三、Web自动化项目实战
- 四、App自动化项目实战
- 五、一线大厂简历
- 六、测试开发DevOps体系
- 七、常用自动化测试工具
- 八、JMeter性能测试
- 九、总结(尾部小惊喜)
前言
1、Pytest和Unittest的区别?
如何区分这两者,很简单unittest作为官方的测试框架,在测试方面更加基础,并且可以再次基础上进行二次开发,同时在用法上格式会更加复杂;
而pytest框架作为第三方框架,方便的地方就在于使用更加灵活,并且能够对原有unittest风格的测试用例有很好的兼容性,同时在扩展上更加丰富,可通过扩展的插件增加使用的场景,比如一些并发测试等;
2、Pytest 安装
pip安装:
pip install pytest
测试安装成功:
pytest --help

py.test --help
检查安装版本:
pytest --version
3、Pytest 示例
Pytest编写规则:
测试文件以test_开头(以_test为结尾)
测试的类以Test开头;
测试的方法以test_开头
断言使用基本的assert
test_example.py
def count_num(a: list) -> int:
    return len(a)


def test_count():
    assert count_num([1, 2, 3]) != 3
执行测试:
pytest test_example.py
执行结果:
C:\Users\libuliduobuqiuqiu\Desktop\GitProjects\PythonDemo\pytest>pytest test_example.py -v
================================================================= test session starts =================================================================
platform win32 -- Python 3.6.8, pytest-6.2.5, py-1.10.0, pluggy-1.0.0 -- d:\coding\python3.6\python.exe
cachedir: .pytest_cache
rootdir: C:\Users\libuliduobuqiuqiu\Desktop\GitProjects\PythonDemo\pytest
plugins: Faker-8.11.0
collected 1 item

test_example.py::test_count FAILED                                                                                                               [100%]

====================================================================== FAILURES =======================================================================
_____________________________________________________________________ test_count ______________________________________________________________________

    def test_count():
>       assert count_num([1, 2, 3]) != 3
E       assert 3 != 3
E        +  where 3 = count_num([1, 2, 3])

test_example.py:11: AssertionError
=============================================================== short test summary info ===============================================================
FAILED test_example.py::test_count - assert 3 != 3
================================================================== 1 failed in 0.16s ==================================================================
备注:
.代表测试通过,F代表测试失败;
-v显示详细的测试信息, -h显示pytest命令详细的帮助信息;
4、标记
默认情况下,pytest会在当前目录下寻找以test_为开头(以_test结尾)的测试文件,并且执行文件内所有以test_为开头(以_test为结尾)的所有函数和方法;
1)指定运行测试用例,可以通过::显示标记(文件名::类名::方法名)(文件名::函数名)
pytest test_example3.py::test_odd
2)指定一些测试用例测试运行,可以使用-k模糊匹配
pytest -k example
3)通过pytest.mark.skip()或者pytest.makr.skipif()条件表达式,跳过指定的测试用例
import pytest

test_flag = False

@pytest.mark.skip()
def test_odd():
    num = random.randint(0, 100)
    assert num % 2 == 1


@pytest.mark.skipif(test_flag is False, reason="test_flag is False")
def test_even():
    num = random.randint(0, 1000)
    assert num % 2 == 0
4)通过pytest.raises()捕获测试用例可能抛出的异常
def test_zero():
    num = 0
    with pytest.raises(ZeroDivisionError) as e:
        num = 1/0
    exc_msg = e.value.args[0]
    print(exc_msg)
    assert num == 0
5)预先知道测试用例会失败,但是不想跳过,需要显示提示信息,使用pytest.mark.xfail()
@pytest.mark.xfail()
def test_sum():
    random_list = [random.randint(0, 100)  for x in range(10)]
    num = sum(random_list)
    assert num < 20
6)对测试用例进行多组数据测试,每组参数都能够独立执行一次(可以避免测试用例内部执行单组数据测试不通过后停止测试)
@pytest.mark.parametrize('num,num2', [(1,2),(3,4)])
def test_many_odd(num: int, num2: int):
    assert num % 2 == 1
    assert num2 % 2 == 0
5、固件(Fixture)
固件就是一些预处理的函数,pytest会在执行测试函数前(或者执行后)加载运行这些固件,常见的应用场景就有数据库的连接和关闭(设备连接和关闭)
简单使用
import pytest


@pytest.fixture()
def postcode():
    return "hello"


def test_count(postcode):
    assert postcode == "hello"
按照官方的解释就是当运行测试函数,会首先检测运行函数的参数,搜索与参数同名的fixture,一旦pytest找到,就会运行这些固件,获取这些固件的返回值(如果有),并将这些返回值作为参数传递给测试函数;
1)预处理和后处理
接下来进一步验证关于官方的说法:
import pytest


@pytest.fixture()
def connect_db():
    print("Connect Database in .......")
    yield
    print("Close Database out .......")


def read_database(key: str):
    p_info = {
        "name": "zhangsan",
        "address": "China Guangzhou",
        "age": 99
    }
    return p_info[key]


def test_count(connect_db):
    assert read_database("name") == "zhangsan"
执行测试函数结果:
============================= test session starts =============================
platform win32 -- Python 3.6.8, pytest-6.2.5, py-1.10.0, pluggy-1.0.0 -- D:\Coding\Python3.6\python.exe
cachedir: .pytest_cache
rootdir: C:\Users\libuliduobuqiuqiu\Desktop\GitProjects\PythonDemo\pytest
plugins: Faker-8.11.0
collecting ... collected 1 item

test_example.py::test_count Connect Database in .......
PASSED                                       [100%]Close Database out .......


============================== 1 passed in 0.07s ==============================
备注:
首先从结果上看验证了官方的解释,pytest执行测试函数前会寻找同名的固件加载运行;
connect_db固件中有yield,这里pytest默认会判断yield关键词之前的代码属于预处理,会在测试前执行,yield之后的代码则是属于后处理,将在测试后执行;
2)作用域
从前面大致了解了固件的作用,抽离出一些重复的工作方便复用,同时pytest框架中为了更加精细化控制固件。
会使用作用域来进行指定固件的使用范围,(比如在这一模块中的测试函数执行一次即可,不需要模块中的函数重复执行)更加具体的例子就是数据库的连接,这一连接的操作可能是耗时的,我只需要在这一模块的测试函数运行一次即可,不需要每次都运行。
而定义固件是,一般通过scop参数来声明作用,常用的有:
function: 函数级,每个测试函数都会执行一次固件;
class: 类级别,每个测试类执行一次,所有方法都可以使用;
module: 模块级,每个模块执行一次,模块内函数和方法都可使用;
session: 会话级,一次测试只执行一次,所有被找到的函数和方法都可用。
import pytest


@pytest.fixture(scope="function")
def func_scope():
    print("func_scope")


@pytest.fixture(scope="module")
def mod_scope():
    print("mod_scope")


@pytest.fixture(scope="session")
def sess_scope():
    print("session_scope")


def test_scope(sess_scope, mod_scope, func_scope):
    pass


def test_scope2(sess_scope, mod_scope, func_scope):
    pass
执行结果:
============================= test session starts =============================
platform win32 -- Python 3.6.8, pytest-6.2.5, py-1.10.0, pluggy-1.0.0 -- D:\Coding\Python3.6\python.exe
cachedir: .pytest_cache
rootdir: C:\Users\libuliduobuqiuqiu\Desktop\GitProjects\PythonDemo\pytest
plugins: Faker-8.11.0
collecting ... collected 2 items

test_example2.py::test_scope session_scope
mod_scope
func_scope
PASSED                                      [ 50%]
test_example2.py::test_scope2 func_scope
PASSED                                     [100%]

============================== 2 passed in 0.07s ==============================
从这里可以看出module,session作用域的固件只执行了一次,可以验证官方的使用介绍
3)自动执行
有人可能会说,这样子怎么那么麻烦,unittest框架中直接定义setUp就能自动执行预处理,同样的pytest框架也有类似的自动执行; pytest框架中固件一般通过参数autouse控制自动运行。
import pytest


@pytest.fixture(scope='session', autouse=True)
def connect_db():
   print("Connect Database in .......")
   yield
   print("Close Database out .......")


def test1():
   print("test1")


def test2():
   print("test")
执行结果:
============================= test session starts =============================
platform win32 -- Python 3.6.8, pytest-6.2.5, py-1.10.0, pluggy-1.0.0 -- D:\Coding\Python3.6\python.exe
cachedir: .pytest_cache
rootdir: C:\Users\libuliduobuqiuqiu\Desktop\GitProjects\PythonDemo\pytest
plugins: Faker-8.11.0
collecting ... collected 2 items

test_example.py::test1 Connect Database in .......
PASSED                                            [ 50%]test1

test_example.py::test2 PASSED                                            [100%]test
Close Database out .......


============================== 2 passed in 0.07s ==============================
从结果看到,测试函数运行前后自动执行了connect_db固件;
4)参数化
前面简单的提到过了@pytest.mark.parametrize通过参数化测试,而关于固件传入参数时则需要通过pytest框架中内置的固件request,并且通过request.param获取参数
import pytest


@pytest.fixture(params=[
    ('redis', '6379'),
    ('elasticsearch', '9200')
])
def param(request):
    return request.param


@pytest.fixture(autouse=True)
def db(param):
    print('\nSucceed to connect %s:%s' % param)

    yield

    print('\nSucceed to close %s:%s' % param)


def test_api():
    assert 1 == 1
执行结果:
============================= test session starts =============================
platform win32 -- Python 3.6.8, pytest-6.2.5, py-1.10.0, pluggy-1.0.0 -- D:\Coding\Python3.6\python.exe
cachedir: .pytest_cache
rootdir: C:\Users\libuliduobuqiuqiu\Desktop\GitProjects\PythonDemo\pytest
plugins: Faker-8.11.0
collecting ... collected 2 items

test_example.py::test_api[param0]
Succeed to connect redis:6379
PASSED                                 [ 50%]
Succeed to close redis:6379

test_example.py::test_api[param1]
Succeed to connect elasticsearch:9200
PASSED                                 [100%]
Succeed to close elasticsearch:9200


============================== 2 passed in 0.07s ==============================
这里模拟连接redis和elasticsearch,加载固件自动执行连接然后执行测试函数再断开连接。
| 下面是我整理的2023年最全的软件测试工程师学习知识架构体系图 |
一、Python编程入门到精通

二、接口自动化项目实战

三、Web自动化项目实战

四、App自动化项目实战

五、一线大厂简历

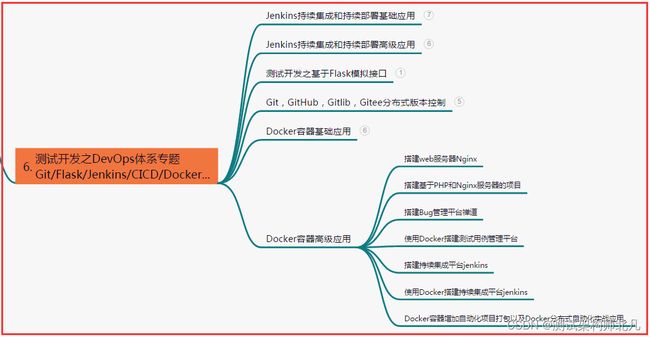
六、测试开发DevOps体系
七、常用自动化测试工具

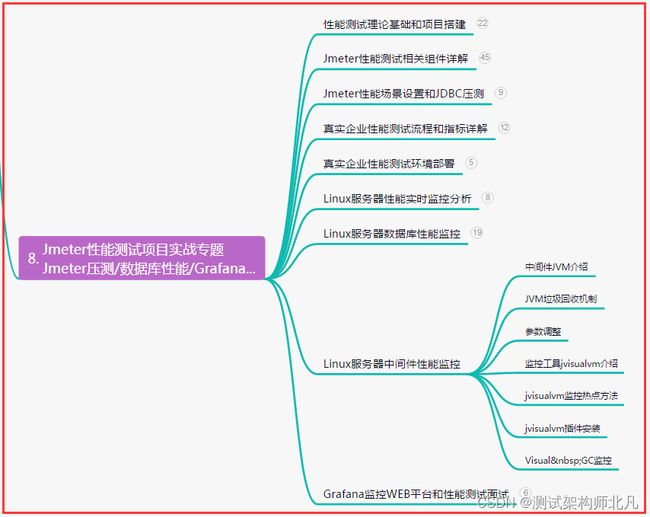
八、JMeter性能测试
九、总结(尾部小惊喜)
不要害怕失败,因为只有在不断经历失败的过程中,才能真正地成长和变得更加强大。坚持追求自己的梦想,终将赢得成功与荣耀。
在追逐梦想的路上,不要惧怕困难与挑战,相信自己的能力,坚持不懈地努力奋斗,你将会超越自我,创造属于自己的不朽传奇。
无论遭遇多少风雨,都要坚持自己的梦想,在困境中寻找勇气和力量,相信自己的能力,努力奋斗,终将走向成功的彼岸。