使用 cfssl 工具生成证书离线部署Harbor企业级私有镜像仓库(超详细无坑)
说明:本文将详细介绍使用cfssl工具生成证书部署Harbor,以及在使用docker和containerd容器运行时,如何进行对接,详细配置方法
Harbor介绍:
Harbor是一个用于存储和分发Docker镜像的企业级Registry服务器,通过添加一些企业必需的功能特性,目标是帮助用户迅速搭建一个企业级的 Docker 镜像管理中心,扩展了开源Docker Distribution。作为一个企业级私有Registry服务器,Harbor提供了更好的性能和安全。提升用户使用Registry构建和运行环境传输镜像的效率。Harbor支持安装在多个Registry节点的镜像资源复制,镜像全部保存在私有Registry中, 确保数据和知识产权在公司内部网络中管控。另外,Harbor也提供了高级的安全特性,诸如安全认证、镜像复制、镜像扫描、Webhook 、用户管理,访问控制和活动审计等。
官网地址:https://goharbor.io/
Harbor下载地址:https://github.com/goharbor/harbor/releases
1 环境说明
1.1 主机规划
| hostname | ip | 软件 |
|---|---|---|
| harbor-registry | 192.168.1.11 | docker,docker-compose,harbor,cfssl |
| client | 192.168.1.12 | containerd |
1.2 版本选择
| 软件 | 版本 |
|---|---|
| CentOS | 7.9.2009 |
| cfssl | v1.6.3 |
| docker | 24.0.1 |
| docker-compose | v2.18.1 |
| harbor | v2.8.1 |
2 准备虚拟机,基础环境配置
2.1 配置ip
nmcli connection modify ens33 ipv4.method manual ipv4.addresses "192.168.1.11/24" ipv4.gateway 192.168.1.254 ipv4.dns "8.8.8.8,114.114.114.114" connection.autoconnect yes
nmcli connection up ens33

nmcli connection modify ens33 ipv4.method manual ipv4.addresses "192.168.1.12/24" ipv4.gateway 192.168.1.254 ipv4.dns "8.8.8.8,114.114.114.114" connection.autoconnect yes
nmcli connection up ens33
2.2 检查是否能访问外网,方便下载安装包
]# ping baidu.com
PING baidu.com (110.242.68.66) 56(84) bytes of data.
64 bytes from 110.242.68.66 (110.242.68.66): icmp_seq=1 ttl=128 time=98.8 ms
64 bytes from 110.242.68.66 (110.242.68.66): icmp_seq=2 ttl=128 time=125 ms
2.3 配置hostname
hostnamectl set-hostname harbor-registry

hostnamectl set-hostname client
2.4 关闭防火墙
systemctl disable --now firewalld
2.5 关闭selinux
setenforce 0
sed -i 's#SELINUX=enforcing#SELINUX=disabled#g' /etc/selinux/config
3 安装docker
Harbor是一个用于存储和分发Docker镜像的企业级Registry服务器,需要依赖Docker来运行
3.1 下载docker
#下载安装包
[root@harbor-registry ~]# wget https://download.docker.com/linux/static/stable/x86_64/docker-24.0.1.tgz

#解压缩并配置文件
[root@harbor-registry ~]# tar -xf docker-24.0.1.tgz
[root@harbor-registry ~]# mv docker/* /usr/bin/
3.2 创建docker启动文件
[root@harbor-registry ~]# cat > /etc/systemd/system/docker.service << EOF
[Unit]
Description=Docker Application Container Engine
Documentation=https://docs.docker.com
After=network-online.target firewalld.service
Wants=network-online.target

[Service]
Type=notify
ExecStart=/usr/bin/dockerd
ExecReload=/bin/kill -s HUP \$MAINPID
LimitNOFILE=infinity
LimitNPROC=infinity
LimitCORE=infinity
TimeoutStartSec=0
Delegate=yes
KillMode=process
Restart=on-failure
StartLimitBurst=3
StartLimitInterval=60s

[Install]
WantedBy=multi-user.target
EOF
3.3 创建docker配置文件
#创建docker配置文件,私有仓库就配置harbor的地址
[root@harbor-registry ~]# mkdir /etc/docker
[root@harbor-registry ~]# cat > /etc/docker/daemon.json << 'EOF'
{
"insecure-registries":["192.168.1.11:443"],
"registry-mirrors": ["https://l32efr19.mirror.aliyuncs.com"]
}
EOF

#配置阿里云镜像加速方法
登录阿里云https://www.aliyun.com/,搜索容器镜像服务,登录后点击:左侧栏镜像工具-镜像加速器
{
  "registry-mirrors": ["https://l32efr19.mirror.aliyuncs.com"]
}
3.4 启动并开机自启
[root@harbor-registry ~]# systemctl daemon-reload
[root@harbor-registry ~]# systemctl enable --now docker
4 安装docker-compose
harbor需要依赖Docker来运行,而docker-compose是一个用于定义和运行多容器Docker应用程序的工具
#下载docker-compose并配置,选择比较新的版本
[root@harbor-registry ~]# curl -L https://github.com/docker/compose/releases/download/v2.18.1/docker-compose-`uname -s`-`uname -m` -o /usr/local/bin/docker-compose

#添加执行权限
[root@harbor-registry ~]# chmod +x /usr/local/bin/docker-compose

#查看
[root@harbor-registry ~]# docker-compose version
Docker Compose version v2.18.1
5 使用cfssl 创建证书
5.1下载证书工具
#cfssl是使用go编写,由CloudFlare开源的一款PKI/TLS工具。主要程序有:
- cfssl,是CFSSL的命令行工具。
- cfssljson用来从cfssl程序获取JSON输出,并将证书,密钥,CSR和bundle写入文件中。

#下载cfssl证书生成工具
[root@harbor-registry ~]# wget "https://github.com/cloudflare/cfssl/releases/download/v1.6.3/cfssl_1.6.3_linux_amd64" -O /usr/local/bin/cfssl
[root@harbor-registry ~]# wget "https://github.com/cloudflare/cfssl/releases/download/v1.6.3/cfssljson_1.6.3_linux_amd64" -O /usr/local/bin/cfssljson
[root@harbor-registry ~]# chmod +x /usr/local/bin/cfssl*

[root@harbor-registry ~]# cfssl version
Version: 1.6.3
Runtime: go1.18
5.2生成CA证书
#创建证书目录
[root@harbor-registry ~]# mkdir -p ~/TLS/harbor
[root@harbor-registry ~]# cd ~/TLS/harbor

#创建ca请求证书
[root@harbor-registry harbor]# cat > ca-csr.json << 'EOF'
{
    "CN": "harbor",
    "hosts": [
        "192.168.1.11"
    ],
    "key": {
        "algo": "rsa",
        "size": 2048
    },
    "names": [
        {
            "C": "CN",
            "ST": "Beijing",
            "L": "Beijing"
        }
    ]
}
EOF

#创建生成CA证书
[root@harbor-registry harbor]# cfssl gencert -initca ca-csr.json | cfssljson -bare ca

[root@harbor-registry harbor]# ls
ca.csr  ca-csr.json  ca-key.pem  ca.pem
5.3配置ca策略证书
[root@harbor-registry harbor]# cat > ca-config.json << 'EOF'
{
    "signing": {
        "default": {
            "expiry": "87600h"
        },
        "profiles": {
            "harbor": {
                "expiry": "87600h",
                "usages": [
                    "signing",
                    "key encipherment",
                    "server auth",
                    "client auth"
                ]
            }
        }
    }
}
EOF
5.4配置harbor请求csr文件
[root@harbor-registry harbor]# cat > harbor-csr.json << 'EOF'
{
    "CN": "OSL.harbor.json",
    "hosts": [],
    "key": {
        "algo": "rsa",
        "size": 2048
    },
    "names": [
        {
            "C": "CN",
            "ST": "Beijing",
            "L": "Beijing"
        }
    ]
}
EOF
5.5生成harbor证书
[root@harbor-registry harbor]# cfssl gencert \
-ca=ca.pem \
-ca-key=ca-key.pem \
-config=ca-config.json \
-profile=harbor \
harbor-csr.json | cfssljson -bare harbor

[root@harbor-registry harbor]# ls
ca-config.json  ca.csr  ca-csr.json  ca-key.pem  ca.pem  harbor.csr  harbor-csr.json  harbor-key.pem  harbor.pem
5.6创建harbor证书目录
[root@harbor-registry harbor]# mkdir -p /opt/harbor/ssl
[root@harbor-registry harbor]# cp harbor*pem /opt/harbor/ssl/
6 搭建Harbor 镜像仓库
Harbor官网地址:https://goharbor.io/
Harbor下载地址:https://github.com/goharbor/harbor/releases
6.1下载harbor离线安装包并解压
[root@harbor-registry ~]# wget https://github.com/goharbor/harbor/releases/download/v2.8.1/harbor-offline-installer-v2.8.1.tgz
[root@harbor-registry ~]# wget https://ghproxy.com/https://github.com/goharbor/harbor/releases/download/v2.8.1/harbor-offline-installer-v2.8.1.tgz   #如果网速太慢下载不下来可用这个国内代理地址下载

[root@harbor-registry ~]# tar -xf harbor-offline-installer-v2.8.1.tgz -C /opt/
6.2配置harbor
[root@harbor-registry ~]# cd /opt/harbor/
#备份默认配置并修改
[root@harbor-registry harbor]# ll
总用量 603560
-rw-r--r-- 1 root root      3639 5月   9 17:08 common.sh
-rw-r--r-- 1 root root 618006846 5月   9 17:09 harbor.v2.8.1.tar.gz
-rw-r--r-- 1 root root     11736 5月   9 17:08 harbor.yml.tmpl
-rwxr-xr-x 1 root root      2725 5月   9 17:08 install.sh
-rw-r--r-- 1 root root     11347 5月   9 17:08 LICENSE
-rwxr-xr-x 1 root root      1881 5月   9 17:08 prepare
drwxr-xr-x 2 root root        46 6月   5 16:43 ssl

说明:harbor.v2.8.1.tar.gz 为harbor安装所需的镜像包,直接执行install.sh脚本就可以导入镜像并安装,harbor.yml.tmpl为配置文件模板

#创建配置文件并修改
[root@harbor-registry harbor]# cp harbor.yml.tmpl harbor.yml

#通过vim编辑后如下
[root@harbor-registry harbor]# grep -v -e '^$' -e '^[[:space:]]*#' harbor.yml
hostname: 192.168.1.11	#harbor的主机名
http:
  port: 80
https:
  port: 443
  certificate: /opt/harbor/ssl/harbor.pem		#证书文件
  private_key: /opt/harbor/ssl/harbor-key.pem	#证书文件
harbor_admin_password: Harbor12345				#登录harbor密码
database:
  password: root123
  max_idle_conns: 100
  max_open_conns: 900
  conn_max_lifetime: 5m
  conn_max_idle_time: 0
data_volume: /data					#数据存放路径
trivy:
  ignore_unfixed: false
  skip_update: false
  offline_scan: false
  security_check: vuln
  insecure: false
jobservice:
  max_job_workers: 10
  logger_sweeper_duration: 1 #days
notification:
  webhook_job_max_retry: 3
  webhook_job_http_client_timeout: 3 #seconds
log:
  level: info
  local:
    rotate_count: 50
    rotate_size: 200M
    location: /var/log/harbor	#日志路径
_version: 2.8.0
proxy:
  http_proxy:
  https_proxy:
  no_proxy:
  components:
    - core
    - jobservice
    - trivy
upload_purging:
  enabled: true
  age: 168h
  interval: 24h
  dryrun: false
cache:
  enabled: false
  expire_hours: 24

#http 通信端口
#https部分是https协议通信,如果不考虑对外,可以关掉
6.3执行install.sh脚本安装harbor
[root@harbor-registry harbor]# ./install.sh

#验证
[root@harbor-registry harbor]# ll /data/
总用量 0
drwxr-xr-x 2   10000 10000  6 6月   5 16:52 ca_download
drwx------ 3 polkitd input 18 6月   5 16:52 database
drwxr-xr-x 2   10000 10000  6 6月   5 16:52 job_logs
drwxr-xr-x 2 polkitd input  6 6月   5 16:52 redis
drwxr-xr-x 2   10000 10000  6 6月   5 16:52 registry
drwxr-xr-x 6 root    root  58 6月   5 16:52 secret

#查看容器启动情况,当stata(状态)为up时,表示容器启动正常。
[root@harbor-registry harbor]# docker-compose ps
NAME                IMAGE                                COMMAND                  SERVICE             CREATED              STATUS                        PORTS
harbor-core         goharbor/harbor-core:v2.8.1          "/harbor/entrypoint.…"   core                About a minute ago   Up About a minute (healthy)
harbor-db           goharbor/harbor-db:v2.8.1            "/docker-entrypoint.…"   postgresql          About a minute ago   Up About a minute (healthy)
harbor-jobservice   goharbor/harbor-jobservice:v2.8.1    "/harbor/entrypoint.…"   jobservice          About a minute ago   Up About a minute (healthy)
harbor-log          goharbor/harbor-log:v2.8.1           "/bin/sh -c /usr/loc…"   log                 About a minute ago   Up About a minute (healthy)   127.0.0.1:1514->10514/tcp
harbor-portal       goharbor/harbor-portal:v2.8.1        "nginx -g 'daemon of…"   portal              About a minute ago   Up About a minute (healthy)
nginx               goharbor/nginx-photon:v2.8.1         "nginx -g 'daemon of…"   proxy               About a minute ago   Up About a minute (healthy)   0.0.0.0:80->8080/tcp, :::80->8080/tcp, 0.0.0.0:443->8443/tcp, :::443->8443/tcp
redis               goharbor/redis-photon:v2.8.1         "redis-server /etc/r…"   redis               About a minute ago   Up About a minute (healthy)
registry            goharbor/registry-photon:v2.8.1      "/home/harbor/entryp…"   registry            About a minute ago   Up About a minute (healthy)
registryctl         goharbor/harbor-registryctl:v2.8.1   "/home/harbor/start.…"   registryctl         About a minute ago   Up About a minute (healthy)


#后续对上面众多容器的操作,都必须在/opt/harbor/这个目录下进行,比如:
#docker-compose restart     重启容器,
#docker-compose down -v     停止并删除现有实例
#docker-compose up -d       启动容器...


排错:harbor-db状态显示为restarting,需要删除数据库里的数据,重新执行./install.sh
6.4 harbor启停
#停止并删除现有实例
数据保留在文件系统中,因此不会丢失任何数据。
[root@harbor-registry harbor]# docker-compose down -v

#重启Harbor
[root@harbor-registry harbor]# docker-compose up -d
6.5 web页面访问控制台验证
https模式:https://192.168.1.11:443
http 模式: http://192.168.1.11:80

用户:admin
密码:Harbor12345 是harbor.yml 文件中harbor_admin_password的值
#如果谷歌打不开 可以用火狐打开
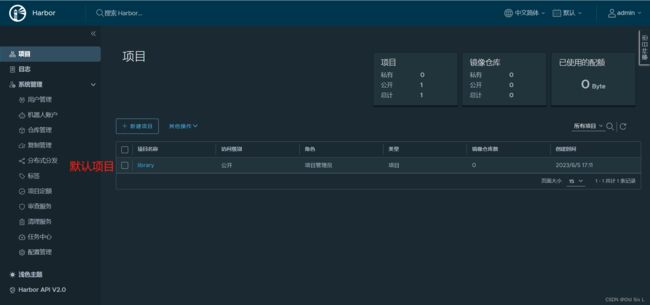
6.6创建项目 mytestproject

7 配置docker对接harbor
7.1尝试登录测试
#先登录测试登录失败
[root@harbor-registry harbor]# docker login -u admin -p Harbor12345 192.168.1.11:443
WARNING! Using --password via the CLI is insecure. Use --password-stdin.
Error response from daemon: Get "https://192.168.1.11:443/v2/": tls: failed to verify certificate: x509: cannot validate certificate for 192.168.1.11 because it doesn't contain any IP SANs
7.2配置docker登录harbor
#配置harbor证书目录
#重点说明:
# /etc/docker/certs.d/registry.harbor.com 这个路径中的registry.harbor.com 需要和你的hosts里192.168.1.11解析的对应就可以

#配置hosts域名解析
[root@harbor-registry harbor]# echo "192.168.1.11 registry.harbor.com" >> /etc/hosts
[root@harbor-registry harbor]# mkdir /etc/docker/certs.d/registry.harbor.com/

#路径下的registry.harbor.com目录需要和hosts里解析的对应
[root@harbor-registry harbor]# mkdir -p /etc/docker/certs.d/registry.harbor.com
[root@harbor-registry harbor]# cp /root/TLS/harbor/harbor*pem /etc/docker/certs.d/registry.harbor.com/

#重启docker,重启harbor
[root@harbor-registry harbor]# systemctl restart docker
[root@harbor-registry harbor]# docker-compose down -v
[root@harbor-registry harbor]# docker-compose up -d

#再次登录
[root@harbor-registry harbor]# docker login -u admin -p Harbor12345 192.168.1.11:443
WARNING! Using --password via the CLI is insecure. Use --password-stdin.
WARNING! Your password will be stored unencrypted in /root/.docker/config.json.
Configure a credential helper to remove this warning. See
https://docs.docker.com/engine/reference/commandline/login/#credentials-store

Login Succeeded

#退出
[root@harbor-registry harbor]#docker logout 192.168.1.28:443

#拉取镜像测试
[root@harbor-registry harbor]# docker pull busybox

[root@harbor-registry harbor]# docker tag beae173ccac6 192.168.1.11:443/mytestproject/busybox:20230605

[root@harbor-registry harbor]# docker push 192.168.1.11:443/mytestproject/busybox:20230605
The push refers to repository [192.168.1.11:443/mytestproject/busybox]
01fd6df81c8e: Pushed
20230605: digest: sha256:62ffc2ed7554e4c6d360bce40bbcf196573dd27c4ce080641a2c59867e732dee size: 527
7.3 设置harbor开机自启
[root@harbor-registry harbor]# cat >> /etc/rc.local << 'EOF'
cd /opt/harbor
docker-compose up -d
EOF

[root@harbor-registry harbor]# chmod +x /etc/rc.local
补充:

如果以后修改了harbor.yml文件,那么先停止使用docker-compose down,再去修改harbor.yml文件,执行prepare 然后 重新启动部署 ./install.sh
正常启动harbor启动:docker-compose up -d
未修改配置文件,重启Harbor命令:docker-compose start | stop | restart
8 配置containerd对接harbor仓库
说明:为了更好的操作,直观展示,新建一台虚拟机 192.168.1.12
8.1下载并解压containerd
#下载安装包
[root@client ~]# wget https://github.com/containerd/containerd/releases/download/v1.7.1/cri-containerd-cni-1.7.1-linux-amd64.tar.gz

#解压二进制包
[root@client ~]# tar -xf cri-containerd-cni-1.7.1-linux-amd64.tar.gz -C /
8.2配置containerd所需的模块
[root@client ~]# cat > /etc/modules-load.d/containerd.conf << EOF
overlay
br_netfilter
EOF

#加载模块
[root@client ~]# systemctl restart systemd-modules-load.service

#查看containerd相关模块加载情况:
[root@client ~]# lsmod | egrep 'br_netfilter|overlay'
8.3创建 Containerd 的配置文件并修改
[root@client ~]# mkdir /etc/containerd
[root@client ~]# containerd config default > /etc/containerd/config.toml

[root@client ~]# grep SystemdCgroup /etc/containerd/config.toml
            SystemdCgroup = false
[root@client ~]# sed -i s#SystemdCgroup\ =\ false#SystemdCgroup\ =\ true# /etc/containerd/config.toml

#配置国内镜像加速
[root@client ~]# grep registry.k8s.io /etc/containerd/config.toml
    sandbox_image = "registry.k8s.io/pause:3.8"
[root@client ~]# sed -i s#registry.k8s.io#registry.aliyuncs.com/google_containers#  /etc/containerd/config.toml
8.4配置crictl客户端连接的运行时位置
#下载并解压
[root@client ~]# wget https://github.com/kubernetes-sigs/cri-tools/releases/download/v1.27.0/crictl-v1.27.0-linux-amd64.tar.gz

[root@client ~]# whereis crictl
crictl: /etc/crictl.yaml /usr/local/bin/crictl

[root@client ~]# tar -xf crictl-v1.27.0-linux-amd64.tar.gz -C /usr/local/bin/

#生成配置文件
[root@client ~]# cat > /etc/crictl.yaml << 'EOF'
runtime-endpoint: unix:///run/containerd/containerd.sock
image-endpoint: unix:///run/containerd/containerd.sock
timeout: 10
debug: false
EOF

#测试
[root@client ~]# systemctl enable --now containerd
[root@client ~]# crictl info
[root@client ~]# crictl ps
8.5 配置containerd对接harbor
#containerd 作为容器运行时,当在k8s执行yaml文件时,使用的命令是这个:
[root@client ~]# crictl pull 192.168.1.11:443/mytestproject/busybox:20230605

#配置hosts解析
[root@client ~]# echo "192.168.1.11 registry.harbor.com" >> /etc/hosts

#创建所需的证书目录 registry.harbor.com对应hosts里解析的地址
[root@client ~]# mkdir -p /etc/containerd/certs.d/registry.harbor.com
[root@client ~]# cd /etc/containerd/certs.d/registry.harbor.com
[root@client registry.harbor.com]# scp 192.168.1.11:/opt/harbor/ssl/* .

#修改containerd配置文件
[root@client registry.harbor.com]# cd /etc/containerd/
[root@client containerd]# vim config.toml
#末行模式搜索 registry.configs  在下面添加165-172行的内容
164       [plugins."io.containerd.grpc.v1.cri".registry.configs]
165         [plugins."io.containerd.grpc.v1.cri".registry.configs."registry.harbor.com".tls]
166           insecure_skip_verify = true
167           ca_file = "/etc/containerd/certs.d/registry.harbor.com/ca.pem"
168           cert_file = "/etc/containerd/certs.d/registry.harbor.com/harbor.pem"
169           key_file = "/etc/containerd/certs.d/registry.harbor.com/harbor-key.pem"
170         [plugins."io.containerd.grpc.v1.cri".registry.configs."registry.harbor.com".auth]
171           username = "admin"
172           password = "Harbor12345"

#重启containerd
[root@client containerd]# systemctl daemon-reload
[root@client containerd]# systemctl restart containerd

#拉取镜像验证
[root@client containerd]# crictl pull registry.harbor.com/mytestproject/busybox:20230605
Image is up to date for sha256:62ffc2ed7554e4c6d360bce40bbcf196573dd27c4ce080641a2c59867e732dee

[root@client containerd]# crictl image ls
IMAGE                                 		TAG                 IMAGE ID            SIZE
registry.harbor.com/mytestproject/busybox   20230605            b8604a3fe8543       9.95MB