基于Arduino框架下的ESP32移植LVGL教程
这篇文章将成为一个教程–关于如何在Arduino框架下ESP32移植LVGL(Light and Versatile Graphics Library)。学习之余,在此写下我的学习笔记。
文章目录
- 关于LVGL
- 硬件软件
- 开发环境
- 硬件设置
- 在移植LVGL前驱动LCD
-
- TFT_eSPI驱动TFT显示屏
- 移植LVGL
-
- 编辑配置文件
- 编辑main.cpp文件
-
- 编写回调函数
- 设置功能
- 教程源码链接及其他
关于LVGL
简而言之,LVGL是一个具有广泛功能的轻量图形库。基本上适用于所有的显示器,因为其本身不是LCD驱动库—它依赖于其他额外的库来驱动显示器。此外,它还是一个开源库,在此附上开源链接。
硬件软件
硬件:
· ESP32开发板
· 带有SPI接口的LCD
· USB供电线
软件:
· Platform IO(也可以使用Arduino IDE,本教程中使用前者)
· TFT_eSPI或其他显示屏驱动库(例如Adafruit GFX Library)
开发环境
对于本教程,我将使用PlatformIO开发环境。该IDE相较于Arduino IDE,个人使用感觉更加便捷容易。
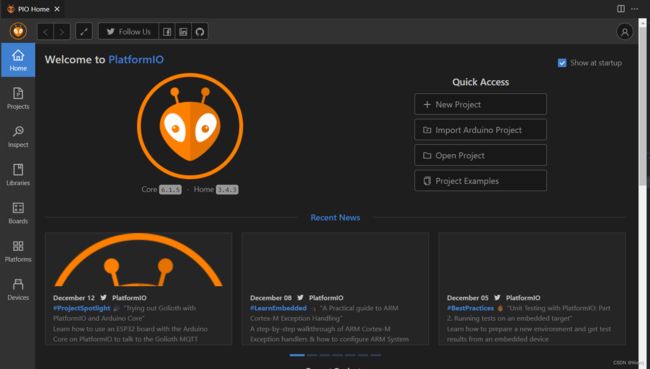
要开始使用 PlatformIO,首先,你需要下载它。实际上,它是 Visual Studio Code 的一个附加组件——可扩展的文本编辑器。
安装后,可以创建你的第一个项目。使用方法在此就不赘述。 
硬件设置
本教程中,使用是的1.44寸TFT屏模块/SPI,驱动IC是ST7735,连接ESP32开发板如下

在移植LVGL前驱动LCD
首先,你需要一个在 LVGL 之外工作的显示器——只有它的驱动程序库。根据显示类型(SPI、I2C、并行),有多种选择。如果你使用 Adafruit 的(或具有相同驱动器 IC 的类似 LCD)显示器,则可以使用 Adafruit 库。你还可以使用基于 Adafruit 库的Bodmer 的 TFT_eSPI库。如果你已经熟悉 eSPi 库,则可以使用它。你还可以为显示器编写你自己的几个驱动程序函数——这样你将节省一些程序内存,因为 LVGL 只需要上述库中的一些函数。本教程中使用的是TFT_eSPI。
TFT_eSPI驱动TFT显示屏
你可以在PlatformIO中直接下载,或从GithubTFT_eSPI获取,也可以直接获取本教程的驱动代码。
将库文件添加至工程后,需要编辑修改User_Setup.h文件以满足你的要求。以下代码为本教程
#define USER_SETUP_INFO "User_Setup"

#define ST7735_DRIVER      // Define additional parameters below for this display

#define TFT_WIDTH  128
#define TFT_HEIGHT 128

#define ST7735_GREENTAB128    // For 128 x 128 display

#define TFT_MOSI 13 // In some display driver board, it might be written as "SDA" and so on.15
#define TFT_SCLK 14 //14
#define TFT_CS   15  // Chip select control pin
#define TFT_DC   27  // Data Command control pin
#define TFT_RST  4  // Reset pin (could connect to Arduino RESET pin)
#define TFT_BL   26  // LED back-ligh t

#define LOAD_GLCD   // Font 1. Original Adafruit 8 pixel font needs ~1820 bytes in FLASH
#define LOAD_FONT2  // Font 2. Small 16 pixel high font, needs ~3534 bytes in FLASH, 96 characters
#define LOAD_FONT4  // Font 4. Medium 26 pixel high font, needs ~5848 bytes in FLASH, 96 characters
#define LOAD_FONT6  // Font 6. Large 48 pixel font, needs ~2666 bytes in FLASH, only characters 1234567890:-.apm
#define LOAD_FONT7  // Font 7. 7 segment 48 pixel font, needs ~2438 bytes in FLASH, only characters 1234567890:-.
#define LOAD_FONT8  // Font 8. Large 75 pixel font needs ~3256 bytes in FLASH, only characters 1234567890:-.
//#define LOAD_FONT8N // Font 8. Alternative to Font 8 above, slightly narrower, so 3 digits fit a 160 pixel TFT
#define LOAD_GFXFF  // FreeFonts. Include access to the 48 Adafruit_GFX free fonts FF1 to FF48 and custom fonts

// Comment out the #define below to stop the SPIFFS filing system and smooth font code being loaded
// this will save ~20kbytes of FLASH
#define SMOOTH_FONT

#define SPI_FREQUENCY  40000000
#define SPI_READ_FREQUENCY  20000000
// #define SPI_TOUCH_FREQUENCY  2500000
此外,还需实例化一个tft对象并初始化
static const uint16_t screenWidth = 128;
static const uint16_t screenHeight = 128;

TFT_eSPI tft = TFT_eSPI(screenWidth, screenHeight); /* TFT instance */

/* TFT init */
tft.init(ST7735_BLACK);
tft.setRotation(0);
至此,LCD屏幕驱动完成。
移植LVGL
当LCD屏幕启动并运行时,下一步就是使LVGL适配你的显示设置。首先,下载LVGL至你的PlatformIO工程中,下载方法同上TFT_eSPI。本教程使用的@8.2.0版本。
ps:并非本教程中所有内容对不同版本的lvgl完全适用。
编辑配置文件
一开始我们需要配置一些 LVGL 库。转到项目中的 LVGL 文件夹,找到“lv_conf_template.h”文件。将其重命名为“lv_conf.h”。然后,打开它进行编辑。在里面你会发现一行告诉你
/*
 * Copy this file as `lv_conf.h`
 * 1. simply next to the `lvgl` folder
 * 2. or any other places and
 *    - define `LV_CONF_INCLUDE_SIMPLE`
 *    - add the path as include path
 */
“将这个文件复制并重命名为 lv_conf.h并放至lvgl文件夹”。
首先,您应该将第一个定义更改为如下所示:
#if 1
然后,找到一行:
#define LV_TICK_CUSTOM 0
使用 Arduino 时,您需要将其值更改为 1:
#define LV_TICK_CUSTOM 1
虽然此文件中有更多设置,但需要更改这两行才能在 Arduino 系统上启动一个简单的 LVGL 示例。此外,如果你将 LV_TICK_CUSTOM 的值保留为 0,则屏幕不会定期更新或在屏幕触摸后更新。
编辑main.cpp文件
包含LVGL库
#include "../lvgl/src/lvgl.h"
注意到上面的 include 中有一条很长的路径。通常它应该像这样工作:
#include "lvgl.h"
但有时 PlatformIO 决定不查找所需的头文件,你将不得不从当前文件编写一个相对路径。
接下来,让我们创建一些变量:
static lv_disp_draw_buf_t draw_buf; //初始化显示缓冲区
static lv_color_t buf_1[screenWidth * screenHeight];//用于LVGL使用的缓冲区

lv_obj_t *screenMain;	//指向所用屏幕的实例化对象
lv_obj_t *labelName;
lv_obj_t *labelTime;
lv_obj_t *labelLocation;
lv_obj_t *labelWeather;
lv_obj_t *labelTemperature;
编写回调函数
编写回调函数,用于将缓冲区的内容复制到显示器的特定区域。
void my_disp_flush(lv_disp_drv_t *disp, const lv_area_t *area, lv_color_t *color_p)
{
    uint32_t w = (area->x2 - area->x1 + 1);
    uint32_t h = (area->y2 - area->y1 + 1);

    tft.startWrite();
    tft.setAddrWindow(area->x1, area->y1, w, h);
    tft.pushColors(&color_p->full, w * h, true);
    tft.endWrite();

    lv_disp_flush_ready(disp);
}
设置功能
当我们完成以上步骤后,需要将所需代码添加至setup()函数中:
    /* TFT init */
    tft.init(ST7735_BLACK);
    tft.setRotation(0);
    /*初始化显示*/
    lv_init();  //初始化lvgl库
    lv_disp_draw_buf_init(&draw_buf, buf_1, NULL, screenWidth * screenHeight); //开启双缓冲

    /*Initialize the display*/
    static lv_disp_drv_t disp_drv;
    lv_disp_drv_init(&disp_drv);
    /*Change the following line to your display resolution*/
    disp_drv.hor_res = screenWidth;
    disp_drv.ver_res = screenHeight;
    disp_drv.flush_cb = my_disp_flush;  /*Set your driver function*/
    disp_drv.draw_buf = &draw_buf;      /*Assign the buffer to the display*/
    lv_disp_drv_register(&disp_drv);    //注册显示屏

    screenMain = lv_obj_create(NULL);    //创建一个实际的屏幕对象
    labelName = lv_label_create(screenMain);
    // labelFans = lv_label_create(screenMain);
    labelTime = lv_label_create(screenMain);
    labelLocation = lv_label_create(screenMain);
    labelWeather = lv_label_create(screenMain);
    labelTemperature = lv_label_create(screenMain);
    // imgHeadPhoto = lv_img_create(screenMain);

    while(1)
    {
        lv_label_set_long_mode(labelName, LV_LABEL_LONG_WRAP);
        lv_label_set_text(labelName, "Hello! Yogurt");
        lv_obj_set_size(labelName, 120, 20);
        lv_obj_align(labelName, LV_ALIGN_DEFAULT, 0, 0);
        lv_obj_set_style_text_font(labelName,&lv_font_chinese_14, 0);

        lv_label_set_long_mode(labelLocation, LV_LABEL_LONG_WRAP);
        lv_label_set_text_fmt(labelLocation, "城市: %s", location);
        lv_obj_set_size(labelLocation, 120, 20);
        lv_obj_align(labelLocation, LV_ALIGN_DEFAULT, 0, 40);
        lv_obj_set_style_text_font(labelLocation,&lv_font_chinese_14, 0);

        lv_label_set_long_mode(labelWeather, LV_LABEL_LONG_WRAP);
        lv_label_set_text_fmt(labelWeather, "天气: %s",weather);
        lv_obj_set_size(labelWeather, 120, 20);
        lv_obj_align(labelWeather, LV_ALIGN_DEFAULT, 0, 60);
        lv_obj_set_style_text_font(labelWeather,&lv_font_chinese_14, 0);

        lv_label_set_long_mode(labelTemperature, LV_LABEL_LONG_WRAP);
        lv_label_set_text_fmt(labelTemperature, "气温: %s度",temperature);
        lv_obj_set_size(labelTemperature, 120, 20);
        lv_obj_align(labelTemperature, LV_ALIGN_DEFAULT, 0, 80);
        lv_obj_set_style_text_font(labelTemperature,&lv_font_chinese_14, 0);

        // lv_img_set_src(imgHeadPhoto, &head_photo);
        // lv_obj_align(imgHeadPhoto, LV_ALIGN_CENTER, 64, 64);
        // lv_obj_set_size(imgHeadPhoto, 60, 60);

        lv_scr_load(screenMain);

        lv_task_handler();
        vTaskDelay(1);
    }
编译代码并烧录,至此,我们的LVGL移植完毕。
教程源码链接及其他
教程源码链接:https://github.com/Yogurt-994/MyESP32Project/tree/master/NODEMCU-32_LVGL_JSON
LVGL 官方网站:https://lvgl.io/
百问网韦东山LVGL 中文站:http://lvgl.100ask.net/8.2/index.html