插件式换肤框架原理解析
作者:ak
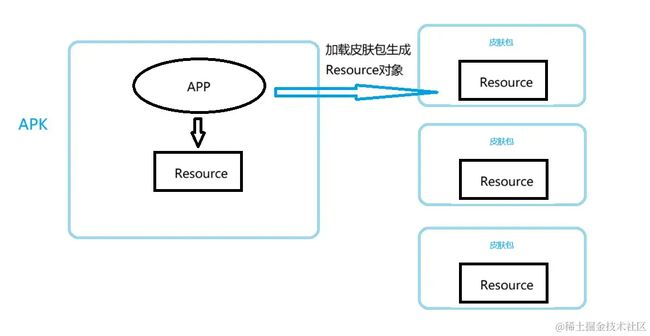
插件换肤实现原理概述
- 收集到需要换肤的控件
- 确定控件中需要换肤的属性和资源ID
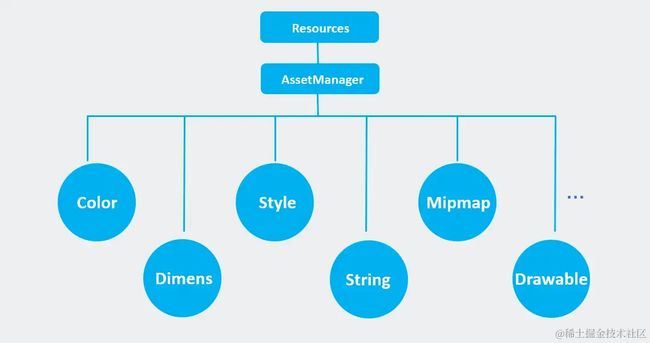
- 加载插件APK,构造
AssetManager并生成插件的Resource类,就可以加载插件包中的资源 - 执行换肤:通过ID加载插件包中的资源,然后再通过控件的属性的
set方法改变属性即可
要解决的问题:
1、怎样去获取皮肤包中的资源?
2、怎么确定当前页面中有哪些资源要进行替换?
一、加载插件资源
通过插件包,构造AssetManager并生成插件的Resources类,
PackageManager packageManager = mContext.getPackageManager();
//检索插件包信息
PackageInfo packageInfo = packageManager.getPackageArchiveInfo(path, PackageManager.GET_ACTIVITIES);
//拿到插件包的包名
mSkinPackageName = packageInfo.packageName;
//构造 AssetManager 类
AssetManager assetManager = AssetManager.class.newInstance();
//反射调用AssetManager的setApkAssets方法来设置路径
Method addAssetPath = assetManager.getClass().getDeclaredMethod("addAssetPath", String.class);
addAssetPath.setAccessible(true);
addAssetPath.invoke(assetManager, path);
//创建插件包的资源对象,管理资源包里面的资源
mResources = new Resources(assetManager, mContext.getResources().getDisplayMetrics(),
        mContext.getResources().getConfiguration());
拿到了插件的Resources对象,就可以去加载插件包中的资源。
二、确定换肤控件及属性
怎么确定当前客户端中有哪些资源要进行替换?
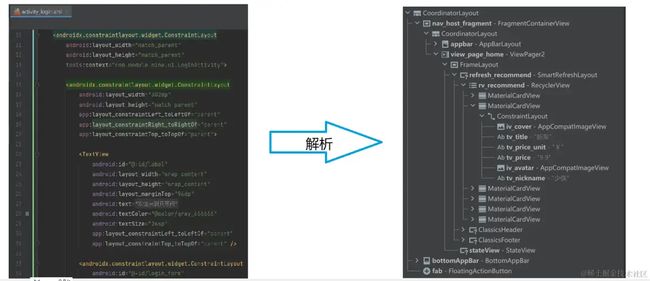
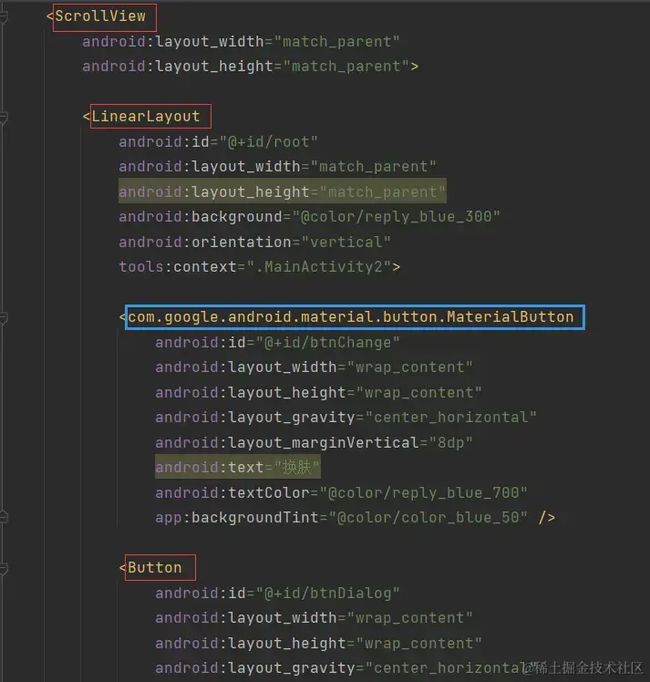
既然我们的布局和属性都写在 XML 文件中, 是不是可以通过 XML 文件中的属性来确定哪些控件需要进行换肤; 从而收集需要换肤的View,并找到那些需要更改的属性。
换肤框架一般是在activity加载View的时候使用LayoutInflater.Factory2来截获View的加载过程,然后记录Activity的每一个View需要调整的属性,也就是保存那些 需要换肤的控件 和识别 需要换肤的属性.
1、LayoutInflater源码解读
1.1、XML的解析过程
我们在页面上能够看到控件,都是通过View对象绘制出来的;而写在XML布局文件中的控件之所以能够被我们看见,它肯定是经过了 对XML文件进行解析,然后转化为View对象
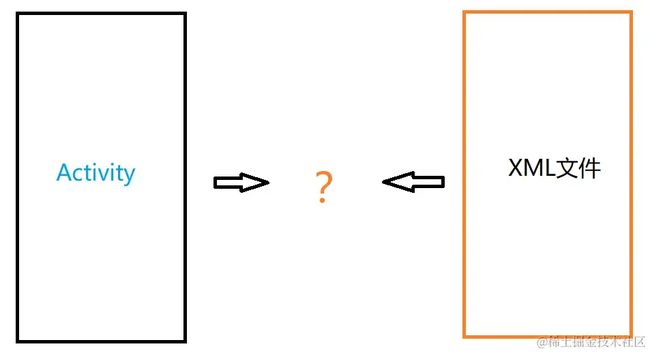
那么页面和布局文件是如何关联起来的呢?
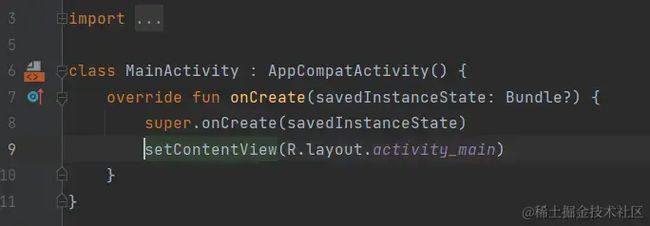
最为关键的一句就是setContentView() ;整个转化的过程都是在这里面
这里是AppcompatActivity,我们点进去看
调用了getDelegete()的setContentView()
这里的delegete是AppcompatDelegete,点进去可以看到AppcompatDelegete它是一个抽象类,所以这里getDelegete()拿到的肯定是它的子类
而它的唯一实现类是AppcompatDelegateImpl,所以我们点到AppcompatDelegateImpl.setContentView()方法
这里第一行首先初始化了DecorView,DecorView是整个Activity中最顶级的View,我们知道Activity组件是用来管理Window的,我们在屏幕上看到的Activity页面就是它所持有的Window,而Window的唯一实现类是PhoneWindow,PhoneWindow中有一个最顶层的View,这个View就是DecorView。
接着通过findViewById拿到了android.R.id.content,这个content就是我们根布局,后面会把我们的布局添加到根布局里面。
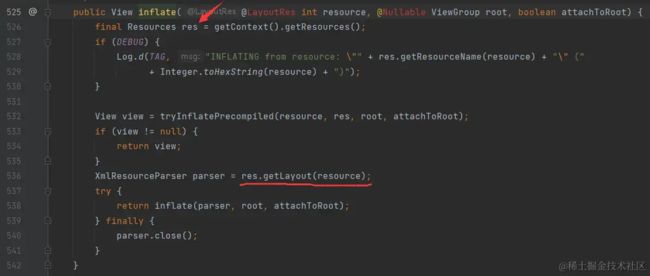
这里调用了LayoutInflater的inflate方法,并且把xml和根布局传了进去; 接着往下走
首先,得到了我们的Resources对象,然后通过Resource对象,初始化了XML解析器
Ok,在这里得到我们的XML解析器之后,它又调用了一个 inflate() 方法。 传入了XML解析器、根布局,来解析我们的XML,把它加载到我们的contentView里面。
点进去之后我们看最关键的,这里去创建了一个Temp,而在下面把这个Temp View给添加到了contentView里面,也就是添加到我们的android.R.id.content里面。 那么就可以知道,这里的temp View 其实就是在XML中找到的根布局,就也是XML里的第一个View。
public View inflate(XmlPullParser parser, @Nullable ViewGroup root, boolean attachToRoot) {
    synchronized (mConstructorArgs) {

        ......省略部分代码......

        View result = root;
           try {
           //第一个节点的名字,也就是 xml 中的根视图
            final String name = parser.getName();

            "节点一:创建XML中的根布局View"
            //Temp is the root view that was found in the xml
            final View temp = createViewFromTag(root, name, inflaterContext, attrs);

            ViewGroup.LayoutParams params = null;

            if (root != null) {
                if (DEBUG) {
                    System.out.println("Creating params from root: " +
                            root);
                }
                // Create layout params that match root, if supplied
                params = root.generateLayoutParams(attrs);
                if (!attachToRoot) {
                    // Set the layout params for temp if we are not
                    // attaching. (If we are, we use addView, below)
                    temp.setLayoutParams(params);
                }
            }

            if (DEBUG) {
                System.out.println("-----> start inflating children");
            }

            "节点二:创建XML根布局内部的子View"
            // Inflate all children under temp against its context.
            rInflateChildren(parser, temp, attrs, true);

            if (DEBUG) {
                System.out.println("-----> done inflating children");
            }

            "我们找到所有子View附加到根布局temp后"
            // 就可以把根部局temp添加到 【android.R.id.content】中
            if (root != null && attachToRoot) {
                root.addView(temp, params);
            }

            // Decide whether to return the root that was passed in or the
            // top view found in xml.
            if (root == null || !attachToRoot) {
                result = temp;
            }

        } catch (Exception e) {
            e.printStackTrace();
        }

        ......省略部分代码......

        return result;
    }
}
节点一:创建XML中的根布局View
createViewFromTag(root, name, inflaterContext, attrs);
根据解析的name创建View并返回
节点二:创建XML根布局内部的子View
rInflateChildren(parser, temp, attrs, true);
使用递归的方式调用createViewFromTag方法完成子View的加载
接下来我们看createViewFromTag()是如何创建View的
点进去看到返回值是View,我们去找一下View是在哪里返回的,以及它是在哪里创建的。
可以看View的创建和return都在这一块,首先通过tryCreateView()尝试创建View,如果创建失败了View为空,那么才会进到下面这一段默认逻辑去创建
我们先来看tryCreateView()方法:
public final View tryCreateView(@Nullable View parent, @NonNull String name,
    @NonNull Context context,
    @NonNull AttributeSet attrs) {
    if (name.equals(TAG_1995)) {
        // Let's party like it's 1995!
        return new BlinkLayout(context, attrs);
    }

    View view;
    if (mFactory2 != null) {
        view = mFactory2.onCreateView(parent, name, context, attrs);
    } else if (mFactory != null) {
        view = mFactory.onCreateView(name, context, attrs);
    } else {
        view = null;
    }

    if (view == null && mPrivateFactory != null) {
        view = mPrivateFactory.onCreateView(parent, name, context, attrs);
    }

    return view;
}
尝试用3个Factory来创建View,如果创建成功了就直接返回View; 如果创建失败返回null,则通过前面那一段默认逻辑去创建。
我们可以利用这一点,通过设置自己的Factory来收集到需要换肤的控件。
默认逻辑部分:
try {
    View view = tryCreateView(parent, name, context, attrs);

    if (view == null) {
        final Object lastContext = mConstructorArgs[0];
        mConstructorArgs[0] = context;
        try {
            if (-1 == name.indexOf('.')) {  //判断`name`中是否包含小数点,
                view = onCreateView(context, parent, name, attrs);
            } else {
                view = createView(context, name, null, attrs);
            }
        } finally {
            mConstructorArgs[0] = lastContext;
        }
    }

    return view;
}
- 如果
name中没有.小数点,则认为它是android.view包下的控件,走oncreateView方法,此时会在name前面拼接上android.view.的包名
- 如果包含
.小数点,则认为是全包名路径,不需要拼接前缀。
最终使用构建出来的全包名路径,通过反射得到类的构造方法来创建实例对象。
@UnsupportedAppUsage
static final Class[] mConstructorSignature = new Class[] {
        Context.class, AttributeSet.class};

public final View createView(@android.annotation.NonNull Context viewContext, @android.annotation.NonNull String name,
                             @Nullable String prefix, @Nullable AttributeSet attrs) throws ClassNotFoundException, InflateException {
                              ......省略部分代码......
    //从缓存中获取构造方法
    Constructor constructor = sConstructorMap.get(name);
    if (constructor != null && !verifyClassLoader(constructor)) { //校验
        constructor = null;
        sConstructorMap.remove(name);
    }
    Class clazz = null;

    if (constructor == null) {  //如果缓存中不存在
        // Class not found in the cache, see if it's real, and try to add it
        clazz = Class.forName(prefix != null ? (prefix + name) : name, false,
                mContext.getClassLoader()).asSubclass(View.class);

        if (mFilter != null && clazz != null) {
            boolean allowed = mFilter.onLoadClass(clazz);
            if (!allowed) {
                failNotAllowed(name, prefix, viewContext, attrs);
            }
        }
        //获得两个参数的构造方法
        constructor = clazz.getConstructor(mConstructorSignature);
        constructor.setAccessible(true);
        sConstructorMap.put(name, constructor);   //缓存构造方法
    }

     ......省略部分代码......

    mConstructorArgs[0] = viewContext; //构建参数Context和AttributeSet
    Object[] args = mConstructorArgs;
    args[1] = attrs;

    final View view = constructor.newInstance(args);
    return view;
}
到这里原理就介绍完了,我们可以自定义一个Factory继承自Factory2,去实现一个换肤插件式换肤框架了,关键在于实现Factory2的onCreateView方法来收集属性。
题外
另外一种情况是原生主题切换换肤中,有些页面为了避免重走生命周期配置了android:configChanges="uiMode"
此时切换黑白模式时,一般是在onConfigurationChanged()回调中重新设置属性。
这时候我们其实可以写一个工具类来完成重设操作:通过解析XML,将属性查询设置给对应的View.
Android 学习笔录
Android 性能优化篇:https://qr18.cn/FVlo89
Android Framework底层原理篇:https://qr18.cn/AQpN4J
Android 车载篇:https://qr18.cn/F05ZCM
Android 逆向安全学习笔记:https://qr18.cn/CQ5TcL
Android 音视频篇:https://qr18.cn/Ei3VPD
Jetpack全家桶篇(内含Compose):https://qr18.cn/A0gajp
OkHttp 源码解析笔记:https://qr18.cn/Cw0pBD
Kotlin 篇:https://qr18.cn/CdjtAF
Gradle 篇:https://qr18.cn/DzrmMB
Flutter 篇:https://qr18.cn/DIvKma
Android 八大知识体:https://qr18.cn/CyxarU
Android 核心笔记:https://qr21.cn/CaZQLo
Android 往年面试题锦:https://qr18.cn/CKV8OZ
2023年最新Android 面试题集:https://qr18.cn/CgxrRy
Android 车载开发岗位面试习题:https://qr18.cn/FTlyCJ
音视频面试题锦:https://qr18.cn/AcV6Ap
