【分享】从零开始在树莓派4B上搭建环境,使用ros控制dofbot机械臂(一)
文章目录
-
-
-
- 《从零开始配置树莓派控制机械臂》专栏传送门
- 0. 准备阶段
- 1. 在电脑上下载所需软件及镜像文件
- 2. 安装镜像文件
- 3. 进入树莓派系统
- 4. 安装树莓派配置工具raspi-config
- 5. 更换系统软件源
- 6. 安装I2C工具和I2C-Python环境
- 7. 安装JupyterLab
-
-
《从零开始配置树莓派控制机械臂》专栏传送门
【分享】从零开始在树莓派4B上搭建环境,使用ros控制dofbot机械臂(一)
【分享】从零开始在树莓派4B上搭建环境,使用ros控制dofbot机械臂(二)
【分享】从零开始在树莓派4B上搭建环境,使用ros控制dofbot机械臂(三)
【分享】从零开始在树莓派4B上搭建环境,使用ros控制dofbot机械臂(四)
【分享】从零开始在树莓派4B上搭建环境,使用ros控制dofbot机械臂(五)
【分享】从零开始在树莓派4B上搭建环境,使用ros控制dofbot机械臂(六)
0. 准备阶段
准备一张至少32G的Micro SD卡,一个Micro SD卡转USB转换器,一个能正常使用的树莓派,网线一条,树莓派电源线一条。

1. 在电脑上下载所需软件及镜像文件
去官网下载树莓派官方系统:
链接:https://ubuntu.com/download/raspberry-pi
我选择下载这个Ubuntu Server20.04.4 LTS版本。
下载Win32DiskImager:
可以到官方链接下载:
Win32DiskImager
也可以从我的阿里云链接下载:https://www.aliyundrive.com/s/Ts3sFNqLqxd
2. 安装镜像文件
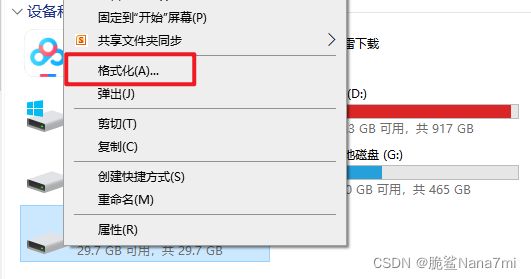
先把Micro SD卡右键选择格式化,卷标尽量不要出现中文字符。也注意别格式化了其他的磁盘以免造成数据丢失。

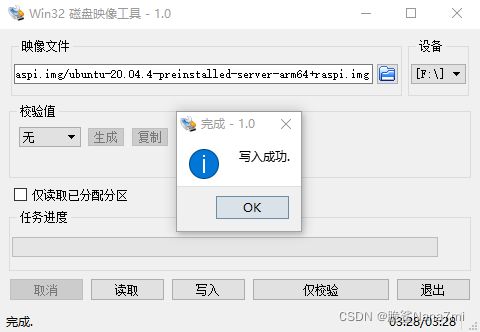
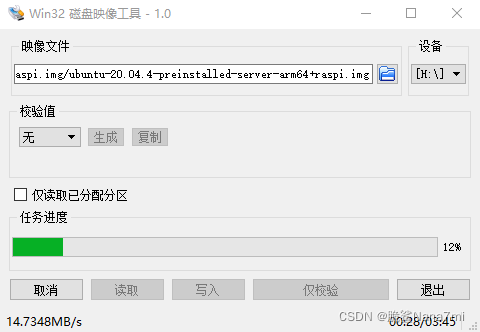
打开之前下载好的Win32DiskImager,选中之前下载解压好的镜像文件,并且在设备里选中自己的Micro SD卡
在叫boot的磁盘里新建一个文本文档,并重命名为ssh用于与树莓派进行ssh连接,注意不要带有后缀。

3. 进入树莓派系统
发现是sd卡未插好,关机后重新拔插开机后进入系统,初始密码和账号都是ubuntu,登录进去后,系统会提示更改新的密码。插上网线后,输入命令安装必备库:
sudo apt-get install net-tools
sudo apt install whiptail parted lua5.1 alsa-utils psmisc
4. 安装树莓派配置工具raspi-config
raspi-config是Raspberry PI官方Raspbian镜像自带的一个系统配置工具。
在树莓派上输入
sudo raspi-config
wget http://archive.raspberrypi.org/debian/pool/main/r/raspi-config/raspi-config_20200902_all.deb
sudo dpkg -i raspi-config_20200902_all.deb
树莓派修改和矫正时间设置
在树莓派上,打date命令可以看到系统的日期时间:
![]()
(后面的CST表示中国标准时间)
如果显示时间比当前时间慢了8小时,那就要设置一下时区
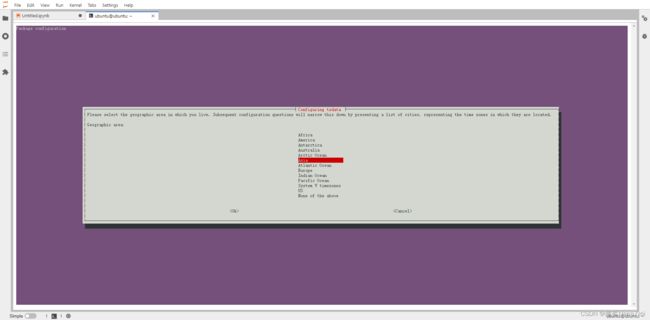
sudo dpkg-reconfigure tzdata
5. 更换系统软件源
由于树莓派默认的软件源服务器是在国外的,安装软件时网络下载速度会比较慢,文件大的情况甚至还有可能经常断开连接,所以可以通过修改软件源为国内的服务器,这里以更换清华大学提供的软件源为例。
1.输入以下命令备份原来的软件源,以备随时可以更换回原始的软件源。
sudo cp -v /etc/apt/sources.list /etc/apt/sources.list.backup
2.使用命令更改文件的权限。
sudo chmod 777 /etc/apt/sources.list
3.打开编辑源文件,把原来的文件在每行最前位置增加一个井号‘#’,作为注释掉原来的代码。
sudo nano /etc/apt/sources.list
再输入以下内容(点击鼠标右键可以粘贴):
deb http://mirrors.tuna.tsinghua.edu.cn/ubuntu-ports/ focal main restricted universe multiverse
deb http://mirrors.tuna.tsinghua.edu.cn/ubuntu-ports/ focal-security main restricted universe multiverse
deb http://mirrors.tuna.tsinghua.edu.cn/ubuntu-ports/ focal-updates main restricted universe multiverse
deb http://mirrors.tuna.tsinghua.edu.cn/ubuntu-ports/ focal-proposed main restricted universe multiverse
deb http://mirrors.tuna.tsinghua.edu.cn/ubuntu-ports/ focal-backports main restricted universe multiverse
deb-src http://mirrors.tuna.tsinghua.edu.cn/ubuntu-ports/ focal main restricted universe multiverse
deb-src http://mirrors.tuna.tsinghua.edu.cn/ubuntu-ports/ focal-security main restricted universe multiverse
deb-src http://mirrors.tuna.tsinghua.edu.cn/ubuntu-ports/ focal-updates main restricted universe multiverse
deb-src http://mirrors.tuna.tsinghua.edu.cn/ubuntu-ports/ focal-proposed main restricted universe multiverse
deb-src http://mirrors.tuna.tsinghua.edu.cn/ubuntu-ports/ focal-backports main restricted universe multiverse
输入完成后,按Ctrl+S保存,再按Ctrl+X退出。
4.输入以下命令更新软件源
sudo apt update
6. 安装I2C工具和I2C-Python环境
i2c-tools工具是一个专门调试i2c的,开源,可获取挂载的设备及设备地址,还可以在对应的设备指定寄存器设置值或者获取值等功能。
1.运行以下命令安装I2C工具
sudo apt install i2c-tools
2.测试I2C功能,扫描当前连接的I2C设备地址。
sudo i2cdetect -y -r 1
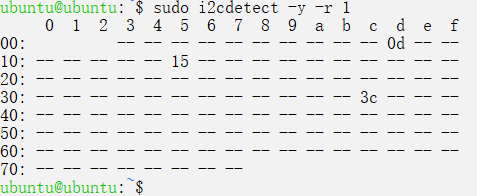
上图中表示连接了三个I2C设备,其中0x15就是机械臂扩展板的I2C设备地址。
3.添加当前用户到I2C组中,这样的好处是可以使用当前用户运行I2C命令,而不需要管理员权限。
sudo adduser ubuntu i2c
4.重启树莓派,让dofbot用户添加到I2C组生效。
sudo reboot
安装I2C-Python环境
由于ubuntu mate 20.04系统默认已经带有Python3.8环境,所以只需要安装其他库文件即可。
1.安装pip3
sudo apt install python3-pip
2.安装smbus
sudo apt install python3-smbus
3.安装其他相关工具
sudo apt install build-essential python3-dev
7. 安装JupyterLab
JupyterLab 是一个交互式的开发环境,是 Jupyter notebook 的下一代产品,集成了更多的功能,支持插件扩展,通过网页即可运行操作,简单方便又功能强大,是一款非常值得使用的代码编辑神器。
安装jupyterlab是需要使用root用户安装的,而ubuntu mate 20.04系统的root用户默认是没有密码并且不可切换的,所以需要给root设置密码后才可以使用root账户。
1.输入以下命令给root设置密码,然后输入两次相同的密码确认。
sudo passwd
sudo su
1.安装ffi库
apt-get install libffi-dev
2.安装jupyter
pip3 install -i https://pypi.tuna.tsinghua.edu.cn/simple jupyter
3.安装jupyter lab
pip3 install -i https://pypi.tuna.tsinghua.edu.cn/simple jupyterlab
4.安装完成后切换回普通用户
su ubuntu
配置JupyterLab
1.生成配置文件
jupyter notebook --generate-config
2.用ipython生成jupyterlab的登录密码。
ipython
在In [1]输入:from notebook.auth import passwd
在In [2]输入:passwd()
然后输入两次相同的密码,按回车确认。注意这里的密码是用于登录jupyterlab界面的,为了方便记住,可以与用户密码保持一致。
然后系统会输出密码的密文,把这个密文整段复制,每个密码生成的密文可能不同,请复制实际输出的密文。
在In [3]输入:exit()
3.编译jupyter的配置文件
nano ~/.jupyter/jupyter_notebook_config.py
直接跳到最后面,增加以下内容:
c.NotebookApp.ip = '0.0.0.0'
c.NotebookApp.open_browser = False
c.NotebookApp.password = 整个密码密文
c.NotebookApp.port = 8888
最后保存并退出。
安装jupyterlab插件
1.安装nodejs和npm
curl -sL https://deb.nodesource.com/setup_12.x | sudo bash -
sudo apt-get install -y nodejs gcc g++ make python
node -v
sudo npm i -g npm
2.安装jupyter小部件扩展插件,由于需要下载和编译,运行时间比较久,并且有可能会出错,如果出错了就重新运行安装一次。
sudo jupyter labextension install @jupyter-widgets/jupyterlab-manager
3.安装statusbar插件
sudo jupyter labextension install @jupyterlab/statusbar
4.到此jupyterlab就已经安装完成了。
启动jupyterlab
1.进入要运行代码的目录,这里以新建一个test文件夹为例。
mkdir test
cd test
2.打开jupyterlab
这里我另外使用screen命令后台执行的指令,有感兴趣的或者会使用screen命令的可以试试。
jupyter lab
远程访问jupyterlab
1.电脑上打开浏览器(推荐使用Chrome或者Firefox浏览器),然后输入树莓派的IP:端口号。这里以IP为192.168.1.100,port为8888为例。
http://192.168.1.100:8888/

