HarmonyOS入门教程之页面跳转(Java版)
页面跳转即AbilitySlice间导航。这部分有两种,一种是同Page里跳转,另一种是不同Page里跳转
下面将介绍这两种的实现方式
正文
1. 同Page跳转的三种实现方式
1.1. 基本实验步骤
1. 在layout文件夹中写xml布局文件
ability_main.xml是主页面,其他三个是要跳转到的页面,可以随便定义内容
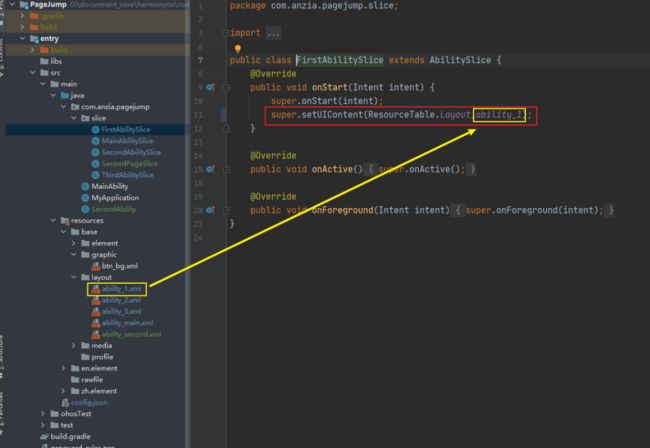
2. 在slice中声明创建Slice文件声明调用layout布局文件
3. 在主Slice中,编写业务代码实现跳转(不同的方式实现区别主要在第3个步骤)
1.2. 核心代码部分
1.2.1. 无参跳转
MainAbilitySlice.java
// 第一个按钮:实现基本的跳转
// 通过xml布局文件中的组件ID获取组件
Button btn_1 = (Button) findComponentById(ResourceTable.Id_btn_1);
// 设置按钮点击监听事件,在点击时进行如下操作
btn_1.setClickedListener(component -> {  // lambda表达式
    Intent btn_1_intent = new Intent();  // Intent:意图,是对象之间传递信息的载体
    // 通过present进行跳转操作
    /**
   * 参数说明
    * new FirstAbilitySlice():表示要跳转到的slice
    * btn_1_intent:把信息载体作为参数传到对应slice中
    */
    present(new FirstAbilitySlice(), btn_1_intent);
});
调用present()之后会直接跳转
1.2.2. 带参数跳转
大部分内容和第一个实现差不多,所以就不写注释了
MainAbilitySlice.java
// 第二个按钮:实现带参数跳转;可以边跳转边传值改变内容
Button btn_2 = (Button) findComponentById(ResourceTable.Id_btn_2);
btn_2.setClickedListener(component -> {
   Intent btn_2_intent = new Intent();
   btn_2_intent.setParam("data", "鸿蒙,你好");    // 设置参数,形式是K:V结构,存在intent中
   present(new SecondAbilitySlice(), btn_2_intent);
});
secondAbilitySlice.java
@Override
public void onStart(Intent intent) {
    super.onStart(intent);
    super.setUIContent(ResourceTable.Layout_ability_2);


    Text text = (Text) findComponentById(ResourceTable.Id_ability_text_2);  // 获得text组件
    // getStringParam(),从inent中通过键获取值,因为是键值对形式;返回的结果为"鸿蒙,你好"
    text.setText(intent.getStringParam("data"));  // 修改text组件的内容,会覆盖原来的内容


}
在主页面设置参数存入intent中之后跳转,跳转到目标页面Slice后,读取inent中的参数,从而修改本来的内容
内容由 “第二个页面跳转实现” 变为 “鸿蒙,你好”
1.2.3. 带返回值跳转
(以下代码按步骤实现)
MainAbilitySlice.java
// 第三个按钮:实现带返回值跳转;可以通过校验返回值,在onResult中实现校验通过后的其他行为
text_main = (Text) findComponentById(ResourceTable.Id_text_main);
Button btn_3 = (Button) findComponentById(ResourceTable.Id_btn_3);
btn_3.setClickedListener(component -> {
    Intent btn_3_intent = new Intent();
    // 这是使用的是presentForResult()进行跳转,最后一个参数是请求代码,用于返回时校验
    presentForResult(new ThirdAbilitySlice(), btn_3_intent, 666);
});
ThridAbilitySlice.java
@Override
public void onStart(Intent intent) {
   super.onStart(intent);
   super.setUIContent(ResourceTable.Layout_ability_3);


   // 通过组件id获取组件
   Text text = (Text) findComponentById(ResourceTable.Id_ability_text_3);
   text.setClickedListener(component -> {
      Intent intent1 = new Intent();
      intent1.setParam("pwd", "51cto");  // 设置参数
      setResult(intent1);    // 设置返回的结果
      terminate();   // 点击事件结束后销毁该slice
   });


}
MainAbilitySlice.java
@Override
protected void onResult(int requestCode, Intent resultIntent) {
    super.onResult(requestCode, resultIntent);
    // 如果请求代码校验通过,则执行一下的操作
    if (requestCode == 666) {
        // 获取pwd的值
        String pwd = resultIntent.getStringParam("pwd");
        // 在pwd的值,添加到原文本的后面
        text_main.append(" 密码:" + pwd);
    }
}
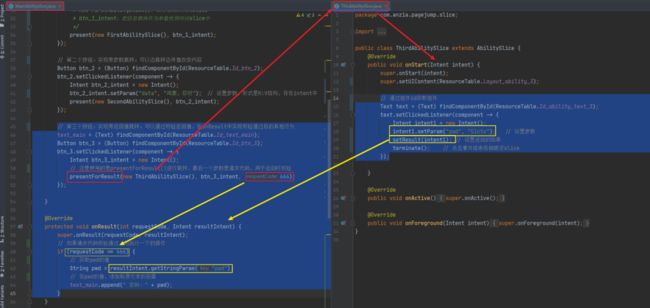
调用流程如下所示
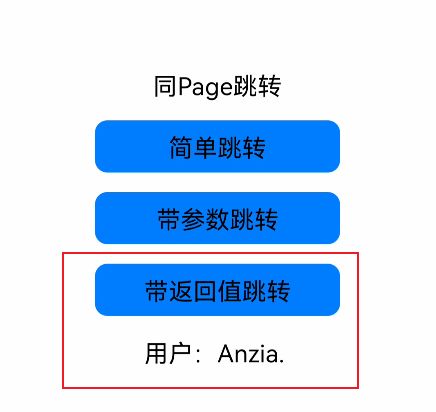
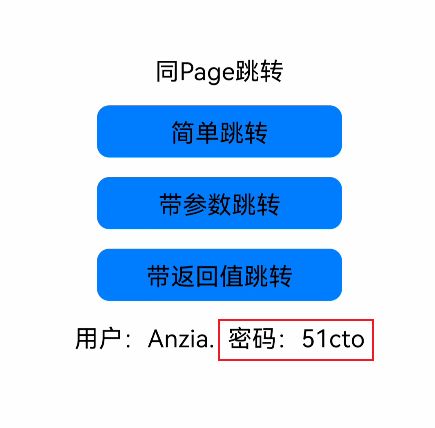
结果
 点击获取密码后,会调用terminate()方法销毁页面。回到主页面同时调用onResult()方法,执行文字拼接
2. 不同Page跳转的两种实现方式
2.1 基本实验步骤
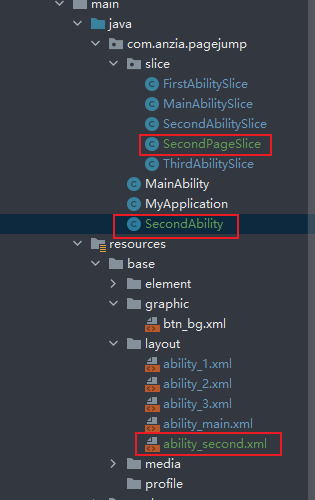
1. 新建Ability,同时DES会自动在layout和slice中创建新的文件
2. 在layout文件夹中写xml布局文件
3. 在slice中声明创建Slice文件声明调用layout布局文件
4. 在主Slice中,编写业务代码实现跳转
2.2. 核心代码部分
2.2.1. 通过 new Intent.OperationBuilder() 方式
MainAbilitySlice.java
// 推荐使用这种方法实现!使用OperationBuilder()方法实现
Button btn_4 = (Button) findComponentById(ResourceTable.Id_btn_4);
btn_4.setClickedListener(component -> {
   Intent btn_4_intent = new Intent();
   Operation operation = new Intent.OperationBuilder()
         .withDeviceId("")    // 设备Id,在本地上进行跳转可以为空,跨设备进行跳转则需要传入值
         .withBundleName("com.anzia.pagejump")    // 包名
         .withAbilityName(".SecondAbility")    // Ability页面的名称,在本地可以缺省前面的路径
         .build();    // 构建代码
   btn_4_intent.setOperation(operation);    // 将operation存入到intent中
   startAbility(btn_4_intent);    // 实现Ability跳转
});
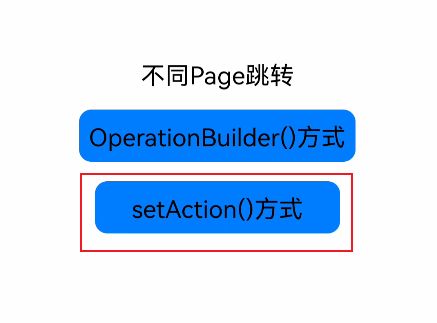
2.2.2. 通过 setAction() 方式
第一步:在config中声明SecondAbility的actions
第二步:在SecondAbility中添加Action路由
public class SecondAbility extends Ability {
   @Override
   public void onStart(Intent intent) {
      super.onStart(intent);
      super.setMainRoute(SecondPageSlice.class.getName());


       // 第一个参数为:config.json中声明的actions;第二个参数为:要跳转目标Slice的路径名
      super.addActionRoute("abilityslice2", SecondPageSlice.class.getName());
   }
}
第三步:在MainAbilitySlice.java中实现不同页面跳转
// 不推荐这个,挺麻烦的
// 先去config.json中添加对应的action
// 在Ability文件添加addActionRoute()路由
// 在Slice文件中组件的监听事件设置跳转方法
Button btn_5 = (Button) findComponentById(ResourceTable.Id_btn_5);
btn_5.setClickedListener(component -> {
   Intent btn_5_intent = new Intent();
   btn_5_intent.setAction("abilityslice2");
   startAbility(btn_5_intent);
});
结果
3.1. 同页面跳转
默认:
// 直接调用present()方法
带参数:
// 主页面
intent.setParam()
present()
// 目标页面
intent.getXXXParam()
等待返回值:
// 主页面
presentForResult()
// 目标页面
setResult()
// 主页面
实现onResult()方法
3.2. 不同页面跳转
OperationBuilder()方式
// 主页面
Operation operation = new Intent.opationBuilder()
    .withDeviceId(设备id)
    .withBundleName(包名)
    .withAbilityName(FA名)
    .build();
intent.setOparation(operation);
startAbility(intent);
setAction()方式
// 在config.json中声明actions
// 在目标Ability中调用addActionRoute()方法添加路由
super.addActionRoute();
// 主页面
intent.setAction(action名);
startAbility(intent);
3.3. 差别
有present()、presentForResult()的是同页面跳转
有startAbility()的是不同页面跳转
不同页面跳转推荐使用OperationBuilder()方式,因为这种方式在跨设备调用还需要用。习惯这一种就好了
【abilityslice页面跳转.rar】是源码
https://harmonyos.51cto.com/resource/643
--完--
关注「HarmonyOS应用开发者」,一起学习成长
后台回复"教程" 获得最新鸿蒙开发者教程,助你快速上手鸿蒙开发!
花了半个月时间整理了522页的《HarmonyOS从入门到精通》电子书

