【Elasticsearch】小白实战!ES使用Reindex迁移数据
1、前期准备
文章有点长,如果你想认真阅读,建议到我语雀文档上观看,格式友好 -> ES 迁移工作
最近有一个需求是需要我负责将里水服务器里的 ES 数据迁移到 CCSE 上,但是由于现在环境还没打通,所以就先在蓝鲸和我本地上进行测试,因为之前没有接触过 ES 数据的迁移,所以上手时有点懵,下面是我在网络上找到的 ES 迁移的文章,写的还不错!
Elasticsearch使用reindex做数据迁移
但目前蓝鲸环境没有数据,因此需要我自己手动造一些数据,于是我到平台刷新对应模块,然后 debug 拿到请求报文,接着就开始造数据了,预期是插入 2000w 条数据(实际生产环境中,数据是亿级的),然后测试从蓝鲸环境迁移到本地的失败率是多少,以及整体耗时情况。
在体量较大的情况下,单条插入肯定效率低下,所以考虑:
1、使用批量处理(Bulk API):Elasticsearch 提供了批量处理(Bulk API)来高效地插入多个文档。可以将多个 IndexRequest 打包成一个批量请求,然后一次性提交给 ES。这通常比逐个插入文档更高效,因为减少了通信开销。
2、使用并发处理:假如你又大量文档需要插入,可以考虑并行化处理。使用多线程或异步操作,同时插入多个文档,这可以加速插入过程。
3、数据预处理:在插入前,考虑对数据进行预处理,例如将数据批量转换为 JSON 格式,然后一次性提交。
4、适当的分片设置:在 Elasticseaerch 中,索引可能会被分成多个分片,每个分片可以并行处理请求。(由于项目限制,最大只能创建 4 分片 1 副本的索引)
关于分片和副本数量对 ES 批量数据插入的影响,这篇文章总结的还不错:探究分片副本数量等条件对ElasticSearch批量数据插入的影响
5、关闭自动刷新:在批量插入数据之前关闭自动刷星,将 refresh-interval 值设置为 -1,表示关闭自动刷新。(效果不明显)
// 关闭自动刷新
UpdateSettingsRequest request = new UpdateSettingsRequest(indexName);
Settings settings = Settings.builder()
        .put("refresh_interval", -1) // -1 表示关闭刷新,或者设置一个较大的值来延长刷新间隔
        .build();
request.settings(settings);
try {
    AcknowledgedResponse response = restHighLevelClient.indices().putSettings(request, RequestOptions.DEFAULT);
    if (response.isAcknowledged()) {
        // 刷新已关闭或刷新间隔已延长
        System.err.println("刷新已关闭或刷新间隔已延长");
    } else {
        // 处理失败情况
        System.err.println("处理失败情况");
    }
} catch (Exception e) {
    System.err.println(e.getMessage());
}
2、 开始进行压测
压力测试我没有使用 Jmeter 和 caffeine 等工具,而是使用了 阿里开源的 arthas,一来是可以直观看到方法的整体耗时,二是可以清楚看到每个代码的执行耗时。
1、首先下载 arthas(官网自行下载)
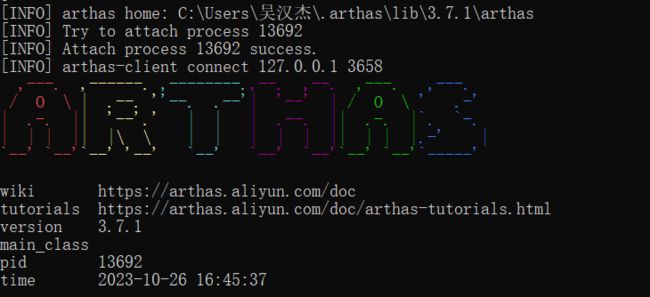
2、在 对应目录下 运行 jar 包
java -jar arthas-boot.jar3、选择对应的服务,输入数字即可(AdminApp 是我 springcloud 项目的模块服务)
4、启动成功:
接着输入追踪方法命令:trace ${包名+类名} ${方法名} ,例如下面是我要追踪的方法:
![]()
接着控制面板会卡住,你只需要触发刚刚输入的 Java 方法即可,如果耗时没有出现,按 c 键就会显示出来,按 q 键则退出当前追踪的方法。
下面是我的压测数据:
扩大数据量,插入 1w 条,1k 条为一批,耗时 187 秒(第一次)
压测,插入 1w 条数据,1k 条一批,耗时 32 秒(第二次)
继续压测,插入 1w 条数据,2k 条一批,耗时 24 秒
继续压测,插入 1w 条数据,5k 条一批,耗时 24 秒
扩大数据量,插入 10w 条,5k 条一批,耗时 240 秒
继续扩大数据量,插入 100w 条,5k 条一批,耗时 23178 秒(猜想是网络延时)
更换网络环境,插入 100w 条数据,5k 一批,耗时 1837 秒(第一次)
设置刷新间隔 refresh_interval 为 -1,插入 100w 条数据,5k 一批,耗时 1830 秒(第二次)
插入 210w 条数据,3k 为一批,耗时 3878 秒
插入 300w 条数据,3k 为一批,耗时 5154 秒
插入 100w 条数据,5k 为一批,耗时 1599 秒
将最占用空间的字段去除,插入 500w 条数据,5k 条数据为一批,耗时 4846 秒
综合考量,最终使用 5000 条数据为一批来进行数据的插入
3、ES 使用 reindex 做数据迁移
自行到官网进行安装:ES官网(你可能需要科学上网)
我安装的 ES 版本是 7.9.3
3.1、创建 es 索引
在 windows 系统中,如何创建es索引?
要在 Windows 系统中创建 Elasticsearch 索引,你可以使用 Elasticsearch 的 REST API 或者 Elasticsearch 客户端库(如 Java 客户端)来执行相关操作。以下是使用 Elasticsearch REST API 创建索引的一般步骤:
1)安装 Elasticsearch
2)启动 Elasticsearch
3)使用 REST API 创建索引
curl -X PUT "http://localhost:9200/your_index_name" -H "Content-Type: application/json" -d '{
    "settings" : {
        "number_of_shards" : 1,
        "number_of_replicas" : 0
    }
}'
在上述示例中,将索引名称替换为你想要创建的索引的名称。还可以设置索引的配置参数,如分片数和副本数。此示例中的设置将索引创建为具有一个主分片和零个副本的索引。
4)验证索引是否创建成功
使用 HTTP 请求或 Elasticsearch 客户端,你可以检查是否成功创建了索引。你可以执行以下 cURL 命令:
curl -X GET "http://localhost:9200/_cat/indices"这将列出所有现有的索引,包括新创建的索引。
但是这样操作有点麻烦,通常来说,我们依赖 http 发送工具来操作,这里我使用 postman 来创建 es 索引:
1)新建一个面板,然后填写请求信息
- 选择请求类型为 PUT
- ip 和 端口请修改成你自己的 ip+端口
- es_reindex_test01 是新建的索引名称
2)在请求头设置 Content-Type 为 application/json
3)设置请求主体(Body)
- 在请求主体部分,选择 "raw"(原始数据)选项。
- 在文本框中输入 Elasticsearch 索引的配置信息,如下所示的 JSON 样本:
4)点击发送,正常情况返回创建成功信息:
3.2、reindex 数据迁移
首先需要明白一个概念:在使用 es 的 reindex 做数据迁移的时候,源索引和目标索引在不同的服务器上,此时应该在哪一台服务器上操作?
当使用 Elasticsearch 的 Reindex 功能进行数据迁移时,你可以选择在任何一个 Elasticsearch 节点上执行操作,不一定非要在源索引和目标索引所在的服务器上执行。Reindex 操作是一个 Elasticsearch 集群级别的操作,可以从一个集群中的一个节点迁移数据到另一个集群中的一个节点或同一集群内的不同索引。
这意味着你可以在任何连接到源集群和目标集群的 Elasticsearch 节点上执行 Reindex 操作,而不必在源索引和目标索引所在的特定服务器上进行操作。只需确保你的 Elasticsearch 客户端能够连接到源和目标集群,然后在客户端上运行 Reindex 操作。
当执行 Reindex 操作时,需要指定源索引和目标索引的名称,以及可能需要的一些转换逻辑或映射。操作将从源索引中检索数据并将其索引到目标索引中。
这里我在目标节点上进行数据迁移,所以需要测试是否能够连接到源节点:
为了在我本地方便观察 es 的数据,我下载了 elastic kibana ,kibana 在 windows 的安装教程可以看这篇文档 Kibana在Windows系统下的安装
需要注意的是,kibana 的版本应该与 elasticsearch 的版本对应上,虽然它们都是向后兼容的,但是仍然建议尽量匹配它们的版本以避免潜在的兼容性问题。
这里我下载的 kibana 是 7.9.3 版本的,保险起见,对比两个产品的发布日期,时间一致应该没什么问题
3.2.1、postman 遇到的小坑
到网上查看 ES 使用 reindex 做数据迁移的 demo:Elasticsearch使用reindex做数据迁移,这篇文章内容主要是摘录官网的,写的比较通俗易懂。
以远程 ES 集群进行 reindex 为例,官网给出的样例是:
curl -X POST "localhost:9200/_reindex?pretty" -H 'Content-Type: application/json' -d'{
  "source": {
    "remote": {
      "host": "http://otherhost:9200",
      "username": "user",
      "password": "pass"
    },
    "index": "my-index-000001",
    "query": {
      "match": {
        "test": "data"
      }
    }
  },
  "dest": {
    "index": "my-new-index-000001"
  }
}'
在 win 系统下你可以拿到 cmd 去执行,或者 powershell 都可以,我这里使用 postman 来执行,然后下面是我遇到的一些需要注意的点:
1)配置白名单
在配置文件 conf/elasticsearch.yml 添加白名单:
# 运行reindex的服务器白名单
reindex.remote.whitelist: "otherhost:9200, another:9200, 127.0.10.*:9200, localhost:*"
然后开始进行数据迁移,这里由于还处于测试阶段,因此测试时选择了体量小的索引:
迁移完成后:
![]()
可以看到,数据体量几乎一致,但是存储大小相差接近 2 倍,这里是因为我是直接创建新的索引,然后就做数据迁移的工作,在使用 Elasticsearch 的 Reindex API 时,目标索引的映射关系和字段通常是不需要提前创建的,但可以选择提前创建目标索引并定义其映射关系。
有两种常用的方法:
- 自动映射:Elasticsearch 支持自动映射,这意味着如果目标索引不存在,Reindex 操作将自动创建目标索引并尝试根据源索引中的数据自动创建映射。这可以在某些情况下非常方便,特别是当你只需将数据从一个索引迁移到另一个索引,而不关心映射细节时。自动映射的结果取决于源数据的结构。
- 显式映射:如果你需要更精细的控制目标索引的映射关系和字段,你可以提前创建目标索引并定义其映射。这可以确保目标索引的字段类型、分析器和其他设置与你的预期一致。在这种情况下,Reindex 操作会尊重目标索引的显式映射。
明显,我使用的是自动映射的方式,所以两个索引内在映射关系和分词策略都是不同的,存储大小自然也就不同,通常来说当使用 Reindex 将数据从一个索引迁移到另一个索引时,索引占用的内存大小可能会有所增加。这是因为在 Reindex 操作期间,Elasticsearch可能会进行一些内部操作,例如重新索引数据、构建倒排索引、以及执行其他维护任务,这些操作可能会占用额外的内存空间。
另一个因素可能是映射自动创建导致的内存增加。当使用自动映射时,Elasticsearch会尝试根据源索引中的数据来创建映射,这可能会导致生成较大的映射。如果源索引中有大量不同类型的数据或字段,自动映射可能会生成较大的映射,从而占用更多内存空间。
总的来说,这是一种正常情况。
那如果需要迁移的索引成千上万呢?难道每一次都手动去做映射处理吗?
对于大规模的索引管理,可以考虑使用 Elasticsearch 的模板(index templates)来自动应用映射规则。模板可以用来为特定的索引模式定义映射规则,以确保新创建的索引满足要求。
PUT _template/my-index-template
{
  "index_patterns": ["my-index-*"],  # 匹配以"my-index-"开头的索引
  "mappings": {
    "properties": {
      "field1": {
        "type": "text",
        "analyzer": "standard"
      },
      "field2": {
        "type": "keyword"
      },
      "field3": {
        "type": "date",
        "format": "yyyy-MM-dd"
      }
    }
  }
}
由于业务需求,在做数据迁移时,我需要保证前后的索引配置信息一致,所以显然需要使用显示映射,下面是在进行显示映射是遇到的坑:
1)手动创建索引时参数异常——_doc
2)无法手动设置 creation_date,因为 creation_date 是一个只读属性,无法手动更改,这个属性由 Elasticseaerch 自动设置的,并记录了索引的创建时间戳。在索引创建时,Elasticsearch 会自动为索引分配一个创建时间。
如果想记录特定的时间戳或日期,可以在文档级别添加一个自定义字段,而不是尝试更改索引的 index.creation_date 属性。在文档中添加自定义字段可以灵活地记录每个文档的相关时间信息,而不影响索引级别的元数据。
以下属性同理:
数据迁移之后:
可以看到数据没有丢失,并且存储大小相差不多。耗时:2min47.29s
接着对大数据量的索引进行迁移,迁移 6200146 条数据,耗时:1h3min7.74s
![]()
3.2.2、reindex 脚本
但是,最终脚本还是要给到运维去执行,因此需要一个简单易用的脚本。
windows 脚本:
由于我无法处理 windows 中 cmd 里 json 格式的报错问题,因此我将 json 主体内容放在一个 json 文件中:
{
    "source": {
      "remote": {
        "host": "http://40019.cdc.k8s:24636",
        "username": "elastic",
        "password": "BUgus!&f0d8PLOdL"
      },
      "index": "online_user_2022_10_24_17_37_43"
    },
    "dest": {
      "index": "es_reindex_test01"
    }
}
然后在命令行中使用 cURL 执行 Reindex 操作,并引用该 json 文件:
curl -X POST http://localhost:9200/_reindex -H "Content-Type: application/json" -d @C:\path\to\your\reindex_request.json测试下来是没有问题的。
3.2.2.1、索引模板
但是在数据迁移过程中,索引数量比较多,一个个手动迁移是不现实的,考虑使用索引模板来操作:
PUT _template/my-index-template				# 索引模板名称:my-index-template
{
  "index_patterns": ["my-index-*"],  # 匹配以"my-index-"开头的索引
  "mappings": {
    "properties": {
      "field1": {
        "type": "text",
        "analyzer": "standard"
      },
      "field2": {
        "type": "keyword"
      },
      "field3": {
        "type": "date",
        "format": "yyyy-MM-dd"
      }
    }
  }
}
有几点需要注意:
1. 创建索引模板并应用模板:
在创建新的索引时,可以选择使用模板来自动应用映射规则。当你创建新索引时,ES 会自动检查是否有匹配的模板,并应用到模板中定义的映射
curl -X PUT http://localhost:9200/my-index-2023-10-30 -H "Content-Type: application/json" -d '{
  "settings": {},
  "mappings": {},
  "aliases": {}
}'
在这个示例中,我们创建一个新的索引 my-index-2023-10-30,并没有显式定义映射或设置。但由于我们的模板 my-index-template 匹配了这个索引名称,模板中定义的映射规则将被自动应用于新索引。
2. 手动映射会覆盖索引模板中定义的映射关系
举例来说,如果你创建了一个名为my-index-template的索引模板,其中定义了一些默认映射规则,然后创建了一个名为my-index的索引,并手动映射了该索引的规则,手动映射规则将优先于模板中的规则。
这种行为允许你在特定索引上灵活地应用不同的映射规则,而不受模板的限制。在一些情况下,你可能想要在特定索引上手动定义映射规则,而在其他索引上使用模板提供的默认规则。这种方式提供了更大的灵活性和控制。
3.2.2.2、编写 .sh 脚本
由于我不能直接操作生产环境的服务器,因此我在本地模拟一个生产环境。搭建虚拟机+安装 ES,步骤其实很简单,这里虚拟机的下载和安装和 ES 在 Linux 的安装解压就不赘述了。
主要注意的是,在 Linux 中,ES 的启用不用通过 root 用户,所以需要新增一个用户,但该用户需要有 root 的权限,如何将普通用户添加 root 权限可以见我这篇文章:Linux 如何将角色添加到 root
此外,我还在虚拟机上安装了 kibana,以方便观察数据,这里需要去修改 kibana.yml 配置文件才可以在本地浏览器上访问 kibina,具体操作见我这篇文章:kibana7.x 对外访问配置
接下来编写 Linux 脚本:
SOURCE_HOST="target_host:target_port"
DESK_HOST="localhost:9200"

# 索引名称
online_user_01="online_user_2022_10_24_17_37_43"
user_operate_01="user_operate_2023_10_26_17_37_49"
monitor_log_history_01="monitor_log_history_2023_04_21_14_08_54"

# 索引模板名称
INDEX_TEMPLATE_NAME1="online_user_"
INDEX_TEMPLATE_NAME2="user_operate_"
INDEX_TEMPLATE_NAME3="monitor_log_history_"


# 映射定义——"online_user_"
MAPPING1='{
    "index_patterns": ["'$INDEX_TEMPLATE_NAME1'*"],
    "settings": {
        "index": {
            "number_of_shards": "4",
            "max_result_window": "1000000",
            "number_of_replicas": "1"
        }
    },
    "mappings": {
        "properties": {
        "clientType": {
          "type": "keyword"
        },
        "id": {
          "type": "text",
          "analyzer": "standard"
        },
        "imToken": {
          "type": "text",
          "analyzer": "standard"
        },
        "isIm": {
          "type": "keyword"
        },
        "loginTime": {
          "type": "date",
          "format": "yyyy-MM-dd HH:mm:ss"
        },
        "message": {
          "type": "text",
          "analyzer": "standard"
        },
        "onlineTime": {
          "type": "text",
          "analyzer": "standard"
        },
        "orgIds": {
          "type": "keyword"
        },
        "orgNames": {
          "type": "keyword"
        },
        "outTime": {
          "type": "date",
          "format": "yyyy-MM-dd HH:mm:ss"
        },
        "period": {
          "type": "integer"
        },
        "remoteAddr": {
          "type": "keyword"
        },
        "ruleCode": {
          "type": "keyword"
        },
        "token": {
          "type": "text",
          "analyzer": "standard"
        },
        "usageTime": {
          "type": "integer"
        },
        "userAccount": {
          "type": "keyword"
        },
        "userLevel": {
          "type": "keyword"
        },
        "userName": {
          "type": "keyword"
        }
      }
    }
}'
# 映射定义——"user_operate_"
MAPPING2='{
    "index_patterns": ["'$INDEX_TEMPLATE_NAME2'*"],
    "settings": {
        "index": {
            "number_of_shards": "4",
            "max_result_window": "1000000",
            "number_of_replicas": "1"
        }
    },
    "mappings": {
        "properties": {
            "appCode": {
                "type": "keyword"
            },
            "appName": {
                "type": "keyword"
            },
            "begin": {
                "type": "date",
                "format": "yyyy-MM-dd HH:mm:ss"
            },
            "channelId": {
                "type": "text",
                "analyzer": "standard"
            },
            "clientVersion": {
                "type": "keyword"
            },
            "deviceType": {
                "type": "keyword"
            },
            "end": {
                "type": "date",
                "format": "yyyy-MM-dd HH:mm:ss"
            },
            "id": {
                "type": "text",
                "analyzer": "standard"
            },
            "localAddr": {
                "type": "text",
                "analyzer": "standard"
            },
            "logList": {
                "type": "text",
                "analyzer": "standard"
            },
            "message": {
                "type": "text",
                "analyzer": "standard"
            },
            "method": {
                "type": "text",
                "analyzer": "standard"
            },
            "name": {
                "type": "keyword"
            },
            "operateName": {
                "type": "keyword"
            },
            "operateType": {
                "type": "keyword"
            },
            "operator": {
                "type": "keyword"
            },
            "orgIds": {
                "type": "keyword"
            },
            "orgNames": {
                "type": "keyword"
            },
            "param": {
                "type": "text",
                "analyzer": "standard"
            },
            "phoneModel": {
                "type": "keyword"
            },
            "remoteAddr": {
                "type": "text",
                "analyzer": "standard"
            },
            "requestUri": {
                "type": "keyword"
            },
            "resourceVersion": {
                "type": "text",
                "analyzer": "standard"
            },
            "result": {
                "type": "text",
                "analyzer": "standard"
            },
            "saveLog": {
                "type": "keyword"
            },
            "time": {
                "type": "integer"
            },
            "type": {
                "type": "text",
                "analyzer": "standard"
            },
            "uri": {
                "type": "keyword"
            },
            "userAgent": {
                "type": "text",
                "analyzer": "standard"
            },
            "userLevel": {
                "type": "keyword"
            }
        }
    }
}'
# 映射定义——"monitor_log_history_"
MAPPING3='{
    "index_patterns": ["'$INDEX_TEMPLATE_NAME3'*"],
    "settings": {
        "index": {
            "number_of_shards": "4",
            "max_result_window": "10000",
            "number_of_replicas": "1"
        }
    },
    "mappings": {
        "properties": {
        "createTime": {
          "type": "keyword"
        },
        "dbType": {
          "type": "keyword"
        },
        "exCount": {
          "type": "keyword"
        },
        "exTag": {
          "type": "keyword"
        },
        "hours": {
          "type": "keyword"
        },
        "id": {
          "type": "text",
          "analyzer": "standard"
        },
        "monitorId": {
          "type": "keyword"
        },
        "name": {
          "type": "keyword"
        },
        "requestUri": {
          "type": "keyword"
        },
        "statusCode": {
          "type": "keyword"
        },
        "type": {
          "type": "keyword"
        }
      }
    }
}'


# 创建或更新索引模板
create_or_update_template() {
    echo "Creating or updating index template...$MAPPING4"
    curl -X PUT "$DESK_HOST/_template/$INDEX_TEMPLATE_NAME1" -H "Content-Type: application/json" -H "Authorization: Basic ZWxhc3RpYzpCVWd1cyEmZjBkOFBMT2RM" -d "$MAPPING1"
    curl -X PUT "$DESK_HOST/_template/$INDEX_TEMPLATE_NAME2" -H "Content-Type: application/json" -H "Authorization: Basic ZWxhc3RpYzpCVWd1cyEmZjBkOFBMT2RM" -d "$MAPPING2"
    curl -X PUT "$DESK_HOST/_template/$INDEX_TEMPLATE_NAME3" -H "Content-Type: application/json" -H "Authorization: Basic ZWxhc3RpYzpCVWd1cyEmZjBkOFBMT2RM" -d "$MAPPING3"
    echo "Index template created or updated."
}
# 调用函数创建或更新索引模板
create_or_update_template

create_index() {
    echo "Creating index..."
    curl -X PUT "$DESK_HOST/$online_user_01" -H "Content-Type: application/json" -H "Authorization: Basic base64(username:password)"
    curl -X PUT "$DESK_HOST/$user_operate_01" -H "Content-Type: application/json" -H "Authorization: Basic base64(username:password)"
    curl -X PUT "$DESK_HOST/$monitor_log_history_01" -H "Content-Type: application/json" -H "Authorization: Basic base64(username:password)"
    echo "Index created."
}
# 调用函数创建索引
create_index


# 数据迁移
move_data() {
    echo "start to move ES data...$online_user_01"
    curl -X POST "$DESK_HOST/_reindex" -H "Content-Type:application/json" -d '{"source": {"remote": {"host": "'$SOURCE_HOST'","username": "xxx","password": "xxx"},"index": "'$online_user_01'"},"dest": {"index": "'$online_user_01'"}}'
    echo "end move $online_user_01 data!"

    echo "start to move ES data...$user_operate_01"
    curl -X POST "$DESK_HOST/_reindex" -H "Content-Type:application/json" -d '{"source": {"remote": {"host": "'$SOURCE_HOST'","username": "xxx","password": "xxx"},"index": "'$user_operate_01'"},"dest": {"index": "'$user_operate_01'"}}'
    echo "end move $user_operate_01 data!"

    echo "start to move ES data...$monitor_log_history_01"
    curl -X POST "$DESK_HOST/_reindex" -H "Content-Type:application/json" -d '{"source": {"remote": {"host": "'$SOURCE_HOST'","username": "xxx","password": "xxx"},"index": "'$monitor_log_history_01'"},"dest": {"index": "'$monitor_log_history_01'"}}'
    echo "end move $monitor_log_history_01 data!"
}
# 停顿3s
sleep 3
# 调用数据迁移函数
move_data
在 .sh 文件中,有很多的换行问题,会导致数据格式的问题,这里需要将 windows 的文件格式转为 linux 的文件格式:
# 到reindex.sh对应的目录下执行(在Linux环境下执行)
[root@localhost admin]# sed -i 's/\r$//' reindex.sh
然后执行脚本:
[root@localhost admin]# sh reindex.sh 查看执行结果:
Kibana 索引管理:
可见,适配 Linux 环境的 ES 数据迁移的测试环境脚本编写完成(后续有调优的问题,由于我本地无法再现服务器配置和 ES 集群,所以这里只能先搁置,后续补上)
创作不易,一键三联


