centos 部署postgresql 13
pg 数据库下载地址
创建组和用户,pg数据库出于安全方面不能用root启动和停止。
grouadd postgres
useradd -g postgres postgres

passwd postgres #设置密码
上传 官网下载的安装包并解压
tar -zxvf postgresql-13.3.tar.gz
yum -y install gcc  readline-devel zlib zlib-devel #安装依赖

cd postgresql-13.3/ #进入解压目录

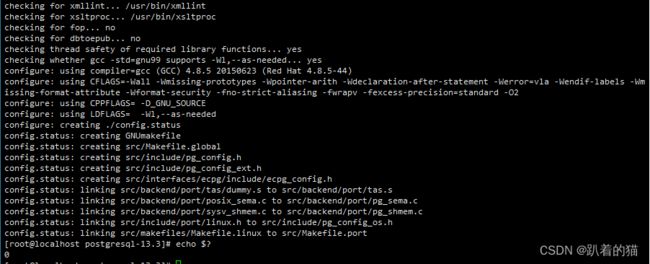
./configure --prefix=/opt/postgres  #进行./configure,make,make install
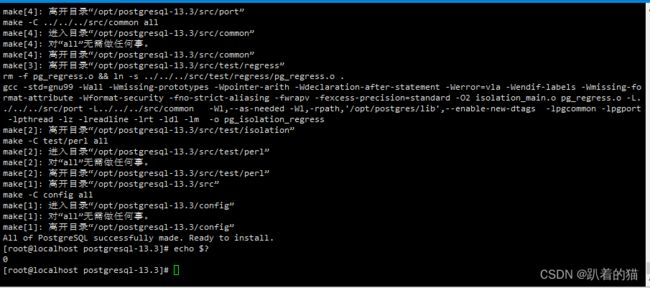
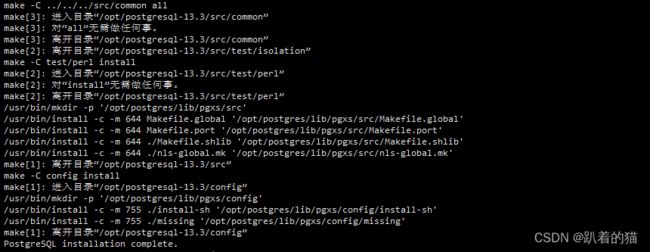
make && make install   #通过 echo $? 来检查是否执行成功
安装完成后设置 postgres 用户的变量
su - postgres #切换到 postgres 用户

vim .bash_profile

# .bash_profile

# Get the aliases and functions
if [ -f ~/.bashrc ]; then
        . ~/.bashrc
fi

# User specific environment and startup programs

export PGHOME=/opt/postgres  #添加 设置pg 数据库的安装目录
export PGDATA=/opt/postgres/data  #添加 设置pg 数据库的data 目录
PATH=$PATH:$HOME/bin:$PGHOME/bin  #将PATH 变量
PATH=$PATH:$HOME/.local/bin:$HOME/bin

export PATH

exit #退回到root 用户
在 pg的安装目录下创建 data目录
mkdir /opt/postgres/data
给 pg 安装目录设置postgres 权限
chown -R postgres:postgres /opt/postgres/

su - postgres #切换到postgres 用户
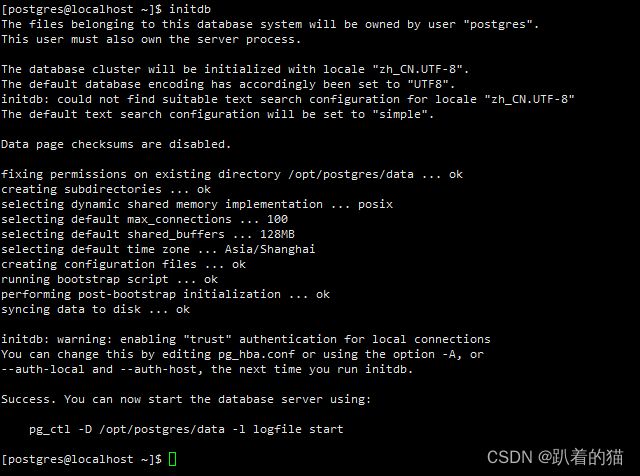
initdb #执行数据库初始化
cd /opt/postgres/data  #初始化成功后,进入data目录修改配置文件

postgresql.conf #pg数据库的配置文件
pg_hba.conf   #访问策略配置文件

vim pg_hba.conf  #编辑访问策略配置文件,G 进入到文本的最后。

# TYPE  DATABASE        USER            ADDRESS                 METHOD

# "local" is for Unix domain socket connections only
local   all             all                                     trust
# IPv4 local connections:
host    all             all             127.0.0.1/32            trust
# IPv6 local connections:
host    all             all             ::1/128                 trust
# Allow replication connections from localhost, by a user with the
# replication privilege.
local   replication     all                                     trust
host    replication     all             127.0.0.1/32            trust
host    replication     all             ::1/128                 trust
host    all             all             0.0.0.0/0               md5
TYPE 表示主机类型
值为 `local` 表示是unix-domain的socket连接,
值为 `host` 是TCP/IP socket
值为 `hostssl` 是SSL加密的TCP/IP socket
DATABASE 表示数据库名称
值为: `all` ,`sameuser`,`samerole`,`replication`,`数据库名称` ,或者多个 数据库名称用 `逗号`,注意ALL不匹配 replication
USER 表示用户名称
`all(全部)`,`一个用户名`,`一组用户名` ,多个用户时,可以用 `,`逗号隔开, 或者在用户名称前缀 `+` ;
ADDRESS 参数
可访问的地址,来源地址,本地为127.0.0.1/32,多个IP时使用英文逗号分割,使用IP段时更改掩码位数即可,例如:10.10.10.0/0。
METHOD 认证方式
trust:无条件地允许联接,登录不需要口令,不安全。
reject:联接无条件拒绝,常用于从一个组中"过滤"某些主机。
md5:要求客户端提供一个 MD5 加密的口令进行认证。
password:和"md5"一样,但是口令是以明文形式在网络上传递的,我们不应该在不安全的网络上使用这个方式。
vim postgresql.conf #设置pg配置文件

listen_addresses = '*'
port = 5432
max_connections = 500
shared_buffers = 512MB
logging_collector = on
log_directory = 'pg_log'
log_filename = 'postgresql-%Y-%m-%d_%H%M%S.log'
log_rotation_size = 1GB
log_statement = 'mod'
timezone = 'Asia/Shanghai'
listen_addresses : 可以连接服务器使用的IP,一般初始值为 localhost或者local,意味着只有本机可以连接数据库。 这里一般设置为 " * " ,允许全部的IP连接数据库。
port : 侦听端口,默认为5432。
max_connections : 允许的最大并发连接数。
share_buffers: 共享缓存大小,主要存储了最近访问的数据页。建议设置成服务器的25%系统内存。
logging_collector = on:启用日志。
log_directory = 'pg_log':指定日志的存放位置,在data目录下。
log_filename = 'postgresql-%Y-%m-%d_%H%M%S.log':log_filename:日志的命名格式, 默认是postgresql-%Y-%m-%d_%H%M%S.log。支持strftime格式。%Y-%m等代表时间的年-月-日等。
log_rotation_size = 1GB:日志文件的最大磁盘空间。
log_statement = 'mod':记录用户登陆数据库后的各种操作,
mod(记录ddl+insert,delete,update和truncate)
ddl(记录create,drop和alter)
timezone = 'Asia/Shanghai': pg数据库的时区设置。
[postgres@localhost ~]$ pg_ctl -D /opt/postgres/data start  #启动pg数据库
waiting for server to start......2022-06-07 11:46:19.757 CST [6625] LOG:  redirecting log output to logging collector process
2022-06-09 11:46:19.757 CST [6625] HINT:  Future log output will appear in directory "pg_log".
 done
server started  #启动成功  日志记录在pg_log 下

start 启动 stop 停止 restart 重启(一些配置修改后最好重启一下)

[postgres@localhost ~]$ psql -U postgres
postgres=# ALTER USER postgres WITH PASSWORD '123456'; #更改postgres 用户的密码。
ALTER ROLE
postgres=#
到这里就暂时结束了,后续会继续更新关于PG的数据的一些运维和操作,收藏点赞哦!


