智能联系人管理Python代码
在PyCharm中运行《智能联系人管理》即可进入如图1所示的系统主界面。
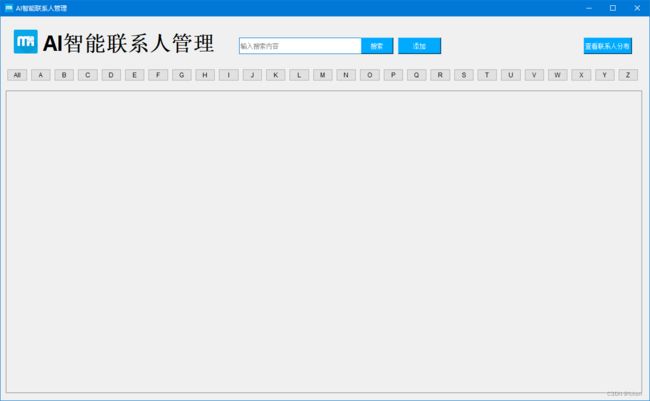
图1 系统主界面
具体的操作步骤如下:
(1)添加联系人。在主界面中,单击“添加”按钮,将打开添加联系人窗口,在该窗口中,单击“选择名片”按钮,选择一张名片对应的图片,系统将自动识别该名片中的信息,并且显示到右侧的文本框中。
(2)搜索联系人。在主界面顶部的文本框中,输入要搜索的内容,单击“搜索”按钮,将从已经保存的联系人信息中查找相应的内容,如果找到对应的内容,将显示在下方
(3)编辑或删除联系人。在显示联系人时,每个联系人的右侧都有两个按钮,一个是“编辑”,另一个是“删除”,单击不同的按钮将实现相应的功能。
# qt5模块
from PyQt5 import QtCore, QtGui, QtWidgets
from PyQt5.QtWidgets import *
from PyQt5.QtGui import *
from PyQt5.QtWebEngineWidgets import *
from PyQt5.QtCore import *
# 自定义模块
import mainpage
import addpage
import gridlayout
import editpage
import pinyintool
# 内置模块
import sys
import requests, base64, json
import collections
import os
import re
# 第三方模块
import pandas as pd
from pandas import DataFrame
from PIL import Image
import phone
from pyecharts.charts import Pie
# 获取文件的路径
cdir = os.getcwd()
# 文件路径
path=cdir+'/res/datafile/'
# 读取路径 判断是否创建了文件
if not os.path.exists(path):
# 根据路径建立文件夹
os.makedirs(path)
# 姓名 公司 电话 手机 邮件 地址 城市 分类 name comp tel mobile email addr city type
cardfile = pd.DataFrame(columns=['name', 'comp', 'tel', 'mobile', 'email', 'addr', 'city', 'type'])
# 生成xlsx文件
cardfile.to_excel(path+'名片信息表.xlsx', sheet_name='data', index=None)
# 编辑页面
class editWindow(QWidget,editpage.Ui_Form):
# 初始化方法
def __init__(self):
# 找到父类 首页面
super(editWindow, self).__init__()
# 初始化页面方法
self.setupUi(self)
# 为保存按钮添加事件
self.pushButton_2.clicked.connect(self.editkeep)
# 显示添加名片页面
def OPEN(self):
# 显示页面
self.show()
# 保存编辑内容
def editkeep(self):
# 获取按钮名称
indexName = self.pushButton_2.objectName()
# 获取表
pi_table = pd.read_excel(path + '名片信息表.xlsx', sheet_name='data')
# 获取控件信息 # 'name', 'comp', 'tel', 'mobile', 'email', 'addr', 'city', 'type'
name = self.lineEdit.text()
comp = self.lineEdit_2.text()
tel = self.lineEdit_3.text()
mobile = self.lineEdit_4.text()
email = self.lineEdit_5.text()
addr = self.lineEdit_6.text()
# 判断手机号是否为空
if mobile.strip():
# 根据手机号判断区域
try:
info = phone.Phone().find(int(mobile))
except Exception as e:
print("根据手机号判断区域时出错", e)
QMessageBox.critical(self, "错误:", "手机号码不正确!", QMessageBox.Ok) # 弹出提示对话框
self.lineEdit_4.setFocus() # 让手机文本框获得焦点
return
# 判断手机号是否正确返回信息
if info == None:
city = '其他'
else:
# 正确返回信息获取省
city = info['province']
else:
city = '其他'
# 判断姓名是否为空
if name.strip():
# 获取首字母拼音
type = pinyintool.getPinyin(name[0])
# 根据行号删除数据
datas = pi_table.drop(index=[int(indexName)], axis=0)
data = datas.append({'name': name,
'comp': comp,
'tel': tel,
'mobile': mobile,
'email': email,
'addr': addr,
'city': city,
'type': type
}, ignore_index=True)
# 更新xlsx文件
DataFrame(data).to_excel(path + '名片信息表.xlsx',
sheet_name='data', index=False)
self.close()
window.dataall()
else:
QMessageBox.information(self, '提示信息', '姓名不能为空')
pass
#首页列表样式
class griditem(QWidget,gridlayout.Ui_Form):
# 初始化方法
def __init__(self):
# 找到父类 首页面
super(griditem, self).__init__()
# 初始化页面方法
self.setupUi(self)
# 显示饼图类
class HtmlWindows(QMainWindow):
def __init__(self):
super(QMainWindow,self).__init__()
self.setGeometry(200, 200, 850, 500)
self.browser = QWebEngineView()
def set(self,title,hurl):
self.setWindowTitle(title)
d = os.path.dirname(os.path.realpath(sys.argv[0])) # 获取当前文件所在路径
d=re.sub(r'\\','/',d) # 将路径中的分隔符\替换为/
url=d+'/res/datafile/'+hurl
self.browser.load(QUrl(url))
self.setCentralWidget(self.browser)
# 首页页面
class parentWindow(QWidget,mainpage.Ui_Form):
# 初始化方法
def __init__(self):
# 找到父类 首页面
super(parentWindow, self).__init__()
# 初始化页面方法
self.setupUi(self)
# 标签按钮绑定事件
self.pushButton_3.clicked.connect(self.dataall)
self.pushButton_4.clicked.connect(lambda:self.dataother('A'))
self.pushButton_6.clicked.connect(lambda:self.dataother('B'))
self.pushButton_5.clicked.connect(lambda:self.dataother('C'))
self.pushButton_7.clicked.connect(lambda:self.dataother('D'))
self.pushButton_8.clicked.connect(lambda:self.dataother('E'))
self.pushButton_9.clicked.connect(lambda:self.dataother('F'))
self.pushButton_10.clicked.connect(lambda:self.dataother('G'))
self.pushButton_11.clicked.connect(lambda:self.dataother('H'))
self.pushButton_12.clicked.connect(lambda:self.dataother('I'))
self.pushButton_13.clicked.connect(lambda:self.dataother('J'))
self.pushButton_14.clicked.connect(lambda:self.dataother('K'))
self.pushButton_15.clicked.connect(lambda:self.dataother('L'))
self.pushButton_16.clicked.connect(lambda:self.dataother('M'))
self.pushButton_17.clicked.connect(lambda:self.dataother('N'))
self.pushButton_18.clicked.connect(lambda:self.dataother('O'))
self.pushButton_19.clicked.connect(lambda:self.dataother('P'))
self.pushButton_20.clicked.connect(lambda:self.dataother('Q'))
self.pushButton_21.clicked.connect(lambda:self.dataother('R'))
self.pushButton_22.clicked.connect(lambda:self.dataother('S'))
self.pushButton_23.clicked.connect(lambda:self.dataother('T'))
self.pushButton_24.clicked.connect(lambda:self.dataother('U'))
self.pushButton_25.clicked.connect(lambda:self.dataother('V'))
self.pushButton_26.clicked.connect(lambda:self.dataother('W'))
self.pushButton_27.clicked.connect(lambda:self.dataother('X'))
self.pushButton_28.clicked.connect(lambda:self.dataother('Y'))
self.pushButton_29.clicked.connect(lambda:self.dataother('Z'))
# 搜索按钮绑定事件
self.pushButton.clicked.connect(self.seachbtn)
self.pushButton_30.clicked.connect(self.lookpie)
# 显示全部数据
self.dataall()
# 显示饼图
def lookpie(self):
# 获取表数据
# 读取文件内容
pi_table = pd.read_excel(path + '名片信息表.xlsx', sheet_name='data')
# 获取城市信息
citattr = pi_table['city'].values
# 判断是否有城市信息
if len(citattr)==0:
# 没有信息提示
QMessageBox.information(self, '提示信息', '没有联系人')
return
attr = []
v1 = []
# 循环表里city项
for i in citattr:
# 判断city项是否包含在attr里
if not i in attr:
# 不包含在attr表里时候添加到attr里
attr.append(i)
# Counter(计数器)是对字典的补充,用于追踪值的出现次数。
d = collections.Counter(citattr)
# 循环城市列表
for k in attr:
# d[k] 是k在列表d中出现的次数
v1.append(d[k])
# 生成饼图
pie = Pie("联系人分布")
pie.add("", attr, v1, is_label_show=True)
pie.show_config()
pie.render(path+'联系人分布饼图.html')
# 显示饼图
htmlwidows.set('联系人分布','联系人分布饼图.html')
htmlwidows.show()
pass
#搜索功能
def seachbtn(self):
# 读取文件内容
pi_table = pd.read_excel(path + '名片信息表.xlsx', sheet_name='data')
seachk=self.lineEdit.text()
# 查询数据 用户名和公司如果有一个包含搜索内容筛选出来
cardArray = pi_table[(pi_table['name'].str.contains(seachk)) | (pi_table['comp'].str.contains(seachk))].values
tb = pi_table[(pi_table['name'].str.contains(seachk)) | (pi_table['comp'].str.contains(seachk))]
if len(cardArray) == 0:
QMessageBox.information(self, '提示信息', '没有搜索内容')
else:
# 每次点循环删除管理器的组件
while self.gridLayout.count():
# 获取第一个组件
item = self.gridLayout.takeAt(0)
widget = item.widget()
# 删除组件
widget.deleteLater()
i = -1
for n in range(len(cardArray)):
# x 确定每行显示的个数 0,1,2 每行3个
x = n % 3
# 当x为0的时候设置换行 行数+1
if x == 0:
i += 1
item = griditem()
item.label_8.setText('姓名:' + str(cardArray[n][0]))
item.label_9.setText('公司:' + str(cardArray[n][1]))
item.label_10.setText('电话:' + str(cardArray[n][2]))
item.label_11.setText('手机:' + str(cardArray[n][3]))
item.label_12.setText('邮箱:' + str(cardArray[n][4]))
item.label_13.setText('地址:' + str(cardArray[n][5]))
# 设置名称 为获取项目行数
item.pushButton.setObjectName(str(tb.index.tolist()[n]))
item.pushButton_3.setObjectName(str(tb.index.tolist()[n]))
# 为按钮绑定点击事件
item.pushButton.clicked.connect(self.edit)
item.pushButton_3.clicked.connect(self.deletedata)
# 动态给gridlayout添加布局
self.gridLayout.addWidget(item, i, x)
# 设置上下滑动控件可以滑动 把scrollAreaWidgetContents_2添加到scrollArea中
self.scrollAreaWidgetContents.setMinimumHeight(i * 200)
# girdlayout 添加到滑动控件中
self.scrollAreaWidgetContents.setLayout(self.gridLayout)
#显示全部数据
def dataall(self):
# 每次点循环删除管理器的组件
while self.gridLayout.count():
# 获取第一个组件
item = self.gridLayout.takeAt(0)
widget = item.widget()
# 删除组件
widget.deleteLater()
i=-1
# 读取文件内容
pi_table = pd.read_excel(path + '名片信息表.xlsx', sheet_name='data')
# 获取所有数据
cardArray = pi_table.values
# 循环数据
for n in range(len(cardArray)):
# x 确定每行显示的个数 0,1,2 每行3个
x = n % 3
# 当x为0的时候设置换行,即行数+1
if x == 0:
i += 1
item = griditem()
item.label_8.setText('姓名:'+str(cardArray[n][0]))
item.label_9.setText('公司:'+str(cardArray[n][1]))
item.label_10.setText('电话:'+str(cardArray[n][2]))
item.label_11.setText('手机:'+str(cardArray[n][3]))
item.label_12.setText('邮箱:'+str(cardArray[n][4]))
item.label_13.setText('地址:'+str(cardArray[n][5]))
# 设置名称 为获取项目行数
item.pushButton.setObjectName(str(pi_table.index.tolist()[n]))
item.pushButton_3.setObjectName(str(pi_table.index.tolist()[n]))
# 为按钮绑定点击事件
item.pushButton.clicked.connect(self.edit)
item.pushButton_3.clicked.connect(self.deletedata)
# 动态添加控件到gridlayout中
self.gridLayout.addWidget(item,i, x)
# 设置上下滑动控件可以滑动 把scrollAreaWidgetContents_2添加到scrollArea中
self.scrollAreaWidgetContents.setMinimumHeight(i*200)
# 设置gridlayout到滑动控件中
self.scrollAreaWidgetContents.setLayout(self.gridLayout)
pass
# 删除数据方法
def deletedata(self):
# 获取信号源 点击的按钮
sender = self.gridLayout.sender()
# 获取按钮名称
indexName = sender.objectName()
# 获取表信息
pi_table = pd.read_excel(path + '名片信息表.xlsx', sheet_name='data')
# 根据行号删除数据
data=pi_table.drop(index=[int(indexName)], axis=0)
# 更新xlsx文件
DataFrame(data).to_excel(path + '名片信息表.xlsx',
sheet_name='data', index=False)
# 显示全部数据
self.dataall()
# 编辑数据
def edit(self):
# 获取信号源 点击的按钮
sender = self.gridLayout.sender()
# 获取按钮名称
indexName=sender.objectName()
pi_table = pd.read_excel(path + '名片信息表.xlsx', sheet_name='data')
# 根据行号 获取数据
cardArray =pi_table.iloc[[indexName]].values
# 打开编辑页面
editWindow.OPEN()
# 设置数据
editWindow.lineEdit.setText(str(cardArray[0][0]))
editWindow.lineEdit_2.setText(str(cardArray[0][1]))
editWindow.lineEdit_3.setText(str(cardArray[0][2]))
editWindow.lineEdit_4.setText(str(cardArray[0][3]))
editWindow.lineEdit_5.setText(str(cardArray[0][4]))
editWindow.lineEdit_6.setText(str(cardArray[0][5]))
# 设置按钮名称
editWindow.pushButton_2.setObjectName(str(indexName))
pass
# 显示部分数据
def dataother(self,typeAZ):
# 每次点循环删除管理器的组件
while self.gridLayout.count():
# 获取第一个组件
item = self.gridLayout.takeAt(0)
# 获取布局
widget = item.widget()
# 删除组件
widget.deleteLater()
pass
# 读取文件内容
pi_table = pd.read_excel(path + '名片信息表.xlsx', sheet_name='data')
i = -1
# 筛选内容
cardArray = pi_table[pi_table['type'] == typeAZ].values
tb= pi_table[pi_table['type'] == typeAZ]
for n in range(len(cardArray)):
# x 确定每行显示的个数 0,1,2 每行3个
x = n % 3
# 当x为0的时候设置换行 行数+1
if x == 0:
i += 1
item = griditem()
item.label_8.setText('姓名:' + str(cardArray[n][0]))
item.label_9.setText('公司:' + str(cardArray[n][1]))
item.label_10.setText('电话:' + str(cardArray[n][2]))
item.label_11.setText('手机:' + str(cardArray[n][3]))
item.label_12.setText('邮箱:' + str(cardArray[n][4]))
item.label_13.setText('地址:' + str(cardArray[n][5]))
# 设置名称 为获取项目行数
item.pushButton.setObjectName(str(tb.index.tolist()[n]))
item.pushButton_3.setObjectName(str(tb.index.tolist()[n]))
# 为按钮绑定点击事件
item.pushButton.clicked.connect(self.edit)
item.pushButton_3.clicked.connect(self.deletedata)
# 动态设置控件
self.gridLayout.addWidget(item, i, x)
# 动态设置滑动控件滑动高度
self.scrollAreaWidgetContents.setMinimumHeight(i * 200)
# giridLayout 添加到滑动控件中
self.scrollAreaWidgetContents.setLayout(self.gridLayout)
#添加名片页面
class childWindow(QWidget,addpage.Ui_Form):
# 初始化方法
def __init__(self):
# 找到父类 添加名片页面
super(childWindow, self).__init__()
# 初始化页面方法
self.setupUi(self)
# 给选择名片按钮添加事件
self.pushButton.clicked.connect(self.openfile)
# 给保存按钮添加事件
self.pushButton_2.clicked.connect(self.keep)
#保存名片信息到文档
def keep(self):
pi_table = pd.read_excel(path + '名片信息表.xlsx', sheet_name='data')
# 获取输出框内容
name =self.lineEdit.text()
comp = self.lineEdit_2.text()
tel= self.lineEdit_3.text()
mobile= self.lineEdit_4.text()
email= self.lineEdit_5.text()
addr= self.lineEdit_6.text()
# 判断手机号是否为空
if mobile.strip():
# 根据手机号判断区域
try:
info = phone.Phone().find(int(mobile))
except Exception as e:
print("根据手机号判断区域时出错",e)
QMessageBox.critical(self,"错误:","手机号码不正确!",QMessageBox.Ok) # 弹出提示对话框
self.lineEdit_4.setFocus() # 让手机文本框获得焦点
return
# 判断手机号是否正确返回信息
if info==None:
city = '其他'
else:
# 正确返回信息获取省
city = info['province']
else:
city = '其他'
# 判断姓名是否为空
if name.strip():
# 获取首字母拼音
type=pinyintool.getPinyin(name[0])
# 添加数据
data = pi_table.append({'name': name,
'comp': comp,
'tel': tel,
'mobile': mobile,
'email': email,
'addr': addr,
'city': city,
'type': type,
}, ignore_index=True)
# 更新xlsx文件
DataFrame(data).to_excel(path + '名片信息表.xlsx',
sheet_name='data', index=False)
# 首页面显示全部数据
window.dataall()
# 关闭添加页面
self.close()
else:
QMessageBox.information(self, '提示信息', '姓名不能为空')
pass
# 显示添加名片页面
def OPEN(self):
# 移除控件上图片
self.label_2.setPixmap(QPixmap(""))
# 移除输入框内容
self.lineEdit.setText("")
self.lineEdit_2.setText("")
self.lineEdit_3.setText("")
self.lineEdit_4.setText("")
self.lineEdit_5.setText("")
self.lineEdit_6.setText("")
# 显示页面
self.show()
#选择名片按钮执行方法
def openfile(self):
# 启动选择文件对话空,查找jpg以及png图片
self.download_path = QFileDialog.getOpenFileName(self, "选择要识别的图片", "/", "Image Files(*.jpg *.png)")
# 判断是否选择图片
if not self.download_path[0].strip():
# 没有选择图片执行
# 消息对话框 information 提问对话框 question 警告对话框 warning
# 严重错误对话框 critical 关于对话框 about
QMessageBox.information(self, '提示信息', '没有选择名片图片')
pass
else:
# 选择图片执行
# 图片路径self.download_path[0]
# 理由pixmap解析图片
pixmap = QPixmap(self.download_path[0])
# 设置图片
self.label_2.setPixmap(pixmap)
# 让图片自适应label大小
self.label_2.setScaledContents (True)
try:
# 识别名片图片返回识别结果
content=self.recg()
except:
QMessageBox.information(self, '提示信息', '识别错误请重新选择图片')
cjson = json.loads(content)
# 判断是否正确返回内容
if cjson['code']=='0':
# 名称
self.dcontent(1, cjson)
# 公司
self.dcontent(2, cjson)
# 电话
self.dcontent(3, cjson)
# 手机
self.dcontent(4, cjson)
# 邮件
self.dcontent(5, cjson)
# 地址
self.dcontent(6, cjson)
else:
QMessageBox.information(self, '提示信息', '信息码-'+cjson['code']+
' 请去官网http://developer.hanvon.com/api/toAPIinfo.do?id=2&num= 查看原因')
pass
#设置识别显示的内容
def dcontent(self,k,count):
try:
if k==1:
self.lineEdit.setText(count['name'][0])
elif k==2:
self.lineEdit_2.setText(count['comp'][0])
elif k==3:
self.lineEdit_3.setText(count['tel'][0])
elif k==4:
self.lineEdit_4.setText(count['mobile'][0])
elif k==5:
self.lineEdit_5.setText(count['email'][0])
elif k==6:
self.lineEdit_6.setText(count['addr'][0])
except:
pass
# 信号槽 点击按钮显示大图功能
def wichbtn(self):
# 使用电脑中的看图工具打开图片
img = Image.open(self.download_path[0])
# 显示图片
img.show()
# 识别名片图片
def recg(self):
# 汉王云名片接口 API申请地址
# http://developer.hanvon.com
# 请将您申请的Key写到项目根目录下的key.txt文件中,并且将其写在第一行
with open('key.txt',"r") as file:
key = file.readline() # 读取写到key.txt文件中的您申请的Key
url = 'https://api.hanvon.com/rt/ws/v1/ocr/bcard/recg?key=%s&code=91f6a58d-e418-4e58-8ec2-61b583c55ba2' % key
img = Image.open(self.download_path[0])
# 设置模式L为灰度图
img2 = img.convert('L')
_w = img2.width
_h = img2.height
img2 = img2.resize((int(_w), int(_h)), Image.ANTIALIAS)
img2.save('card_gray.jpg')
base64img = base64.b64encode(open('card_gray.jpg', 'rb').read()).decode()
'''
lang:指定使用的语言。值为:auto(多语言)、chns(中文简体)、chnt(中文繁体)、en(英文)
color:指定颜色。值为gray(进行灰度处理)、color(原图像未做任何处理 上传图像的类型)
image:指定名片图像的base64串
'''
data = {"lang": 'auto', "color": 'gray', "image": base64img}
headers = {"Content-Type": "application/octet-stream"}
resp = requests.post(url, data=json.dumps(data), headers=headers)
return resp.text
if __name__=='__main__':
# 每一个PyQt5应用都必须创建一个应用对象
app=QApplication(sys.argv)
# 初始化页面
window=parentWindow()
# 显示首页
window.show()
child = childWindow()
# 初始化编辑页面
editWindow = editWindow()
# 显示联系人窗体
htmlwidows = HtmlWindows()
# 添加按钮添加事件
window.pushButton_2.clicked.connect(child.OPEN)
# 项目结束调用
sys.exit(app.exec_())