Week 10 homework
1、在阿里云服务器搭建openv-p-n
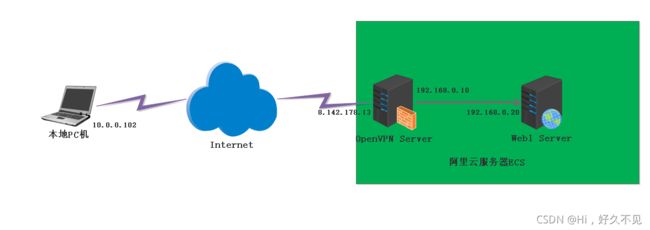
环境:
步骤:
购买两台ECS云服务器,一台带公网IP用作OpenVPN服务器,另一台不带公网IP用作web站点;
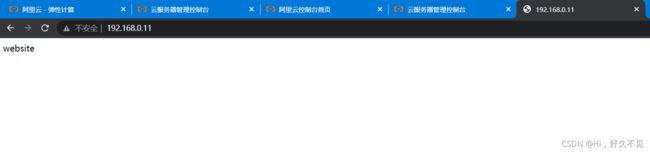
配置web
1)安装web
[root@web1 ~]# yum -y install httpd
2)启动服务
[root@web1 ~]# systemctl enable --now httpd
Created symlink /etc/systemd/system/multi-user.target.wants/httpd.service → /usr/lib/systemd/system/httpd.service.
3)配置站点内容
[root@web1 ~]# echo website > /var/www/html/index.html
4)测试
[root@web1 ~]# curl 192.168.0.11
website
配置OpenVPN
1)安装相关包
安装包说明:
open:OpenVPN服务包
easy-rsa:证书管理工具
[root@-server ~]# yum -y install open easy-rsa
2)生成服务器配置文件
[root@-server ~]# cp /usr/share/doc/open/sample/sample-config-files/server.conf /etc/open/
3)准备证书签发相关文件
[root@-server ~]# cp -r /usr/share/easy-rsa/ /etc/open/easy-rsa-server
4)准备签发证书相关变量的配置文件
[root@-server ~]# cp /usr/share/doc/easy-rsa/vars.example /etc/open/easy-rsa-server/3/vars
5)修改给CA和OpenVPN服务器颁发证书的有效期
建议修改给CA和OpenVPN服务器颁发的证书的有效期,可适当加长
[root@-server ~]# vim /etc/open/easy-rsa-server/3/vars
#set_var EASYRSA_CA_EXPIRE      3650
set_var EASYRSA_CA_EXPIRE       36500    # CA证书有效期修改为36500天

#set_var EASYRSA_CERT_EXPIRE    825
set_var EASYRSA_CERT_EXPIRE     3650	# 服务器证书有效期修改为3650天
6)初始化PKI生成PKI相关目录和文件
[root@-server ~]# cd /etc/open/easy-rsa-server/3
[root@-server 3]# ./easyrsa init-pki
7)创建CA机构
[root@-server 3]# ./easyrsa build-ca nopass

Note: using Easy-RSA configuration from: /etc/open/easy-rsa-server/3.0.8/vars
Using SSL: openssl OpenSSL 1.1.1g FIPS  21 Apr 2020
Generating RSA private key, 2048 bit long modulus (2 primes)
....................+++++
........+++++
e is 65537 (0x010001)
You are about to be asked to enter information that will be incorporated
into your certificate request.
What you are about to enter is what is called a Distinguished Name or a DN.
There are quite a few fields but you can leave some blank
For some fields there will be a default value,
If you enter '.', the field will be left blank.
-----
Common Name (eg: your user, host, or server name) [Easy-RSA CA]:    # 直接回车

CA creation complete and you may now import and sign cert requests.
Your new CA certificate file for publishing is at:
/etc/open/easy-rsa-server/3/pki/ca.crt    # 生成的自签名证书
8)创建服务端证书申请
[root@-server 3]# ./easyrsa gen-req server nopass

Note: using Easy-RSA configuration from: /etc/open/easy-rsa-server/3.0.8/vars
Using SSL: openssl OpenSSL 1.1.1g FIPS  21 Apr 2020
Generating a RSA private key
..................................................................................................+++++
...................+++++
writing new private key to '/etc/open/easy-rsa-server/3/pki/easy-rsa-2000.MLZnho/tmp.kp9dOk'
-----
You are about to be asked to enter information that will be incorporated
into your certificate request.
What you are about to enter is what is called a Distinguished Name or a DN.
There are quite a few fields but you can leave some blank
For some fields there will be a default value,
If you enter '.', the field will be left blank.
-----
Common Name (eg: your user, host, or server name) [server]:    # 默认直接回车

Keypair and certificate request completed. Your files are:
req: /etc/open/easy-rsa-server/3/pki/reqs/server.req
key: /etc/open/easy-rsa-server/3/pki/private/server.key
9)颁发服务端证书
[root@-server 3]# ./easyrsa sign server server

Note: using Easy-RSA configuration from: /etc/open/easy-rsa-server/3.0.8/vars
Using SSL: openssl OpenSSL 1.1.1g FIPS  21 Apr 2020


You are about to sign the following certificate.
Please check over the details shown below for accuracy. Note that this request
has not been cryptographically verified. Please be sure it came from a trusted
source or that you have verified the request checksum with the sender.

Request subject, to be signed as a server certificate for 3650 days:

subject=
    commonName                = server


Type the word 'yes' to continue, or any other input to abort.
  Confirm request details: yes    # 输入yes回车
Using configuration from /etc/open/easy-rsa-server/3/pki/easy-rsa-2029.hRBtmL/tmp.CD2V09
Check that the request matches the signature
Signature ok
The Subject's Distinguished Name is as follows
commonName            :ASN.1 12:'server'
Certificate is to be certified until Nov 13 04:39:50 2031 GMT (3650 days)

Write out database with 1 new entries
Data Base Updated

Certificate created at: /etc/open/easy-rsa-server/3/pki/issued/server.crt    # 生成的服务器证书文件
10)查看证书
[root@-server 3]# cat pki/issued/server.crt
Certificate:
    Data:
        Version: 3 (0x2)
        Serial Number:
            a0:c4:30:80:9a:eb:a3:d0:ec:61:d8:08:4e:18:cc:0c
        Signature Algorithm: sha256WithRSAEncryption
        Issuer: CN=Easy-RSA CA
        Validity
            Not Before: Nov 15 04:39:50 2021 GMT
            Not After : Nov 13 04:39:50 2031 GMT
        Subject: CN=server
        Subject Public Key Info:
            Public Key Algorithm: rsaEncryption
                RSA Public-Key: (2048 bit)
                Modulus:
                    00:96:54:18:fd:d3:ba:b3:87:7a:a8:b8:bb:08:13:
                    17:12:8f:37:3f:d6:ff:d5:5a:b5:bf:55:cd:2b:e2:
                    97:98:93:60:20:3a:58:78:47:4b:c6:39:c3:7f:04:
                    cb:50:71:3d:f1:97:85:35:7a:4a:25:4e:b3:0b:d3:
                    83:ce:ae:81:2b:22:c3:e4:8b:bf:25:c3:e8:5f:cd:
                    5d:bb:e9:3f:ca:c6:49:2c:04:3c:83:46:4f:f5:47:
                    c6:36:46:a4:b7:78:bf:1e:3b:8d:0a:f1:2e:64:69:
                    9b:38:89:f3:63:cb:1e:9c:63:37:aa:c1:9a:4e:54:
                    73:69:46:f6:9c:f9:9d:c1:32:a9:10:87:a3:16:33:
                    75:e1:68:2f:c3:e8:43:f0:01:30:cd:20:30:3b:ed:
                    70:80:18:b1:89:d1:e8:9f:a5:5c:55:04:7b:86:29:
                    3c:c8:c5:cb:08:20:4c:65:df:d2:f3:7c:c1:94:2a:
                    a2:1a:11:26:52:8c:06:3e:3a:5c:f3:de:f1:26:ba:
                    59:44:3a:77:b5:7c:e7:e6:ae:c4:00:1b:c7:ad:82:
                    d6:e0:a5:0e:22:3c:dd:08:f4:78:9c:b6:8e:a9:e9:
                    d7:12:d9:6d:ff:2e:b3:cd:db:f5:4d:10:3c:b6:ce:
                    26:a4:38:ac:c0:f2:fd:57:91:e9:ec:cc:be:b8:72:
                    df:71
                Exponent: 65537 (0x10001)
        X509v3 extensions:
            X509v3 Basic Constraints:
                CA:FALSE
            X509v3 Subject Key Identifier:
                41:20:03:CC:FC:7D:F6:61:92:56:2B:DE:E9:10:86:20:F1:E5:B1:04
            X509v3 Authority Key Identifier:
                keyid:97:82:0E:AD:B3:F4:73:4E:64:84:D6:47:86:39:1A:4C:DF:C9:36:52
                DirName:/CN=Easy-RSA CA
                serial:58:EA:00:08:41:BB:F3:87:EA:BF:65:B6:AB:D5:10:8C:02:39:5E:6E

            X509v3 Extended Key Usage:
                TLS Web Server Authentication
            X509v3 Key Usage:
                Digital Signature, Key Encipherment
            X509v3 Subject Alternative Name:
                DNS:server
    Signature Algorithm: sha256WithRSAEncryption
         05:4e:e7:39:2b:0b:9c:c4:c9:fc:96:f3:12:4b:fc:cc:2a:d9:
         3e:4b:ab:9f:d3:48:f6:35:24:59:b4:eb:a2:14:8e:1b:6e:ab:
         19:ec:3a:20:3b:1e:9f:b0:01:89:56:88:f4:0c:4c:3b:bd:16:
         38:f8:27:55:78:29:f4:18:f7:45:98:a5:fa:17:61:b9:1c:6d:
         0d:dd:d3:de:a4:82:bd:6d:56:35:13:c3:8f:97:aa:a6:94:df:
         2f:2b:d3:04:33:65:06:12:70:94:3a:2f:30:3e:c9:2f:26:8b:
         db:43:57:76:a3:e9:f7:83:13:b9:32:5f:d4:48:e2:fb:81:31:
         bd:0f:b4:10:31:bf:13:bc:cc:a0:82:39:2f:03:a7:84:bc:f0:
         d7:2c:5d:f5:17:e4:8a:c8:2e:fc:22:78:58:4f:f3:e5:4b:33:
         5c:0c:75:80:f8:33:1e:b9:4b:64:00:68:13:31:74:e4:3e:3d:
         58:ce:a6:cb:72:79:85:c9:75:60:db:7f:47:75:7b:85:28:42:
         3e:d0:10:6b:c3:d0:8b:5b:9b:7f:cc:26:b7:db:0f:0b:59:d2:
         60:e8:78:fc:cb:a9:6c:bb:0f:c7:da:94:5f:d5:7f:1a:32:ec:
         5f:35:b6:19:93:43:67:d3:90:5a:99:97:17:6b:0b:c1:c2:60:
         55:de:89:2b
-----BEGIN CERTIFICATE-----
MIIDaDCCAlCgAwIBAgIRAKDEMICa66PQ7GHYCE4YzAwwDQYJKoZIhvcNAQELBQAw
FjEUMBIGA1UEAwwLRWFzeS1SU0EgQ0EwHhcNMjExMTE1MDQzOTUwWhcNMzExMTEz
MDQzOTUwWjARMQ8wDQYDVQQDDAZzZXJ2ZXIwggEiMA0GCSqGSIb3DQEBAQUAA4IB
DwAwggEKAoIBAQCWVBj907qzh3qouLsIExcSjzc/1v/VWrW/Vc0r4peYk2AgOlh4
R0vGOcN/BMtQcT3xl4U1ekolTrML04POroErIsPki78lw+hfzV276T/KxkksBDyD
Rk/1R8Y2RqS3eL8eO40K8S5kaZs4ifNjyx6cYzeqwZpOVHNpRvac+Z3BMqkQh6MW
M3XhaC/D6EPwATDNIDA77XCAGLGJ0eifpVxVBHuGKTzIxcsIIExl39LzfMGUKqIa
ESZSjAY+Olzz3vEmullEOne1fOfmrsQAG8etgtbgpQ4iPN0I9Hicto6p6dcS2W3/
LrPN2/VNEDy2ziakOKzA8v1XkenszL64ct9xAgMBAAGjgbUwgbIwCQYDVR0TBAIw
ADAdBgNVHQ4EFgQUQSADzPx99mGSVive6RCGIPHlsQQwUQYDVR0jBEowSIAUl4IO
rbP0c05khNZHhjkaTN/JNlKhGqQYMBYxFDASBgNVBAMMC0Vhc3ktUlNBIENBghRY
6gAIQbvzh+q/Zbar1RCMAjlebjATBgNVHSUEDDAKBggrBgEFBQcDATALBgNVHQ8E
BAMCBaAwEQYDVR0RBAowCIIGc2VydmVyMA0GCSqGSIb3DQEBCwUAA4IBAQAFTuc5
KwucxMn8lvMSS/zMKtk+S6uf00j2NSRZtOuiFI4bbqsZ7DogOx6fsAGJVoj0DEw7
vRY4+CdVeCn0GPdFmKX6F2G5HG0N3dPepIK9bVY1E8OPl6qmlN8vK9MEM2UGEnCU
Oi8wPskvJovbQ1d2o+n3gxO5Ml/USOL7gTG9D7QQMb8TvMyggjkvA6eEvPDXLF31
F+SKyC78InhYT/PlSzNcDHWA+DMeuUtkAGgTMXTkPj1YzqbLcnmFyXVg239HdXuF
KEI+0BBrw9CLW5t/zCa32w8LWdJg6Hj8y6lsuw/H2pRf1X8aMuxfNbYZk0Nn05Ba
mZcXawvBwmBV3okr
-----END CERTIFICATE-----

[root@-server 3]# cat pki/serial
A0C430809AEBA3D0EC61D8084E18CC0D
[root@-server 3]# cat pki/index.txt
V	311113043950Z		A0C430809AEBA3D0EC61D8084E18CC0C	unknown	/CN=server
11)创建Diffie-Hellman密钥
[root@-server 3]# ./easyrsa gen-dh

Note: using Easy-RSA configuration from: /etc/open/easy-rsa-server/3.0.8/vars
Using SSL: openssl OpenSSL 1.1.1g FIPS  21 Apr 2020
Generating DH parameters, 2048 bit long safe prime, generator 2
This is going to take a long time
...............................................................................................................
... ...
DH parameters of size 2048 created at /etc/open/easy-rsa-server/3/pki/dh.pem
12)查看生成的文件
[root@-server 3]# ll pki/dh.pem
-rw------- 1 root root 424 Nov 15 12:43 pki/dh.pem
[root@-server 3]# cat pki/dh.pem
-----BEGIN DH PARAMETERS-----
MIIBCAKCAQEAylc+QZI9cYYj8q7nHIJL0E1kBPhjkkyerlo8foqMGD2VtBet0Kwv
+xRpcgLcinOa7Hu40BczOTLHycoeubJkEGM8dP/1NEldx3ASxE8SZG//UPOAE8WF
r4V9yl1L/G2454cAbakS6ca8FNlXOPxYybl40hjc+D06H1ttN29mQ3tnEoHCVpa7
Uf9Aypj/SVECeXr4n5dkaqJb56WYldwP9bpGKwhGODux4RqQjtdOYR3g418IFwcN
+k9ZDdV3jYMjCCtuR+keLcvVUyTUGXJE92MW7pALs39GUUiTdG3TTT315vqshTnU
U9ev9EFtpcKSn1soBfjulRd3PhyTzS6e0wIBAg==
-----END DH PARAMETERS-----
13)准备客户端证书环境
[root@-server ~]# cp -r /usr/share/easy-rsa/ /etc/open/easy-rsa-client
[root@-server ~]# cp /usr/share/doc/easy-rsa/vars.example /etc/open/easy-rsa-client/3/vars
[root@-server ~]# cd /etc/open/easy-rsa-client/3
[root@-server 3]# ls
easyrsa  openssl-easyrsa.cnf  vars  x509-types
14)生成证书申请所需目录PKI和文件
[root@-server 3]# ./easyrsa init-pki

Note: using Easy-RSA configuration from: /etc/open/easy-rsa-client/3.0.8/vars

init-pki complete; you may now create a CA or requests.
Your newly created PKI dir is: /etc/open/easy-rsa-client/3/pki    # 生成的新目录
15)创建客户端证书申请
[root@-server 3]# ./easyrsa init-pki

Note: using Easy-RSA configuration from: /etc/open/easy-rsa-client/3.0.8/vars

init-pki complete; you may now create a CA or requests.
Your newly created PKI dir is: /etc/open/easy-rsa-client/3/pki


[root@-server 3]# ./easyrsa gen-req liuxiaofu nopass

Note: using Easy-RSA configuration from: /etc/open/easy-rsa-client/3.0.8/vars
Using SSL: openssl OpenSSL 1.1.1g FIPS  21 Apr 2020
Generating a RSA private key
..................................................................................+++++
......................+++++
writing new private key to '/etc/open/easy-rsa-client/3/pki/easy-rsa-2212.DsHZHR/tmp.LoJezq'
-----
You are about to be asked to enter information that will be incorporated
into your certificate request.
What you are about to enter is what is called a Distinguished Name or a DN.
There are quite a few fields but you can leave some blank
For some fields there will be a default value,
If you enter '.', the field will be left blank.
-----
Common Name (eg: your user, host, or server name) [liuxiaofu]:    # 直接回车

Keypair and certificate request completed. Your files are:
req: /etc/open/easy-rsa-client/3/pki/reqs/liuxiaofu.req    #生成的证书申请文件
key: /etc/open/easy-rsa-client/3/pki/private/liuxiaofu.key    # 生成的私钥文件
16)签发客户端证书
[root@-server 3]# cd /etc/open/easy-rsa-server/3
[root@-server 3]# ./easyrsa import-req /etc/open/easy-rsa-client/3/pki/reqs/liuxiaofu.req liuxiaofu
Note: using Easy-RSA configuration from: /etc/open/easy-rsa-server/3.0.8/vars
Using SSL: openssl OpenSSL 1.1.1g FIPS  21 Apr 2020

The request has been successfully imported with a short name of: liuxiaofu
You may now use this name to perform signing operations on this request.

[root@-server 3]# tree pki
pki
├── ca.crt
├── certs_by_serial
│   └── A0C430809AEBA3D0EC61D8084E18CC0C.pem
├── dh.pem
├── index.txt
├── index.txt.attr
├── index.txt.attr.old
├── index.txt.old
├── issued
│   └── server.crt
├── openssl-easyrsa.cnf
├── private
│   ├── ca.key
│   └── server.key
├── renewed
│   ├── certs_by_serial
│   ├── private_by_serial
│   └── reqs_by_serial
├── reqs
│   ├── liuxiaofu.req    # 导入的证书申请文件
│   └── server.req
├── revoked
│   ├── certs_by_serial
│   ├── private_by_serial
│   └── reqs_by_serial
├── safessl-easyrsa.cnf
├── serial
└── serial.old

12 directories, 16 files
17)修改给客户端颁发的证书有效期,修改为90天
[root@-server 3]# vim vars
set_var EASYRSA_CERT_EXPIRE     90
18)颁发客户端证书
[root@-server 3]# ./easyrsa sign client liuxiaofu

Note: using Easy-RSA configuration from: /etc/open/easy-rsa-server/3.0.8/vars
Using SSL: openssl OpenSSL 1.1.1g FIPS  21 Apr 2020


You are about to sign the following certificate.
Please check over the details shown below for accuracy. Note that this request
has not been cryptographically verified. Please be sure it came from a trusted
source or that you have verified the request checksum with the sender.

Request subject, to be signed as a client certificate for 90 days:

subject=
    commonName                = liuxiaofu


Type the word 'yes' to continue, or any other input to abort.
  Confirm request details: yes
Using configuration from /etc/open/easy-rsa-server/3/pki/easy-rsa-2294.v8lKUn/tmp.5MQqJb
Check that the request matches the signature
Signature ok
The Subject's Distinguished Name is as follows
commonName            :ASN.1 12:'liuxiaofu'
Certificate is to be certified until Feb 13 04:51:52 2022 GMT (90 days)

Write out database with 1 new entries
Data Base Updated

Certificate created at: /etc/open/easy-rsa-server/3/pki/issued/liuxiaofu.crt    # 生成的客户端证书文件
19)查看客户端证书
[root@-server 3]# cat pki/issued/liuxiaofu.crt
Certificate:
    Data:
        Version: 3 (0x2)
        Serial Number:
            d2:45:68:cb:95:61:9a:97:c9:e4:8e:e8:d0:90:20:7e
        Signature Algorithm: sha256WithRSAEncryption
        Issuer: CN=Easy-RSA CA
        Validity
            Not Before: Nov 15 04:51:52 2021 GMT
            Not After : Feb 13 04:51:52 2022 GMT
        Subject: CN=liuxiaofu
        Subject Public Key Info:
            Public Key Algorithm: rsaEncryption
                RSA Public-Key: (2048 bit)
                Modulus:
                    00:dd:78:f2:0e:a0:41:6f:f1:89:17:12:58:44:f9:
                    1a:38:dd:95:83:1a:ba:08:b7:23:bd:69:a0:31:f3:
                    9b:0a:dc:9c:d0:2d:15:43:95:23:eb:79:2d:dd:9c:
                    3b:c2:a8:1d:80:b3:91:27:1e:32:20:51:75:76:17:
                    a7:44:1f:5d:9b:96:ef:a5:be:8e:ef:78:07:1e:76:
                    94:16:5f:4d:a9:58:fd:9b:fa:15:74:6b:6c:e6:2d:
                    6d:11:cc:0e:72:5a:87:f5:67:c1:28:49:51:68:fb:
                    a7:bc:8a:24:24:ab:23:c3:06:d5:00:ec:9f:a1:f6:
                    cc:da:56:98:01:6c:a1:0a:41:69:90:f1:6a:82:a9:
                    f4:6b:65:b4:bc:ba:15:68:41:bd:4f:d1:8c:74:3e:
                    4c:e5:df:88:32:fa:f9:60:99:97:c9:4f:33:21:6f:
                    09:44:b3:85:df:f8:4a:80:84:c1:cc:05:27:ca:97:
                    48:2d:60:e5:c4:a6:0e:25:5c:5b:5e:7e:59:63:ec:
                    83:17:cd:d4:12:ac:cf:6d:09:f6:a8:2f:4f:06:24:
                    78:0d:c5:dc:71:71:72:33:d1:f6:0a:c3:5d:ce:42:
                    04:fc:38:55:90:c5:8d:23:d0:96:5a:1c:e7:5a:dc:
                    70:db:c0:b8:22:cc:8a:05:db:fa:3c:95:22:9c:b4:
                    c9:05
                Exponent: 65537 (0x10001)
        X509v3 extensions:
            X509v3 Basic Constraints:
                CA:FALSE
            X509v3 Subject Key Identifier:
                3D:C6:FF:D6:AC:76:C5:17:4A:38:41:6F:1E:BC:DE:B1:22:5A:45:34
            X509v3 Authority Key Identifier:
                keyid:97:82:0E:AD:B3:F4:73:4E:64:84:D6:47:86:39:1A:4C:DF:C9:36:52
                DirName:/CN=Easy-RSA CA
                serial:58:EA:00:08:41:BB:F3:87:EA:BF:65:B6:AB:D5:10:8C:02:39:5E:6E

            X509v3 Extended Key Usage:
                TLS Web Client Authentication
            X509v3 Key Usage:
                Digital Signature
    Signature Algorithm: sha256WithRSAEncryption
         bb:ab:d9:f2:26:a7:88:15:1c:81:39:2c:10:ce:14:36:ea:b9:
         3a:e1:a7:39:b8:37:42:05:ba:bd:99:98:af:01:39:7e:ff:3b:
         47:63:9c:6d:a4:47:3d:37:8f:4a:f7:20:19:74:c3:31:72:95:
         6a:44:35:c5:92:6c:d5:5c:0b:4c:e9:46:41:ae:96:2c:ff:fa:
         20:f8:cf:31:e9:96:7d:07:16:fd:1f:2c:fc:e8:4c:18:7d:b8:
         36:1b:02:a9:e7:99:b0:24:58:92:66:9d:d0:42:2b:93:34:77:
         43:e2:66:ac:4e:6d:6e:aa:e0:10:57:16:68:c0:f4:5d:4b:26:
         ff:b9:95:46:f7:2d:ad:f5:31:ed:00:0c:d8:5d:50:9c:99:2f:
         6e:3f:82:9f:60:77:c3:43:20:d2:6f:07:9d:97:52:96:4f:8c:
         a7:65:cd:40:60:01:20:47:6f:4d:cd:d3:23:67:85:ec:6c:c3:
         43:12:0f:0e:6f:35:4e:9d:2d:5f:b9:64:4f:7e:64:db:e7:8d:
         98:6a:b2:97:49:2a:81:56:f9:6b:ab:ed:a4:e1:9a:74:9a:07:
         c3:94:9a:65:79:69:76:77:6c:d4:ad:7b:55:e9:23:ca:80:8d:
         ca:80:83:dc:03:82:6f:bb:67:a0:06:40:fb:81:0f:10:0d:c7:
         e8:11:be:79
-----BEGIN CERTIFICATE-----
MIIDWDCCAkCgAwIBAgIRANJFaMuVYZqXyeSO6NCQIH4wDQYJKoZIhvcNAQELBQAw
FjEUMBIGA1UEAwwLRWFzeS1SU0EgQ0EwHhcNMjExMTE1MDQ1MTUyWhcNMjIwMjEz
MDQ1MTUyWjAUMRIwEAYDVQQDDAlsaXV4aWFvZnUwggEiMA0GCSqGSIb3DQEBAQUA
A4IBDwAwggEKAoIBAQDdePIOoEFv8YkXElhE+Ro43ZWDGroItyO9aaAx85sK3JzQ
LRVDlSPreS3dnDvCqB2As5EnHjIgUXV2F6dEH12blu+lvo7veAcedpQWX02pWP2b
+hV0a2zmLW0RzA5yWof1Z8EoSVFo+6e8iiQkqyPDBtUA7J+h9szaVpgBbKEKQWmQ
8WqCqfRrZbS8uhVoQb1P0Yx0Pkzl34gy+vlgmZfJTzMhbwlEs4Xf+EqAhMHMBSfK
l0gtYOXEpg4lXFtefllj7IMXzdQSrM9tCfaoL08GJHgNxdxxcXIz0fYKw13OQgT8
OFWQxY0j0JZaHOda3HDbwLgizIoF2/o8lSKctMkFAgMBAAGjgaIwgZ8wCQYDVR0T
BAIwADAdBgNVHQ4EFgQUPcb/1qx2xRdKOEFvHrzesSJaRTQwUQYDVR0jBEowSIAU
l4IOrbP0c05khNZHhjkaTN/JNlKhGqQYMBYxFDASBgNVBAMMC0Vhc3ktUlNBIENB
ghRY6gAIQbvzh+q/Zbar1RCMAjlebjATBgNVHSUEDDAKBggrBgEFBQcDAjALBgNV
HQ8EBAMCB4AwDQYJKoZIhvcNAQELBQADggEBALur2fImp4gVHIE5LBDOFDbquTrh
pzm4N0IFur2ZmK8BOX7/O0djnG2kRz03j0r3IBl0wzFylWpENcWSbNVcC0zpRkGu
liz/+iD4zzHpln0HFv0fLPzoTBh9uDYbAqnnmbAkWJJmndBCK5M0d0PiZqxObW6q
4BBXFmjA9F1LJv+5lUb3La31Me0ADNhdUJyZL24/gp9gd8NDINJvB52XUpZPjKdl
zUBgASBHb03N0yNnhexsw0MSDw5vNU6dLV+5ZE9+ZNvnjZhqspdJKoFW+Wur7aTh
mnSaB8OUmmV5aXZ3bNSte1XpI8qAjcqAg9wDgm+7Z6AGQPuBDxANx+gRvnk=
-----END CERTIFICATE-----

[root@-server 3]# cat pki/index.txt
V	311113043950Z		A0C430809AEBA3D0EC61D8084E18CC0C	unknown	/CN=server
V	220213045152Z		D24568CB95619A97C9E48EE8D090207E	unknown	/CN=liuxiaofu
20)将CA和服务器证书相关文件复制到服务器相应的目录
[root@-server 3]# mkdir /etc/open/certs
[root@-server 3]# cp /etc/open/easy-rsa-server/3/pki/ca.crt /etc/open/certs/
[root@-server 3]# cp /etc/open/easy-rsa-server/3/pki/issued/server.crt /etc/open/certs/
[root@-server 3]# cp /etc/open/easy-rsa-server/3/pki/private/server.key /etc/open/certs/
[root@-server 3]# cp /etc/open/easy-rsa-server/3/pki/dh.pem /etc/open/certs/
[root@-server 3]# ll /etc/open/certs/
total 20
-rw------- 1 root root 1204 Nov 15 12:55 ca.crt
-rw------- 1 root root  424 Nov 15 12:56 dh.pem
-rw------- 1 root root 4608 Nov 15 12:55 server.crt
-rw------- 1 root root 1704 Nov 15 12:56 server.key
21)将客户端私钥与证书相关文件复制到服务器相关的目录
[root@-server 3]# mkdir /etc/open/client/liuxiaofu
[root@-server 3]# cp /etc/open/easy-rsa-client/3/pki/private/liuxiaofu.key /etc/open/client/liuxiaofu/
[root@-server 3]# cp /etc/open/easy-rsa-server/3/pki/issued/liuxiaofu.crt /etc/open/client/liuxiaofu/
[root@-server 3]# cp /etc/open/easy-rsa-server/3/pki/ca.crt /etc/open/client/liuxiaofu/
[root@-server 3]# ll /etc/open/client/liuxiaofu/
total 16
-rw------- 1 root root 1204 Nov 15 13:01 ca.crt
-rw------- 1 root root 4499 Nov 15 13:00 liuxiaofu.crt
-rw------- 1 root root 1704 Nov 15 13:00 liuxiaofu.key
22)修改服务端配置文件
[root@-server ~]# vim /etc/open/server.conf
port 1194
proto tcp
dev tun
ca /etc/open/certs/ca.crt
cert /etc/open/certs/server.crt
key /etc/open/certs/server.key
dh /etc/open/certs/dh.pem
server 10.8.0.0 255.255.255.0
push "route 192.168.0.0 255.255.255.0"
keepalive 10 120
cipher AES-256-CBC
compress lz4-v2
push "compress lz4-v2"
max-clients 2048
user open
group open
status /var/log/open/open-status.log
log-append /var/log/open/open.log
verb 3
mute 20
23)准备日志相关目录
[root@-server ~]# getent passwd open
open:x:989:985:OpenVPN:/etc/open:/sbin/nologin
[root@-server ~]# mkdir /var/log/open
[root@-server ~]# chown open.open /var/log/open
[root@-server ~]# ls -ld /var/log/open
drwxr-xr-x 2 open open 6 Nov 15 13:04 /var/log/open
24)开启路由转发功能
[root@-server ~]# echo 'net.ipv4.ip_forward = 1' >> /etc/sysctl.conf
[root@-server ~]# sysctl -p
vm.swappiness = 0
kernel.sysrq = 1
net.ipv4.neigh.default.gc_stale_time = 120
net.ipv4.conf.all.rp_filter = 0
net.ipv4.conf.default.rp_filter = 0
net.ipv4.conf.default.arp_announce = 2
net.ipv4.conf.lo.arp_announce = 2
net.ipv4.conf.all.arp_announce = 2
net.ipv4.tcp_max_tw_buckets = 5000
net.ipv4.tcp_syncookies = 1
net.ipv4.tcp_max_syn_backlog = 1024
net.ipv4.tcp_synack_retries = 2
net.ipv4.tcp_slow_start_after_idle = 0
net.ipv4.ip_forward = 1
25)添加SNAT规则
[root@-server ~]# echo 'iptables -t nat -A POSTROUTING -s 10.8.0.0/24 -j MASQUERADE' >> /etc/rc.d/rc.local
[root@-server ~]# chmod +x /etc/rc.d/rc.local
[root@-server ~]# /etc/rc.d/rc.local
[root@-server ~]# iptables -t nat -vnL --line-number
Chain PREROUTING (policy ACCEPT 0 packets, 0 bytes)
num   pkts bytes target     prot opt in     out     source               destination

Chain INPUT (policy ACCEPT 0 packets, 0 bytes)
num   pkts bytes target     prot opt in     out     source               destination

Chain POSTROUTING (policy ACCEPT 0 packets, 0 bytes)
num   pkts bytes target     prot opt in     out     source               destination
1        0     0 MASQUERADE  all  --  *      *       10.8.0.0/24          0.0.0.0/0

Chain OUTPUT (policy ACCEPT 0 packets, 0 bytes)
num   pkts bytes target     prot opt in     out     source               destination
26)启动open服务
[root@-server ~]# vim /usr/lib/systemd/system/open@.service
[Unit]
Description=OpenVPN Robust And Highly Flexible Tunneling Application On %I
After=network.target
[Service]
Type=notify
PrivateTmp=true
ExecStart=/usr/sbin/open --cd /etc/open/ --config %i.conf
[Install]
WantedBy=multi-user.target

[root@-server ~]# systemctl daemon-reload
[root@-server ~]# systemctl enable --now open@server
Created symlink /etc/systemd/system/multi-user.target.wants/open@server.service → /usr/lib/systemd/system/open@.service.
27)查看服务状态
[root@-server ~]# systemctl status open@server.service
● open@server.service - OpenVPN Robust And Highly Flexible Tunneling Application On server
   Loaded: loaded (/usr/lib/systemd/system/open@.service; enabled; vendor preset: disabled)
   Active: active (running) since Mon 2021-11-15 13:10:26 CST; 22s ago
 Main PID: 2763 (open)
   Status: "Initialization Sequence Completed"
    Tasks: 1 (limit: 22988)
   Memory: 1.7M
   CGroup: /system.slice/system-open.slice/open@server.service
           └─2763 /usr/sbin/open --cd /etc/open/ --config server.conf

Nov 15 13:10:26 -server.node.com systemd[1]: Starting OpenVPN Robust And Highly Flexible Tunneling Application>
Nov 15 13:10:26 -server.node.com systemd[1]: Started OpenVPN Robust And Highly Flexible Tunneling Application >
lines 1-12/12 (END)
28)查看端口
[root@-server ~]# ss -ntlp
State     Recv-Q    Send-Q       Local Address:Port       Peer Address:Port
LISTEN    0         128                0.0.0.0:22              0.0.0.0:*        users:(("sshd",pid=1032,fd=5))
LISTEN    0         32                 0.0.0.0:1194            0.0.0.0:*        users:(("open",pid=2763,fd=8))
29)查看日志
[root@-server ~]# cat /var/log/open/open.log
Mon Nov 15 13:10:26 2021 OpenVPN 2.4.11 x86_64-redhat-linux-gnu [SSL (OpenSSL)] [LZO] [LZ4] [EPOLL] [PKCS11] [MH/PKTINFO] [AEAD] built on Apr 21 2021
Mon Nov 15 13:10:26 2021 library versions: OpenSSL 1.1.1g FIPS  21 Apr 2020, LZO 2.08
Mon Nov 15 13:10:26 2021 WARNING: you are using user/group/chroot/setcon without persist-tun -- this may cause restarts to fail
Mon Nov 15 13:10:26 2021 WARNING: you are using user/group/chroot/setcon without persist-key -- this may cause restarts to fail
Mon Nov 15 13:10:26 2021 NOTE: your local LAN uses the extremely common subnet address 192.168.0.x or 192.168.1.x.  Be aware that this might create routing conflicts if you connect to the VPN server from public locations such as internet cafes that use the same subnet.
Mon Nov 15 13:10:26 2021 Diffie-Hellman initialized with 2048 bit key
Mon Nov 15 13:10:26 2021 ROUTE_GATEWAY 192.168.0.253/255.255.255.0 IFACE=eth0 HWADDR=00:16:3e:02:89:bf
Mon Nov 15 13:10:26 2021 TUN/TAP device tun0 opened
Mon Nov 15 13:10:26 2021 TUN/TAP TX queue length set to 100
Mon Nov 15 13:10:26 2021 /sbin/ip link set dev tun0 up mtu 1500
Mon Nov 15 13:10:26 2021 /sbin/ip addr add dev tun0 local 10.8.0.1 peer 10.8.0.2
Mon Nov 15 13:10:26 2021 /sbin/ip route add 10.8.0.0/24 via 10.8.0.2
Mon Nov 15 13:10:26 2021 Could not determine IPv4/IPv6 protocol. Using AF_INET
Mon Nov 15 13:10:26 2021 Socket Buffers: R=[87380->87380] S=[16384->16384]
Mon Nov 15 13:10:26 2021 Listening for incoming TCP connection on [AF_INET][undef]:1194
Mon Nov 15 13:10:26 2021 TCPv4_SERVER link local (bound): [AF_INET][undef]:1194
Mon Nov 15 13:10:26 2021 TCPv4_SERVER link remote: [AF_UNSPEC]
Mon Nov 15 13:10:26 2021 GID set to open
Mon Nov 15 13:10:26 2021 UID set to open
Mon Nov 15 13:10:26 2021 MULTI: multi_init called, r=256 v=256
Mon Nov 15 13:10:26 2021 IFCONFIG POOL: base=10.8.0.4 size=62, ipv6=0
Mon Nov 15 13:10:26 2021 MULTI: TCP INIT maxclients=2048 maxevents=2052
Mon Nov 15 13:10:26 2021 Initialization Sequence Completed
30)查看IP地址
[root@-server ~]# ip a
1: lo: <LOOPBACK,UP,LOWER_UP> mtu 65536 qdisc noqueue state UNKNOWN group default qlen 1000
    link/loopback 00:00:00:00:00:00 brd 00:00:00:00:00:00
    inet 127.0.0.1/8 scope host lo
       valid_lft forever preferred_lft forever
    inet6 ::1/128 scope host
       valid_lft forever preferred_lft forever
2: eth0: <BROADCAST,MULTICAST,UP,LOWER_UP> mtu 1500 qdisc mq state UP group default qlen 1000
    link/ether 00:16:3e:02:89:bf brd ff:ff:ff:ff:ff:ff
    inet 192.168.0.10/24 brd 192.168.0.255 scope global dynamic noprefixroute eth0
       valid_lft 315356832sec preferred_lft 315356832sec
    inet6 fe80::216:3eff:fe02:89bf/64 scope link
       valid_lft forever preferred_lft forever
3: tun0: <POINTOPOINT,MULTICAST,NOARP,UP,LOWER_UP> mtu 1500 qdisc fq_codel state UNKNOWN group default qlen 100
    link/none
    inet 10.8.0.1 peer 10.8.0.2/32 scope global tun0
       valid_lft forever preferred_lft forever
    inet6 fe80::6c98:c0b2:dc46:91c2/64 scope link stable-privacy
       valid_lft forever preferred_lft forever
31)查看路由
[root@-server ~]# route -n
Kernel IP routing table
Destination     Gateway         Genmask         Flags Metric Ref    Use Iface
0.0.0.0         192.168.0.253   0.0.0.0         UG    100    0        0 eth0
10.8.0.0        10.8.0.2        255.255.255.0   UG    0      0        0 tun0
10.8.0.2        0.0.0.0         255.255.255.255 UH    0      0        0 tun0
192.168.0.0     0.0.0.0         255.255.255.0   U     100    0        0 eth0
32)生成open客户端配置文件
[root@-server ~]# grep '^[[[:alpha:]].*' /usr/share/doc/open/sample/sample-config-files/client.conf > /etc/open/client/liuxiaofu/client.o
33)修改客户端配置文件
[root@-server ~]# vim /etc/open/client/liuxiaofu/client.o
client
dev tun
proto tcp
remote  8.142.178.13 1194
resolv-retry infinite
nobind
persist-key
persist-tun
ca ca.crt
cert liuxiaofu.crt
key liuxiaofu.key
remote-cert-tls server
cipher AES-256-CBC
verb 3
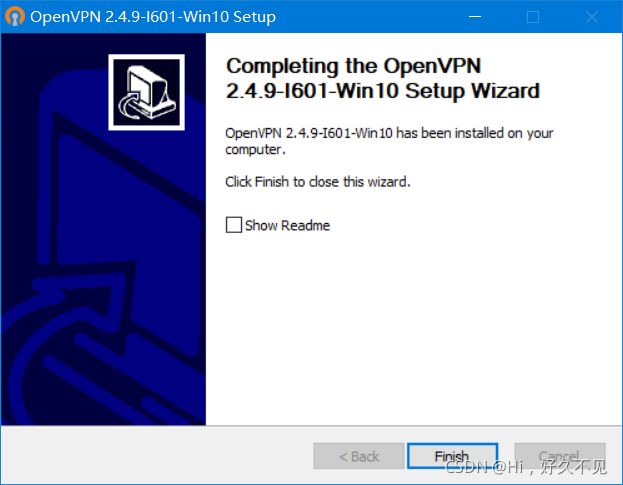
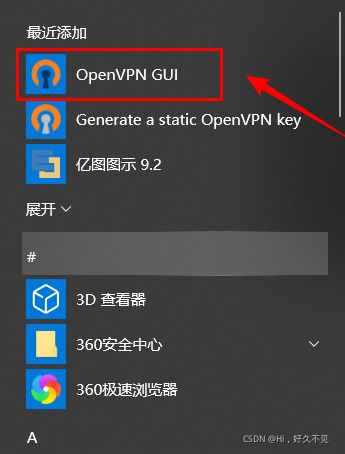
windows配置部署open客户端
1)安装open客户端
官方客户端下载地址:
https://open.net/community-downloads/
![]()


2)在服务器打包证书并下载发送给windows客户端
[root@-server ~]# cd /etc/open/client/liuxiaofu/
[root@-server liuxiaofu]# ll
total 20
-rw------- 1 root root 1204 Nov 15 13:01 ca.crt
-rw-r--r-- 1 root root  217 Nov 15 13:16 client.o
-rw------- 1 root root 4499 Nov 15 13:00 liuxiaofu.crt
-rw------- 1 root root 1704 Nov 15 13:00 liuxiaofu.key
[root@-server liuxiaofu]# zip -e liuxiaofu.zip *
Enter password:
Verify password:
  adding: ca.crt (deflated 26%)
  adding: client.o (deflated 27%)
  adding: liuxiaofu.crt (deflated 45%)
  adding: liuxiaofu.key (deflated 23%)
3)放置到windows客户端的c:\program files\open\config目录下
[root@-server liuxiaofu]# sz liuxiaofu.zip
-bash: sz: command not found
[root@-server liuxiaofu]# yum -y install lrzsz
[root@-server liuxiaofu]# sz liuxiaofu.zip

4)连接open

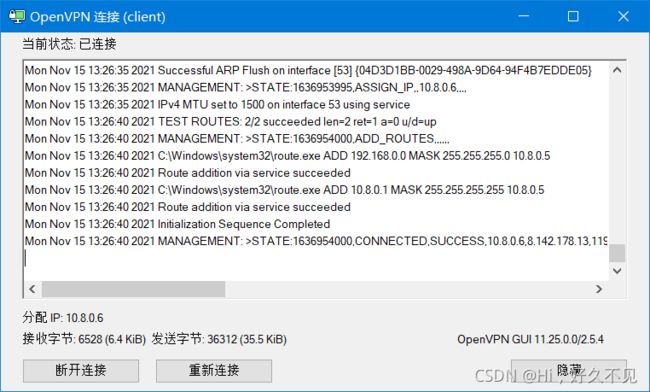
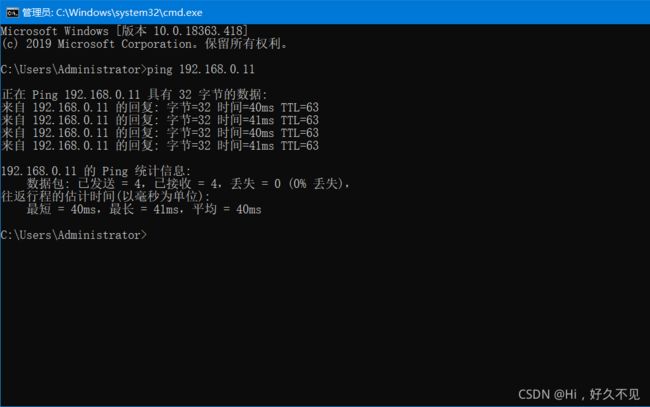
5)验证连通性及web访问
2、通过编译、二进制安装MySQL5.7
二进制安装MySQL5.7
1)下载安装包(mysql-5.7.36为例)
wget http://mirrors.163.com/mysql/Downloads/MySQL-5.7/mysql-5.7.36-linux-glibc2.12-x86_64.tar.gz
2)安装相关包
yum -y install libaio numactl-libs
3)添加用户和组
groupadd -r -g 306 mysql
useradd -r -g 306 -u 306 -s /sbin/nologin mysql
4)准备程序文件
tar xf mysql-5.7.36-linux-glibc2.12-x86_64.tar.gz -C /usr/local
cd /usr/local
ln -s mysql-5.7.36-linux-glibc2.12-x86_64/ mysql
chown -R mysql.mysql /usr/local/mysql/*
5)准备环境变量
echo 'PATH=/usr/local/mysql/bin:$PATH' > /etc/profile.d/mysql.sh
. /etc/profile.d/mysql.sh
6)准备配置文件
vim /etc/my.cnf
[mysqld]
datadir=/data/mysql
skip_name_resolve=1
socket=/data/mysql/mysql.sock
log_error=/data/mysql/mysql.log
pid-file=/data/mysql/mysql.pid
[client]
socket=/data/mysql/mysql.sock
7)生成数据库文件,并提取root密码
mysqld --initialize --user=mysql --datadir=/data/mysql
awk '/temporary password/{print $NF}' /data/mysql/mysql.log
!inp)o#0pr0H
8)准备服务启动脚本
cp /usr/local/mysql/support-files/mysql.server /etc/init.d/mysqld
9)启动服务
chkconfig --add mysqld
service mysqld start
10)修改root口令
mysqladmin -u root -p'!inp)o#0pr0H' password 123456
11)连接MySQL
mysql -uroot -p123456
mysql: [Warning] Using a password on the command line interface can be insecure.
Welcome to the MySQL monitor.  Commands end with ; or \g.
Your MySQL connection id is 4
Server version: 5.7.36 MySQL Community Server (GPL)

Copyright (c) 2000, 2021, Oracle and/or its affiliates.

Oracle is a registered trademark of Oracle Corporation and/or its
affiliates. Other names may be trademarks of their respective
owners.

Type 'help;' or '\h' for help. Type '\c' to clear the current input statement.

mysql>
编译安装MySQL5.7(centos7.9)
基础环境:
1)安装相关依赖包(需配置好epel源)
安装之前请确保系统中无其他版本的数据库!
yum -y install make patch gcc gcc-c++ git libaio libaio-devel ncurses ncurses-devel perl bison bison-devel libxml libxml-devel libxml2 libxml2-devel zlib zlib-devel libgcrypt glibc glibc-devel glib2 glib2-devel flex bzip2* curl* openssl-devel openssl
2)安装cmake(编译工具)
# 准备cmake-3.8.2.tar.gz(使用windows下载)
URL:https://cmake.org/files/v3.8/cmake-3.8.2.tar.gz
tar xf cmake-3.8.2.tar.gz
cd cmake-3.8.2/
./bootstrap
gmake -j 12
make install
3)安装Boost库
# 准备boost_1_59_0.tar.gz(使用windows下载)
# URL:https://udomain.dl.sourceforge.net/project/boost/boost/1.59.0/boost_1_59_0.tar.gz
tar xf boost_1_59_0.tar.gz -C /usr/local
chown -R root:root /usr/local/boost_1_59_0
chmod -R 755 /usr/local/boost_1_59_0
ln -s /usr/local/boost_1_59_0/ /usr/local/boost
安装MySQL
1)创建MySQL组及mysql用户
groupadd -r -g 306 mysql
useradd -r -u 306 -g 306 -s /sbin/nologin -M -d /data/mysql mysql
2)创建数据库目录及修改目录属性
mkdir -p /data/mysql
chown mysql.mysql /data/mysql
chmod 700 /data/mysql
3)下载并解压MySQL压缩包
wget https://downloads.mysql.com/archives/get/p/23/file/mysql-5.7.35.tar.gz

tar xf mysql-5.7.35.tar.gz -C /usr/local/
cd /usr/local/mysql-5.7.35
4)cmake配置
cmake . \
-DCMAKE_INSTALL_PREFIX=/apps/mysql \
-DMYSQL_DATADIR=/data/mysql \
-DSYSCONFDIR=/etc \
-DMYSQL_TCP_PORT=3306 \
-DMYSQL_USER=mysql \
-DMYSQL_UNIX_ADDR=/data/mysql/mysql.sock \
-DWITH_EXTRA_CHARSETS=all \
-DDEFAULT_CHARSET=utf8mb4 \
-DDEFAULT_COLLATION=utf8mb4_unicode_ci \
-DWITH_INNOBASE_STORAGE_ENGINE=1 \
-DWITH_MYISAM_STORAGE_ENGINE=1 \
-DWITH_ARCHIVE_STORAGE_ENGINE=1 \
-DWITH_FEDERATED_STORAGE_ENGINE=1 \
-DWITH_BLACKHOLE_STORAGE_ENGINE=1 \
-DWITH_PERFSCHEMA_STORAGE_ENGINE=1 \
-DWITHOUT_EXAMPLE_STORAGE_ENGINE=1 \
-DWITH_ZLIB=bundled \
-DWITH_SSL=system \
-DENABLED_LOCAL_INFILE=1 \
-DWITH_DEBUG=0 \
-DMYSQL_MAINTAINER_MODE=0 \
-DWITH_EMBEDDED_SERVER=0 \
-DINSTALL_SHAREDIR=share \
-DDOWNLOAD_BOOST=0 \
-DWITH_BOOST=/usr/local/boost
5)编译安装
make -j 12
make install
cd /usr/local
ln -s mysql-5.7.35 mysql
配置MySQL
1)准备环境变量
echo 'PATH=/apps/mysql/bin:$PATH' > /etc/profile.d/mysql.sh
. /etc/profile.d/mysql.sh
2)创建配置文件
vim /etc/my.cnf
[mysqld]
server-id=1
log-bin
datadir=/data/mysql
socket=/data/mysql/mysql.sock
log-error=/data/mysql/mysql.log
pid-file=/data/mysql/mysql.pid
[client]
socket=/data/mysql/mysql.sock
3)设置安装目录权限
chown -R root.root /apps/mysql
4)初始化数据库
mysqld --initialize-insecure --user=mysql --basedir=/apps/mysql --datadir=/data/mysql
5)配置MySQL服务
cp /apps/mysql/support-files/mysql.server /etc/init.d/mysqld
6)启动服务
chkconfig --add mysqld
service mysqld start
7)登录Mysql
mysql -uroot -p
Enter password:
Welcome to the MySQL monitor.  Commands end with ; or \g.
Your MySQL connection id is 2
Server version: 5.7.35-log Source distribution

Copyright (c) 2000, 2021, Oracle and/or its affiliates.

Oracle is a registered trademark of Oracle Corporation and/or its
affiliates. Other names may be trademarks of their respective
owners.

Type 'help;' or '\h' for help. Type '\c' to clear the current input statement.

mysql>
8)修改root口令
mysqladmin -uroot password Centos79@202111

mysql -uroot -p 		# 此时无法使用空密码登录
Enter password:
ERROR 1045 (28000): Access denied for user 'root'@'localhost' (using password: NO)

mysql -uroot -pCentos79@202111    # 指定修改后的密码登录,成功了!
mysql: [Warning] Using a password on the command line interface can be insecure.
Welcome to the MySQL monitor.  Commands end with ; or \g.
Your MySQL connection id is 5
Server version: 5.7.35-log Source distribution

Copyright (c) 2000, 2021, Oracle and/or its affiliates.

Oracle is a registered trademark of Oracle Corporation and/or its
affiliates. Other names may be trademarks of their respective
owners.

Type 'help;' or '\h' for help. Type '\c' to clear the current input statement.

mysql>
3、二进制安装mariadb10.4
1)安装相关包
yum -y install libaio
2)下载mariadb10.4的二进制包
wget https://mirrors.tuna.tsinghua.edu.cn/mariadb/mariadb-10.4.22/bintar-linux-x86_64/mariadb-10.4.22-linux-glibc_214-x86_64.tar.gz

ls mari*
mariadb-10.4.22-linux-glibc_214-x86_64.tar.gz
3)解压二进制包,解压包建立软链接
tar xf mariadb-10.4.22-linux-glibc_214-x86_64.tar.gz -C /usr/local/
cd /usr//local/
ln -s mariadb-10.4.22-linux-glibc_214-x86_64/ mysql
4)目录内的所有者和所属组
# 查看该目录下所有的所属者和所属组
ll
total 168
drwxr-xr-x  2 liuxiaofu liuxiaofu  4096 Oct 22  2020 bin
-rw-r--r--  1 liuxiaofu liuxiaofu 17987 Nov  6 03:03 COPYING
-rw-r--r--  1 liuxiaofu liuxiaofu  2093 Nov  6 03:03 CREDITS
drwxrwxr-x  2 liuxiaofu liuxiaofu    81 Nov  6 03:55 docs
drwxrwxr-x  3 liuxiaofu liuxiaofu    19 Nov  6 03:55 include
-rw-r--r--  1 liuxiaofu liuxiaofu  8779 Nov  6 03:03 INSTALL-BINARY
drwxr-xr-x  5 liuxiaofu liuxiaofu  4096 Jul 29 06:02 lib
drwxrwxr-x  4 liuxiaofu liuxiaofu    30 Nov  6 03:55 man
drwxrwxr-x  9 liuxiaofu liuxiaofu  4096 Nov  6 03:55 mysql-test
-rw-r--r--  1 liuxiaofu liuxiaofu  2874 Nov  6 03:03 README.md
-rw-r--r--  1 liuxiaofu liuxiaofu 19520 Nov  6 03:03 README-wsrep
drwxrwxr-x  2 liuxiaofu liuxiaofu    56 Nov  6 03:55 scripts
drwxrwxr-x 31 liuxiaofu liuxiaofu  4096 Nov  6 03:55 share
drwxrwxr-x  4 liuxiaofu liuxiaofu  4096 Nov  6 03:55 sql-bench
drwxrwxr-x  3 liuxiaofu liuxiaofu   165 Nov  6 03:55 support-files
-rw-r--r--  1 liuxiaofu liuxiaofu 86263 Nov  6 03:03 THIRDPARTY

# 修改该目录下所有的所属者和所属组
chown -R root.root /usr/local/mysql/
ll /usr/local/mysql/
total 168
drwxr-xr-x  2 root root  4096 Oct 22  2020 bin
-rw-r--r--  1 root root 17987 Nov  6 03:03 COPYING
-rw-r--r--  1 root root  2093 Nov  6 03:03 CREDITS
drwxrwxr-x  2 root root    81 Nov  6 03:55 docs
drwxrwxr-x  3 root root    19 Nov  6 03:55 include
-rw-r--r--  1 root root  8779 Nov  6 03:03 INSTALL-BINARY
drwxr-xr-x  5 root root  4096 Jul 29 06:02 lib
drwxrwxr-x  4 root root    30 Nov  6 03:55 man
drwxrwxr-x  9 root root  4096 Nov  6 03:55 mysql-test
-rw-r--r--  1 root root  2874 Nov  6 03:03 README.md
-rw-r--r--  1 root root 19520 Nov  6 03:03 README-wsrep
drwxrwxr-x  2 root root    56 Nov  6 03:55 scripts
drwxrwxr-x 31 root root  4096 Nov  6 03:55 share
drwxrwxr-x  4 root root  4096 Nov  6 03:55 sql-bench
drwxrwxr-x  3 root root   165 Nov  6 03:55 support-files
-rw-r--r--  1 root root 86263 Nov  6 03:03 THIRDPARTY
5)创建该服务对应的用户账号和组
groupadd -r -g 306 mysql
useradd -u 306 -g 306 -r -s /sbin/nologin -d /data/mysql mysql
getent passwd mysql
mysql:x:306:306::/data/mysql:/sbin/nologin

mkdir -p /data/mysql
chown mysql.mysql /data/mysql
chmod 770 /data/mysql
ll -d /data/mysql
drwxr-x--- 2 mysql mysql 6 Nov 18 15:50 /data/mysql
6)创建存放数据库的目录
mkdir /data/mysql
chown mysql:mysql /data/mysql
ll -d /data/mysql
drwxr-xr-x 2 mysql mysql 6 Nov 19 12:46 /data/mysql
7)创建数据库文件
./scripts/mysql_install_db --user=mysql --datadir=/data/mysql
Installing MariaDB/MySQL system tables in '/data/mysql' ...
OK

To start mysqld at boot time you have to copy
support-files/mysql.server to the right place for your system


Two all-privilege accounts were created.
One is root@localhost, it has no password, but you need to
be system 'root' user to connect. Use, for example, sudo mysql
The second is mysql@localhost, it has no password either, but
you need to be the system 'mysql' user to connect.
After connecting you can set the password, if you would need to be
able to connect as any of these users with a password and without sudo

See the MariaDB Knowledgebase at http://mariadb.com/kb or the
MySQL manual for more instructions.

You can start the MariaDB daemon with:
cd '.' ; ./bin/mysqld_safe --datadir='/data/mysql'

You can test the MariaDB daemon with mysql-test-run.pl
cd './mysql-test' ; perl mysql-test-run.pl

Please report any problems at http://mariadb.org/jira

The latest information about MariaDB is available at http://mariadb.org/.
You can find additional information about the MySQL part at:
http://dev.mysql.com
Consider joining MariaDB's strong and vibrant community:
https://mariadb.org/get-involved/
8)创建数据库的配置文件
vim /etc/my.cnf
[mysqld]
server-id=1
log-bin
datadir=/data/mysql
socket=/data/mysql/mysql.sock
log-error=/data/mysql/mysql.log
pid-file=/data/mysql/mysql.pid

[client]
socket=/data/mysql/mysql.sock
9)设置启动脚本
cp /usr/local/mysql/support-files/mysql.server /etc/init.d/mysqld
vim /etc/init.d/mysqld
datadir=
修改成
datadir=/data/mysqld
10)启动服务
chkconfig --add mysqld
chkconfig --list mysql
mysqld         	0:off	1:off	2:on	3:on	4:on	5:on	6:off

service mysqld start
Starting mysqld (via systemctl):                           [  OK  ]

ss -tnl
State           Recv-Q          Send-Q                   Local Address:Port                   Peer Address:Port
LISTEN          0               128                            0.0.0.0:22                          0.0.0.0:*
LISTEN          0               128                               [::]:22                             [::]:*
LISTEN          0               80                                   *:3306                              *:*
11)设置PATH环境变量
echo 'PATH=/usr/local/mysql/bin:$PATH' > /etc/profile.d/mysql.sh
. /etc/profile.d/mysql.sh
echo $PATH
/usr/local/mysql/bin:/usr/local/sbin:/usr/local/bin:/usr/sbin:/usr/bin:/root/bin
12)登录到Mariadb
mysql
Welcome to the MariaDB monitor.  Commands end with ; or \g.
Your MariaDB connection id is 10
Server version: 10.4.22-MariaDB-log MariaDB Server

Copyright (c) 2000, 2018, Oracle, MariaDB Corporation Ab and others.

Type 'help;' or '\h' for help. Type '\c' to clear the current input statement.

MariaDB [(none)]> show databases;
+--------------------+
| Database           |
+--------------------+
| information_schema |
| mysql              |
| performance_schema |
| test               |
+--------------------+
4 rows in set (0.000 sec)
13)对数据库进行安全加固
mysql_secure_installation

NOTE: RUNNING ALL PARTS OF THIS SCRIPT IS RECOMMENDED FOR ALL MariaDB
      SERVERS IN PRODUCTION USE!  PLEASE READ EACH STEP CAREFULLY!

In order to log into MariaDB to secure it, we'll need the current
password for the root user. If you've just installed MariaDB, and
haven't set the root password yet, you should just press enter here.

Enter current password for root (enter for none):
OK, successfully used password, moving on...

Setting the root password or using the unix_socket ensures that nobody
can log into the MariaDB root user without the proper authorisation.

You already have your root account protected, so you can safely answer 'n'.

Switch to unix_socket authentication [Y/n] y
Enabled successfully!
Reloading privilege tables..
 ... Success!


You already have your root account protected, so you can safely answer 'n'.

Change the root password? [Y/n] y
New password:
Re-enter new password:
Password updated successfully!
Reloading privilege tables..
 ... Success!


By default, a MariaDB installation has an anonymous user, allowing anyone
to log into MariaDB without having to have a user account created for
them.  This is intended only for testing, and to make the installation
go a bit smoother.  You should remove them before moving into a
production environment.

Remove anonymous users? [Y/n] y
 ... Success!

Normally, root should only be allowed to connect from 'localhost'.  This
ensures that someone cannot guess at the root password from the network.

Disallow root login remotely? [Y/n] y
 ... Success!

By default, MariaDB comes with a database named 'test' that anyone can
access.  This is also intended only for testing, and should be removed
before moving into a production environment.

Remove test database and access to it? [Y/n] y
 - Dropping test database...
 ... Success!
 - Removing privileges on test database...
 ... Success!

Reloading the privilege tables will ensure that all changes made so far
will take effect immediately.

Reload privilege tables now? [Y/n] y
 ... Success!

Cleaning up...

All done!  If you've completed all of the above steps, your MariaDB
installation should now be secure.

Thanks for using MariaDB!
14)再次登录Mariadb
mysql -uroot -p123456
Welcome to the MariaDB monitor.  Commands end with ; or \g.
Your MariaDB connection id is 10
Server version: 10.4.22-MariaDB-log MariaDB Server

Copyright (c) 2000, 2018, Oracle, MariaDB Corporation Ab and others.

Type 'help;' or '\h' for help. Type '\c' to clear the current input statement.

MariaDB [(none)]>