C#把dll分别放在指定的文件夹
C#客户端程序,生成后是一个exe,如果带有大量的dll,那么dll和exe会混乱在一起,看起来非常混乱,我们可以建立一个文件夹,把dll放进去,这样看起来就非常的清晰美观。
一共有二种方法
第一种,配置方法。
1.我们建立一个winform程序,对2个dll分别引用,调用里面的方法
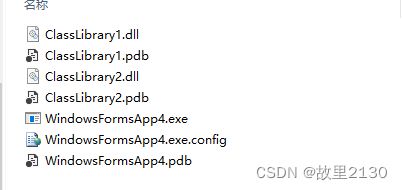
生成后的文件是这样的
2.打开App.config文件夹,其中dll和dll/2相当于文件夹
3.选择所有的dll,把复制本地设置成 FALSE
4.打开项目的exe路径,分别建立dll文件夹,把其中一个dll放进去
建立dll/2文件夹,把另一个dll放进去
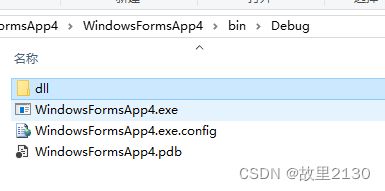
5.文件夹的效果
WindowsFormsApp4.exe
WindowsFormsApp4WindowsFormsApp4.exe.config
dll
...../ClassLibrary1.dll
...../2/ClassLibrary2.dll
6.效果,这样就比较好看一些。
第二种,代码方法
1.同样建立一个项目,选择所有的dll,把复制本地设置成 FALSE
2.在窗体的初始化出写入
AppDomain.CurrentDomain.AssemblyResolve += CurrentDomain_AssemblyResolve; static System.Reflection.Assembly CurrentDomain_AssemblyResolve(object sender, ResolveEventArgs args)
{
string path = System.IO.Path.Combine(AppDomain.CurrentDomain.BaseDirectory, @"dll2\");
path = System.IO.Path.Combine(path, args.Name.Split(',')[0]);
path = String.Format(@"{0}.dll", path);
return System.Reflection.Assembly.LoadFrom(path);
}3.在项目的debug文件夹中,建立代码中的名字dll2文件夹,把所有的dll扔进去即可。
4.代码
using System;
using System.Collections.Generic;
using System.ComponentModel;
using System.Data;
using System.Drawing;
using System.IO;
using System.Linq;
using System.Reflection;
using System.Text;
using System.Threading.Tasks;
using System.Windows.Forms;
namespace WindowsFormsApp1
{
public partial class Form1 : Form
{
public Form1()
{
InitializeComponent();
AppDomain.CurrentDomain.AssemblyResolve += CurrentDomain_AssemblyResolve;
}
private void Form1_Load(object sender, EventArgs e)
{
ClassLibrary1.Class1 c = new ClassLibrary1.Class1();
ClassLibrary2.Class1 c1 = new ClassLibrary2.Class1();
MessageBox.Show(c.A() + c1.B());
}
///
/// 对外解析dll失败时调用
///
///
///
/// 拓展
当我们有一个项目的时候,项目中有很多dll,可以配置,使这些dll生成到固定的目录路径下,这样就不用去复制dll了。
1.建立2个项目,第一个输出类库,第二个输出控制台程序
2.Class1代码
using System;

namespace ClassLibrary1
{
    public class Class1
    {
        public int A(int a, int b)
        {
            return a + b;
        }
    }
}
3.Program的代码
using ClassLibrary1;
using Newtonsoft.Json;
using System;
using System.Collections.Generic;
using System.Linq;

namespace ConsoleApp4
{
    static class Program
    {
        static void Main(string[] args)
        {
            Class1 class1 = new Class1();
            int c = class1.A(1, 2);
            Console.WriteLine(c);
            Console.ReadKey();
        }
    }
}
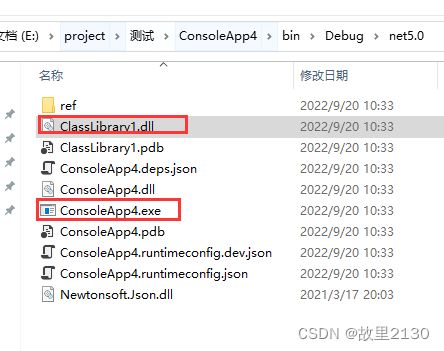
4.正常情况下,我们都是进行引用,就是使用ConsoleApp4直接项目引用项目ClassLibrary1,然后点击生成,那么ClassLibrary1的dll自动就和ConsoleApp4在一起了。
下面,如果我们要把ClassLibrary1.dll放在a文件夹下面
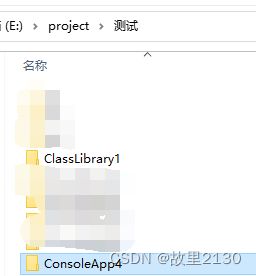
1.在项目中可以看到,两个项目是同级别的目录
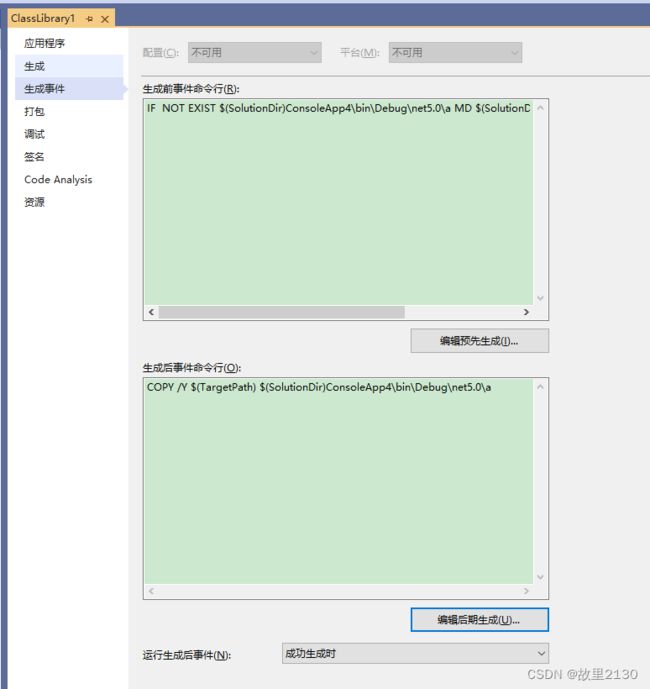
2.在第一个项目中增加如下代码
生成前命令,就是在生成dll之前,进行操作
IF NOT EXIST $(SolutionDir)ConsoleApp4\bin\Debug\net5.0\a MD $(SolutionDir)ConsoleApp4\bin\Debug\net5.0\a代码意思: 如果不存在这个路径,那么就建立一个路径
生成后命令,就是在生成dll之后,进行操作
COPY /Y $(TargetPath) $(SolutionDir)ConsoleApp4\bin\Debug\net5.0\a代码意思:复制此$(TargetPath)路径的文件到a目录下
BAT命令参考
Windows bat脚本学习二(命令窗口指令)_qq_34981的博客-CSDN博客_命令窗口指令
3.当我们点击重新生成代码的时候,可以看到自动生成了a文件夹和ClassLibrary1.dll
这个与建立文件夹,然后选择生成路径的功能是一样的。
然后再使用最上面的2种方法,把dll进行加载,就可以运行了,主要是脚本命令的使用。
来源:C#把dll分别放在指定的文件夹_wpf core dll 放文件夹-CSDN博客

