Canvas艺术之旅:探索锚点抠图的无限可能
说在前面
在日常的图片处理中,我们经常会遇到需要抠图的情况,无论是为了美化照片、制作海报,还是进行图片合成。抠图对于我们来说也是一种很常用的功能了,今天就让我们一起来看下怎么使用canvas来实现一个锚点抠图功能。
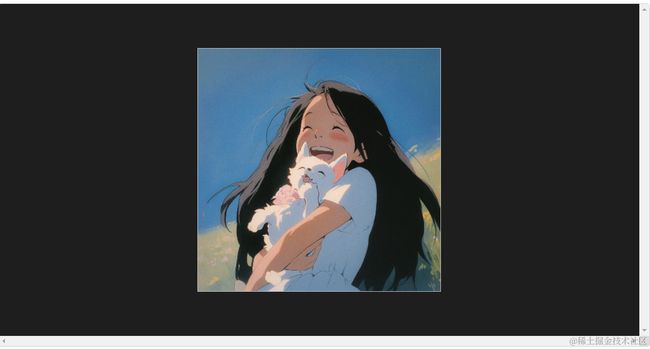
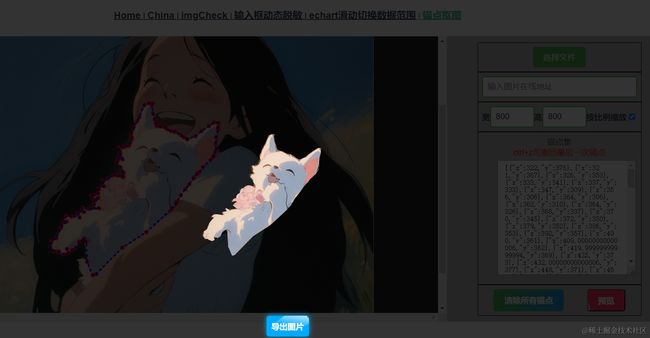
效果展示
体验地址
http://jyeontu.xyz/JDemo/#/imgCut
代码实现
一、图片上传
想要进行抠图的话我们得先有图片是吧,所以要有个图片上传的功能。
1、本地图片上传
这里我们使用简单的点击按钮上传,前面也有文章介绍过了拖拽上传功能的实现,这里就不赘述了,有兴趣的可以看下这篇文章:《文件拖拽上传功能已经烂大街了,你还不会吗?》
这里我们直接使用input标签来实现上传功能即可:
handleFileUpload(e) {
  let file = e.target.files[0];
  if (!file) return;
  this.srcLink = "";
  const reader = new FileReader();
  reader.onload = event => {
    const img = new Image();
    img.onload = () => {
      this.image = img;
      this.width = img.width;
      this.height = img.height;
      this.originWidth = img.width;
      this.originHeight = img.height;
      this.drawCanvas();
    };
    img.src = event.target.result;
  };
  reader.readAsDataURL(file);
}
2、在线链接图片
使用Input输入在线图片链接:
<input
    type="input"
    @change="inputSrc"
    placeholder="输入图片在线地址"
    v-model="srcLink"
    class="input-style"
    style="width: 100%;"
/>
getImageBase64FromURL(url, callback) {
  return new Promise(resove => {
    const xhr = new XMLHttpRequest();
    xhr.onload = function() {
      const reader = new FileReader();
      reader.onloadend = function() {
        resove(reader.result);
      };
      reader.readAsDataURL(xhr.response);
    };
    xhr.open("GET", url);
    xhr.responseType = "blob";
    xhr.send();
  });
},
async inputSrc() {
  const src = await this.getImageBase64FromURL(this.srcLink);
  const img = new Image();
  img.onload = () => {
    this.image = img;
    this.width = img.width;
    this.height = img.height;
    this.drawCanvas();
  };
  img.src = src;
}
3、将上传的图片绘制到canvas中
drawCanvas() {
  setTimeout(() => {
    if (!this.image || !this.ctx) {
      return;
    }
    this.ctx.clearRect(0, 0, this.width, this.height);
    this.ctx.save();
    this.ctx.translate(this.width / 2, this.height / 2);
    this.ctx.drawImage(
      this.image,
      -this.width / 2,
      -this.height / 2,
      this.width,
      this.height
    );
    this.ctx.restore();
    this.realPoints.forEach(point => {
      this.drawPoint(point.x, point.y);
    });
    this.connectPoints(); // 每次绘制canvas后连接所有点
  }, 100);
}
使用ctx.clearRect()方法清除整个画布,以便在重新绘制之前清空之前的内容。然后,使用ctx.save()方法保存当前的绘图状态。
通过ctx.translate()方法将绘图原点移动到画布的中心位置(this.width / 2, this.height / 2),这样可以方便地绘制图像和点的坐标。
使用ctx.drawImage()方法绘制图像,参数分别为图像对象this.image、图像左上角的x和y坐标(-this.width / 2, -this.height / 2),以及图像的宽度和高度(this.width, this.height)。这样就在画布上绘制了图像。
接着使用ctx.restore()方法恢复之前保存的绘图状态。
然后,通过forEach循环遍历this.realPoints数组中的每个点,调用this.drawPoint()方法绘制每个点。
最后,调用this.connectPoints()方法连接所有的点,以绘制线条。
二、锚点选择与撤销
1、监听鼠标点击
这里我们使用canvas来展示图片:
<canvas
    ref="canvas"
    id="example-canvas"
    :width="width"
    :height="height"
    @click="canvasClick"
    tabindex="0"
>canvas>
监听canvas的点击事件并保存点击坐标
canvasClick(event) {
  if (!this.image || !this.ctx) {
    return;
  }
  const x = event.offsetX / (this.width / this.originWidth);
  const y = event.offsetY / (this.height / this.originHeight);
  this.points.push({ x, y }); // 将坐标添加到数组中
  const point = this.tranPoint({ x, y });
  this.drawPoint(point.x, point.y);
},
2、绘制锚点
前面我们获取到点击坐标了,这里我们需要在该坐标上绘制上锚点:
drawPoint(x, y) {
  // 绘制一个小圆点
  this.ctx.beginPath();
  this.ctx.arc(x, y, 4, 0, 2 * Math.PI);
  this.ctx.fillStyle = "red";
  this.ctx.fill();
  this.ctx.closePath();
  this.connectPoints(); // 每次点击后连接所有点
},
使用beginPath()方法创建路径,然后使用arc()方法绘制圆形,参数解释如下:
- x: 圆心的x轴坐标
- y: 圆心的y轴坐标
- 4: 圆的半径
- 0, 2 * Math.PI: 圆弧的起始角度和结束角度,这里表示绘制一个完整的圆
接下来设置fillStyle属性为红色,使用fill()方法填充圆形区域,并使用closePath()方法关闭路径。
3、连接锚点
用虚线将所有锚点按顺序连接起来:
connectPoints() {
  if (this.realPoints.length <= 1) {
    return;
  }
  this.ctx.beginPath();
  this.ctx.moveTo(this.realPoints[0].x, this.realPoints[0].y);
  for (let i = 1; i < this.realPoints.length; i++) {
    this.ctx.lineTo(this.realPoints[i].x, this.realPoints[i].y);
  }
  this.ctx.setLineDash([5, 5]);
  this.ctx.strokeStyle = "blue";
  this.ctx.lineWidth = 2;
  this.ctx.stroke();
  this.ctx.closePath();
}
如果realPoints数组长度大于1,接着使用beginPath()方法开始创建新的路径,并通过moveTo()方法将画笔移动到第一个点的位置(this.realPoints[0].x, this.realPoints[0].y)。随后使用for循环遍历realPoints数组中的每个点,使用lineTo()方法将画笔移动到下一个点的位置(this.realPoints[i].x, this.realPoints[i].y),从而连接所有的点。
在绘制线条之前,通过setLineDash()方法设置虚线的样式,这里是一个5像素的实线和5像素的空白,表示虚线的样式。然后设置线条的颜色为蓝色,线宽为2像素,最后通过stroke()方法绘制连接线条。最后使用closePath()方法关闭路径。
4、锚点撤销功能
平时我们都习惯了通过Ctrl+Z来撤销上一步操作,这里我们也加上,通过监听键盘按键事件来实现当用户按下Ctrl+Z组合键时,撤销最后一步锚点操作,也就是将锚点列表的最后一个删除即可:
document.addEventListener("keydown", event => {
  if (event.ctrlKey && event.key === "z") {
    event.preventDefault();
    that.undoPoint();
  }
});
undoPoint() {
  if (this.points.length > 0) {
    this.points.pop();
    this.drawCanvas();
  }
},
5、获取锚点集合
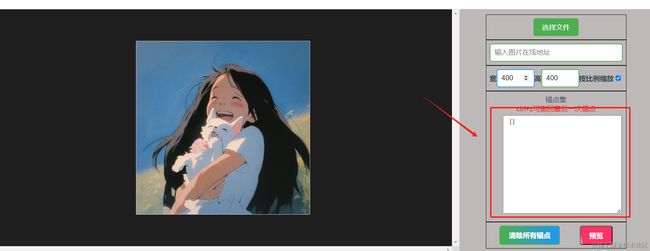
这里我们在右边预留了一个展示锚点列表的文本域
<textarea v-model="pointsStr" class="points-list">textarea>
computed: {
    pointsStr() {
      return JSON.stringify(this.realPoints);
    }
}
大家觉得这里输出锚点集合可以做什么?这里先卖个关子,下一篇博客就会需要用到这里的锚点集合了。
三、尺寸修改
页面上我们可以对图片尺寸进行修改,便于获取不同比例下的锚点集:
1、页面图片尺寸修改
<label class="label-style">宽label>
<input
    type="number"
    v-model="width"
    @input="resizeImage($event, 'width')"
    @keydown.ctrl.z.prevent
    class="input-style"
/>
<label class="label-style">高label>
<input
    type="number"
    v-model="height"
    @input="resizeImage($event, 'height')"
    @keydown.ctrl.z.prevent
    class="input-style"
/>
<label class="label-style">按比例缩放label>
<input type="checkbox" v-model="aspectRatio" class="checkbox-style" />
resizeImageByWidth(event) {
  this.width = event.target.value ? parseInt(event.target.value) : null;
  if (this.aspectRatio && this.width) {
    this.height = Math.round(
      (this.width / this.originWidth) * this.originHeight
    );
  }
},
resizeImageByHeight(event) {
  this.height = event.target.value ? parseInt(event.target.value) : null;
  if (this.aspectRatio && this.height) {
    this.width = Math.round(
      (this.height / this.originHeight) * this.originWidth
    );
  }
},
resizeImage(event, dimension) {
  if (!this.image) {
    return;
  }
  if (dimension === "width") {
    this.resizeImageByWidth(event);
  } else if (dimension === "height") {
    this.resizeImageByHeight(event);
  }
  if (
    this.aspectRatio &&
    (!event || event.target !== document.activeElement)
  ) {
    const aspectRatio = this.originWidth / this.originHeight;
    if (this.width && !this.height) {
      this.height = Math.round(this.originWidth / aspectRatio);
    } else if (!this.width && this.height) {
      this.width = Math.round(this.originHeight * aspectRatio);
    } else if (this.width / aspectRatio < this.height) {
      this.width = Math.round(this.originHeight * aspectRatio);
    } else {
      this.height = Math.round(this.originWidth / aspectRatio);
    }
  }
  this.$refs.canvas.width = this.width ? this.width : null;
  this.$refs.canvas.height = this.height ? this.height : null;
  this.image.width = this.width;
  this.image.height = this.height;
  this.drawCanvas();
}
根据 dimension 的值(可能是 “width” 或 “height”),调用相应的方法来调整图像的宽度或高度。
resizeImageByWidth(event) 方法用于根据给定的宽度调整图像的大小。它首先将 event.target.value 转换为整数,并将结果赋值给 this.width。然后,如果启用了纵横比 (this.aspectRatio) 并且 this.width 有值,则计算出相应的高度,使得调整后的图像与原始图像保持相同的纵横比。
resizeImageByHeight(event) 方法用于根据给定的高度调整图像的大小。它的逻辑与 resizeImageByWidth(event) 类似,只是操作的是 this.height 和宽高比的计算方式不同。
接下来,如果启用了纵横比 (this.aspectRatio) 并且没有通过键盘事件触发该方法,则根据原始图像的宽高比 (this.originWidth / this.originHeight) 进行额外的调整。具体的调整逻辑如下:
- 如果只设置了宽度 (
this.width) 而没有设置高度 (this.height),则根据原始图像的宽高比计算出相应的高度。 - 如果只设置了高度 (
this.height) 而没有设置宽度 (this.width),则根据原始图像的宽高比计算出相应的宽度。 - 如果设置了宽度和高度,并且根据当前的宽高比计算出的宽度小于当前的高度,则根据原始图像的宽高比计算出相应的宽度。
- 否则,根据原始图像的宽高比计算出相应的高度。
最后,根据调整后的宽度和高度,更新画布(this.$refs.canvas.width 和 this.$refs.canvas.height),以及图像的宽度和高度 (this.image.width 和 this.image.height)。然后调用 drawCanvas() 方法重新绘制画布。
2、锚点根据缩放比例进行修改
图片缩放之后,锚点位置也要进行对应的缩放。
tranPoint(point) {
  let { x, y } = point;
  x = x * (this.width / this.originWidth);
  y = y * (this.height / this.originHeight);
  return { x, y };
}
四、抠图预览
1、图片预览组件
这里我们简单编写一个图片预览弹窗组件:
模板部分包含了一个遮罩层和图片预览,以及一个导出按钮。当用户点击遮罩层时,会触发 hidePreview 方法,关闭预览。图片预览部分使用了动态绑定的 :src 属性来显示当前的图片,而导出按钮则绑定了 handleExport 方法,在点击时会触发导出操作。
脚本部分定义了名为 “previewImg” 的组件,其中包括了两个属性 imageList 和 currentImage,分别用于接收图片列表和当前显示的图片。在方法部分,定义了 hidePreview 方法用于关闭预览,并通过 $emit 向父组件发送 “close” 事件,以通知父组件关闭预览。另外还有 handleExport 方法,用于处理导出操作,并通过 $emit 向父组件发送 “export” 事件,并传递当前图片的路径。
2、抠图操作
cutImg() {
  const canvas = document.createElement("canvas");
  const ctx = canvas.getContext("2d");
  if (!this.image || !ctx) {
    return;
  }
  const image = this.image;
  canvas.width = image.width;
  canvas.height = image.height;

  // 定义剪切路径
  const cutPath = this.realPoints;
  ctx.beginPath();
  ctx.moveTo(cutPath[0].x, cutPath[0].y);
  for (let i = 1; i < cutPath.length; i++) {
    ctx.lineTo(cutPath[i].x, cutPath[i].y);
  }
  ctx.closePath();
  ctx.clip();

  // 绘制图片
  ctx.drawImage(image, 0, 0, this.width, this.height);
  // 将Canvas元素转换为PNG图像
  const imgData = canvas.toDataURL("image/png");
  this.currentImage = imgData;
  this.showImg = true;
}
获取要剪切的图片对象,并根据该图片的宽度和高度设置 的宽度和高度。
然后,定义剪切路径,通过遍历 cutPath 数组中的点坐标,使用 ctx.lineTo() 方法绘制路径。最后使用 ctx.closePath() 方法闭合路径,并调用 ctx.clip() 方法将剪切路径应用于上下文。
接着,使用 ctx.drawImage() 方法绘制剪切后的图片。传入的参数包括原始图片对象、剪切后的起始点坐标以及剪切后的宽度和高度。
最后,使用 canvas.toDataURL() 方法将 元素转换为 base64 编码的 PNG 图像数据,并将该数据赋值给 imgData 变量。然后将 imgData 赋值给 currentImage 属性,将剪切后的图片显示出来(通过在模板中绑定 currentImage)。
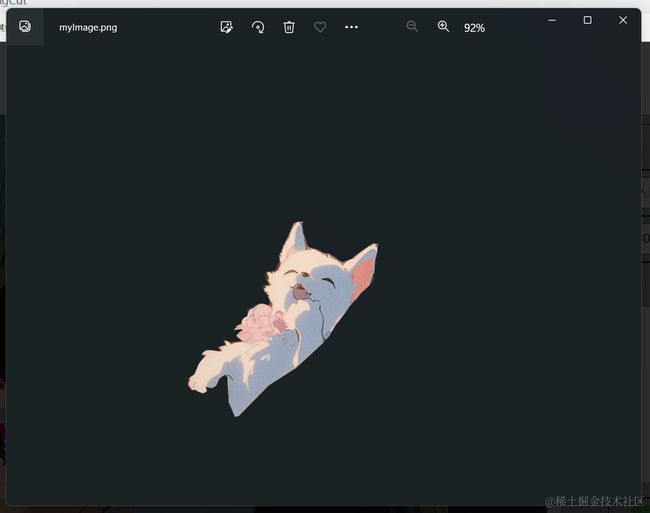
五、导出抠图图片
downloadImg(imgData) {
  // 创建一个链接元素,将图像数据作为URL设置给它
  const link = document.createElement("a");
  link.download = "myImage.png";
  link.href = imgData;

  // 触发链接的下载事件
  link.click();
}
首先,通过 document.createElement("a") 创建一个 元素,并将该元素赋值给 link 变量。
然后,将要下载的图片的文件名设置为 “myImage.png”,可以根据实际需要修改。
接下来,将图片数据 imgData 设置为链接元素的 href 属性,这样点击链接时会下载该图片。
最后,通过调用 link.click() 方法触发链接的点击事件,从而触发下载操作。
源码地址
gitee
https://gitee.com/zheng_yongtao/jyeontu-vue-demo.git
公众号
关注公众号『前端也能这么有趣』发送 vueDemo即可获取源码。
说在后面
这里是 JYeontu,现在是一名前端工程师,有空会刷刷算法题,平时喜欢打羽毛球 ,平时也喜欢写些东西,既为自己记录 ,也希望可以对大家有那么一丢丢的帮助,写的不好望多多谅解 ,写错的地方望指出,定会认真改进 ,偶尔也会在自己的公众号『
前端也能这么有趣』发一些比较有趣的文章,有兴趣的也可以关注下。在此谢谢大家的支持,我们下文再见 。


