vue2+three.js实现页面引入3d模型并进行简单模型控制
一、通过npm下载three.js相关插件
npm i three gsap二、页面引入
import * as THREE from "three";
// 引入扩展库OrbitControls.js
import { OrbitControls } from "three/addons/controls/OrbitControls.js";
// 引入扩展库GLTFLoader.js
import { GLTFLoader } from "three/addons/loaders/GLTFLoader.js";
三、声明场景、相机等相关变量
      bodyMaterial: null, //材质控制
      computer: "", //模型声明
      scene: "", //场景声明
      crame: "", //相机声明
      renderer: "", //渲染器声明
四、给3d模型创建盒子
五、创建场景、相机、地面、材质
 //创建材质
      const textureLoader = new THREE.TextureLoader();
      const texture = textureLoader.load("./model/hei.png");
      this.bodyMaterial = new THREE.MeshBasicMaterial({ map: texture });
      //创建场景
      this.scene = new THREE.Scene();
      //创建相机
      this.camera = new THREE.PerspectiveCamera(
        75,
        window.innerWidth / window.innerHeight,
        0.1,
        1000
      );
      this.camera.position.set(0, 2, 6);
      //创建渲染器
      this.renderer = new THREE.WebGLRenderer({
        //开启抗锯齿
        antialias: true,
      });
      this.renderer.setSize(window.innerWidth, window.innerHeight);
      const canvas = this.$refs.canvas;
      canvas.appendChild(this.renderer.domElement);
//渲染器背景
      // this.renderer.setClearColor("#000");
      this.scene.background = new THREE.Color("#ccc");
      this.scene.environment = new THREE.Color("#ccc");
      render();
      //添加地面
      const gridHelper = new THREE.GridHelper(10, 10);
      this.scene.add(gridHelper);
      //添加控制器
      controls = new OrbitControls(this.camera, this.renderer.domElement);
创建材质代码段解释:此时的方法是将一个图片转换为一个材质,并将该材质贴到3d电脑模型的屏幕上,(具体怎么精确贴到模型屏幕上,下面代码做有解释)
六、外部模型引入(格式为:glb/gltf)
 //模型引入
      const loader = new GLTFLoader();
      loader.load("./model/computer.glb", (gltf) => {
        this.computer = gltf.scene;
        this.computer.position.set(0, 0, 0);
      this.scene.add(this.computer );
七、渲染模型之后想进行控制模型的某一位置
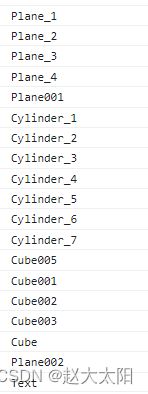
可以在控制台打印出模型位置name,一般建模时会声明出来模型位置name
 this.computer.traverse((child) => {
          if (child.isMesh) {
            console.log(child.name);
          }
本模型 Plane002为屏幕名称,下面对Plane002进行控制
        this.computer.traverse((child) => {
          if (child.isMesh) {
            console.log(child.name);
          }
          if (child.isMesh && child.name.includes("Plane002")) {
            carbody = child;
            carbody.material = this.bodyMaterial;
          }
        });
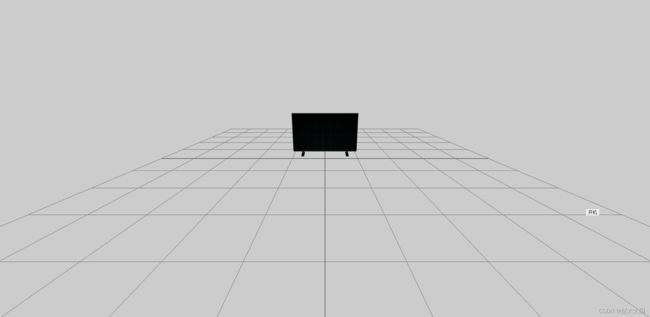
此时就将上面所转换的图片精准的贴在模型的屏幕上
八、材质控制(点击控制材质变化)
       //开机
    open() {
      const textureLoader = new THREE.TextureLoader();
      const newtexture1 = textureLoader.load("./model/win.png");
      this.bodyMaterial.map = newtexture1;
      this.bodyMaterial.needsUpdate = true;
      // this.paoche.visible=false   模型.visible  控制渲染的模型是否隐藏/显示
    },
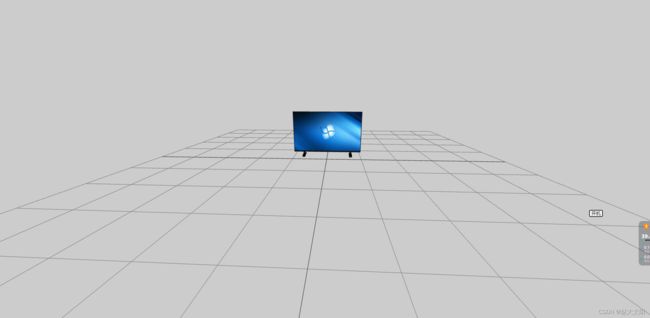
九、效果展示
点击开机按钮
十、
以上就是拿到指定模型name 进行一些3d模型控制
例1:4s店车辆颜色选择。使用上面的方法太过繁琐。不建议使用。
当拿到模型某一位置名字时,可以直接进行更换此位置颜色。
      //创建材质
      this.bodyMaterial = new THREE.MeshBasicMaterial({
        color: this.color,
        metalness: 1,
        roughness: 0.5,
        clearcoat: 1,
        clearcoatRoughness: 0,
      });
控制材质
this.bodyMaterial.color.set("#fff");支持多颜色更改
例2:控制模型某一部位(如vr模型驾驶,点击车门,车门打开,进入查看驾驶室)
此时需要使用射线进行相应操作。本次就不做详细赘述
例3:将html页面嵌套到3d模型中
此时需要使用cssRenderer 3d渲染器加 CSS3DObject 对象进行相应操作。本次就不做详细赘述
上面仅为自身理解,如有错误请大佬指正!!!


