- Stable diffusion 3.5本地运行环境配置记录
寸先生的牛马庄园
扩散模型stablediffusion
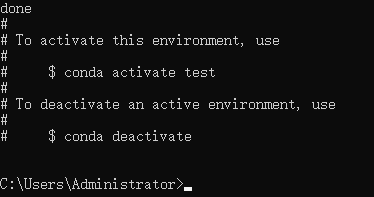
1.环境配置创建虚环境condacreate-nsd3.5python=3.10Pytorch(>2.0)condainstallpytorch==2.2.2torchvision==0.17.2torchaudio==2.2.2pytorch-cuda=12.1-cpytorch-cnvidiaJupyter能使用Anaconda虚环境condainstallipykernelpython-mi
- PyTorch使用常见异常和解决办法汇总
东哥说AI
机器学习与深度学习实战PyTorch异常解决办法
文章目录1.使用conda安装PyTorch后同时在Jupyter导入失败Nomodulenamed'torch'2.PyTorch使用张量时报错expectedscalartypeDoublebutfoundFloat3.PyTorch创建Embedding时报错IndexError:indexoutofrangeinself1.使用conda安装PyTorch后同时在Jupyter导入失败No
- emmc kernel driver流程
zjuestcer
linuxkernel存储emmcdriver
首先执行的第一个函数:mmc_blk_register(__init触发)1.完成了mmcblock设备的注册,可以在proc/devices下看到这个Block设备2.将mmc_driver和mmc_bus_type进行绑定,这样将mmc_bus_probe和mmc_blk_probe联系起来了第二个函数:sprd_sdhc_probe(__init触发)
- 最新版Jupyter Notebook的汉化
jay丿
jupyterpythonide
最新版JupyterNotebook的汉化,要在Anacondaprompt里面输入pipinstalljupyterlab-language-pack-zh-CN,然后在setting里面设置为中文,其他地方不行
- (一文搞定)使用sd卡,往野火EBF6UL/LL-pro板子,移植官方uboot、kernel以及构建rootfs
又摆有菜
嵌入式硬件arm开发linux
0、事先声明1、我的pc是Linux操作系统,接下来的操作也都是在linux系统上的。不是windows操作系统。(如若你是win系统,可安装虚拟机,解决这个问题。此帖不讨论如何在win上安装虚拟机)。2、只在win下面使用了串口软件mobaxterm。(此操作,事先请先安装usb转串口ch340驱动)1、EBF6UL/LL-pro简介这是野火的开发版,芯片使用的nxp的imx6ull。其他不在介
- Pycharm远程连接服务器和配置远程python环境
hlee-top
技巧pycharm服务器
首先在setting中添加PythonInterpreter,点击右边齿轮图标添加输入连接和用户名然后选择python环境的路径,一般是/home/username/anaconda3/envs/envsname/bin/python。下面为服务器到本地文件的映像。然后在顶部工具栏中的Tools中Deployment里选择Configuration进行配置,Localpath为本地项目的位置,De
- pytorch阶段性总结2
Colinnian
pytorch人工智能python
nn神经网络functional当中卷积的使用importtorchimporttorch.nn.functionalasF#数据input=torch.tensor([[1,2,0,3,1],[0,1,2,3,1],[1,2,1,0,0],[5,2,3,1,1],[2,1,0,1,1]])#卷积核kernel=torch.tensor([[1,2,1],[0,1,0],[2,1,0]])#min
- 【模块】AKConv卷积模块
dearr__
扒网络模块深度学习人工智能
论文《AKConv:ConvolutionalKernelwithArbitrarySampledShapesandArbitraryNumberofParameters》1、作用AKConv旨在解决深度学习中标准卷积操作的两个固有限制:限定在局部窗口内,限制了从其他位置捕获信息的能力;卷积核固定大小,限制了对不同目标形状和大小的适应能力。这种新方法允许卷积核具有任意参数和采样形状,提供了一种灵活
- 【解读】核密度图
dearr__
python开发语言
def:what核密度估计(KernelDensityEstimation,简称KDE)是一种用来估计随机变量概率密度函数的非参数方法实现:(库函数)howimportseabornassnsimportmatplotlib.pyplotasplt#使用Seaborn绘制KDE图sns.kdeplot(data,shade=True)#添加标签和标题plt.xlabel('Data')plt.yl
- 在Anaconda的虚拟环境中安装R,并在vscode中使用
smx6666668
r语言vscode开发语言
在Anaconda的虚拟环境中使用R,并且希望在VSCode中同时使用Python和R,确实需要同时安装Python和R。这是因为VSCode的Jupyter插件和内核管理依赖于Python,而R则作为Jupyter的另一个内核运行。以下是具体的操作步骤和逻辑:1.为什么需要同时安装Python和RVSCode的Jupyter插件:VSCode的Jupyter扩展是基于Python的,安装后需要P
- conda创建环境/安装包报错网络问题
胖胖大王叫我来巡山
condapython
1.报错(base)xx@xxxdeMacBook-Proanaconda3%condacreate-nworkpython=3.7.11Collectingpackagemetadata(current_repodata.json):failedCondaHTTPError:HTTP000CONNECTIONFAILEDforurlElapsed:-AnHTTPerroroccurredwhen
- 反调试技术 linux,动态反调试技术
Coming May
反调试技术linux
一、异常1.SEH2.SetUnhandledExceptionFilter()进程中发生异常,若SEH未处理或者注册的SEH不存在,此时会调用执行系统的kernel32!UnhandledExceptionFilter()API.该函数内部会运行系统的最后一个异常处理器(名为TopLevelExceptionFilter或LastExceptionFilter).系统最后的异常处理器通常会弹出错
- STM32MP157A之U-boot移植
学编程的小杨
stm32嵌入式硬件单片机
(一)U-boot移植步骤1.1》导入源码1)打开ubuntu,打开终端(ctrl+alt+T),在用户目录下建立如下目录:linux@ubuntu:~$mkdirfs_mp157alinux@ubuntu:~$cdfs_mp157a/linux@ubuntu:~/fs_mp157a$mkdirkerneldriversfs_mp157a-----stm32mp157驱动开发总目录kernel--
- 1.4常规es报错问题
AustinCien
ELFK运维elkelasticsearch
问题一:unabletoinstallsyscallfilter[2016-11-06T16:27:21,712][WARN][o.e.b.JNANatives]unabletoinstallsyscallfilter:Java.lang.UnsupportedOperationException:seccompunavailable:requireskernel3.5+withCONFIG_SE
- python包安装相关-conda,pip-虚拟环境
hn_lgc
python深度学习anaconda
运行python的时候一定要注意当前运行所在环境位置,环境位置不同,包含的依赖包是不同的,然后不注意的话就是出很多莫名其妙的问题,比如一个pycharm里面不能运行的东西,命令行又能运行啥的PIP使用的一些点:pip安装包的时候加上后缀--prefer-binary不用最新的包,这样能避免很多包冲突安装不上的问题。为什么anaconda环境中,还需要用pip安装包,anaconda本身只提供部分包
- RDMA原理
完颜振江
网络服务器运维RDMA
RDMA(远程直接内存访问)技术通过绕过操作系统内核和CPU干预,实现高效的低延迟数据传输。以下是对其原理的系统性解析:1.核心原理零拷贝(Zero-copy):数据直接在应用内存与网卡间传输,无需内核缓冲区的复制。内核旁路(KernelBypass):应用程序通过用户态驱动直接操作网卡,减少上下文切换开销。CPU卸载(CPUOffload):数据传输由支持RDMA的智能网卡(RNIC)处理,释放
- 深度学习笔记线性代数方面,记录一些每日学习到的知识
肆——
人工智能深度学习python
记录一些每日学习到的新知识:torch:Torch是一个有大量机器学习算法支持的科学计算框架,是一个与Numpy类似的张量(Tensor)操作库jupyter:JupyterNotebook的本质是一个Web应用程序,便于创建和共享程序文档,支持实时代码,数学方程,可视化和markdown。用途包括:数据清理和转换,数值模拟,统计建模,机器学习等等。只有一个轴的张量,形状只有一个元素torch.a
- 【Python】工作流:Jupyter Notebook、Airflow
浪子西科
Pythonpythonjupyter开发语言
工作流:JupyterNotebook、Airflow1.JupyterNotebook1.1安装可以使用pip或者conda进行安装。使用pip安装:pipinstallnotebook使用conda安装:condainstall-cconda-forgenotebook1.2基本概念Notebook文件:以.ipynb为扩展名,它是一个包含代码、文本(支持Markdown格式)、图像和计算结果
- YOLOv8实例分割训练自己的数据集
NoContours
YOLOpython开发语言
转载https://blog.csdn.net/m0_51530640/article/details/1299752571.利用labelme进行数据标注1.1Labelme安装方法首先安装Anaconda,然后运行下列命令:####################forPython2####################condacreate--name=labelmepython=2.7s
- 【R语言】在Jupyter Notebook中使用conda管理的R语言
小丫么小阿豪
R语言
Motivation忽然发现jupyter竟然能拿来写R,帮教授配了个环境结果g了,试了一下感觉像是conda管理包的问题,记录一下正确的步骤。步骤创建一个新conda环境condacreate-nr-kernel激活环境condaactivater-kernel安装JupyternotebookcondainstallJupyter安装Rkernel(好像下面两步可以替换为condainstal
- flash_attn安装
壶小旭
PythonLinuxpython
flash_attn安装1.cuda-nvcc安装https://anaconda.org/nvidia/cuda-nvcc2.torch安装#https://pytorch.org/#找到对应cuda版本的torch进行安装pip3installtorchtorchvisiontorchaudio--index-urlhttps://download.pytorch.org/whl/cu1213
- Anaconda 2025 最新版安装与Python环境配置指南(附官方下载链接)
waicsdn_haha
程序员教程pythonlinuxjupyterfpga开发javawindows
一、软件定位与核心功能Anaconda2025是Python/R数据科学集成开发平台,预装1500+科学计算库,新增AI模型可视化调试、多环境GPU加速等特性。相较于传统Python安装,其优势包括:环境隔离:通过conda工具实现多版本Python环境共存包管理:一键安装NumPy/Pandas/Scikit-learn等工具链跨平台支持:Windows/macOS/Linux统一操作逻辑二、安
- 支持向量机 (Support Vector Machine, SVM)
数维学长986
支持向量机算法机器学习
支持向量机(SupportVectorMachine,SVM)支持向量机(SVM)是一种广泛应用于分类、回归分析以及异常检测的监督学习算法。它基于结构风险最小化(StructuralRiskMinimization,SRM)原则,通过寻找一个最优超平面来实现数据的分类。SVM不仅可以处理线性可分问题,也能够通过核技巧(KernelTrick)处理非线性可分问题。1.基本概念超平面:在特征空间中,S
- yolov5转onnx模型,onnx转rknn模型部署在rk3588平台上
wtqpshhh
YOLOpython
安装python等环境,以及相关依赖库,然后克隆YOLOv5仓库的源码。#安装anaconda参考前面环境搭建教程,然后使用conda命令创建环境condacreate-nyolov5python=3.9condaactivateyolov5#拉取最新的yolov5(教程测试时是v7.0),可以指定下版本分支#gitclonehttps://github.com/ultralytics/yolov
- 如何在jupyter notebook中切换虚拟环境
gelie11
pythonpytorch
如何在jupyternotebook中切换虚拟环境在base环境中安装nb_conda_kernels激活要切换的虚拟环境在激活的环境中安装ipykernel最后正常快捷启动jupyternotebook在base环境中安装nb_conda_kernelscondainstallnb_conda_kernels注意这个包只能用conda安装,如果安装不下来,去搜索离线安装,解压之后放在base环境
- jupyter notebook在Linux系统中导入虚拟环境
tiantian11253
linuxjupyterpython
一、创建虚拟环境:1、Anaconda自带的工具创建虚拟环境:1.1离线创建:condacreate-nenv_name--offlinepython=3.6.31.2在线创建:condacreate-nenv_namepython=3.6.3注:env_name表示你要创建的虚拟环境的名称python=3.6.3表示新建的环境指定的python解释器版本,不指定代表默认环境的python版本1.
- 如何使用Python快速开发一个带管理系统界面的网站-解析方案
萧鼎
python基础到进阶教程python开发语言
如果你想用Python开发一个管理系统界面的网站,并且希望界面美观,可以考虑以下几个框架和库:1.Streamlit(快速、简洁)适合:数据分析、仪表盘、内部管理系统特点:写法简单,类似JupyterNotebook自带现代化UI,无需前端开发内置交互组件,如表单、图表、按钮缺点:不适合复杂的权限管理和大规模系统示例代码:importstreamlitasstst.title("管理系统")st.
- 全国青少年软件编程等级考试标准(Python1级-6级)
huaseven0703
pythonpytorchpython
一级标准一、了解Python多种开发环境,熟练使用Python自带的IDLE开发环境,能够进行程序编写、调试和分析,具备使用Python开发环境进行程序设计的能力1.了解Python常见的几种编程环境:IDLE、VisualStudioCode、JupyterNotebook;2.熟悉IDLE的操作过程,会打开IDLE,会新建文件、保存文件;3.熟练掌握使用IDEL进行编程,会修改文件、运行文件等
- python制图之小提琴图
pianmian1
python信息可视化开发语言
提琴图(ViolinPlot)是一种结合了箱线图(BoxPlot)和核密度估计(KernelDensityEstimation,KDE)的可视化工具,用于展示数据的分布情况和概率密度。它在数据可视化中具有独特的作用.本节我们学习如何使用python绘制提琴图#导入所需的库importmatplotlib.pyplotasplt#用于绘图importnumpyasnp#用于数值计算importpan
- yolov8:pt 转 onnx
DI_f
yoloYOLO
yolov8官方教程1.安装包我使用的是虚拟环境,yolov8包已经下载到本地了,因此直接在anacondaprompt命令行继续安装首先激活自己的虚拟环境,然后执行安装命令pipinstallultralyticsyolov8中没有requirement.txt文件,直接安装ultralytics即可2.进行模型转换将转换好的pt文件放在weight文件夹下,然后在这个文件夹创建一个py文件,里
- 统一思想认识
永夜-极光
思想
1.统一思想认识的基础,才能有的放矢
原因:
总有一种描述事物的方式最贴近本质,最容易让人理解.
如何让教育更轻松,在于找到最适合学生的方式.
难点在于,如何模拟对方的思维基础选择合适的方式. &
- Joda Time使用笔记
bylijinnan
javajoda time
Joda Time的介绍可以参考这篇文章:
http://www.ibm.com/developerworks/cn/java/j-jodatime.html
工作中也常常用到Joda Time,为了避免每次使用都查API,记录一下常用的用法:
/**
* DateTime变化(增减)
*/
@Tes
- FileUtils API
eksliang
FileUtilsFileUtils API
转载请出自出处:http://eksliang.iteye.com/blog/2217374 一、概述
这是一个Java操作文件的常用库,是Apache对java的IO包的封装,这里面有两个非常核心的类FilenameUtils跟FileUtils,其中FilenameUtils是对文件名操作的封装;FileUtils是文件封装,开发中对文件的操作,几乎都可以在这个框架里面找到。 非常的好用。
- 各种新兴技术
不懂事的小屁孩
技术
1:gradle Gradle 是以 Groovy 语言为基础,面向Java应用为主。基于DSL(领域特定语言)语法的自动化构建工具。
现在构建系统常用到maven工具,现在有更容易上手的gradle,
搭建java环境:
http://www.ibm.com/developerworks/cn/opensource/os-cn-gradle/
搭建android环境:
http://m
- tomcat6的https双向认证
酷的飞上天空
tomcat6
1.生成服务器端证书
keytool -genkey -keyalg RSA -dname "cn=localhost,ou=sango,o=none,l=china,st=beijing,c=cn" -alias server -keypass password -keystore server.jks -storepass password -validity 36
- 托管虚拟桌面市场势不可挡
蓝儿唯美
用户还需要冗余的数据中心,dinCloud的高级副总裁兼首席营销官Ali Din指出。该公司转售一个MSP可以让用户登录并管理和提供服务的用于DaaS的云自动化控制台,提供服务或者MSP也可以自己来控制。
在某些情况下,MSP会在dinCloud的云服务上进行服务分层,如监控和补丁管理。
MSP的利润空间将根据其参与的程度而有所不同,Din说。
“我们有一些合作伙伴负责将我们推荐给客户作为个
- spring学习——xml文件的配置
a-john
spring
在Spring的学习中,对于其xml文件的配置是必不可少的。在Spring的多种装配Bean的方式中,采用XML配置也是最常见的。以下是一个简单的XML配置文件:
<?xml version="1.0" encoding="UTF-8"?>
<beans xmlns="http://www.springframework.or
- HDU 4342 History repeat itself 模拟
aijuans
模拟
来源:http://acm.hdu.edu.cn/showproblem.php?pid=4342
题意:首先让求第几个非平方数,然后求从1到该数之间的每个sqrt(i)的下取整的和。
思路:一个简单的模拟题目,但是由于数据范围大,需要用__int64。我们可以首先把平方数筛选出来,假如让求第n个非平方数的话,看n前面有多少个平方数,假设有x个,则第n个非平方数就是n+x。注意两种特殊情况,即
- java中最常用jar包的用途
asia007
java
java中最常用jar包的用途
jar包用途axis.jarSOAP引擎包commons-discovery-0.2.jar用来发现、查找和实现可插入式接口,提供一些一般类实例化、单件的生命周期管理的常用方法.jaxrpc.jarAxis运行所需要的组件包saaj.jar创建到端点的点到点连接的方法、创建并处理SOAP消息和附件的方法,以及接收和处理SOAP错误的方法. w
- ajax获取Struts框架中的json编码异常和Struts中的主控制器异常的解决办法
百合不是茶
jsjson编码返回异常
一:ajax获取自定义Struts框架中的json编码 出现以下 问题:
1,强制flush输出 json编码打印在首页
2, 不强制flush js会解析json 打印出来的是错误的jsp页面 却没有跳转到错误页面
3, ajax中的dataType的json 改为text 会
- JUnit使用的设计模式
bijian1013
java设计模式JUnit
JUnit源代码涉及使用了大量设计模式
1、模板方法模式(Template Method)
定义一个操作中的算法骨架,而将一些步骤延伸到子类中去,使得子类可以不改变一个算法的结构,即可重新定义该算法的某些特定步骤。这里需要复用的是算法的结构,也就是步骤,而步骤的实现可以在子类中完成。
- Linux常用命令(摘录)
sunjing
crondchkconfig
chkconfig --list 查看linux所有服务
chkconfig --add servicename 添加linux服务
netstat -apn | grep 8080 查看端口占用
env 查看所有环境变量
echo $JAVA_HOME 查看JAVA_HOME环境变量
安装编译器
yum install -y gcc
- 【Hadoop一】Hadoop伪集群环境搭建
bit1129
hadoop
结合网上多份文档,不断反复的修正hadoop启动和运行过程中出现的问题,终于把Hadoop2.5.2伪分布式安装起来,跑通了wordcount例子。Hadoop的安装复杂性的体现之一是,Hadoop的安装文档非常多,但是能一个文档走下来的少之又少,尤其是Hadoop不同版本的配置差异非常的大。Hadoop2.5.2于前两天发布,但是它的配置跟2.5.0,2.5.1没有分别。 &nb
- Anychart图表系列五之事件监听
白糖_
chart
创建图表事件监听非常简单:首先是通过addEventListener('监听类型',js监听方法)添加事件监听,然后在js监听方法中定义具体监听逻辑。
以钻取操作为例,当用户点击图表某一个point的时候弹出point的name和value,代码如下:
<script>
//创建AnyChart
var chart = new AnyChart();
//添加钻取操作&quo
- Web前端相关段子
braveCS
web前端
Web标准:结构、样式和行为分离
使用语义化标签
0)标签的语义:使用有良好语义的标签,能够很好地实现自我解释,方便搜索引擎理解网页结构,抓取重要内容。去样式后也会根据浏览器的默认样式很好的组织网页内容,具有很好的可读性,从而实现对特殊终端的兼容。
1)div和span是没有语义的:只是分别用作块级元素和行内元素的区域分隔符。当页面内标签无法满足设计需求时,才会适当添加div
- 编程之美-24点游戏
bylijinnan
编程之美
import java.util.ArrayList;
import java.util.Arrays;
import java.util.HashSet;
import java.util.List;
import java.util.Random;
import java.util.Set;
public class PointGame {
/**编程之美
- 主页面子页面传值总结
chengxuyuancsdn
总结
1、showModalDialog
returnValue是javascript中html的window对象的属性,目的是返回窗口值,当用window.showModalDialog函数打开一个IE的模式窗口时,用于返回窗口的值
主界面
var sonValue=window.showModalDialog("son.jsp");
子界面
window.retu
- [网络与经济]互联网+的含义
comsci
互联网+
互联网+后面是一个人的名字 = 网络控制系统
互联网+你的名字 = 网络个人数据库
每日提示:如果人觉得不舒服,千万不要外出到处走动,就呆在床上,玩玩手游,更不能够去开车,现在交通状况不
- oracle 创建视图 with check option
daizj
视图vieworalce
我们来看下面的例子:
create or replace view testview
as
select empno,ename from emp where ename like ‘M%’
with check option;
这里我们创建了一个视图,并使用了with check option来限制了视图。 然后我们来看一下视图包含的结果:
select * from testv
- ToastPlugin插件在cordova3.3下使用
dibov
Cordova
自己开发的Todos应用,想实现“
再按一次返回键退出程序 ”的功能,采用网上的ToastPlugins插件,发现代码或文章基本都是老版本,运行问题比较多。折腾了好久才弄好。下面吧基于cordova3.3下的ToastPlugins相关代码共享。
ToastPlugin.java
package&nbs
- C语言22个系统函数
dcj3sjt126com
cfunction
C语言系统函数一、数学函数下列函数存放在math.h头文件中Double floor(double num) 求出不大于num的最大数。Double fmod(x, y) 求整数x/y的余数。Double frexp(num, exp); double num; int *exp; 将num分为数字部分(尾数)x和 以2位的指数部分n,即num=x*2n,指数n存放在exp指向的变量中,返回x。D
- 开发一个类的流程
dcj3sjt126com
开发
本人近日根据自己的开发经验总结了一个类的开发流程。这个流程适用于单独开发的构件,并不适用于对一个项目中的系统对象开发。开发出的类可以存入私人类库,供以后复用。
以下是开发流程:
1. 明确类的功能,抽象出类的大概结构
2. 初步设想类的接口
3. 类名设计(驼峰式命名)
4. 属性设置(权限设置)
判断某些变量是否有必要作为成员属
- java 并发
shuizhaosi888
java 并发
能够写出高伸缩性的并发是一门艺术
在JAVA SE5中新增了3个包
java.util.concurrent
java.util.concurrent.atomic
java.util.concurrent.locks
在java的内存模型中,类的实例字段、静态字段和构成数组的对象元素都会被多个线程所共享,局部变量与方法参数都是线程私有的,不会被共享。
- Spring Security(11)——匿名认证
234390216
Spring SecurityROLE_ANNOYMOUS匿名
匿名认证
目录
1.1 配置
1.2 AuthenticationTrustResolver
对于匿名访问的用户,Spring Security支持为其建立一个匿名的AnonymousAuthenticat
- NODEJS项目实践0.2[ express,ajax通信...]
逐行分析JS源代码
Ajaxnodejsexpress
一、前言
通过上节学习,我们已经 ubuntu系统搭建了一个可以访问的nodejs系统,并做了nginx转发。本节原要做web端服务 及 mongodb的存取,但写着写着,web端就
- 在Struts2 的Action中怎样获取表单提交上来的多个checkbox的值
lhbthanks
javahtmlstrutscheckbox
第一种方法:获取结果String类型
在 Action 中获得的是一个 String 型数据,每一个被选中的 checkbox 的 value 被拼接在一起,每个值之间以逗号隔开(,)。
所以在 Action 中定义一个跟 checkbox 的 name 同名的属性来接收这些被选中的 checkbox 的 value 即可。
以下是实现的代码:
前台 HTML 代码:
- 003.Kafka基本概念
nweiren
hadoopkafka
Kafka基本概念:Topic、Partition、Message、Producer、Broker、Consumer。 Topic: 消息源(Message)的分类。 Partition: Topic物理上的分组,一
- Linux环境下安装JDK
roadrunners
jdklinux
1、准备工作
创建JDK的安装目录:
mkdir -p /usr/java/
下载JDK,找到适合自己系统的JDK版本进行下载:
http://www.oracle.com/technetwork/java/javase/downloads/index.html
把JDK安装包下载到/usr/java/目录,然后进行解压:
tar -zxvf jre-7
- Linux忘记root密码的解决思路
tomcat_oracle
linux
1:使用同版本的linux启动系统,chroot到忘记密码的根分区passwd改密码 2:grub启动菜单中加入init=/bin/bash进入系统,不过这时挂载的是只读分区。根据系统的分区情况进一步判断. 3: grub启动菜单中加入 single以单用户进入系统. 4:用以上方法mount到根分区把/etc/passwd中的root密码去除 例如: ro
- 跨浏览器 HTML5 postMessage 方法以及 message 事件模拟实现
xueyou
jsonpjquery框架UIhtml5
postMessage 是 HTML5 新方法,它可以实现跨域窗口之间通讯。到目前为止,只有 IE8+, Firefox 3, Opera 9, Chrome 3和 Safari 4 支持,而本篇文章主要讲述 postMessage 方法与 message 事件跨浏览器实现。postMessage 方法 JSONP 技术不一样,前者是前端擅长跨域文档数据即时通讯,后者擅长针对跨域服务端数据通讯,p


