8、Qt中定时器的使用
一、说明
在Qt中常使用如下两种定时器
1、使用QObiect类的定时器事件QTimerEvent
与定时器相关的函数有:startTimer()、timeEvent()、killTimer();startTimer(int interval)函数开始一个定时器并返回定时器ID,如果不能开始一个定时器,将返回0。定时器开始后,每隔interval毫秒间隔将触发一次超时事件,超时事件由timerEvent函数处理,在timerEvent函数中通过定时器ID来区分不同的定时器;使用killTimer ( int id )停止定时器,id就是要停止定时器的ID。
2、使用QTimer类
首先创建一个定时器类的对象QTimer *timer = new QTimer(this);
使用timer->setInterval(int msec)提前设置定时器时间或者使用timer->start(std::chrono::milliseconds msec)在定时器开始时设置时间;
在定时器开始msec毫秒后,timer 后会发出timeout()信号,所以在创建好定时器对象后给其建立信号与槽连接connect(timer, SIGNAL(timeout()), this, SLOT(onTimeout()));
在超时槽函数onTimeout()里面做超时处理。
在需要开启定时器的地方调用timer->start(1000);
使用timer->stop();停止定时器。
注:void QTimer::singleShot(int msec, const QObject *receiver, const char *member)
这个静态函数进行一次定时器的使用,在msec毫秒后,调用槽函数member,如下示例,程序在6秒后自动终止
QApplication app(argc, argv);
QTimer::singleShot(6000, &app, SLOT(quit()));
...
return app.exec();
二、QTimerEvent使用
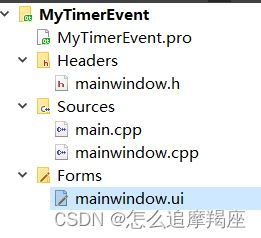
创建一个Qt项目,基类选择QMainWindow
在界面上放置如下控件,并修改objectName
修改.h代码如下,声明两个整型变量(m_timer1Id、m_timer2Id)用来存储定时器ID
#ifndef MAINWINDOW_H
#define MAINWINDOW_H

#include

namespace Ui {
class MainWindow;
}

class MainWindow : public QMainWindow
{
    Q_OBJECT

public:
    explicit MainWindow(QWidget *parent = nullptr);
    ~MainWindow();

protected:
    void timerEvent(QTimerEvent* event); //定时器事件

private slots:
    void on_startPushButton1_clicked();

    void on_stopPushButton1_clicked();

    void on_startPushButton2_clicked();

    void on_stopPushButton2_clicked();

private:
    Ui::MainWindow *ui;

    int m_timer1Id; //定时器1ID
    int m_timer2Id; //定时器2ID
};

#endif // MAINWINDOW_H
修改.cpp代码如下,四个摁键控制两个定时器的开始和停止,timerEvent函数进行定时器超时事件的处理
#include "mainwindow.h"
#include "ui_mainwindow.h"
#include
#include

MainWindow::MainWindow(QWidget *parent) :
    QMainWindow(parent),
    ui(new Ui::MainWindow)
{
    ui->setupUi(this);
}

MainWindow::~MainWindow()
{
    delete ui;
}

void MainWindow::timerEvent(QTimerEvent *event)
{
    //使用定时器ID区分定时器
    if(event->timerId() == m_timer1Id)
    {
        qDebug() << "定时器1:" << QTime::currentTime().toString("hh:mm:ss");
    }
    else if(event->timerId() == m_timer2Id)
    {
        qDebug() << "定时器2:" << QTime::currentTime().toString("hh:mm:ss");
    }
}

void MainWindow::on_startPushButton1_clicked()
{
    m_timer1Id = startTimer(1000*3); //3秒定时器
    qDebug() <<"定时器1开始" << QTime::currentTime().toString("hh:mm:ss");
}

void MainWindow::on_stopPushButton1_clicked()
{
    killTimer(m_timer1Id);
    qDebug() <<"定时器1停止" << QTime::currentTime().toString("hh:mm:ss");
}

void MainWindow::on_startPushButton2_clicked()
{
    m_timer2Id = startTimer(1000*5); //5秒定时器

    qDebug() <<"定时器2开始" << QTime::currentTime().toString("hh:mm:ss");
}

void MainWindow::on_stopPushButton2_clicked()
{
    killTimer(m_timer2Id);
    qDebug() <<"定时器2停止" << QTime::currentTime().toString("hh:mm:ss");
}
运行程序,点击“开始”“开始”,等一会,点击“停止”“停止”,
输出内容如下,定时器1每隔3秒输出一次,定时器2每隔5秒输出一次,符合程序设定
三、QTimer使用
创建一个Qt项目,基类选择QMainWindow
在界面上放置如下控件,并修改objectName
修改.h代码,声明两个QTimer对象(m_timer1、m_timer2)和两个超时处理槽函数(onTimerOut1、onTimerOut2)
#ifndef MAINWINDOW_H
#define MAINWINDOW_H

#include
#include

namespace Ui {
class MainWindow;
}

class MainWindow : public QMainWindow
{
    Q_OBJECT

public:
    explicit MainWindow(QWidget *parent = nullptr);
    ~MainWindow();

private slots:
    void on_startPushButton1_clicked();

    void on_stopPushButton1_clicked();

    void onTimerOut1();

    void on_startPushButton2_clicked();

    void on_stopPushButton2_clicked();

    void onTimerOut2();

private:
    Ui::MainWindow *ui;

    QTimer *m_timer1;
    QTimer *m_timer2;
};

#endif // MAINWINDOW_H
修改.cpp代码,在构造函数中对两个QTimer对象进行初始化,并绑定槽函数,四个摁键控制两个定时器的开始和停止,onTimerOut1和onTimerOut2函数进行定时器超时事件的处理
#include "mainwindow.h"
#include "ui_mainwindow.h"
#include
#include

MainWindow::MainWindow(QWidget *parent) :
    QMainWindow(parent),
    ui(new Ui::MainWindow)
{
    ui->setupUi(this);

    m_timer1 = new QTimer(this);
    //m_timer1->setInterval(3*1000); //定时3秒
    connect(m_timer1, &QTimer::timeout, this, &MainWindow::onTimerOut1);

    m_timer2 = new QTimer(this);
    //m_timer2->setInterval(5*1000); //定时5秒
    connect(m_timer2, &QTimer::timeout, this, &MainWindow::onTimerOut2);
}

MainWindow::~MainWindow()
{
    delete ui;
}

void MainWindow::on_startPushButton1_clicked()
{
    m_timer1->start(3*1000); //3秒定时器
    qDebug() <<"定时器1开始" << QTime::currentTime().toString("hh:mm:ss");
}

void MainWindow::on_stopPushButton1_clicked()
{
    m_timer1->stop();
    qDebug() <<"定时器1停止" << QTime::currentTime().toString("hh:mm:ss");
}

void MainWindow::onTimerOut1()
{
    qDebug() <<"定时器1:" << QTime::currentTime().toString("hh:mm:ss");
}

void MainWindow::on_startPushButton2_clicked()
{
    m_timer2->start(5*1000); //5秒定时器
    qDebug() <<"定时器2开始" << QTime::currentTime().toString("hh:mm:ss");
}

void MainWindow::on_stopPushButton2_clicked()
{
    m_timer2->stop();
    qDebug() <<"定时器2停止" << QTime::currentTime().toString("hh:mm:ss");
}

void MainWindow::onTimerOut2()
{
    qDebug() <<"定时器2:" << QTime::currentTime().toString("hh:mm:ss");
}
运行程序,点击“开始”“开始”,等一会,点击“停止”“停止”,
输出内容如下,定时器1每隔3秒输出一次,定时器2每隔5秒输出一次,符合程序设定


