Spring Cloud + Vue前后端分离-第2章 使用Maven搭建SpringCloud项目
Spring Cloud + Vue前后端分离-第2章 使用Maven搭建SpringCloud项目
Maven两大核心功能:
依赖管理(Jar包管理)
构建项目(项目打包)
使用Eureka搭建注册中心
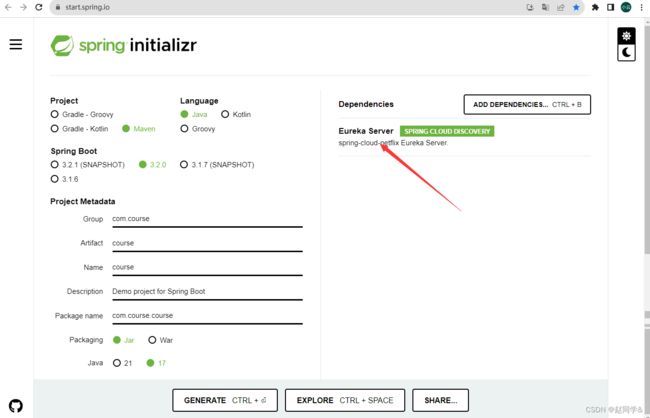
使用spring initializr创建spring cloud项目
SpringCloud和Maven简介
SpringBoot和SpringCloud:SpringBoot是单应用开发框架,SpringCloud是管理多个SpringBoot应用的微服务框架
GENERATE下载就可以了
下载完成后是个压缩包,解压后,打开idea,点击filer>open就可以导入项目了
项目初始化,要把代码管理优先做后,不管是学习还是工作,养成阶段性提交代码的习惯。代码管理选择git
一个项目里不是所有的文件都需要提交到git,比如.iml这个是idea本地项目文件,比如maven的target文件夹。所以用.gitignore帮我们自动排除
1.增加eureka子模块作为注册服务端
2.将单maven项目改造成maven父子项目
pom.xml(course)
	4.0.0

		org.springframework.boot
		spring-boot-starter-parent
		2.2.2.RELEASE


	com.course
	course
	0.0.1-SNAPSHOT
	pom
	course
	Demo project for Spring Boot

		eureka


		1.8
		Hoxton.RELEASE


			org.springframework.boot
			spring-boot-starter-test
			test


				org.springframework.cloud
				spring-cloud-dependencies
				${spring-cloud.version}
				pom
				import


				org.springframework.boot
				spring-boot-maven-plugin


			spring-milestones
			Spring Milestones
			https://repo.spring.io/milestone

				false
pom.xml(eureka)
    4.0.0

        com.course
        course
        0.0.1-SNAPSHOT


    eureka
    jar

    eureka
    http://maven.apache.org


        UTF-8


            org.springframework.cloud
            spring-cloud-starter-netflix-eureka-server
搭建业务模块-system
1.解决注册中心服务启动失败的问题
1.解决注册中心服务启动失败的问题
支持application.properties或application.yml文件,默认会读取resources目录下或resources/config目录下,后续会有读/config目录的示例
spring.application.name=eureka
server.port=8761
eureka.client.fetch-registry=false
eureka.client.register-with-eureka=false
springboot默认集成slf4j框架,它定义了一些日志接口,规范日志输出,真正的实现是logback或log4j,我们代码中写的都是slf4j的代码
2.优化启动日志显示
启动日志可以按需扩展,甚至可以打印一些有趣的字符图
package com.course;

import org.slf4j.Logger;
import org.slf4j.LoggerFactory;
import org.springframework.boot.SpringApplication;
import org.springframework.boot.autoconfigure.SpringBootApplication;
import org.springframework.cloud.netflix.eureka.server.EnableEurekaServer;
import org.springframework.context.ConfigurableApplicationContext;
import org.springframework.core.env.Environment;

/**
 * Hello world!
 *
 */
@SpringBootApplication
@EnableEurekaServer
public class EurekaApplication {

    private static final Logger logger = LoggerFactory.getLogger(EurekaApplication.class);
    //    public static void main(String[] args) {
//        SpringApplication.run(EurekaApplication.class, args);
//    }
    public static void main(String[] args) {

        SpringApplication app = new SpringApplication(EurekaApplication.class);
        Environment env = app.run(args).getEnvironment();
        logger.info("启动成功!!");
        logger.info("Eureka地址: \thttp://127.0.0.1:{}", env.getProperty("server.port"));
    }

}
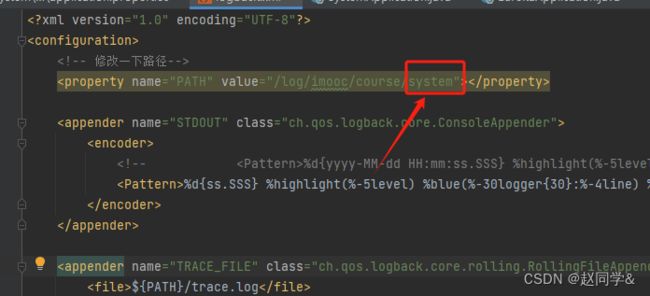
logback.xml
            %d{ss.SSS} %highlight(%-5level) %blue(%-30logger{30}:%-4line) %msg%n


        ${PATH}/trace.log

            ${PATH}/trace.%d{yyyy-MM-dd}.%i.log

                10MB


            %d{yyyy-MM-dd HH:mm:ss.SSS} %-5level %-50logger{50}:%-4line %green(%-8X{UUID}) %msg%n


        ${PATH}/error.log

            ${PATH}/error.%d{yyyy-MM-dd}.%i.log

                10MB


            %d{yyyy-MM-dd HH:mm:ss.SSS} %-5level %-50logger{50}:%-4line %green(%-8X{UUID}) %msg%n


            ERROR
            ACCEPT
            DENY
小建议:养成阶段性提交代码的习惯,可以是完成一个小功能。并且每天下班前提交本地代码,前提是不能编译报错或影响已有的功能
2.新建Maven子项目system
maven父子模块的配置: 在子模块中使用parent标签指向父模块,在父模块中使用module标签引入子模块
将system配置成最简单的SpringBoot项目
(注意:java和resources是同级目录!!!小编大意,求原谅)
package com.course.system;

import org.slf4j.Logger;
import org.slf4j.LoggerFactory;
import org.springframework.boot.SpringApplication;
import org.springframework.boot.autoconfigure.SpringBootApplication;
import org.springframework.core.env.Environment;


@SpringBootApplication

public class SystemApplication {

    private static final Logger logger = LoggerFactory.getLogger(SystemApplication.class);

    public static void main(String[] args) {

        SpringApplication app = new SpringApplication(SystemApplication.class);
        Environment env = app.run(args).getEnvironment();
        logger.info("启动成功!!");
        logger.info("System地址: \thttp://127.0.0.1:{}", env.getProperty("server.port"));
    }

}
spring.application.name=system
server.port=9001
    4.0.0

        com.course
        course
        0.0.1-SNAPSHOT


    system
    jar


        org.springframework.cloud
        spring-cloud-starter-netflix-eureka-client


        org.springframework.boot
        spring-boot-starter-web
3.将system注册到注册中心
第1步:增加eureka-client依赖
第2步:增加配置,指向注册中心的地址
第3步:增加@EnableEurekaClient
搭建路由模块-gateway
SpringCloug的网关组件可以用gateway或zuul,最早使用的是zuul,后面spring自己出了gateway
网关主要功能:
限流(流量控制);
重试(请求失败时重试,慎用);
跨域(前后端不在同一个域);
路由(转发请求);
鉴权(登录校验,签名校验)等...
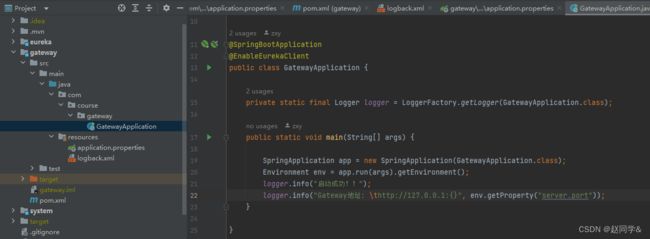
新建Maven子项目gateway
步骤和system模块一样改一些参数
新增gateway子模块,增加gateway依赖,并注册到注册中心
(注意:java和resources是同级目录!!!小编大意,求原谅)
spring.application.name=gateway
server.port=9000
eureka.client.service-url.defaultZone=http://localhost:8761/eureka/

#路由转发
spring.cloud.gateway.routes[0].id=system
spring.cloud.gateway.routes[0].uri=http://127.0.0.1:9001
spring.cloud.gateway.routes[0].predicates[0].name=Path
spring.cloud.gateway.routes[0].predicates[0].args[0]=/system/**
    4.0.0

        com.course
        course
        0.0.1-SNAPSHOT


    gateway
    jar


        org.springframework.cloud
        spring-cloud-starter-netflix-eureka-client


            org.springframework.cloud
            spring-cloud-starter-gateway
路由转发
路由转发:将外部请求转发到实际的业务模块进行处理。
1.在gateway增加system路由转发配置,调试成功
我们做的所有的改动都需要重启应用才能生效,后续我们介绍热部署,不再需要手动重启,从而提高开发效率


