SpringBoot整合Aop实现日志操作
1、新增日志实体类
@Data
@EqualsAndHashCode(callSuper = false)
@Accessors(chain = true)
@TableName("sys_log")
@ApiModel(value="Log对象", description="系统操作日志")
public class Log implements Serializable {

    private static final long serialVersionUID = 1L;

    @ApiModelProperty(value = "日志id")
    @TableId(value = "id", type = IdType.AUTO)
    private Integer id;

    @ApiModelProperty(value = "系统类型@ 1  运营平台 2  采购商  3  供应商")
    @TableField("sys_type")
    private Integer sysType;

    @TableField("sys_id")
    private Integer sysId;

    @ApiModelProperty(value = "操作类型")
    @TableField("oper_type")
    private String operType;

    @ApiModelProperty(value = "操作人")
    @TableField("oper_by")
    private String operBy;

    @ApiModelProperty(value = "操作时间")
    @TableField("oper_time")
    private LocalDateTime operTime;

    @ApiModelProperty(value = "操作内容")
    @TableField("oper_content")
    private String operContent;

    @ApiModelProperty(value = "ip")
    @TableField("ip")
    private String ip;

    public Log( Integer sysType, Integer sysId, String operType, String operBy, LocalDateTime operTime, String operContent, String ip) {
        super();
        this.sysType = sysType;
        this.sysId = sysId;
        this.operType = operType;
        this.operBy = operBy;
        this.operTime = operTime;
        this.operContent = operContent;
        this.ip = ip;
    }
}
2、使用代码生成器生成各种逻辑层,访问层
2.1业务访问层
/**
 *
 * 系统操作日志 Mapper 接口
 *
 *
 * @author zzw
 * @since 2022-08-02
 */
public interface LogMapper extends BaseMapper<Log> {

}
2.2业务逻辑层
/**
 *
 * 系统操作日志 服务类
 *
 *
 * @author zzw
 * @since 2022-08-02
 */
public interface ILogService extends IService<Log> {

}
2.3业务逻辑实现层
/**
 *
 * 系统操作日志 服务实现类
 *
 *
 * @author zzw
 * @since 2022-08-02
 */
@Service
public class LogServiceImpl extends ServiceImpl<LogMapper, Log> implements ILogService {

}
3、编写需要依赖的注解
@Target(ElementType.METHOD) //注解放置的目标位置,METHOD是可注解在方法级别上
@Retention(RetentionPolicy.RUNTIME) //注解在哪个阶段执行
@Documented
public @interface OperationAnnotation {
    String operContent() default  ""; // 内容

    int sysType() default 0; // 平台类型(采购商,供货商,运营平台)

    String operType() default ""; // 操作类型(0.登录,1.增加,2.删除,3.修改,4.查询,5.查看)

}
4、编写解析IP工具类
/**
 * @author zzw
 * @description TODO
 * @date 2022-08-04 10:35
 */
public class HttpUtils {
    /**
     * 获取用户真实IP地址,不使用request.getRemoteAddr();的原因是有可能用户使用了代理软件方式避免真实IP地址,
     *
     * 可是,如果通过了多级反向代理的话,X-Forwarded-For的值并不止一个,而是一串IP值,究竟哪个才是真正的用户端的真实IP呢?
     * 答案是取X-Forwarded-For中第一个非unknown的有效IP字符串。
     *
     * 如:X-Forwarded-For:192.168.1.134, 192.168.1.135, 192.168.1.136,
     * 192.168.1.137
     *
     * 用户真实IP为: 192.168.1.134
     *
     * @param request
     * @return
     */
    public static String getIpAddress(HttpServletRequest request) {
        String Xip = request.getHeader("X-Real-IP");
        String XFor = request.getHeader("X-Forwarded-For");

        //多次反向代理后会有多个ip值,第一个ip才是真实ip
        if (StringUtils.isNotEmpty(XFor) && !"unKnown".equalsIgnoreCase(XFor)) {
            int index = XFor.indexOf(",");
            if (index != -1) {
                return "0:0:0:0:0:0:0:1".equals(XFor.substring(0, index)) ? "127.0.0.1" : XFor.substring(0, index);
            } else {
                return "0:0:0:0:0:0:0:1".equals(XFor) ? "127.0.0.1" : XFor;
            }
        }
        XFor = Xip;
        if (StringUtils.isNotEmpty(XFor) && !"unKnown".equalsIgnoreCase(XFor))
            return "0:0:0:0:0:0:0:1".equals(XFor) ? "127.0.0.1" : XFor;

        if (StringUtils.isBlank(XFor) || "unknown".equalsIgnoreCase(XFor))
            XFor = request.getHeader("Proxy-Client-IP");

        if (StringUtils.isBlank(XFor) || "unknown".equalsIgnoreCase(XFor))
            XFor = request.getHeader("WL-Proxy-Client-IP");

        if (StringUtils.isBlank(XFor) || "unknown".equalsIgnoreCase(XFor))
            XFor = request.getHeader("HTTP_CLIENT_IP");

        if (StringUtils.isBlank(XFor) || "unknown".equalsIgnoreCase(XFor))
            XFor = request.getHeader("HTTP_X_FORWARDED_FOR");

        if (StringUtils.isBlank(XFor) || "unknown".equalsIgnoreCase(XFor))
            XFor = request.getRemoteAddr();
        return "0:0:0:0:0:0:0:1".equals(XFor) ? "127.0.0.1" : XFor;
    }
}
5、编写切面逻辑
/**
 * @author zzw
 * @description TODO
 * @date 2022-08-04 13:59
 */
@Aspect
@Component
@EnableAsync
public class SystemLogAspect {
    @Resource
    private ILogService logService;//日志 mapper

    private LocalDateTime operTime = null; // 操作时间
    private String operBy = null; // 操作人
    private Integer sysId = 0; // 操作人ID
    private String ip = null; // ip地址
    private HttpServletRequest request = null;//请求

    /**
     * 注解的位置
     */
    @Pointcut("@annotation(com.example.demo.security.config.OperationAnnotation)")
    public void logPointCut() {}

    /**
     * @param joinPoint
     * @Description 前置通知  方法调用前触发   记录开始时间,从session中获取操作人
     */
    @Before(value="logPointCut()")
    public void before(JoinPoint joinPoint){
        operTime = LocalDateTime.now();
    }
    /**
     * @param joinPoint
     * @Description 获取入参方法参数
     * @return
     */
    public Map<String, Object> getNameAndValue(JoinPoint joinPoint) {
        Map<String, Object> param = new HashMap<>();
        Object[] paramValues = joinPoint.getArgs();
        String[] paramNames = ((CodeSignature)joinPoint.getSignature()).getParameterNames();
        for (int i = 0; i < paramNames.length; i++) {
            if(paramValues[i] instanceof Integer || paramValues[i] instanceof String) {
                param.put(paramNames[i], paramValues[i]);
            }
        }
        return param;
    }
    /**
     * @param joinPoint
     * @Description 后置通知    方法调用后触发   记录结束时间 ,操作人 ,入参等
     */
    @After(value="logPointCut()")
    public void after(JoinPoint joinPoint) {
        request = getHttpServletRequest();
        String targetName = joinPoint.getTarget().getClass().getName();
        String methodName = joinPoint.getSignature().getName();
        Object[] arguments = joinPoint.getArgs();
        Class<?> targetClass = null;
        try {
            targetClass = Class.forName(targetName);
        } catch (ClassNotFoundException e) {
            e.printStackTrace();
        }
        Method[] methods = targetClass.getMethods();
        String operContent;// 操作内容
        Integer sysType; // 系统类型
        String operType;// 操作类型
        Class<?>[] clazzs;
        for (Method method : methods) {
            if (method.getName().equals(methodName)) {
                clazzs = method.getParameterTypes();
                if (clazzs!=null&&clazzs.length == arguments.length
                        &&method.getAnnotation(OperationAnnotation.class)!=null) {
                    request = getHttpServletRequest();
                    sysType = method.getAnnotation(OperationAnnotation.class).sysType();//通过注解方法获取当前平台类型
                    // 注意(我们这里使用的是SpringSecurity安全框架,可以直接使用SpringSecurity全文获取当前用户信息)
                    UserLoginPer user = (UserLoginPer) SecurityContextHolder.getContext().getAuthentication().getPrincipal();
                    operBy = user.getUsername();
                    sysId = user.getSysId();
                    ip = HttpUtils.getIpAddress(request);//通过请求解析当前IP
                    operContent = method.getAnnotation(OperationAnnotation.class).operContent();//通过注解方法获取当前内容
                    operType = method.getAnnotation(OperationAnnotation.class).operType();//通过注解方法获取当前操作类型
                    operTime = LocalDateTime.now();
                    Log log=new Log(sysType,sysId,operType,operBy,operTime,operContent,ip);
                    System.out.println("增加参数:"+log);
                    logService.save(log);
                }
            }
        }
    }
    /**
     * @Description: 获取request
     */
    public HttpServletRequest getHttpServletRequest(){
        RequestAttributes ra = RequestContextHolder.getRequestAttributes();
        ServletRequestAttributes sra = (ServletRequestAttributes)ra;
        HttpServletRequest request = sra.getRequest();
        return request;
    }
    /**
     * @param joinPoint
     * @return 环绕通知
     * @throws Throwable
     */
    public Object around(ProceedingJoinPoint joinPoint) throws Throwable {
        return null;
    }
    /**
     * @param joinPoint
     * @Description 异常通知
     */
    public void throwing(JoinPoint joinPoint) {
        System.out.println("异常通知");
    }
}
6、编写视图层代码
/**
 * @Author zzw
 * @Create
 * @Description
 */
@Api(tags = "登录")
@RestController
public class LoginController {

    @Resource
    private IUserService userService;

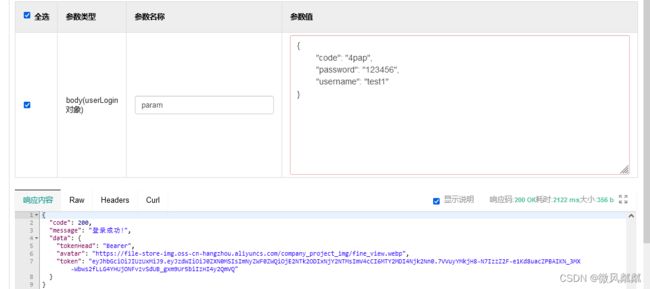
    @ApiOperation(value = "登录之后返回token")
    @PostMapping("/login")
    @OperationAnnotation(operContent = "管理者登录",sysType = 1,operType = "登录")
    public RespBean login(@RequestBody UserLoginParam param, HttpServletRequest request) {
        return userService.login(param.getUsername(), param.getPassword(), param.getCode(),request);
    }
}

