vue-admin-element项目分析与难题解决
移植vue-admin-element 到普通的项目中
遇到的问题
这个是将layout目录移植过来

将styles中的scss移植过来
将项目中的store移植过来

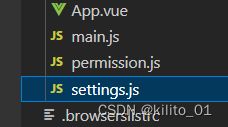
src目录中的setting和permission这个路由权限移植过来
这个是main.js 我是使用sdn引入vue和vue-router 和axios和vuex
就不要再import 引入vue和vue-router 要不然会报错 会有重复引入的问题
// import Vue from 'vue'

// 全局样式  重置css样式表
import './styles/normalize.css'
// vue-admin-element 样式表
import './styles/index.scss'

import App from './App.vue'
import router from './router'
import store from './store'
import  './permission'


Vue.config.productionTip = false
// 禁用用户通过插件查看vuex数据
Vue.config.devtools = false
// 这个图片后期要换
const loadimage = require('./assets/common/loading.png')
const errorimage = require('./assets/common/logo.png')
// 图片懒加载
Vue.use(VueLazyload, {
  preLoad: 1.3,
  error: errorimage,
  loading: loadimage,
  attempt: 1
})

new Vue({
  router,
  store,
  render: h => h(App)
}).$mount('#app')
这个是permission.js 路由权限文件 和vue-admin里的权限路由一样
import router from "./router/index.js";
import store from "./store/index.js";
const WHITE_LIST = ['/login','/404']
import { getToken } from '@/utils/auth' // get token from cookie

// 使用cdn引入elementui 在js中使用message
// ELEMENT.Message.error('错误');

router.beforeEach(async (to,from,next)=>{
    // 是否有token?
    const hasToken = getToken()
    // 有token
    if(hasToken){
    // 是否去登入页
       if(to.path === '/login'){
       // 放行
        next()
       }else{
       // 判断是否有角色
        const hasRoles = store.getters.roles && store.getters.roles.length > 0
       if(hasRoles){
       // 放行
         next()
       }else{
       // 没有角色
        try {
        // 获取角色信息
          const { roles } = await store.dispatch('user/getInfo')
          // 将角色信息传入这个方法 去返回符合角色的路由信息
          const accessRoutes = await store.dispatch('permission/generateRoutes', roles)
          // 将路由信息加入路由
          // addRoutes 这个是路由3.0 版本的 后面的版本废弃了这个方法
          // 我本来用的是3.5的路由 用addRoute 传入 路由
          // 在router.push() 跳转路由的时候会报错 要在push后面添加.catch((res)=>{})去捕获错误才行
          // 所以我就将路由降到了3.0版本 也是无奈啊!!!
          router.addRoutes(accessRoutes)
          // 我百度后 说是添加路由后 要等新的路由添加到路由生效后 再跳转
          // 确保addRoutes()时动态添加的路由已经被完全加载上去
          // next({ ...to, replace: true })中的replace: true只是一个设置信息,告诉VUE本次操作后,不能通过浏览器后退按钮,返回前一个路由。
          next({ ...to, replace: true })

        } catch (error) {
            await store.dispatch('user/resetToken')
            next('/login')
        }
       }
       }
    }else{
        if(WHITE_LIST.indexOf(to.path) !== -1){
             next()
        }else{
            next('/login')
        }

    }

})

router.afterEach((to,from)=>{
    // to: 去的路由
    // from: 来的路由
})
export default WHITE_LIST
app.vue 最外的vue
<template>
  <div id="#app">
    <router-view></router-view>
  </div>
</template>

<script>
export default {
}
</script>
<style lang="scss">
</style>
这是vue.config.js 文件 打包时 去掉了vue vue-router等
const {
	defineConfig
} = require('@vue/cli-service')
// const NodePolyfillPlugin = require('node-polyfill-webpack-plugin')
// 需要排除的包,对象
let externals = {}

// 判断是否是生产环境
const isProduction = process.env.NODE_ENV === 'production'
// 如果是生产环境,需要执行以下逻辑
if (isProduction) {
	externals = {
		/**
		 * externals对象属性分析:
		 * '包名':'在项目中引入的名字'**/
		'axios': 'axios',
		'element-ui': 'ELEMENT',
		'vue': 'Vue',
		'vue-router': 'VueRouter',
		'vuex': 'Vuex'
	}

}


module.exports = defineConfig({
	publicPath: isProduction ? './' : '/',
	transpileDependencies: true,
	configureWebpack: {
		// 打包瘦身
		// 当为开发环境时,externals为空对象
		// 当为生产环境时,externals对象值为排除第三方包,达到瘦身目的
		externals: externals,
		resolve: {
			fallback: {
			  path: require.resolve('path-browserify')
			}
		  }
	},
	css:{
		loaderOptions: {
			scss: {
				prependData: `
				@import "@/styles/common.scss";
			  `
			}
		  }
	},
	// configureWebpack: config => {
	// 	const plugins = []
	// 	plugins.push(new NodePolyfillPlugin())
	// }
	// devServer: {
	//   // 设置代理请求
	//   proxy: {
	//     // 以 api开头
	//     '^/api': {
	//       // 设置代理地址 把基地址禁用
	//       target: ''
	//     }
	//   }
	// }
})
index.html文件 cdn 引入文件
<!DOCTYPE html>
<html lang="">

<head>
	<meta charset="utf-8">
	<meta http-equiv="X-UA-Compatible" content="IE=edge">
	<meta name="viewport" content="width=device-width,initial-scale=1.0">
	<link rel="icon" href="<%= BASE_URL %>favicon.ico">
	<title>xxx</title>

	<link rel="stylesheet" href="https://unpkg.com/[email protected]/lib/theme-chalk/index.css">
    <script src="https://unpkg.com/[email protected]/dist/vue.js"></script>
    <script src="https://unpkg.com/[email protected]/dist/vue-router.js"></script>
    <script src="https://unpkg.com/[email protected]/dist/vuex.js"></script>
	<script src="https://unpkg.com/[email protected]/dist/axios.min.js"></script>
	<script src="https://unpkg.com/[email protected]/lib/index.js"></script>
</head>

<body>
	<noscript>
		<strong>We're sorry but <%= htmlWebpackPlugin.options.title %> doesn't work properly without JavaScript
				enabled. Please enable it to continue.</strong>
	</noscript>
	<div id="app"></div>
	<!-- built files will be auto injected -->

</body>

</html>
scss中的文件
我这个项目中不知道为啥 #app{} 这个设置不上去 不生效
所以在sidebar.scss 中的把#app 这一层注释掉 就可以了

app这个尾巴的括号 别忘 去掉

:exprot{
xx:xx
}
这个是sass 导出变量 在vue页面中可以引入 就可以获取到变量
要抛出变量的话,文件名要改,要不然获取不到变量 文件名中间要加上module 如上图片
我用的是vue-cli4 创建的项目 用的sass 版本是
![]()
sass版本太高会报错 所以降低sass版本
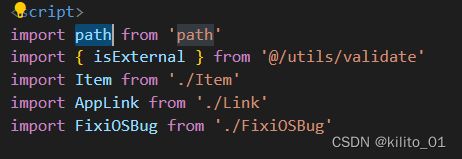
项目里有的页面会用到path 例如 SidebarItem 页面
import path from ‘path’
需要下载 “path-browserify”: “^1.0.1”,

layout中的index.vue
<template>
  <div :class="classObj" class="app-wrapper">
    <!-- 左侧导航栏 -->
    <sidebar class="sidebar-container" />
    <div :class="{hasTagsView:needTagsView}" class="main-container">
      <div :class="{'fixed-header':fixedHeader}">
        <!-- 顶部导航 -->
        <navbar />
        <!-- tag栏 -->
        <tags-view v-if="needTagsView" />
      </div>
      <app-main />

    </div>
  </div>
</template>

<script>
// 由components中的index.js 统一引入四个组件
import { AppMain, Navbar,  Sidebar, TagsView } from './components'
import { mapState } from 'vuex'

export default {
  name: 'Layout',
  components: {
    AppMain,
    Navbar,
    Sidebar,
    TagsView
  },
  computed: {
    ...mapState({
      sidebar: state => state.app.sidebar,
      device: state => state.app.device,
      needTagsView: state => state.settings.tagsView,
      fixedHeader: state => state.settings.fixedHeader
    }),
    classObj() {
      return {
        hideSidebar: !this.sidebar.opened,
        openSidebar: this.sidebar.opened,
        withoutAnimation: this.sidebar.withoutAnimation,
      }
    }
  },
  methods: {
    handleClickOutside() {
      this.$store.dispatch('app/closeSideBar', { withoutAnimation: false })
    }
  }
}
</script>

<style lang="scss" scoped>
  @import "~@/styles/mixin.scss";
  @import "~@/styles/variables.module.scss";
// 因为#app 这个css样式不生效 所以把这个主体的高度调成100vh 要不然高度塌陷不够一屏
  .app-wrapper {
    @include clearfix;
    position: relative;
    height: 100vh;
    width: 100%;

    &.mobile.openSidebar {
      position: fixed;
      top: 0;
    }
  }

  .drawer-bg {
    background: #000;
    opacity: 0.3;
    width: 100%;
    top: 0;
    height: 100%;
    position: absolute;
    z-index: 999;
  }

  .fixed-header {
    position: fixed;
    top: 0;
    right: 0;
    z-index: 9;
    width: calc(100% - #{$sideBarWidth});
    transition: width 0.28s;
  }

  .hideSidebar .fixed-header {
    width: calc(100% - 54px)
  }

  .mobile .fixed-header {
    width: 100%;
  }
</style>
这个就是 引入主体的四个组件的js
default as AppMain  意思是 引入后重命名 为AppMain  这样在解构的时候 就可以获取到这个重命名的组件
export { default as AppMain } from './AppMain'
export { default as Navbar } from './Navbar'
export { default as Sidebar } from './Sidebar/index.vue'
export { default as TagsView } from './TagsView/index.vue'
navbar.vue
<template>
  <div class="navbar">
    <!-- 汉堡图片的组件 -->
    <hamburger id="hamburger-container" :is-active="sidebar.opened" class="hamburger-container" @toggleClick="toggleSideBar" />
    <!-- 面包屑导航 -->
    <breadcrumb id="breadcrumb-container" class="breadcrumb-container" />

    <div class="right-menu">

      <!-- 顶部navbar -->
      <el-dropdown class="avatar-container right-menu-item hover-effect" trigger="click">
        <!-- 右边用户名和用户头像 -->
        <div class="avatar-wrapper">
          <!-- <img :src="avatar+'?imageView2/1/w/80/h/80'" class="user-avatar"> -->
          <span>用户名</span>
          <i class="el-icon-caret-bottom" />
        </div>
        <!-- 下拉框 -->
        <el-dropdown-menu slot="dropdown">
         <!-- 退出 -->
          <el-dropdown-item divided @click.native="logout">
            <span style="display:block;">退出</span>
          </el-dropdown-item>
        </el-dropdown-menu>
      </el-dropdown>
    </div>
  </div>
</template>

<script>
import { mapGetters } from 'vuex'
import Breadcrumb from '@/components/Breadcrumb'
import Hamburger from '@/components/Hamburger'


export default {
  components: {
    Breadcrumb,
    Hamburger,

  },
  computed: {
    ...mapGetters([
      'sidebar',
      'avatar',
      'device'
    ])
  },
  methods: {
    toggleSideBar() {
      this.$store.dispatch('app/toggleSideBar')
    },
    async logout() {
      await this.$store.dispatch('user/logout')
      this.$router.push(`/login?redirect=${this.$route.fullPath}`)
    }
  }
}
</script>

<style lang="scss" scoped>
.navbar {
  height: 50px;
  overflow: hidden;
  position: relative;
  background: #fff;
  box-shadow: 0 1px 4px rgba(0,21,41,.08);

  .hamburger-container {
    line-height: 46px;
    height: 100%;
    float: left;
    cursor: pointer;
    transition: background .3s;
    -webkit-tap-highlight-color:transparent;

    &:hover {
      background: rgba(0, 0, 0, .025)
    }
  }

  .breadcrumb-container {
    float: left;
  }

  .errLog-container {
    display: inline-block;
    vertical-align: top;
  }

  .right-menu {
    float: right;
    height: 100%;
    line-height: 50px;

    &:focus {
      outline: none;
    }

    .right-menu-item {
      display: inline-block;
      padding: 0 8px;
      height: 100%;
      font-size: 18px;
      color: #5a5e66;
      vertical-align: text-bottom;

      &.hover-effect {
        cursor: pointer;
        transition: background .3s;

        &:hover {
          background: rgba(0, 0, 0, .025)
        }
      }
    }

    .avatar-container {
      margin-right: 30px;

      .avatar-wrapper {
        margin-top: 5px;
        position: relative;

        .user-avatar {
          cursor: pointer;
          width: 40px;
          height: 40px;
          border-radius: 10px;
        }

        .el-icon-caret-bottom {
          cursor: pointer;
          position: absolute;
          right: -20px;
          top: 25px;
          font-size: 12px;
        }
      }
    }
  }
}
</style>
// 汉堡图片的组件没什么好说的 只有svg 要换的话 就直接改成图片
// 面包屑组件
<template>
  <el-breadcrumb class="app-breadcrumb" separator="/">
    <transition-group name="breadcrumb">
      <el-breadcrumb-item v-for="(item,index) in levelList" :key="item.path">
        <!-- 判断是否是最后一项index==levelList.length-1 -->
        <!-- 最后一项不做跳转 -->
        <span v-if="item.redirect==='noRedirect'||index==levelList.length-1" class="no-redirect">{{ item.meta.title }}</span>
        <a v-else @click.prevent="handleLink(item)">{{ item.meta.title }}</a>
      </el-breadcrumb-item>
    </transition-group>
  </el-breadcrumb>
</template>

<script>
import pathToRegexp from 'path-to-regexp'

export default {
  data() {
    return {
      levelList: null
    }
  },
  watch: {
    $route() {
      this.getBreadcrumb()
    }
  },
  created() {
    this.getBreadcrumb()
  },
  methods: {
    getBreadcrumb() {
      // only show routes with meta.title
      // 过滤出当前路由的层级 只有两层 第一层就是父级 第二层就是当前的选中的子级
      let matched = this.$route.matched.filter(item => item.meta && item.meta.title)
      // 选出第一项
      const first = matched[0]
      // 判断是否是首页   如果第一个值没有name值 进入这个判断
      if (!this.isDashboard(first)) {
        // [] 里被我删掉了 路由级数就变为了当前父级和当前子级 首页这个被我删了
        matched = [].concat(matched)
      }
      // 过滤出有meta 有title breadcrumb不为false的数据
      this.levelList = matched.filter(item => item.meta && item.meta.title && item.meta.breadcrumb !== false)
      // console.log(this.levelList);
    },
    // 当前路由的name 是否等于Dashboard 如果相等 就是首页
    isDashboard(route) {
      const name = route && route.name
      if (!name) {
        return false
      }
      return name.trim().toLocaleLowerCase() === 'Dashboard'.toLocaleLowerCase()
    },
    pathCompile(path) {
      // To solve this problem https://github.com/PanJiaChen/vue-element-admin/issues/561
      const { params } = this.$route
      //字符串转为正则表达式 快速填充 url 字符串的参数值
      // 这是百度的答案 我还是没明白是啥用处
      var toPath = pathToRegexp.compile(path)
      return toPath(params)
    },
    handleLink(item) {
      const { redirect, path } = item
      // 判断是否有重定向的值 有的话跳转重定向的地址 redirect
      if (redirect) {
        this.$router.push(redirect)
        return
      }
      this.$router.push(this.pathCompile(path))
    }
  }
}
</script>

<style lang="scss" scoped>
.app-breadcrumb.el-breadcrumb {
  display: inline-block;
  font-size: 14px;
  line-height: 50px;
  margin-left: 8px;

  .no-redirect {
    color: #97a8be;
    cursor: text;
  }
}
</style>
AppMain.vue
<template>
  <section class="app-main">
    <transition name="fade-transform" mode="out-in">
      <!-- 是否缓存路由页面  include-->
      <keep-alive :include="cachedViews">
        <!-- Vue会复用相同组件,对于路由有多个子路由来说,
          当在子路由来回切换时,会导致页面不刷新的问题,
          因为不再执行created和mounted这些钩子函数。
          <router-view :key='key'/>中的key即可解决这个问题 -->
        <router-view :key="key" />
      </keep-alive>
    </transition>
  </section>
</template>

<script>
export default {
  name: 'AppMain',
  computed: {
    // 判断是否保存路由数据的数组
    cachedViews() {
      return this.$store.state.tagsView.cachedViews
    },
    // 当前的路由
    key() {
      return this.$route.path
    }
  }
}
</script>

<style lang="scss" scoped>
.app-main {
  /* 50= navbar  50  */
  min-height: calc(100vh - 50px);
  width: 100%;
  position: relative;
  overflow: hidden;
}

.fixed-header+.app-main {
  padding-top: 50px;
}

.hasTagsView {
  .app-main {
    /* 84 = navbar + tags-view = 50 + 34 */
    min-height: calc(100vh - 84px);
  }

  .fixed-header+.app-main {
    padding-top: 84px;
  }
}
</style>

<style lang="scss">
// fix css style bug in open el-dialog
.el-popup-parent--hidden {
  .fixed-header {
    padding-right: 15px;
  }
}
</style>
ScrollPane.vue
<template>
  <!-- vertical:false 横向滚动  @wheel.native.prevent 鼠标滚动-->
  <el-scrollbar ref="scrollContainer" :vertical="false" class="scroll-container" @wheel.native.prevent="handleScroll">
    <slot />
  </el-scrollbar>
</template>

<script>
const tagAndTagSpacing = 4 // tagAndTagSpacing 每个tag之间的空隙

export default {
  name: 'ScrollPane',
  data() {
    return {
      left: 0
    }
  },
  computed: {
    scrollWrapper() {
      return this.$refs.scrollContainer.$refs.wrap
    }
  },
  mounted() {
    // 添加滚动的监听
    this.scrollWrapper.addEventListener('scroll', this.emitScroll, true)
  },
  beforeDestroy() {
    // 销毁滚动的监听
    this.scrollWrapper.removeEventListener('scroll', this.emitScroll)
  },
  methods: {
    handleScroll(e) {
       // wheelDelta:获取滚轮滚动方向,向上120,向下-120,但为常量,与滚轮速率无关
      // deltaY:垂直滚动幅度,正值向下滚动。电脑鼠标滚轮垂直行数默认值是3
      // wheelDelta只有部分浏览器支持,deltaY几乎所有浏览器都支持
      // -e.deltaY * 40 这个 *40 不知道是啥意思
      const eventDelta = e.wheelDelta || -e.deltaY * 40
      const $scrollWrapper = this.scrollWrapper
       // 0到scrollLeft为滚动区域隐藏部分
      //  eventDelta / 4  这个/4 也不知道是什么意思
      $scrollWrapper.scrollLeft = $scrollWrapper.scrollLeft + eventDelta / 4
    },
    emitScroll() {
      this.$emit('scroll')
    },
    // 移动到目标tag
    moveToTarget(currentTag) {
      // 获取滚动的元素
      const $container = this.$refs.scrollContainer.$el
      // 获取元素的宽度 包括padding border 的值
      const $containerWidth = $container.offsetWidth
      // 获取 wapper 组件
      const $scrollWrapper = this.scrollWrapper
      // 获取tag 组件
      const tagList = this.$parent.$refs.tag
      // 第一个tag 和最后一个tag
      let firstTag = null
      let lastTag = null

      // 找到第一个tag 和最后一个tag
      if (tagList.length > 0) {
        firstTag = tagList[0]
        lastTag = tagList[tagList.length - 1]
      }
      // 当前点击的tag 是否是第一个tag
      if (firstTag === currentTag) {
        // 如果是第一个tag 就滚动到0
        $scrollWrapper.scrollLeft = 0
        // 如果是最后一个tag
      } else if (lastTag === currentTag) {
        // 他的结构是tags-view-container  > el-scrollbar__wrap
        // 里面的wrap的宽度超出container 用里面的宽度 减去 外面的宽度
        // 就是要向左滑动的宽度
        // 滑动的距离是 el-scrollbar__wrap的总宽度 减去tags-view-container 元素的宽度
        $scrollWrapper.scrollLeft = $scrollWrapper.scrollWidth - $containerWidth
      } else {
        // 找到上一个tag和下一个tag
        // 找到当前tag的索引值
        const currentIndex = tagList.findIndex(item => item === currentTag)
        const prevTag = tagList[currentIndex - 1]
        const nextTag = tagList[currentIndex + 1]

        // 下一个tag距离左边的距离 = 下一个tag距离左边的距离 + 下一个tag自身的距离 + tag之间空隙的距离
        const afterNextTagOffsetLeft = nextTag.$el.offsetLeft + nextTag.$el.offsetWidth + tagAndTagSpacing

        // 上一个tag距离左边的距离 = 上一个tag距离左边的距离 - tag之间空隙的距离
        const beforePrevTagOffsetLeft = prevTag.$el.offsetLeft - tagAndTagSpacing

         // 如果下一个tag距离左边的距离 大于 需要往左滑动的距离 + tags-view-containe 元素的宽度
        //  是否点击的是右边边缘的tag 会滑动到下一个tag的距离
        // 说明这个tag的下一个tag 已经超出了tags-view-containe 可见范围
        //  所以会滑动到下一个tag的左边的距离
        // 简单点说就是最右边的下一个tag是否在可见范围内 是否被遮挡
        if (afterNextTagOffsetLeft > $scrollWrapper.scrollLeft + $containerWidth) {
          // 往左滑动的距离 = 下一个tag距离左边的距离 - tags-view-containe 元素的宽度
          $scrollWrapper.scrollLeft = afterNextTagOffsetLeft - $containerWidth

        // 是否点击的是左边边缘的tag  会滑动到上一个tag的距离
        // 上一个tag距离左边的距离是否 小于 往右滑动的距离
        // 就会滑动到上一个tag距离左边的的距离
        } else if (beforePrevTagOffsetLeft < $scrollWrapper.scrollLeft) {
          // 往左滑的距离 = 上一个tag距离左边的距离
          $scrollWrapper.scrollLeft = beforePrevTagOffsetLeft
        }
      }
    }
  }
}
</script>

<style lang="scss" scoped>
.scroll-container {
  white-space: nowrap;
  position: relative;
  overflow: hidden;
  width: 100%;
  ::v-deep {
    .el-scrollbar__bar {
      bottom: 0px;
    }
    .el-scrollbar__wrap {
      height: 49px;
    }
  }
}
</style>
tag 的index页面
<template>
  <div id="tags-view-container" class="tags-view-container">
    <scroll-pane ref="scrollPane" class="tags-view-wrapper" @scroll="handleScroll">
      <!--
        @click.middle.native:监听鼠标中键 判断是否是固定tag 不是的话就删除当前tag
        @contextmenu.prevent.native 监听鼠标右键 打开当前tag的菜单
      -->
      <router-link
        v-for="tag in visitedViews"
        ref="tag"
        :key="tag.path"
        :class="isActive(tag)?'active':''"
        :to="{ path: tag.path, query: tag.query, fullPath: tag.fullPath }"
        tag="span"
        class="tags-view-item"
        @click.middle.native="!isAffix(tag)?closeSelectedTag(tag):''"
        @contextmenu.prevent.native="openMenu(tag,$event)"
      >
        {{ tag.title }}
        <!-- 不是固定tag就显示删除按钮 -->
        <span v-if="!isAffix(tag)" class="el-icon-close" @click.prevent.stop="closeSelectedTag(tag)" />
      </router-link>
    </scroll-pane>
    <ul v-show="visible" :style="{left:left+'px',top:top+'px'}" class="contextmenu">
      <li @click="refreshSelectedTag(selectedTag)">刷新</li>
      <li v-if="!isAffix(selectedTag)" @click="closeSelectedTag(selectedTag)">关闭</li>
      <li @click="closeOthersTags">关闭其他</li>
      <li @click="closeAllTags(selectedTag)">关闭所有</li>
    </ul>
  </div>
</template>

<script>
import ScrollPane from './ScrollPane'
import path from 'path'

export default {
  components: { ScrollPane },
  data() {
    return {
      visible: false,
      top: 0,
      left: 0,
      selectedTag: {}, // 在右键打开菜单时赋值的
      affixTags: []
    }
  },
  computed: {
    visitedViews() { // 获取所有的tags
      return this.$store.state.tagsView.visitedViews
    },
    routes() { // 获取所有的路由信息
      return this.$store.state.permission.routes
    }
  },
  watch: {
    // 触发添加tag 条件就是是否触发了路由 触发了路由 就添加路由 并且前往当前的tag
    $route() {
      this.addTags()
      this.moveToCurrentTag()
    },
    visible(value) {
      if (value) {
        document.body.addEventListener('click', this.closeMenu)
      } else {
        document.body.removeEventListener('click', this.closeMenu)
      }
    }
  },
  mounted() {
    this.initTags()
    this.addTags()
  },
  methods: {
    // 是否是当前激活的状态
    isActive(route) {
      return route.path === this.$route.path
    },
    // 是否是固定tag
    isAffix(tag) {
      return tag.meta && tag.meta.affix
    },
    // 过滤出固定tag
    filterAffixTags(routes, basePath = '/') {
      let tags = []
      // 循环 和 递归 找出固定tag的值
      routes.forEach(route => {
        if (route.meta && route.meta.affix) {
          const tagPath = path.resolve(basePath, route.path)
          tags.push({
            fullPath: tagPath,
            path: tagPath,
            name: route.name,
            meta: { ...route.meta }
          })
        }
        if (route.children) {
          const tempTags = this.filterAffixTags(route.children, route.path)
          if (tempTags.length >= 1) {
            tags = [...tags, ...tempTags]
          }
        }
      })
      return tags
    },
    initTags() {
      // 获取固定tag的数量
      const affixTags = this.affixTags = this.filterAffixTags(this.routes)
      // 循环添加到tag里
      for (const tag of affixTags) {
        // tag必须有name值
        if (tag.name) {
          // 这个是只添加tag  没有添加tag的缓存
          this.$store.dispatch('tagsView/addVisitedView', tag)
        }
      }
    },
    addTags() {
      const { name } = this.$route
      if (name) {
        // 这个是tag 和缓存都添加 上下两个add的方法就差别在这
        this.$store.dispatch('tagsView/addView', this.$route)
      }
      return false
    },
    moveToCurrentTag() {
      // 获取当前所有的tag的值
      const tags = this.$refs.tag
      this.$nextTick(() => {
        // 循环tag
        for (const tag of tags) {
          // 如果tag的path地址和当前的路由地址一致
          if (tag.to.path === this.$route.path) {
            // 就滚动到这个匹配到的path的tag位置
            this.$refs.scrollPane.moveToTarget(tag)
            // when query is different then update
            // 当查询不同时,则更新 就是参数不同的话就会更新当前的路由信息
            // pullPach 是全地址,携带路由参数  path 不带参数
            if (tag.to.fullPath !== this.$route.fullPath) {
              this.$store.dispatch('tagsView/updateVisitedView', this.$route)
            }
            break
          }
        }
      })
    },
    // 刷新页面 就是跳到另一个页面再跳转回来
    refreshSelectedTag(view) {
      this.$store.dispatch('tagsView/delCachedView', view).then(() => {
        const { fullPath } = view
        this.$nextTick(() => {
          this.$router.replace({
            path: '/redirect' + fullPath
          })
        })
      })
    },
    // 删除选中的tag
    closeSelectedTag(view) {
      this.$store.dispatch('tagsView/delView', view).then(({ visitedViews }) => {
        // 判断是否是当前激活的tag页面
        if (this.isActive(view)) {
          // 如果是当前选中的tag 删除后 跳到最后一个tag页面
          // 传入tag数组和当前的tag值
          this.toLastView(visitedViews, view)
        }
      })
    },
    // 关闭其他tag
    closeOthersTags() {
      // 先前往当前路由地址 当路由发生变化 就会触发addtag方法添加当前的tag信息
      this.$router.push(this.selectedTag)

      this.$store.dispatch('tagsView/delOthersViews', this.selectedTag).then(() => {
        // 移动到当前的tag页面
        this.moveToCurrentTag()
      })
    },
    // 关闭所有的除了固定的tag和缓存
    closeAllTags(view) {
      this.$store.dispatch('tagsView/delAllViews').then(({ visitedViews }) => {
        // 如果是固定的tag 就直接return
        if (this.affixTags.some(tag => tag.path === view.path)) {
          return
        }
        // 如果不是固定的tag 就去最后一个tag
        this.toLastView(visitedViews, view)
      })
    },
    // 去往最后一个tag页面
    toLastView(visitedViews, view) {
      const latestView = visitedViews.slice(-1)[0]
      if (latestView) {
        this.$router.push(latestView.fullPath)
      } else {
        // now the default is to redirect to the home page if there is no tags-view,
        // you can adjust it according to your needs.
        // 我加了一个首页固定的tag标签 就不会走到这里
        if (view.name === 'Dashboard') {
          // to reload home page
          this.$router.replace({ path: '/redirect' + view.fullPath })
        } else {
          this.$router.push({ path: '/teacher' })
        }
      }
    },
    openMenu(tag, e) {
      const menuMinWidth = 105
      const offsetLeft = this.$el.getBoundingClientRect().left // container margin left
      const offsetWidth = this.$el.offsetWidth // container width
      const maxLeft = offsetWidth - menuMinWidth // left boundary
      const left = e.clientX - offsetLeft + 15 // 15: margin right

      if (left > maxLeft) {
        this.left = maxLeft
      } else {
        this.left = left
      }

      this.top = e.clientY
      this.visible = true
      this.selectedTag = tag
    },
    // 在滚动的时候 关闭tag菜单
    closeMenu() {
      this.visible = false
    },
    // 滚动的监听事件
    handleScroll() {
      this.closeMenu()
    }
  }
}
</script>

<style lang="scss" scoped>
.tags-view-container {
  height: 34px;
  width: 100%;
  background: #fff;
  border-bottom: 1px solid #d8dce5;
  box-shadow: 0 1px 3px 0 rgba(0, 0, 0, .12), 0 0 3px 0 rgba(0, 0, 0, .04);
  .tags-view-wrapper {
    .tags-view-item {
      display: inline-block;
      position: relative;
      cursor: pointer;
      height: 26px;
      line-height: 26px;
      border: 1px solid #d8dce5;
      color: #495060;
      background: #fff;
      padding: 0 8px;
      font-size: 12px;
      margin-left: 5px;
      margin-top: 4px;
      &:first-of-type {
        margin-left: 15px;
      }
      &:last-of-type {
        margin-right: 15px;
      }
      &.active {
        background-color: #42b983;
        color: #fff;
        border-color: #42b983;
        &::before {
          content: '';
          background: #fff;
          display: inline-block;
          width: 8px;
          height: 8px;
          border-radius: 50%;
          position: relative;
          margin-right: 2px;
        }
      }
    }
  }
  .contextmenu {
    margin: 0;
    background: #fff;
    z-index: 3000;
    position: absolute;
    list-style-type: none;
    padding: 5px 0;
    border-radius: 4px;
    font-size: 12px;
    font-weight: 400;
    color: #333;
    box-shadow: 2px 2px 3px 0 rgba(0, 0, 0, .3);
    li {
      margin: 0;
      padding: 7px 16px;
      cursor: pointer;
      &:hover {
        background: #eee;
      }
    }
  }
}
</style>

<style lang="scss">
//reset element css of el-icon-close
.tags-view-wrapper {
  .tags-view-item {
    .el-icon-close {
      width: 16px;
      height: 16px;
      vertical-align: 2px;
      border-radius: 50%;
      text-align: center;
      transition: all .3s cubic-bezier(.645, .045, .355, 1);
      transform-origin: 100% 50%;
      &:before {
        transform: scale(.6);
        display: inline-block;
        vertical-align: -3px;
      }
      &:hover {
        background-color: #b4bccc;
        color: #fff;
      }
    }
  }
}
</style>
tag的vuex中的页面
const state = {
  visitedViews: [], // tag的值
  cachedViews: []  // 缓存起来的tag
}

const mutations = {
  ADD_VISITED_VIEW: (state, view) => {
    if (state.visitedViews.some(v => v.path === view.path)) return
    state.visitedViews.push(
      Object.assign({}, view, {
        title: view.meta.title || 'no-name'
      })
    )
  },
  ADD_CACHED_VIEW: (state, view) => {
    if (state.cachedViews.includes(view.name)) return
    if (!view.meta.noCache) {
      state.cachedViews.push(view.name)
    }
  },

  DEL_VISITED_VIEW: (state, view) => {
    for (const [i, v] of state.visitedViews.entries()) {
      if (v.path === view.path) {
        state.visitedViews.splice(i, 1)
        break
      }
    }
  },
  // 从cachedViews删除当前tag的值
  DEL_CACHED_VIEW: (state, view) => {
    // 这个tag的值是否在cachedViews数组中 获取下标
    const index = state.cachedViews.indexOf(view.name)
    // 在这个数组中 并且根据下标删除当前项
    index > -1 && state.cachedViews.splice(index, 1)
  },
  // 新的tag页面 = tag数组中过滤出 有固定tag的值 和当前选中的值
  DEL_OTHERS_VISITED_VIEWS: (state, view) => {
    state.visitedViews = state.visitedViews.filter(v => {
      return v.meta.affix || v.path === view.path
    })
  },
  // tag缓存页面 =
  DEL_OTHERS_CACHED_VIEWS: (state, view) => {
    // 找到当前选中tag的下标
    const index = state.cachedViews.indexOf(view.name)
    if (index > -1) {
      // 找到下标 tag缓存数组 = slice截取出当前tag的唯一值
      state.cachedViews = state.cachedViews.slice(index, index + 1)
    } else {
      // if index = -1, there is no cached tags
      // 如果没找到下标 tag缓存数组就为空
      state.cachedViews = []
    }
  },
  //  过滤出固定tag
  DEL_ALL_VISITED_VIEWS: state => {
    // keep affix tags
    const affixTags = state.visitedViews.filter(tag => tag.meta.affix)
    state.visitedViews = affixTags
  },
  // 清空缓存
  DEL_ALL_CACHED_VIEWS: state => {
    state.cachedViews = []
  },
  // 循环tag数组 如果path路由地址相同
  // 就将传进来的当前tag 深拷贝一份 重新赋值给 匹配到的v这一项的内容
  UPDATE_VISITED_VIEW: (state, view) => {
    for (let v of state.visitedViews) {
      if (v.path === view.path) {
        v = Object.assign(v, view)
        break
      }
    }
  }
}

const actions = {
  // 添加缓存和tag
  addView({ dispatch }, view) {
    dispatch('addVisitedView', view)
    dispatch('addCachedView', view)
  },
  // 只添加tag
  addVisitedView({ commit }, view) {
    commit('ADD_VISITED_VIEW', view)
  },
  // 只添加缓存
  addCachedView({ commit }, view) {
    commit('ADD_CACHED_VIEW', view)
  },
  // 将当前缓存页面的tag从缓存数组和显示tag标签的数组都删除
  delView({ dispatch, state }, view) {
    return new Promise(resolve => {
      dispatch('delVisitedView', view)
      dispatch('delCachedView', view)
      resolve({
        visitedViews: [...state.visitedViews],
        cachedViews: [...state.cachedViews]
      })
    })
  },
  delVisitedView({ commit, state }, view) {
    return new Promise(resolve => {
      commit('DEL_VISITED_VIEW', view)
      resolve([...state.visitedViews])
    })
  },
  // 删除当前缓存的tag从cachedViews删除
  // 在返回删除后剩余的tag的值
  delCachedView({ commit, state }, view) {
    return new Promise(resolve => {
      commit('DEL_CACHED_VIEW', view)
      resolve([...state.cachedViews])
    })
  },
  // 删除其他的值
  delOthersViews({ dispatch, state }, view) {
    return new Promise(resolve => {
      // 删除缓存和tag
      dispatch('delOthersVisitedViews', view)
      dispatch('delOthersCachedViews', view)
      resolve({
        visitedViews: [...state.visitedViews],
        cachedViews: [...state.cachedViews]
      })
    })
  },
  // 删除除了当前tag信息的其他值的tag
  delOthersVisitedViews({ commit, state }, view) {
    return new Promise(resolve => {
      commit('DEL_OTHERS_VISITED_VIEWS', view)
      resolve([...state.visitedViews])
    })
  },
  // 删除除了当前tag信息的缓存里其他的值
  delOthersCachedViews({ commit, state }, view) {
    return new Promise(resolve => {
      commit('DEL_OTHERS_CACHED_VIEWS', view)
      resolve([...state.cachedViews])
    })
  },
  // 删除所有的缓存和tag
  delAllViews({ dispatch, state }, view) {
    return new Promise(resolve => {
      dispatch('delAllVisitedViews', view)
      dispatch('delAllCachedViews', view)
      resolve({
        visitedViews: [...state.visitedViews],
        cachedViews: [...state.cachedViews]
      })
    })
  },
  delAllVisitedViews({ commit, state }) {
    return new Promise(resolve => {
      commit('DEL_ALL_VISITED_VIEWS')
      resolve([...state.visitedViews])
    })
  },
  delAllCachedViews({ commit, state }) {
    return new Promise(resolve => {
      commit('DEL_ALL_CACHED_VIEWS')
      resolve([...state.cachedViews])
    })
  },
  // 更新tags 传入当前路由信息
  updateVisitedView({ commit }, view) {
    commit('UPDATE_VISITED_VIEW', view)
  }
}

export default {
  namespaced: true,
  state,
  mutations,
  actions
}