docker容器集成Jenkins+Git+Python3+Newman
制作docker容器集成Jenkins+Git+Python3+Newman第一部分
- 前言
- 一、jenkins是什么
- 二、Docker
-
- 1.使用目的
- 2.Docker是什么
- 3.docker安装
- 4.使用jenkins镜像制作容器。
- 三、Python3环境配置
-
- 1、安装Python3
- 2.使用pip3安装python依赖库
前言
在这篇文章中,我们会从零开始集成我们需要的各种工具和模块,并且记录下遇到的各种问题,方便大家以后遇到了能快速定位解决问题。
一、jenkins是什么
Jenkins是一个开源的、提供友好操作界面的持续集成(CI)工具。本次学习主要的目的是为了搭建Python和Postman自动化测试环境。优化测试效率。
二、Docker
1.使用目的
在知识库中能找到我之前在服务器端直接搭建的jenkins集成框架,当时主要是使用jenkins的热部署war包搭建的。所有的模块文件全部下载在服务器中,版本控制混乱,jenkins中只集成了Newman+Allure+git还有自动化构建提示机器人。当我想在jenkins环境中运行Python自动化测试脚本时,发现还需要安装Python的依赖库,下载安装Python的版本过多,为了保持版本环境的一致性,准备使用docker来集成jenkins。
2.Docker是什么
简单地说,就是一个制作小型虚拟机的技术。让这个虚拟机中只有你需要的模块,压缩虚拟机体积,能让多个小虚拟机在同一个服务器上运行,保持测试环境与正式环境的一致性。
3.docker安装
该处我虚拟机系统使用的是Ubuntu,所以只介绍Ubuntu的安装方式,其余安装方式可以参考菜鸟教程。 菜鸟教程网址.
方法一:使用国内镜像一键安装
curl -sSL https://get.daocloud.io/docker | sh
方法二:使用docker仓库进行安装
1.设置仓库,更新 apt 包索引。
$ sudo apt-get update
2.安装 apt 依赖包,用于通过HTTPS来获取仓库:
$ sudo apt-get install \
    apt-transport-https \
    ca-certificates \
    curl \
    gnupg-agent \
    software-properties-common
3.添加 Docker 的官方 GPG 密钥:
$ curl -fsSL https://mirrors.ustc.edu.cn/docker-ce/linux/ubuntu/gpg | sudo apt-key add -
4.9DC8 5822 9FC7 DD38 854A E2D8 8D81 803C 0EBF CD88 通过搜索指纹的后8个字符,验证您现在是否拥有带有指纹的密钥。
$ sudo apt-key fingerprint 0EBFCD88

pub   rsa4096 2017-02-22 [SCEA]
      9DC8 5822 9FC7 DD38 854A  E2D8 8D81 803C 0EBF CD88
uid           [ unknown] Docker Release (CE deb) <docker@docker.com>
sub   rsa4096 2017-02-22 [S]
5.使用以下指令设置稳定版仓库
$ sudo add-apt-repository \
   "deb [arch=amd64] https://mirrors.ustc.edu.cn/docker-ce/linux/ubuntu/ \
  $(lsb_release -cs) \
  stable"
安装Docker Engine-Community
1.更新 apt 包索引。(不更新可能会下载到旧版本)
$ sudo apt-get update
2安装最新版本的 Docker Engine-Community 和 containerd
$ sudo apt-get install docker-ce docker-ce-cli containerd.io
3测试 Docker 是否安装成功,输入以下指令,打印出以下信息则安装成功:
$ sudo docker run hello-world

Unable to find image 'hello-world:latest' locally
latest: Pulling from library/hello-world
1b930d010525: Pull complete                                                                                                                                  Digest: sha256:c3b4ada4687bbaa170745b3e4dd8ac3f194ca95b2d0518b417fb47e5879d9b5f
Status: Downloaded newer image for hello-world:latest


Hello from Docker!
This message shows that your installation appears to be working correctly.


To generate this message, Docker took the following steps:
 1. The Docker client contacted the Docker daemon.
 2. The Docker daemon pulled the "hello-world" image from the Docker Hub.
    (amd64)
 3. The Docker daemon created a new container from that image which runs the
    executable that produces the output you are currently reading.
 4. The Docker daemon streamed that output to the Docker client, which sent it
    to your terminal.


To try something more ambitious, you can run an Ubuntu container with:
 $ docker run -it ubuntu bash


Share images, automate workflows, and more with a free Docker ID:
 https://hub.docker.com/


For more examples and ideas, visit:
 https://docs.docker.com/get-started/
4.使用jenkins镜像制作容器。
1.下载jenkins镜像(docker操作需要docker操作权限,建议直接切换管理员输入su 以及密码切换)。
docker search jenkins
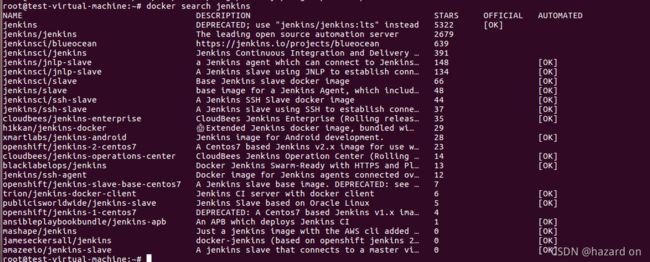
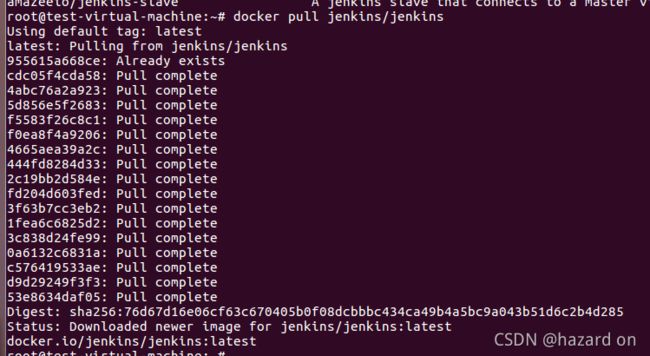
使用该语句默认下载最新的jenkins镜像,尽量选择jenkins/jenkins
docker pull jenkins/jenkins
2.递归(-p)创建宿主机的挂载目录,并且给他授予最高权限777。
mkdir -p /var/jenkins_two
chmod 777 /var/jenkins_two
3.启动容器,映射到宿主机的端口以及挂载目录jenkins_node。
-d让容器在后台运行;–name容器的名字;-p映射端口8080;-p 50000:50000 50000是jenkins的jnlp的端口具体用处待讨论;-v挂载目录,将容器的存储卷挂载在jenkins_node上。
docker run -d --name jenkins-note -p 8080:8080 -p 50000:50000 -v /var/jenkins_two:/var/jenkins_home jenkins/jenkins
4.使用docker images和docker ps,可以查看镜像和正在运行的容器。使用docker可以查看jenkins关闭和运行的容器。

5.查看创建容器的docker日志,找到初始的jenkins管理员密码
docker logs jenkins-note
或者查看挂载目录
cat /var/jenkins_two/secrets/initialAdminPassword
6.至此jenkins容器已经制作完成,jenkins的配置内容我们放到最后的集成部分。下面我们开始在容器中配置Python3环境。
三、Python3环境配置
1、安装Python3
首先,我们配置的容器是Debian系统,所以只能使用apt-get的方式进行安装。其他安装方式涉及gcc的编译环境暂时不使用。
a.以超级管理员权限进入创建好的容器。4868677559ab是容器的id,可以通过docker ps获取。
docker exec -u root -it 4868677559ab bash
b.更新apt源
apt-get update
c.更新apt源速度过慢,所以修改源为国内清华源。因为容器内没有安装编辑文件模块vi和vim,直接修改source.list文件又频繁报错,这里用了个笨方法,有更好的建议欢迎补充。
在宿主机新建一个文件source.list,在里面存入阿里云 的镜像源。链接: 镜像源.
deb http://mirrors.aliyun.com/ubuntu/ xenial main
deb-src http://mirrors.aliyun.com/ubuntu/ xenial main

deb http://mirrors.aliyun.com/ubuntu/ xenial-updates main
deb-src http://mirrors.aliyun.com/ubuntu/ xenial-updates main

deb http://mirrors.aliyun.com/ubuntu/ xenial universe
deb-src http://mirrors.aliyun.com/ubuntu/ xenial universe
deb http://mirrors.aliyun.com/ubuntu/ xenial-updates universe
deb-src http://mirrors.aliyun.com/ubuntu/ xenial-updates universe

deb http://mirrors.aliyun.com/ubuntu/ xenial-security main
deb-src http://mirrors.aliyun.com/ubuntu/ xenial-security main
deb http://mirrors.aliyun.com/ubuntu/ xenial-security universe
deb-src http://mirrors.aliyun.com/ubuntu/ xenial-security universe
在容器中删除原有的sources.list
  cd /etc/apt
  rm sources.list
获取容器长id,docker inspect -f ‘{{.ID}}’ 容器名称
docker inspect -f '{{.ID}}' jenkins-note
使用docker cp命令将文件传入容器中
docker cp 宿主机文件路径文件名称 容器长id:容器地址
docker cp /home/test/Desktop/sources.list 4868677559ab1a8fd5d7ddbf9124de523baa9ee0fc17c4664be206321eb303f6:/etc/apt
更新apt源
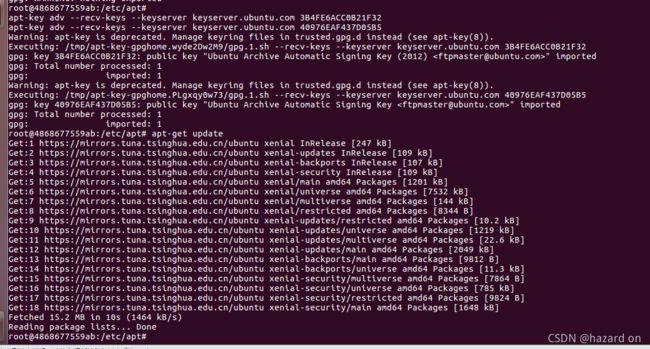
apt-get update
若此时报错,没有pubkey
输入语句加入pubkey
apt-key adv --recv-keys --keyserver keyserver.ubuntu.com 3B4FE6ACC0B21F32
apt-key adv --recv-keys --keyserver keyserver.ubuntu.com 40976EAF437D05B5
最后更新apt源,更新成功
使用apt安装Python3
安装中如果报错
Reading package lists... Done
Building dependency tree... Done
Reading state information... Done
Some packages could not be installed. This may mean that you have
requested an impossible situation or if you are using the unstable
distribution that some required packages have not yet been created
or been moved out of Incoming.
The following information may help to resolve the situation:

The following packages have unmet dependencies:
 ncurses-base : Breaks: libtinfo5 (< 6.1) but 6.0+20160213-1ubuntu1 is to be installed
E: Error, pkgProblemResolver::Resolve generated breaks, this may be caused by held packages.
请输入apt-get install libtinfo5
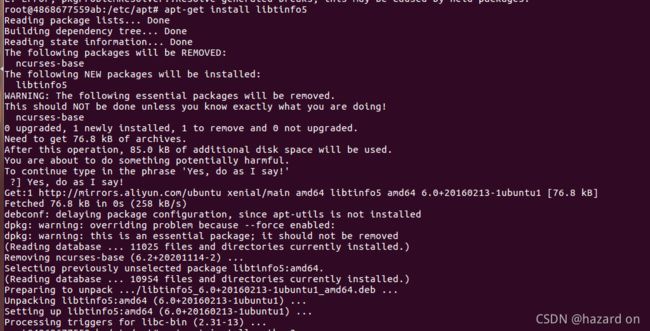
然后开始安装python3
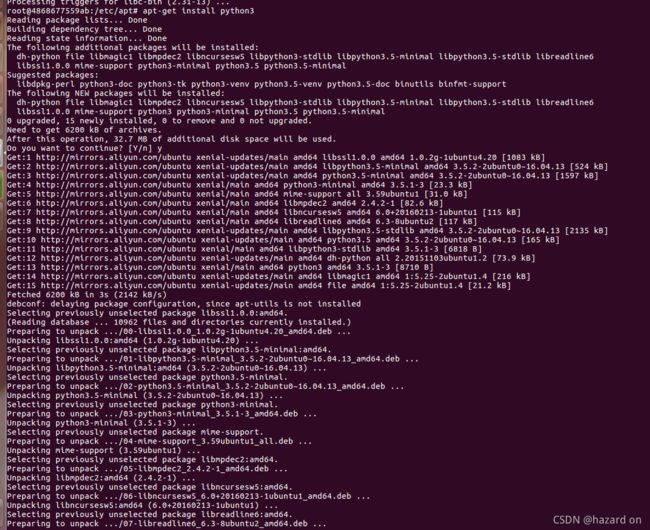
apt-get install python3
apt-get install python3-pip
安装完成后,输入代码查看版本
pip3 --version
python3 --version
至此Python模块安装完成。
2.使用pip3安装python依赖库
使用pip3语句生成本地依赖库
pip3 freeze > requirements.txt
将requirement文件移到容器里面
docker cp /home/test/Desktop/requirements.txt 4868677559ab1a8fd5d7ddbf9124de523baa9ee0fc17c4664be206321eb303f6:/var/jenkins_home
进入到该目录下,安装依赖库。注意:若安装中途报错,本次所有的依赖库将不会安装。报错后请检查依赖库的拼写格式,部分依赖库无法通过该方式安装,需要手动下载安装,活用wget
cd /var/jenkin_home
pip3 install -r requirements.txt
