Qt6 QML Book/Quick入门/基本元素类型
Core Elements
基本元素类型
Elements can be grouped into visual and non-visual elements. A visual element (like the Rectangle) has a geometry and normally presents an area on the screen. A non-visual element (like a Timer) provides general functionality, normally used to manipulate the visual elements.
元素类型可以分为可见元素类型和非可见元素类型。可见元素类型(如Rectangle)具有几何形状,通常在屏幕上显示在一个区域里。非可见元素类型(如Timer)提供常用功能,通常用于操作可见元素。
Currently, we will focus on the fundamental visual elements, such as Item, Rectangle, Text, Image and MouseArea. However, by using the Qt Quick Controls 2 module, it is possible to create user interfaces built from standard platform components such as buttons, labels and sliders.
当前,我们将关注基本的可见元素类型,如Item, Rectangle, Text, Image and MouseArea。然而,通过使用Qt Quick Controls 2模块,可以创建标准平台组件(如buttons, labels和sliders),用于构建用户界面。
Item Element
项元素类型
Item is the base element for all visual elements as such all other visual elements inherits from Item. It doesn’t paint anything by itself but defines all properties which are common across all visual elements:
Item是所有可见元素类型的基元素类型,即所有可见元素类型都继承自Item。它自己不绘制任何东西,但定义了所有可见元素类型的通用属性
- Geometry -
xandyto define the top-left position,widthandheightfor the expansion of the element, andzfor the stacking order to lift elements up or down from their natural ordering. - 几何位置-x和y是左上角的位置坐标,width和height水平和垂直方面的延伸量,z定义堆叠顺序,以提升或降低元素的层叠顺序。
- Layout handling -
anchors(left, right, top, bottom, vertical and horizontal center) to position elements relative to other elements with optionalmargins. - 布局管理-anchors (left, right, top, bottom, vertical and horizontal center) ,用于定位元素相对于其他元素的边距。
- Key handling - attached
KeyandKeyNavigationproperties to control key handling and thefocusproperty to enable key handling in the first place. - 按键处理 - 附加属性Key和KeyNavigation,用于控制按键处理,focus属性用于启用按键处理。
- Transformation -
scaleandrotatetransformation and the generictransformproperty list for x,y,z transformation, as well as atransformOriginpoint. - 变换处理 - scale缩放变换、rotate旋转变换和x,y,z变换轴,以及transformOrigin变换原点。
- Visual -
opacityto control transparency,visibleto show/hide elements,clipto restrain paint operations to the element boundary, andsmoothto enhance the rendering quality. - 可视处理 -不透明度控制透明度,显示/隐藏元素,剪辑限制绘制元素边界,并平滑以提高渲染质量。
- State definition -
stateslist property with the supported list of states, the currentstateproperty, and thetransitionslist property to animate state changes. - 状态定义-状态列表属性,包含支持的状态列表、当前状态属性和转换列表属性,状态过渡动画。
To better understand the different properties we will try to introduce them throughout this chapter in the context of the element presented. Please remember these fundamental properties are available on every visual element and work the same across these elements.
为了更好地理解不同的属性,我们将试着在本章中介绍这些元素。请记住,这些基本属性适用于每个可见元素,并在这些元素中发挥相同的作用。
TIP
注
The Item element is often used as a container for other elements, similar to the div element in HTML.
Item元素类型经常用作其他元素的容器,类似于HTML中的div元素。
Rectangle Element
矩形元素类型
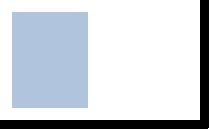
Rectangle extends Item and adds a fill color to it. Additionally it supports borders defined by border.color and border.width. To create rounded rectangles you can use the radius property.
矩形(Rectangle)扩展Item并为其添加颜色填充。此外,它支持自定义的边框,如边框颜色(border. color)和边框宽度(border.width)。要创建圆角矩形,可以使用半径(radius)属性。
Rectangle {
    id: rect1
    x: 12; y: 12
    width: 76; height: 96
    color: "lightsteelblue"
}
Rectangle {
    id: rect2
    x: 112; y: 12
    width: 76; height: 96
    border.color: "lightsteelblue"
    border.width: 4
    radius: 8
}
TIP
注
Valid color values are colors from the SVG color names (see http://www.w3.org/TR/css3-color/#svg-color). You can provide colors in QML in different ways, but the most common way is an RGB string (‘#FF4444’) or as a color name (e.g. ‘white’).
颜色文本是来自SVG颜色名称(参见http://www.w3.org/TR/css3-color/#svg-color)。可以以不同的方式在QML中提供颜色,但最用的是RGB字符串(#FF4444)或颜色名称(例如white)。
A random color can be created using some JavaScript:
也可以使用JavaScript创建随机色:
color: Qt.rgba( Math.random(), Math.random(), Math.random(), 1 )
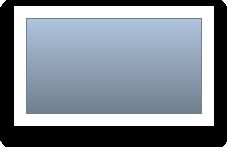
Besides a fill color and a border, the rectangle also supports custom gradients:
除了填充颜色和边框,矩形元素类型还支持自定义渐变填充
Rectangle {
    id: rect1
    x: 12; y: 12
    width: 176; height: 96
    gradient: Gradient {
        GradientStop { position: 0.0; color: "lightsteelblue" }
        GradientStop { position: 1.0; color: "slategray" }
    }
    border.color: "slategray"
}
A gradient is defined by a series of gradient stops. Each stop has a position and a color. The position marks the position on the y-axis (0 = top, 1 = bottom). The color of the GradientStop marks the color at that position.
渐变是由一系列渐变点定义的。每个渐变点都有一个相对位置值和颜色。相对位置值使用y轴上的相对位置(0 =顶部,1 =底部)标识。GradientStop的颜色(color)标记了该位置的颜色。
TIP
注
A rectangle with no width/height set will not be visible. This happens often when you have several rectangles width (height) depending on each other and something went wrong in your composition logic. So watch out!
没有宽度(width)/高度(height)的矩形是不可见的。当有几个宽度或高度相互依赖的矩形时,经常会发生逻辑组合错误。所以要注意下
TIP
注
It is not possible to create an angled gradient. For this, it’s better to use predefined images. One possibility would be to just rotate the rectangle with the gradient, but be aware the geometry of a rotated rectangle will not change and thus will lead to confusion as the geometry of the element is not the same as the visible area. From the author's perspective, it’s really better to use designed gradient images in that case.
无法创建一个角度渐变。若想实现这种效果,最好使用预定义的图像。渐变填充的矩形可以再旋转,但要注意,旋转后的矩形几何形状不会改变。因为元素的几何形状与可见区域不匹配,因此可能会导致布局混淆。笔者的意见,建议使用设计好的渐变图像。
Text Element
文本元素类型
To display text, you can use the Text element. Its most notable property is the text property of type string. The element calculates its initial width and height based on the given text and the font used. The font can be influenced using the font property group (e.g. font.family, font.pixelSize, …). To change the color of the text just use the color property.
要显示文本,可以使用Text元素类型。它最主要的属性是字符串文本属性。元素根据给定的文本和字体计算其初始宽度和高度。字体属性组包括字体名称、字体大小等。要改变文本颜色,需使用color属性。
Text {
    text: "The quick brown fox"
    color: "#303030"
    font.family: "Ubuntu"
    font.pixelSize: 28
}
Text can be aligned to each side and the center using the horizontalAlignment and verticalAlignment properties. To further enhance the text rendering you can use the style and styleColor property, which allows you to render the text in outline, raised and sunken mode.
文本可以使用horizontalAlignment和verticalAlignment属性,进行文本对齐。进一步增强文本效果,可以使用style和styleColor属性,它让文本产生轮廓、弹起或下沉的样式。
For longer text, you often want to define a break position like A very … long text, this can be achieved using the elide property. The elide property allows you to set the elide position to the left, right or middle of your text.
对较长的文本,通常希望定义一个中断位置,这可以使用elide属性实现。elide属性允许将省略位置设置在文本的左侧、右侧或中间。
In case you don’t want the ‘…’ of the elide mode to appear but still want to see the full text you can also wrap the text using the wrapMode property (works only when the width is explicitly set):
如果不想显示省略(elide)模式,希望看到全文,可以使用wrapMode属性将文本换行(仅在指定宽度时有效):
Text {
    width: 40; height: 120
    text: 'A very long text'
    // '...' shall appear in the middle "…"将出现在中间
    elide: Text.ElideMiddle
    // red sunken text styling 红色下陷文字风格
    style: Text.Sunken
    styleColor: '#FF4444'
    // align text to the top 文字顶部对齐
    verticalAlignment: Text.AlignTop
    // only sensible when no elide mode 只有在无省略模式时才生效
    // wrapMode: Text.WordWrap
}
A Text element only displays the given text, and the remaining space it occupies is transparent. This means it does not render any background decoration, and so it's up to you to provide a sensible background if desired.
Text元素类型只显示给定的文本,并且它所占用的空间背景是透明的。也就是说,它不会渲染任何背景,若是需要背景,可以指定一个确切的背景。
TIP
注
Be aware that the initial width of a Text item is dependant on the font and text string that were set. A Text element with no width set and no text will not be visible, as the initial width will be 0.
请注意,Text项的初始宽度依赖于所设置的字体和文本字符串。没有设置宽度且无文本的Text元素将不可见,因为初始宽度将为0。
TIP
注
Often when you want to layout Text elements you need to differentiate between aligning the text inside the Text element boundary box and aligning the element boundary box itself. In the former, you want to use the horizontalAlignment and verticalAlignment properties, and in the latter case, you want to manipulate the element geometry or use anchors.
通常,当布局Text元素时,需要区分对齐边界框内的文本,还是对齐元素边界框本身。前者使用horizontalAlignment和verticalAlignment属性,后者指定元素的几何位置(geometry)或使用锚(anchors)。
Image Element
图片元素类型
An Image element is able to display images in various formats (e.g. PNG, JPG, GIF, BMP, WEBP). For the full list of supported image formats, please consult the Qt documentation. Besides the source property to provide the image URL, it contains a fillMode which controls the resizing behavior.
一个Image元素类型能够显示多种格式图像(例如PNG, JPG, GIF, BMP, WEBP)。有关支持的图像格式完整列表,请参阅Qt文档。除了提供图像URL的source属性外,它还包含一个fillMode属性,用来控制缩放的填充模式。
Image {
    x: 12; y: 12
    // width: 72
    // height: 72
    source: "assets/triangle_red.png"
}
Image {
    x: 12+64+12; y: 12
    // width: 72
    height: 72/2
    source: "assets/triangle_red.png"
    fillMode: Image.PreserveAspectCrop
    clip: true
}
TIP
注
A URL can be a local path with forward slashes ( “./images/home.png” ) or a web-link (e.g. “http://example.org/home.png”).
URL可以是带有正斜杠的本地路径(./images/home.png)或web链接(例如http://example.org/home.png)。
TIP
注
Image elements using PreserveAspectCrop should also enable clipping to avoid image data being rendered outside the Image boundaries. By default clipping is disabled (clip: false). You need to enable clipping (clip: true) to constrain the painting to the elements bounding rectangle. This can be used on any visual element, but should be used sparingly.
图像元素类型,可以使用PreserveAspectCrop属性进行剪切,但要注意启用裁剪属性,以避免图像被渲染到图像边界之外。默认情况下,裁剪属性是禁用的(clip: false)。您需要启用裁剪属性(clip: true),限制绘画在元素的边界矩形内。这适用于任何可见元素类型,但应谨慎使用。
TIP
注
Using C++ you are able to create your own image provider using QQuickImageProvider. This allows you to create images on the fly and make use of threaded image loading.
若想使用c++中的图像,可以使用QQuickImageProvider创建图像提供者。这允许动态地创建图像,或者跨线程加载图像。
MouseArea Element
鼠标区域元素类型
To interact with these elements you will often use a MouseArea. It’s a rectangular invisible item in which you can capture mouse events. The mouse area is often used together with a visible item to execute commands when the user interacts with the visual part.
与这些元素交互,通常会使用MouseArea。它是一个矩形不可见项目,但可以捕获其中的鼠标事件。当与可见项交互时,鼠标区域通常与可见项配合使用,并执行命令。
Rectangle {
    id: rect1
    x: 12; y: 12
    width: 76; height: 96
    color: "lightsteelblue"
    MouseArea {
        id: area
        width: parent.width
        height: parent.height
        onClicked: rect2.visible = !rect2.visible
    }
}

Rectangle {
    id: rect2
    x: 112; y: 12
    width: 76; height: 96
    border.color: "lightsteelblue"
    border.width: 4
    radius: 8
}
TIP
注
This is an important aspect of Qt Quick: the input handling is separated from the visual presentation. This allows you to show the user an interface element where the actual interaction area can be larger.
这是Qt Quick的重要部分:输入处理与可视化显示分离。这样在实际交互时,可以向用户显示更大的元素。
TIP
注
For more complex interaction, see Qt Quick Input Handlers. They are intended to be used instead of elements such as MouseArea and Flickable and offer greater control and flexibility. The idea is to handle one interaction aspect in each handler instance instead of centralizing the handling of all events from a given source in a single element, which was the case before.
有关更复杂的交互,请参阅Qt Quick键盘事件处理相关。这样做目的是,替换MouseArea和Flickable等元素类型,并提供更好的控制性和灵活性。其思想是在每个处理器处理一个种交互,而不是像以前那样,对指定事件集中处理。


