C#开发学习笔记:使用WPF画几何图形并使图形随Slider控件放大缩小(在Winform中显示)
1.创建WinForm窗体以及WPF用户控件
1.1创建WinForm窗体
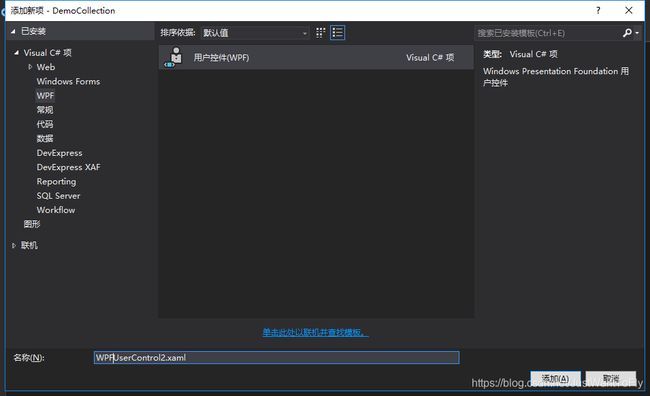
2.创建WPF用户控件
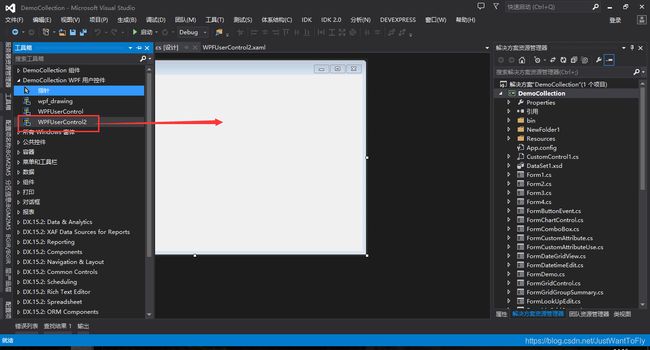
3.先选中工程文件(WPF用户控件所在的工程)生成一下,这样才能在工具箱中看见新加的WPF用户控件
然后将WPF用户控件拖入WinForm窗体中(WinForm与WPF互相操作需要在WinForm中添加ElementHost控件,VS2013添加
WPF用户控件是会自动添加ElementHost控件)
2.WPF开始布局控件
注:
(1).使用ViewBox包裹可以使控件自动填充,如果不用ViewBox包裹当WPF控件添加到WinForm中时,如果改变窗体的大小WPF的控件并不会随着窗体一起改变
(2).ScrollViewer控件必须设定高度和宽度,否则滚动条无法显示出来
3.在WPF用户控件加载时给画布(Canvas)设置绘制的背景图片,同时定义一个椭圆形
 public WPFUserControl2()
{
	InitializeComponent();
	w = this;
	//绑定Image控件要显示的图片
	string path = this.GetType().Assembly.Location;
	FileInfo directory = new FileInfo(path);
	//根据绝对路径获取图片
	string sss = @"G:\自己做的小东西\DemoCollection\DemoCollection\Resources\background2.jpg";
	BitmapImage image = new BitmapImage(new Uri(sss, UriKind.Absolute));

	//Canvas1.Width += 800;
	//Canvas1.Height += 1000;
	//Image1_x = Canvas1.Width;
	//Image1_y = Canvas1.Height;
	//用于存放画布的原始大小
	Original_height = Canvas1.Height;
	Original_width = Canvas1.Width;

	//使用图片绘制画布的背景
	ImageBrush imageBrush = new ImageBrush(image);
	w.Canvas1.Background = imageBrush;

    Ellipse e = new Ellipse();//创建一个椭圆形对象
	//设置椭圆的上、下、左、右的边距
	Thickness thickness = new Thickness(Convert.ToDouble(100), Convert.ToDouble(100), 0, 0);
	e.Height = 140;
	e.Width = 140;
	e.Margin = thickness;
	Canvas1.Children.Add(e);

	//设置椭圆内部绘制的样式
	Brush brush = new SolidColorBrush((Color)ColorConverter.ConvertFromString("Red"));
	e.Fill = brush;
	//设置椭圆在其父控件中的显示顺序
	Panel.SetZIndex(e, 10);
}
4.将图片的缩放与Slider控件的值改变进行关联;在Slider1_ValueChanged事件中进行绑定
private void Slider1_ValueChanged(object sender, RoutedPropertyChangedEventArgs e)
{
	if (e.NewValue != 0)
	{
		double a = Math.Round(e.NewValue);
		if (a != 0)
		{
			//ScaleTransform:在二维坐标系x-y中缩放对象
			//参数分别为:x轴的缩放比例,y轴的缩放比例,此ScaleTransform对象缩放中心坐标的x值,此ScaleTransform对象缩放中心坐标的y值
			//如果后两个参数不设置,则对象以左上角的(0,0)为缩放中心
			ScaleTransform sf = new ScaleTransform(a, a, Canvas1.Width / 2, Canvas1.Height / 2);

			Image1_x = Canvas1.Width;
			Image1_y = Canvas1.Height;
			//使用LayoutTransform时,当Canvas1随着Slider放大缩小时,外层的滚动条可以跟随改变滚动条的高宽
			Canvas1.LayoutTransform = sf;
			//使用RenderTransform时,当Canvas1随着Slider放大缩小时,外层的滚动条无法改变实际显示内容的高宽
			//Canvas1.RenderTransform = sf;
		}

	}
	else
	{
		Canvas1.Width = Original_width;
		Canvas1.Height = Original_height;

	}
}
5.绑定ScrollViewer的ScrollChanged事件,设置滚动条的水平和垂直偏移量,保持滚动条始终在中间位置
private void ScrollViewer1_ScrollChanged(object sender, ScrollChangedEventArgs e)
{
	//判断如果是Slider控件触发滚动条改变才进行滚动条位置的设置,否则不设置(避免鼠标滚动时无法移动滚动条)
	if (Slider1.Value != SliderOldValue && Slider1.Value>=1)
	{
		//SliderOldValue:自定义全局变量
		SliderOldValue = Slider1.Value;
		double ScrollableHeight = ScrollViewer1.ScrollableHeight;
		double ScrollableWidth = ScrollViewer1.ScrollableWidth;
		double aaaa = ScrollViewer1.ContentVerticalOffset;
		double bbbb = ScrollViewer1.ContentHorizontalOffset;
		double ActualHeight = ScrollViewer1.ActualHeight;
		double ActualWidth = ScrollViewer1.ActualWidth;
		double width_center = 0;
		if (ScrollableWidth != 0)
			width_center = ScrollableWidth / 2;
		else
			width_center = ActualWidth / 2;
		//设置水平偏移量
		ScrollViewer1.ScrollToHorizontalOffset(width_center);

		double Height_center = 0;
		if (ScrollableHeight != 0)
			Height_center = ScrollableHeight / 2;
		else
			Height_center = ActualHeight / 2;
		//设置垂直偏移量
		ScrollViewer1.ScrollToVerticalOffset(Height_center);
	}
}
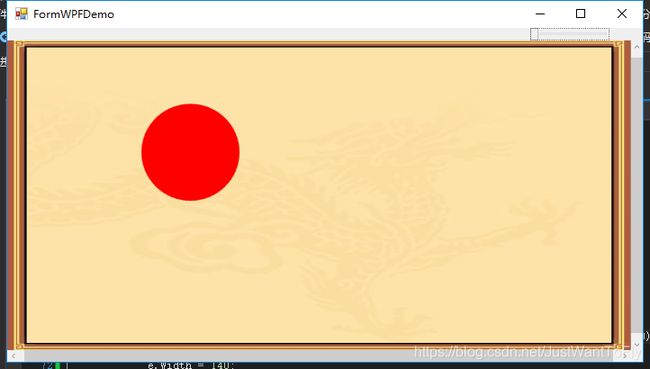
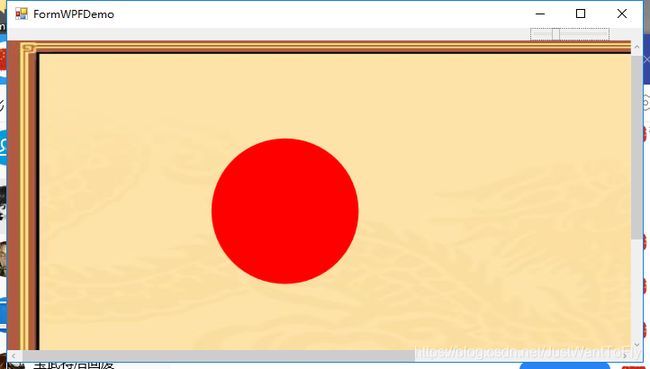
运行效果:
正常情况:
放大后:
使用Ellipse定义图形时,只能通过Margin属性来控制图形的位置,如果想实现在自己指定的点画一个圆形
可使用System.Windows.Shapes.Path;
 public WPFUserControl2()
{
	InitializeComponent();
	w = this;
	//绑定Image控件要显示的图片
	string path = this.GetType().Assembly.Location;
	FileInfo directory = new FileInfo(path);
	//根据绝对路径获取图片
	string sss = @"G:\自己做的小东西\DemoCollection\DemoCollection\Resources\background2.jpg";
	BitmapImage image = new BitmapImage(new Uri(sss, UriKind.Absolute));

	//Canvas1.Width += 800;
	//Canvas1.Height += 1000;
	//Image1_x = Canvas1.Width;
	//Image1_y = Canvas1.Height;
	//用于存放画布的原始大小
	Original_height = Canvas1.Height;
	Original_width = Canvas1.Width;

	//使用图片绘制画布的背景
	ImageBrush imageBrush = new ImageBrush(image);
	w.Canvas1.Background = imageBrush;

	Ellipse e = new Ellipse();//创建一个椭圆形对象
	//设置椭圆的上、下、左、右的边距
	Thickness thickness = new Thickness(Convert.ToDouble(200), Convert.ToDouble(100), 0, 0);
	e.Height = 70;
	e.Width = 70;
	e.Margin = thickness;
	Canvas1.Children.Add(e);

	//设置椭圆内部绘制的样式
	Brush brush = new SolidColorBrush((Color)ColorConverter.ConvertFromString("Red"));
	e.Fill = brush;
	//设置椭圆在其父控件中的显示顺序
	Panel.SetZIndex(e, 10);

	//Path:绘制一系列的直线和曲线;要与System.IO.Path区分开
	System.Windows.Shapes.Path p = new System.Windows.Shapes.Path();

	//Geometry:定义几何形状,可用于对二维图形数据进行裁剪、命中测试、呈现
	//EllipseGeometry:初始化一个具有指定中心点位置,X轴半径,Y轴半径的椭圆
	Geometry g = new EllipseGeometry(new Point(Convert.ToDouble(350), Convert.ToDouble(350)), 10, 10);

	//将要绘制的图像赋值给Path对象
	p.Data = g;


	//指定内部绘制方式
	Brush brush1 = new SolidColorBrush((Color)ColorConverter.ConvertFromString("Black"));
	p.Fill = brush1;
	p.Name = "第1个点";
	Canvas1.Children.Add(p);

	System.Windows.Shapes.Path p1 = new System.Windows.Shapes.Path();
	Geometry g1 = new EllipseGeometry(new Point(Convert.ToDouble(400), Convert.ToDouble(350)), 20, 20);

	p1.Data = g1;
	Brush brush2 = new SolidColorBrush((Color)ColorConverter.ConvertFromString("White"));
	p1.Fill = brush2;
	p1.Name = "第2个点";
	Canvas1.Children.Add(p1);

	System.Windows.Shapes.Path p2 = new System.Windows.Shapes.Path();
	Geometry g2 = new EllipseGeometry(new Point(Convert.ToDouble(500), Convert.ToDouble(350)), 30, 30);

	p2.Data = g2;
	Brush brush3 = new SolidColorBrush((Color)ColorConverter.ConvertFromString("Blue"));
	p2.Fill = brush3;
	p1.Name = "第3个点";
	Canvas1.Children.Add(p2);

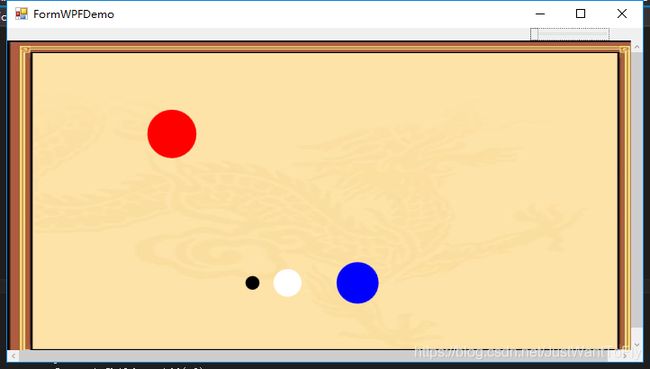
}
运行结果:

