SecureCRT实现批量创建及导入session和批量SSH2登录
一、首先你已经装好了SecureCRT,并且已经激活
二、将下载下来的文件保存在你容易找到的地方,把后缀修改成py或者vbs,这里修改成了vbs
ImportArbitraryDataFromFileToSecureCRTSessions
下载地址:https://forums.vandyke.com/showpost.php?p=37089&postcount=1

三、编写你需要添加的主机信息,文件格式可为.txt,或.csv按照这个这个模板填写
session_name,hostname,port,username,folder,protocol
test01,172.20.0.1,22,admim,test_folder,SSH2
test02,172.20.0.2,22,admim,test_folder,SSH2
test03,172.20.0.1,22,admim,test_folder,SSH2
可添加的各个字符串含义:
session_name: The name that should be used for the session. If this field does not exist, the hostname field is used as the session_name.
folder: Relative path for session as displayed in the Connect dialog.
hostname: The hostname or IP for the remote server.
protocol: The protocol (SSH2, SSH1, telnet, rlogin)
port: The port on which remote server is listening
username: The username for the account on the remote server
emulation: The emulation (vt100, xterm, etc.)
description: The comment/description. Multiple lines are separated with ‘\r’
logon_script: The full path to the Logon Script filename for the session.
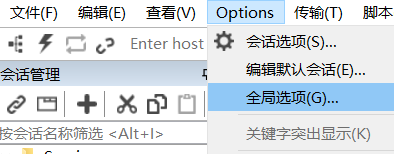
四、打开CRT,点击“脚本”–“运行” 。选择VBS脚本。选择含有所添加主机信息的文件

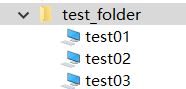
五、添加完成后,可看到已创建test_folder文件夹,并创建了三个session。
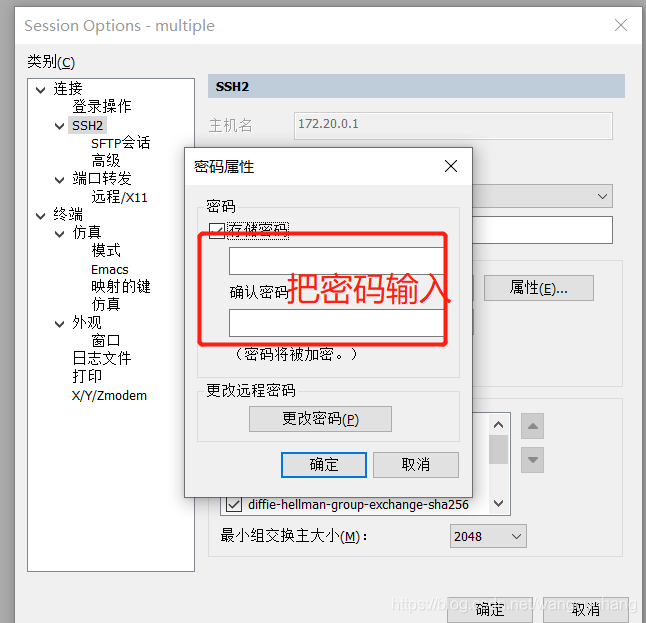
六、将连接SSH设置为接受并自动保存主机密钥:修改CRT配置文件夹下的SSH2.ini文件中的D:“Automatically Accept Host Keys”=00000000为D:“Automatically Accept Host Keys”=00000001。
SSH2.ini文件所在位置

七、设置自动登录账号密码。在新创建的session的文件夹右键,选择设置。

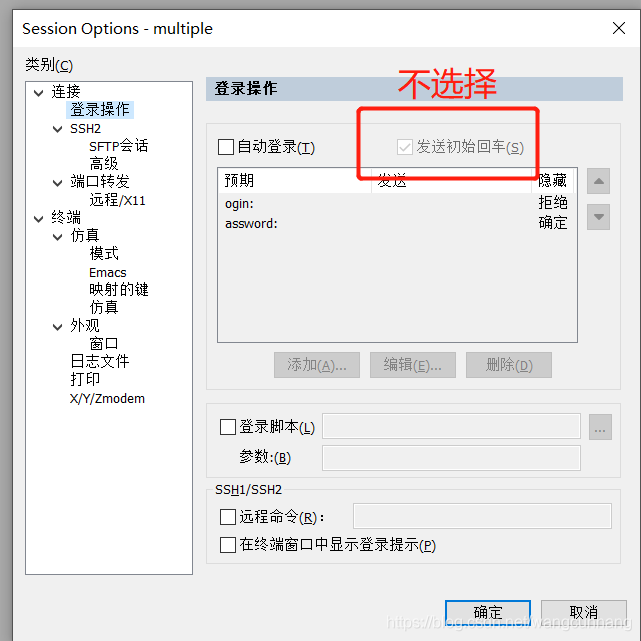
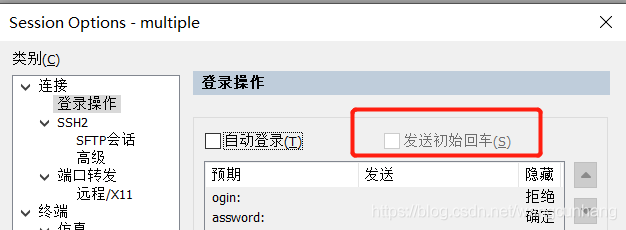

点击确定之后,test_folder文件夹下面的所有session,都可以直接登录了
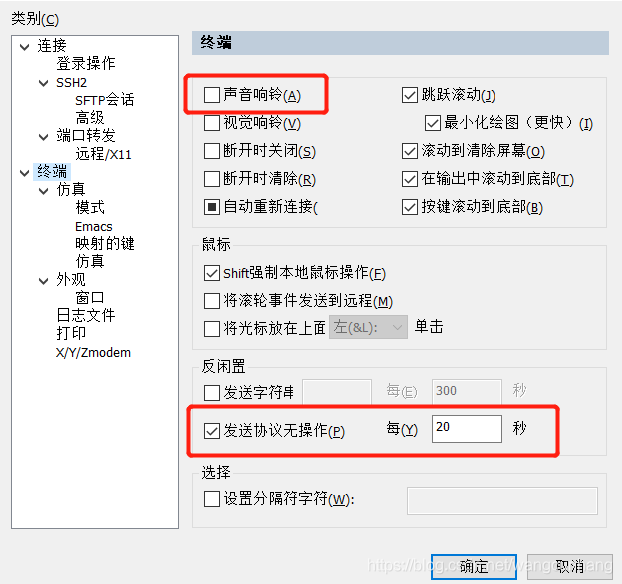
配置长连接