springboot基于数据库的认证Spring Security
Spring Boot针对Spring Security提供了自动化配置方案,因此可以使Spring Security非常容易地整合进Spring Boot项目中,这也是在Spring Boot项目中使用Spring Security的优势。
基本用法
创建项目,添加依赖
创建一个Spring Boot Web项目,然后添加spring-boot-starter-security依赖即可,代码如下:
            org.springframework.boot
            spring-boot-starter-security


            org.springframework.boot
            spring-boot-starter-web
只要开发者在项目中添加了spring-boot-starter-security依赖,项目中所有资源都会被保护起来。

添加hello接口
接下来在项目中添加一个简单的/hello接口,内容如下:
package com.shrimpking.controller;

import org.springframework.web.bind.annotation.GetMapping;
import org.springframework.web.bind.annotation.RestController;

/**
 * Created by IntelliJ IDEA.
 *
 * @Author : Shrimpking
 * @create 2023/6/6 17:22
 */
@RestController
public class HelloController
{
    @GetMapping("/hello")
    public String hello()
    {
        return "hello";
    }
}
配置用户名和密码
如果开发者对默认的用户名和密码不满意,可以在application.properties中配置默认的用户名、密码以及用户角色,配置方式如下:
server.port=8099

spring.security.user.name=user
spring.security.user.password=1234
spring.security.user.roles=admin
启动项目测试
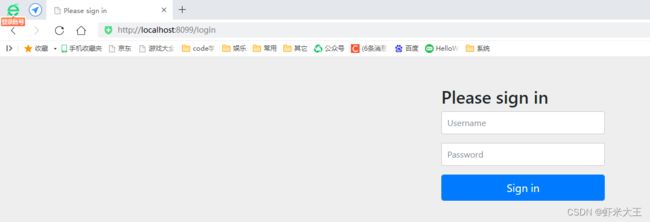
接下来启动项目,启动成功后,访问/hello接口会自动跳转到登录页面,这个登录页面是由Spring Security提供的,如图所示。
基于数据库的认证
在真实项目中,用户的基本信息以及角色等都存储在数据库中,因此需要从数据库中获取数据进行认证。介绍如何使用数据库中的数据进行认证和授权。

设计数据表
首先需要设计一个基本的用户角色表,一共三张表,分别是用户表、角色表以及用户角色关联表。为了方便测试,预置几条测试数据
drop table if EXISTS r_user;
create table r_user(
	id int(11) not null auto_increment primary key,
	userName varchar(32) not null,
	password varchar(50) not null,
	enabled tinyint default 1 comment '是否启用,0未启用,1启用',
	locked tinyint default 0 comment '是否锁定,0锁定,1未锁定'
) comment '用户表';
insert into r_user(userName,password) values ('root','1234');
insert into r_user(userName,password) values ('admin','1234');
insert into r_user(userName,password) values ('king','1234');

drop table if EXISTS r_role;
create table r_role(
	id int(11) not null auto_increment,
	name varchar(32) not null comment '角色英文名称',
	displayName varchar(32) not null comment '角色中文名称',
	primary key(id)
) comment '角色表';
insert into r_role(name,displayName) values('ROLE_dba','数据库管理员');
insert into r_role(name,displayName) values('ROLE_admin','系统管理员');
insert into r_role(name,displayName) values('ROLE_user','用户');

drop table if EXISTS r_user_role;
create table r_user_role(
	id int(11) not null auto_increment primary key,
	userId int not null comment '用户id',
	roleId int not null comment '角色id'
) comment '用户角色关联表';
insert into r_user_role(userId,roleId) values (1,1);
insert into r_user_role(userId,roleId) values (1,2);
insert into r_user_role(userId,roleId) values (1,3);
insert into r_user_role(userId,roleId) values (2,2);
insert into r_user_role(userId,roleId) values (2,3);
insert into r_user_role(userId,roleId) values (3,3);
创建项目,选择MyBatis,因此创建Spring Boot Web项目添加如下依赖:
            org.springframework.boot
            spring-boot-starter-security


            org.springframework.boot
            spring-boot-starter-web


            org.mybatis.spring.boot
            mybatis-spring-boot-starter
            1.3.2


            mysql
            mysql-connector-java
            5.1.47


            com.alibaba
            druid
            1.1.10
配置数据库
在application.properties中进行数据库连接配置:
server.port=8099
#数据源
spring.datasource.type=com.alibaba.druid.pool.DruidDataSource
spring.datasource.driver-class-name=com.mysql.jdbc.Driver
spring.datasource.url=jdbc:mysql://localhost:3306/test?useUnicode=true&characterEncoding=utf-8&useSSL=false&serverTimeZone=UTC
spring.datasource.username=root
spring.datasource.password=mysql123
创建实体类
分别创建角色表和用户表对应的实体类,代码如下:
Role.java
package com.shrimpking.pojo;

/**
 * Created by IntelliJ IDEA.
 *
 * @Author : Shrimpking
 * @create 2023/6/6 18:27
 */
public class Role
{
    private String id;
    private String name;
    private String displayName;

    public Role()
    {
    }

    public Role(String name, String displayName)
    {
        this.name = name;
        this.displayName = displayName;
    }

    public String getId()
    {
        return id;
    }

    public void setId(String id)
    {
        this.id = id;
    }

    public String getName()
    {
        return name;
    }

    public void setName(String name)
    {
        this.name = name;
    }

    public String getDisplayName()
    {
        return displayName;
    }

    public void setDisplayName(String displayName)
    {
        this.displayName = displayName;
    }

    @Override
    public String toString()
    {
        return "Role{" + "id='" + id + '\'' + ", name='" + name + '\'' + ", displayName='" + displayName + '\'' + '}';
    }
}
User.java
package com.shrimpking.pojo;

import org.springframework.security.core.GrantedAuthority;
import org.springframework.security.core.authority.SimpleGrantedAuthority;
import org.springframework.security.core.userdetails.UserDetails;

import java.util.ArrayList;
import java.util.Collection;
import java.util.List;

/**
 * Created by IntelliJ IDEA.
 *
 * @Author : Shrimpking
 * @create 2023/6/6 18:29
 */
public class User implements UserDetails
{
    private int id;
    private String userName;
    private String password;
    private boolean enabled;
    private boolean locked;
    private List roles;

    public User()
    {
    }

    public User(String userName, String password)
    {
        this.userName = userName;
        this.password = password;
    }

    public int getId()
    {
        return id;
    }

    public void setId(int id)
    {
        this.id = id;
    }

    public String getUserName()
    {
        return userName;
    }

    public void setUserName(String userName)
    {
        this.userName = userName;
    }

    /**
     * 获取当前用户对象的密码
     * @return
     */
    @Override
    public String getPassword()
    {
        return password;
    }

    public void setPassword(String password)
    {
        this.password = password;
    }

    /**
     * 当前账号是否可用
     * @return
     */
    @Override
    public boolean isEnabled()
    {
        return enabled;
    }

    public void setEnabled(boolean enabled)
    {
        this.enabled = enabled;
    }

    public boolean isLocked()
    {
        return locked;
    }

    public void setLocked(boolean locked)
    {
        this.locked = locked;
    }

    public List getRoles()
    {
        return roles;
    }

    public void setRoles(List roles)
    {
        this.roles = roles;
    }

    @Override
    public String toString()
    {
        return "User{" + "id=" + id + ", userName='" + userName + '\'' + ", password='" + password + '\'' + ", enabled=" + enabled + ", locked=" + locked + ", roles=" + roles + '}';
    }


    /**
     * 获取当前用户对象所具有的角色信息
     * @return
     */
    @Override
    public Collection getAuthorities()
    {

        List authorities = new ArrayList<>();
        for (Role role : roles)
        {
            authorities.add(new SimpleGrantedAuthority(role.getName()));
        }
        return authorities;
    }

    /**
     * 获取当前用户对象的用户名
     * @return
     */
    @Override
    public String getUsername()
    {
        return userName;
    }

    /**
     * 当前账号是否未过期
     * @return
     */
    @Override
    public boolean isAccountNonExpired()
    {
        return true;
    }

    /**
     * 当前账号是否未锁定
     * @return
     */
    @Override
    public boolean isAccountNonLocked()
    {
        return !locked;
    }

    /**
     * 当前账号密码是否未过期
     * @return
     */
    @Override
    public boolean isCredentialsNonExpired()
    {
        return true;
    }
}
代码解释:
• 用户实体类需要实现UserDetails接口,并实现该接口中的7个方法,getAuthorities,getUsername,isAccountNonExpired,isAccountNonLocked,isCredentialsNonExpired,isEnabled,getPassword。
用户根据实际情况设置这7个方法的返回值。因为默认情况下不需要开发者自己进行密码角色等信息的比对,开发者只需要提供相关信息即可,例如getPassword()方法返回的密码和用户输入的登录密码不匹配,会自动抛出BadCredentialsException异常,isAccountNonExpired()方法返回了false,会自动抛出AccountExpiredException异常,因此对开发者而言,只需要按照数据库中的数据在这里返回相应的配置即可。本案例因为数据库中只有enabled和locked字段,故账户未过期和密码未过期两个方法都返回true。
• getAuthorities()方法用来获取当前用户所具有的角色信息,本案例中,用户所具有的角色存储在roles属性中,因此该方法直接遍历roles属性,然后构造SimpleGrantedAuthority集合并返回。
创建UserService
接下来创建UserService,代码如下:
package com.shrimpking.service;

import com.shrimpking.mapper.UserMapper;
import com.shrimpking.pojo.User;
import org.springframework.beans.factory.annotation.Autowired;
import org.springframework.security.core.userdetails.UserDetails;
import org.springframework.security.core.userdetails.UserDetailsService;
import org.springframework.security.core.userdetails.UsernameNotFoundException;
import org.springframework.stereotype.Service;

/**
 * Created by IntelliJ IDEA.
 *
 * @Author : Shrimpking
 * @create 2023/6/6 19:01
 */
@Service
public class UserService implements UserDetailsService
{
    @Autowired
    private UserMapper userMapper;

    @Override
    public UserDetails loadUserByUsername(String username) throws UsernameNotFoundException
    {
        User user = userMapper.loadUserByUsername(username);
        if(user == null)
        {
            throw new UsernameNotFoundException("账号不存在");
        }
        user.setRoles(userMapper.getUserRolesByUid(user.getId()));
        return user;
    }
}
代码解释:
定义UserService实现UserDetailsService接口,并实现该接口中的loadUserByUsername方法,该方法的参数就是用户登录时输入的用户名,通过用户名去数据库中查找用户,如果没有查找到用户,就抛出一个账户不存在的异常,如果查找到了用户,就继续查找该用户所具有的角色信息,并将获取到的user对象返回,再由系统提供的DaoAuthenticationProvider类去比对密码是否正确。
• loadUserByUsername方法将在用户登录时自动调用。
还涉及UserMapper和UserMapper.xml,相关源码如下:
UserMapper.java
package com.shrimpking.mapper;


import com.shrimpking.pojo.Role;
import com.shrimpking.pojo.User;
import org.apache.ibatis.annotations.Mapper;

import java.util.List;

/**
 * Created by IntelliJ IDEA.
 *
 * @Author : Shrimpking
 * @create 2023/6/6 19:02
 */
@Mapper
public interface UserMapper
{
    User loadUserByUsername(String username);
    List getUserRolesByUid(int id);
}
UserMapper.xml
配置Spring Security
接下来对Spring Security进行配置,代码如下:
package com.shrimpking.config;

import com.shrimpking.service.UserService;
import org.springframework.beans.factory.annotation.Autowired;
import org.springframework.context.annotation.Bean;
import org.springframework.context.annotation.Configuration;
import org.springframework.security.config.annotation.authentication.builders.AuthenticationManagerBuilder;
import org.springframework.security.config.annotation.web.builders.HttpSecurity;
import org.springframework.security.config.annotation.web.configuration.WebSecurityConfigurerAdapter;
import org.springframework.security.crypto.bcrypt.BCryptPasswordEncoder;
import org.springframework.security.crypto.password.NoOpPasswordEncoder;
import org.springframework.security.crypto.password.PasswordEncoder;

/**
 * Created by IntelliJ IDEA.
 *
 * @Author : Shrimpking
 * @create 2023/6/6 19:20
 */
@Configuration
public class WebSecurityConfig extends WebSecurityConfigurerAdapter
{
    @Autowired
    private UserService userService;

    @Bean
    PasswordEncoder passwordEncoder()
    {
        //return new BCryptPasswordEncoder(10); //默认10,取值范围4-31之间

        //本案例使用NoOpPasswordEncoder,即不对密码进行加密。
        return NoOpPasswordEncoder.getInstance();
    }

    @Override
    protected void configure(AuthenticationManagerBuilder auth) throws Exception
    {
        auth.userDetailsService(userService);
    }

    @Override
    protected void configure(HttpSecurity http) throws Exception
    {
        http.authorizeRequests()
                .antMatchers("/admin/**").hasRole("admin")
                .antMatchers("/db/**").hasRole("dba")
                .antMatchers("/user/**").hasRole("user")
                .anyRequest().authenticated()
                .and()
                .formLogin()
                .loginProcessingUrl("/login").permitAll()
                .and()
                .csrf().disable();
    }

}

    /*
    首先配置了三个用户,
    root用户具备ADMIN和DBA的角色,
    admin用户具备ADMIN和USER的角色,
    king用户具备USER的角色。

    调用authorizeRequests()方法开启HttpSecurity的配置,
    antMatchers配置分别表示用户访问“/admin/**”模式的URL必须具备ADMIN的角色;
    antMatchers用户访问“/user/**”模式的URL必须具备ADMIN或USER的角色;
    antMatchers用户访问“/db/**”模式的URL必须具备ADMIN和DBA的角色。
    anyRequest用户访问URL都必须认证后访问(登录后访问)。
    formLogin表示开启表单登录,即读者一开始看到的登录页面,
    loginProcessingUrl同时配置了登录接口为“/login”,即可以直接调用“/login”接口,
    发起一个POST请求进行登录,登录参数中用户名必须命名为username,
    密码必须命名为password,
    配置loginProcessingUrl接口主要是方便Ajax或者移动端调用登录接口。
    permitAll,表示和登录相关的接口都不需要认证即可访问。
    表示关闭csrf。
     */
创建Controller进行测试了,
HelloController.java
package com.shrimpking.controller;
import org.springframework.web.bind.annotation.GetMapping;
import org.springframework.web.bind.annotation.RestController;
/**
* Created by IntelliJ IDEA.
*
* @Author : Shrimpking
* @create 2023/6/6 19:29
*/
@RestController
public class HelloController
{
@GetMapping("/admin/hello")
public String admin()
{
return "hello admin";
}
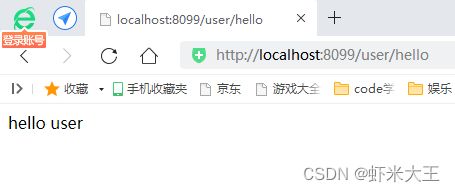
@GetMapping("/user/hello")
public String user()
{
return "hello user";
}
@GetMapping("/db/hello")
public String dba()
{
return "hello dba";
}
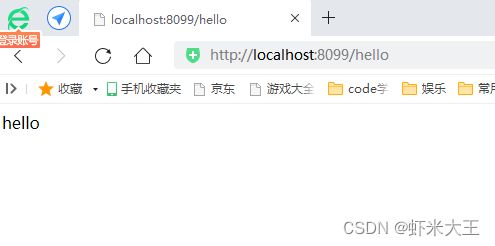
@GetMapping("/hello")
public String hello()
{
return "hello";
}
}
记得pom.xml中过滤条件的配置
                src/main/java

                    **/*.xml
                    **/*.properties

                false


                src/main/resources

                    **/*.xml
                    **/*.properties

                false


权限大小依次为 root > admin > king。