使用unity编写简单的弹幕游戏【ten seconds】
文章目录
- 效果预览
- 物体移动
- 弹幕发射
- 子弹预制件
- 倒计时
- 场景切换
-
- 手动换关
- 自动进入下一关
- 退出游戏
- 音乐播放
-
- 全局音乐
- 音乐名的存放
- 音乐控制/播放器
- 音乐管理器
- 创建音乐管理器实例
- 按照路线走的发射弹幕机
- 会追踪的弹幕发射机
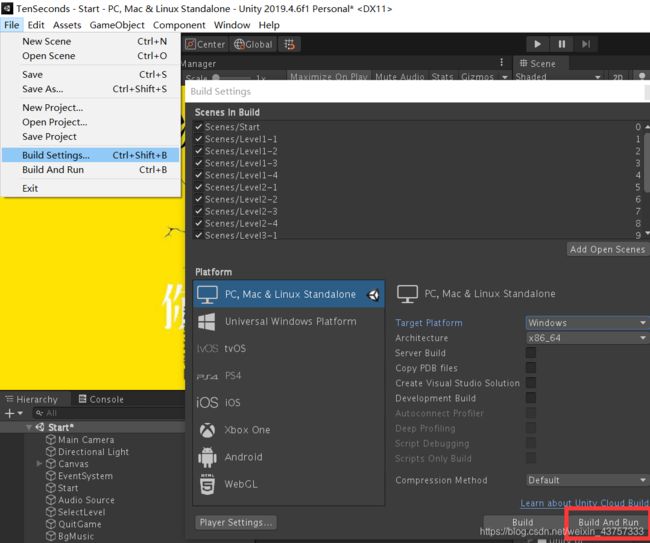
- 导出游戏
-
- 导出报错解决
学校老师给了个主题是Ten Seconds,所以就写了一个弹幕游戏。
主题就是生存十秒,第一次写了一个完整的小游戏,之前的游戏都没有封面UI什么的,基本只实现了逻辑。
效果预览

选关界面:
(总共搞了14个关卡,每章内容是一个主题,到下一章主题会改变,主题是在每一个关卡生存十秒,生存成功即可进入下一关)

选择不敢就会退出游戏
关卡:
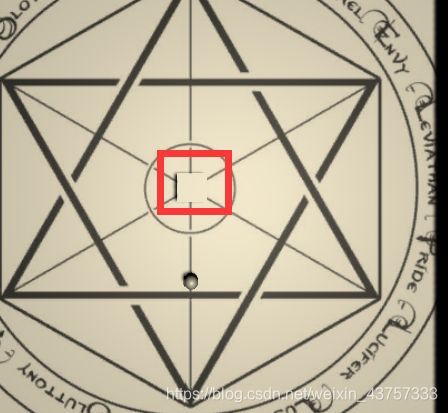
第一章:
第二章:
disanz
第三章:
从这里开始物体会跟随
第四章:物体会追踪玩家的球
搭建场景和贴图很简单就不说了
物体移动
给物体添加角色控制器,然后挂接脚本
PlayerMove.cs
using System.Collections;
using System.Collections.Generic;
using UnityEngine;

public class PlayerMove : MonoBehaviour
{
    public float speed = 10;
    private CharacterController controller;
    // Start is called before the first frame update
    void Start()
    {
        controller = GetComponent<CharacterController>();
    }

    // Update is called once per frame
    void Update()
    {
        float x, z;
        x = Input.GetAxis("Horizontal");
        z = Input.GetAxis("Vertical");
        Vector3 move;
        move = transform.right * x * Time.deltaTime * speed + transform.forward * z * Time.deltaTime * speed;
        controller.Move(move);
    }
}
弹幕发射
using System.Collections;
using System.Collections.Generic;
using UnityEngine;

public class CubeRotate : MonoBehaviour
{
    private float rotation = 0;
    public float rotateSpeed = 2;
    public float Timer = 0.5f;
    public GameObject bullet;
    public float rotaAngle = 0;
    public float shootTime = 1f;
    public float shootnum=36;
    // Start is called before the first frame update
    void Start()
    {

    }

    // Update is called once per frame
    void Update()
    {
        Timer += Time.deltaTime;

        rotation += Timer * rotateSpeed;
        transform.Rotate(new Vector3(0, rotation, 0));//让中心的物体旋转
        if (Timer >= shootTime)
        {
            rotaAngle += 25;//每次发射的球都会发生些许偏移的角度
            Timer -= shootTime;
            for (int i = 0; i < shootnum; i++)
            {
                Quaternion rotateAngle = Quaternion.Euler(0, i * (360/shootnum) + rotaAngle, 0);
                Instantiate(bullet, transform.position, rotateAngle);
            }

        }

    }
}
(这里需要注意一点,由于界面是俯视界面,但是在球发射的时候可能和人不在一个高度上导致无法射中,所以可以从低空的平视来看看是不是在一个平面上)
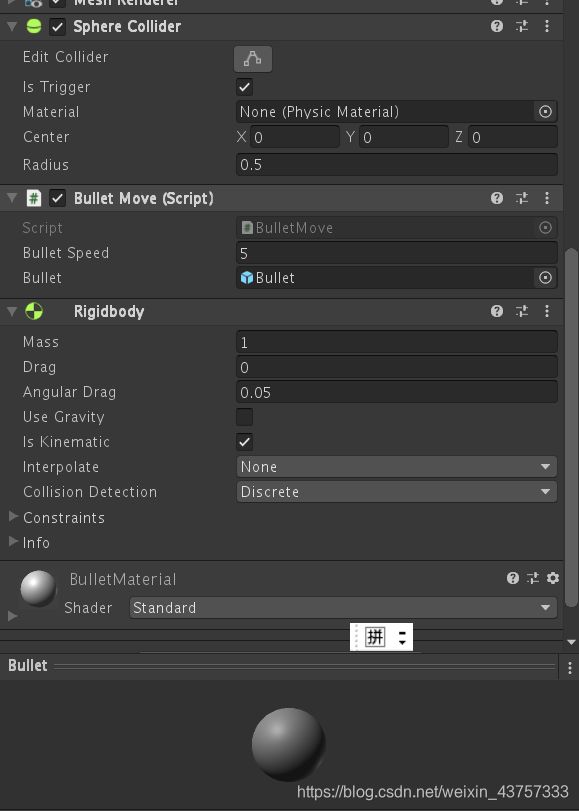
子弹预制件
using System.Collections;
using System.Collections.Generic;
using UnityEngine;
using UnityEngine.SceneManagement;

public class BulletMove : MonoBehaviour
{
    public float BulletSpeed = 5;
    private float Timer = 0;
    public GameObject Bullet;

    // Start is called before the first frame update
    void Start()
    {
        GameObject.Destroy(Bullet, 6.0f);//六秒后自动销毁
    }
    private void FixedUpdate()
    {
        transform.position = transform.position + transform.forward * Time.fixedDeltaTime * BulletSpeed;
    }

    // Update is called once per frame
    private void OnTriggerEnter(Collider other)
    {
        if (other.tag == "Bullet")//防止子弹碰到子弹然后导致子弹消失
        {
            return;
        }
        else
        {
            if (other.gameObject.tag == "Player")
            {
                Destroy(other.gameObject);
                SceneManager.LoadScene(SceneManager.GetActiveScene().buildIndex);//重新加载当前场景
            }
            Destroy(this.gameObject);
        }


    }
}
倒计时
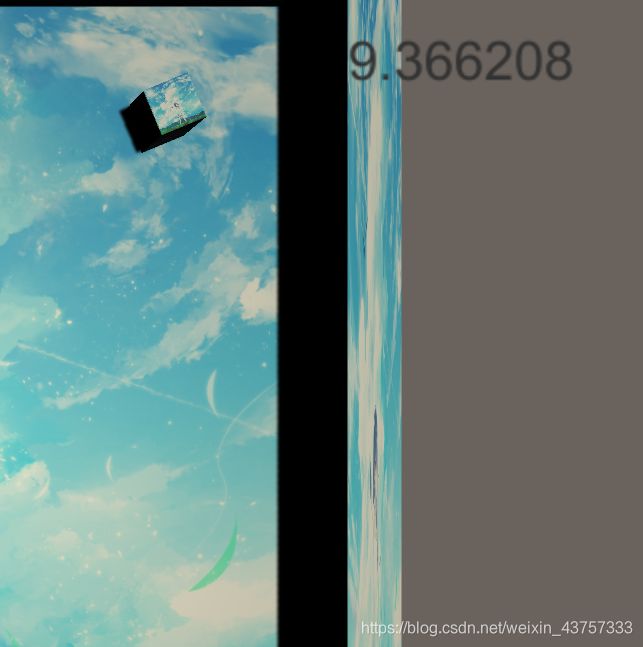
添加一个text在合适的位置,然后挂接以下脚本:
using System.Collections;
using System.Collections.Generic;
using UnityEngine;
using UnityEngine.UI;

public class ChangeText : MonoBehaviour
{
    public Text daojishitext;
    public float Timer=0;
    // Start is called before the first frame update
    void Start()
    {

    }

    // Update is called once per frame
    void Update()
    {
        Timer += Time.deltaTime;
        float NowTime = 10.4f - Timer;
        daojishitext.text = NowTime.ToString();
    }
}
到这里就可以实现一个最简单的弹幕游戏了,接下来为游戏添加一些功能来完善
场景切换
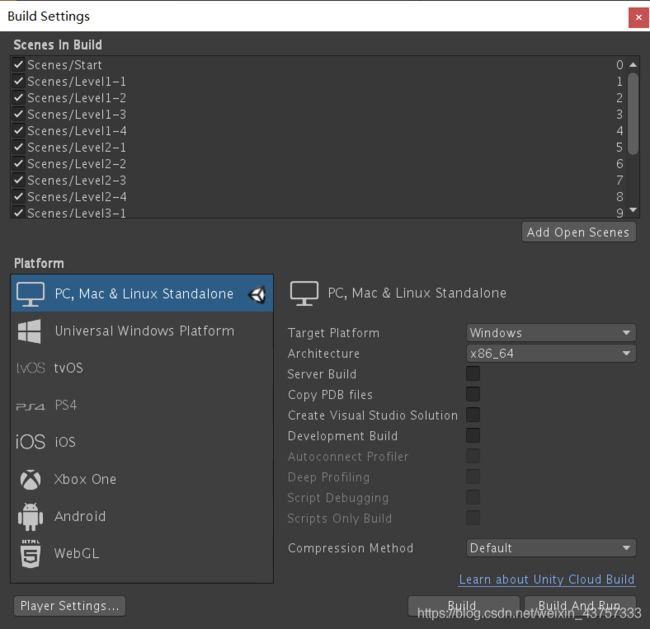
首先需要在File-Build Settings将场景导入,并且场景具有下标
手动换关
在选关界面,设置好了背景之后,需要通过一个画布来实现:

创建一个Panel,(在UI中)
然后添加一个Grid Layout布局

然后其子组件由多个按钮组成:

然后想要使得按下按钮实现关卡切换,需要这样:
首先书写一个脚本里的函数实现关卡切换:
using System.Collections;
using System.Collections.Generic;
using UnityEngine;
using UnityEngine.SceneManagement;

public class LL1 : MonoBehaviour
{
    public void LL()
    {
        SceneManager.LoadScene("Level1-1");//直接加载对应名字的关卡,这里也可以直接用数字代表关卡的下标
    }
    // Start is called before the first frame update
    void Start()
    {

    }

    // Update is called once per frame
    void Update()
    {

    }
}
不要忘了引入头文件:
using UnityEngine.SceneManagement;
但是直接拖拽就会发现无法成功,没有对应函数
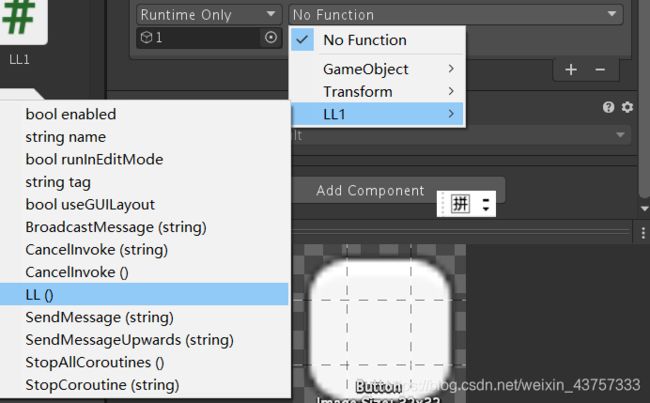
我们只能先将脚本挂接在一个空物体上,然后将空物体拖拽给onclick,然后选择按下onclick时会发生的函数,也就是我们上面写好的脚本
同理 其他的关卡选择也是一样的,只是重复的机械操作,这里不再赘述。
自动进入下一关
并且由于主题是ten seconds,意味着只要当时间超过十秒时,就会自动进入下一个场景,因此在每个场景中创建一个空物体然后挂接以下类似的脚本跳转到下一关:
using System.Collections;
using System.Collections.Generic;
using UnityEngine;
using UnityEngine.SceneManagement;

public class TenSecondsEnd1 : MonoBehaviour
{
    private float Timer;
    // Start is called before the first frame update
    void Start()
    {

    }

    // Update is called once per frame
    void Update()
    {
        Timer += Time.deltaTime;
        if (Timer > 10)
        {
            SceneManager.LoadScene("Level1-2");
        }
    }
}
退出游戏
using System.Collections;
using System.Collections.Generic;
using UnityEngine;
public class QuitGame : MonoBehaviour
{
    public void Quit()
    {
        //UnityEditor.EditorApplication.isPlaying = false;
        Application.Quit();
    }

}
然后按下退出按钮时调用脚本中的函数即可
音乐播放
全局音乐
除此之外,还需要一个自游戏开始时贯穿整个游戏的背景音乐:
参考这篇文章实现:
http://www.voidcn.com/article/p-xaletxkq-bdc.html
需要实现的有两点:
- 在主界面时播放音乐
- 跨场景继续播放音乐
- 再次回到主界面时不会重复播放一样的音乐(
防止出现禁忌の二重存在) - 循环播放
下面我们使用较为规范的方式来实现,也就是尽可能通过代码直接实现而不是在unity中挂接组件拖拽音乐的方式实现。
需要四个脚本:
- 存放音乐名的类
- 音乐控制/播放器(专门用来播放特定音乐的)
- 音乐管理器(创建一个实例,让管理器这个实例添加音乐控制器的脚本,这样就可以实现一个管理器包含多个音乐播放器)
- 用一个脚本来创建音乐管理器的实例
音乐名的存放
首先将背景音乐放到文件夹下:
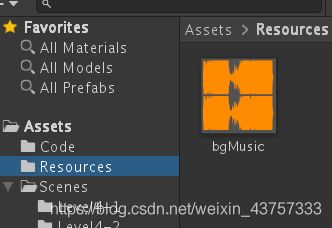
虽然可以通过拖入音乐的方式来实现,不过这里想通过脚本的方式自动装载音乐(事实上,在以后公司里这样的代码应该更加规范吧(?),所以需要这样:
我们可以将音乐的名字存放在类中,方便在代码中直接调用:
using UnityEngine;
using System.Collections;

public class Global
{
    public static string musicName="bgMusic";
}
音乐控制/播放器
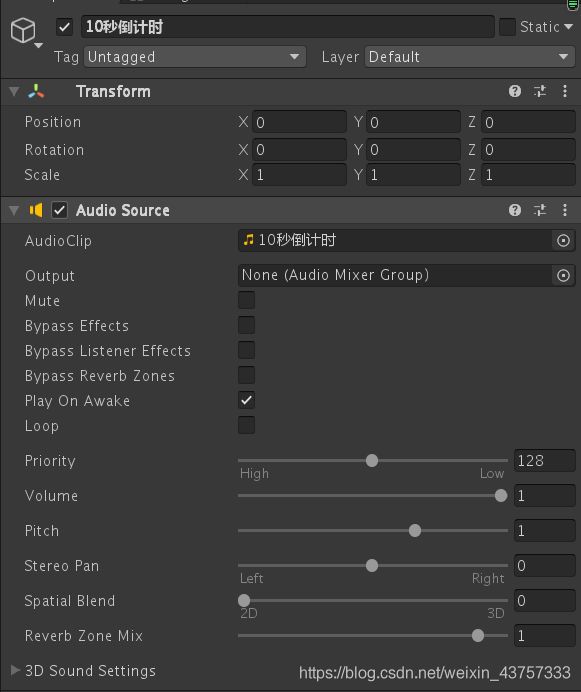
创建一个空物体,挂接Audio Source组件,然后将音乐拖入至Audio Clip即可播放音乐

这是在unity中的方式,下面使用代码来实现:
using UnityEngine;
using System.Collections;

[RequireComponent(typeof(AudioSource))]
public class MusicController : MonoBehaviour
{
    private AudioClip music;
    private AudioSource musicPlayer;
    void Awake()
    {
        //  获取 AudioSource
        musicPlayer = this.GetComponent<AudioSource>();
        //  打开单曲循环
        musicPlayer.loop = true;
        //  关闭开始时就播放的属性
        musicPlayer.playOnAwake = false;

    }
    void UpdateMusicSetting()
    {
        //  读取音乐
        music = (AudioClip)Resources.Load(Global.musicName);
        //  将读取到的音乐赋值给 audioClip
        musicPlayer.clip = music;
        //  播放
        musicPlayer.Play();
    }
    void Start()
    {
        UpdateMusicSetting();
    }
}
上面这段代码如何使用? 我们只需要创建一个实例,然后让这个实例添加这个脚本即可。
音乐管理器
一个音乐管理器可以添加多个音乐播放器,通过这个来实现
AddComponent<MusicController>();
通过这条语句来跨场景保留实例:
DontDestroyOnLoad(instance);
用这个判断防止重复创建:
if (instance == null)
using UnityEngine;
using System.Collections;

public class MusicManager : MonoBehaviour
{
    private static MusicManager instance;
    private MusicManager() { }
    public static MusicManager GetInstance()
    {
        if (instance == null)
        {
            //  创建一个游戏对象,命名为 MusicPlayer
            GameObject musicPlayer = new GameObject("MusicPlayer");
            //  给 MusicPlayer 附上单例脚本
            instance = musicPlayer.AddComponent<MusicManager>();
            //  给 MusicPlayer 游戏对象添加音乐播放器脚本
            musicPlayer.AddComponent<MusicController>();
            //  跨场景不删除这个单例
            DontDestroyOnLoad(instance);
        }
        return instance;
    }
}
创建音乐管理器实例
创建一个空物体,然后挂接这个脚本。这样的话就可以实现了全局音乐了,并且还有音乐管理器,播放器,分工合作而不是全部放在一个脚本里,方便代码复用。
using UnityEngine;
using System.Collections;

public class Test : MonoBehaviour
{

    void Start()
    {
        MusicManager.GetInstance();
    }
}
按照路线走的发射弹幕机
首先需要设定好需要走的路,用目标路径点空物体来承接,然后这些物体挂接在父物体空物体上:

然后对plane烘焙导航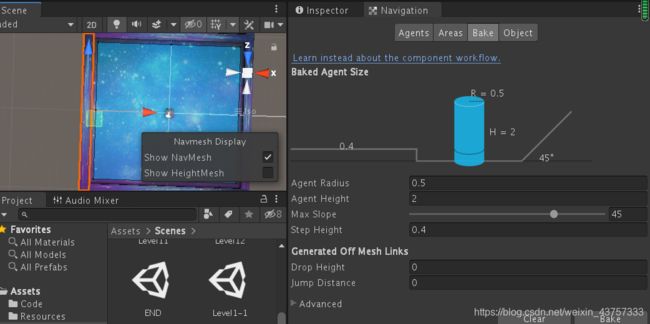
给发射弹幕机cube挂接组件:
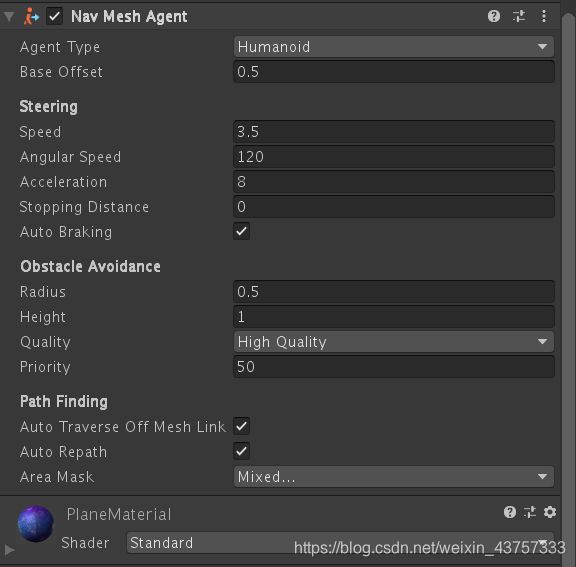
巡逻脚本:
using System.Collections;
using System.Collections.Generic;
using UnityEngine;
using UnityEngine.AI;
public class Patrol : MonoBehaviour
{
    // Start is called before the first frame update
    public float patrolSpeed = 2f;
    public float patrolWaitTime = 0f;
    public Transform patrolWayPoints;
    private NavMeshAgent agent;
    private float patrolTimer;//这个用来记录当敌人达到路径点的时候 停留时间是多久
    private int wayPointIndex;//记录当前目标点是哪个路径点
    void Start()
    {
        agent = GetComponent<NavMeshAgent>();
    }

    // Update is called once per frame
    void Update()
    {
        Patrolling();
    }
    void Patrolling()
    {
        agent.isStopped = false;
        agent.speed = patrolSpeed;
        if (agent.remainingDistance <= agent.stoppingDistance)//由于可能这个物体并不是一分不差的到目的点的,我们可以用用一个范围表示冗余
        //当到达目的点时开始计算时间
        {
            patrolTimer += Time.deltaTime;
            if (patrolTimer >= patrolWaitTime)//如果等待时间已满,则进入下一个点
            {
                if (wayPointIndex == patrolWayPoints.childCount - 1)
                {
                    wayPointIndex = 0;
                }
                else
                {
                    wayPointIndex++;
                }
                patrolTimer = 0;//由于切换完成 所以我们将这个time归零计算
            }
            //这里没有else 是因为如果没=等待时间没满则什么都不会做 只是单单的增加事件
        }
        else
        {
            patrolTimer = 0;
        }
        agent.destination = patrolWayPoints.GetChild(wayPointIndex).position;//Getchild方法可以获得这个东西的子物体
        //括号里面跟的是下标
    }

}
会追踪的弹幕发射机

其实很简单 ,同样需要烘培导航平面和给物体挂接导航体,然后挂接以下脚本:
using System.Collections;
using System.Collections.Generic;
using UnityEngine;
using UnityEngine.AI;
public class Chase : MonoBehaviour
{
    private NavMeshAgent agent;
    public float chaseSpeed = 3f;//追踪的速度
    private bool PlayerInSight=false;
    public GameObject Player;
    // Start is called before the first frame update
    void Start()
    {
        agent = GetComponent<NavMeshAgent>();
    }

    // Update is called once per frame
    void Update()
    {
        Chasing();
    }
    private void Chasing()
    {
        double distance = Mathf.Sqrt(Mathf.Pow((transform.position.x - Player.transform.position.x), 2) + Mathf.Pow((transform.position.y - Player.transform.position.y), 2));
        agent.speed = chaseSpeed;
        if (distance > 3)
        {
            agent.destination = Player.transform.position;
        }
    }

}
导出游戏
导出报错解决
导出游戏时记得当初遇到了一个问题,报错提示:
error CS0234: The type or namespace name ‘EditorApplication’ does not exist
暂时不知道为什么,百度后解决方案:
File→Build Settings→Player Settings→Player→OtherSettings中的
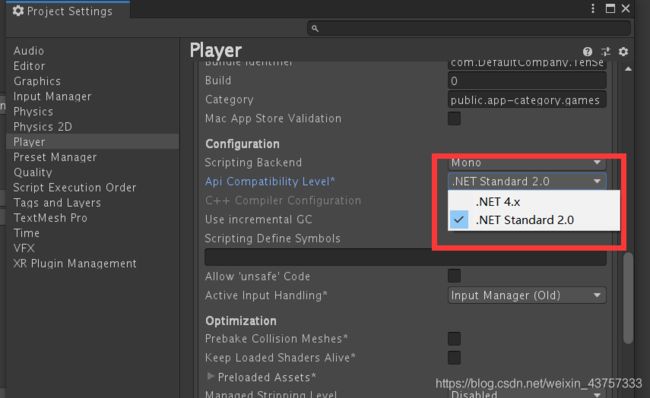
改成和原来不一样的那个,ctrl+s保存即可
